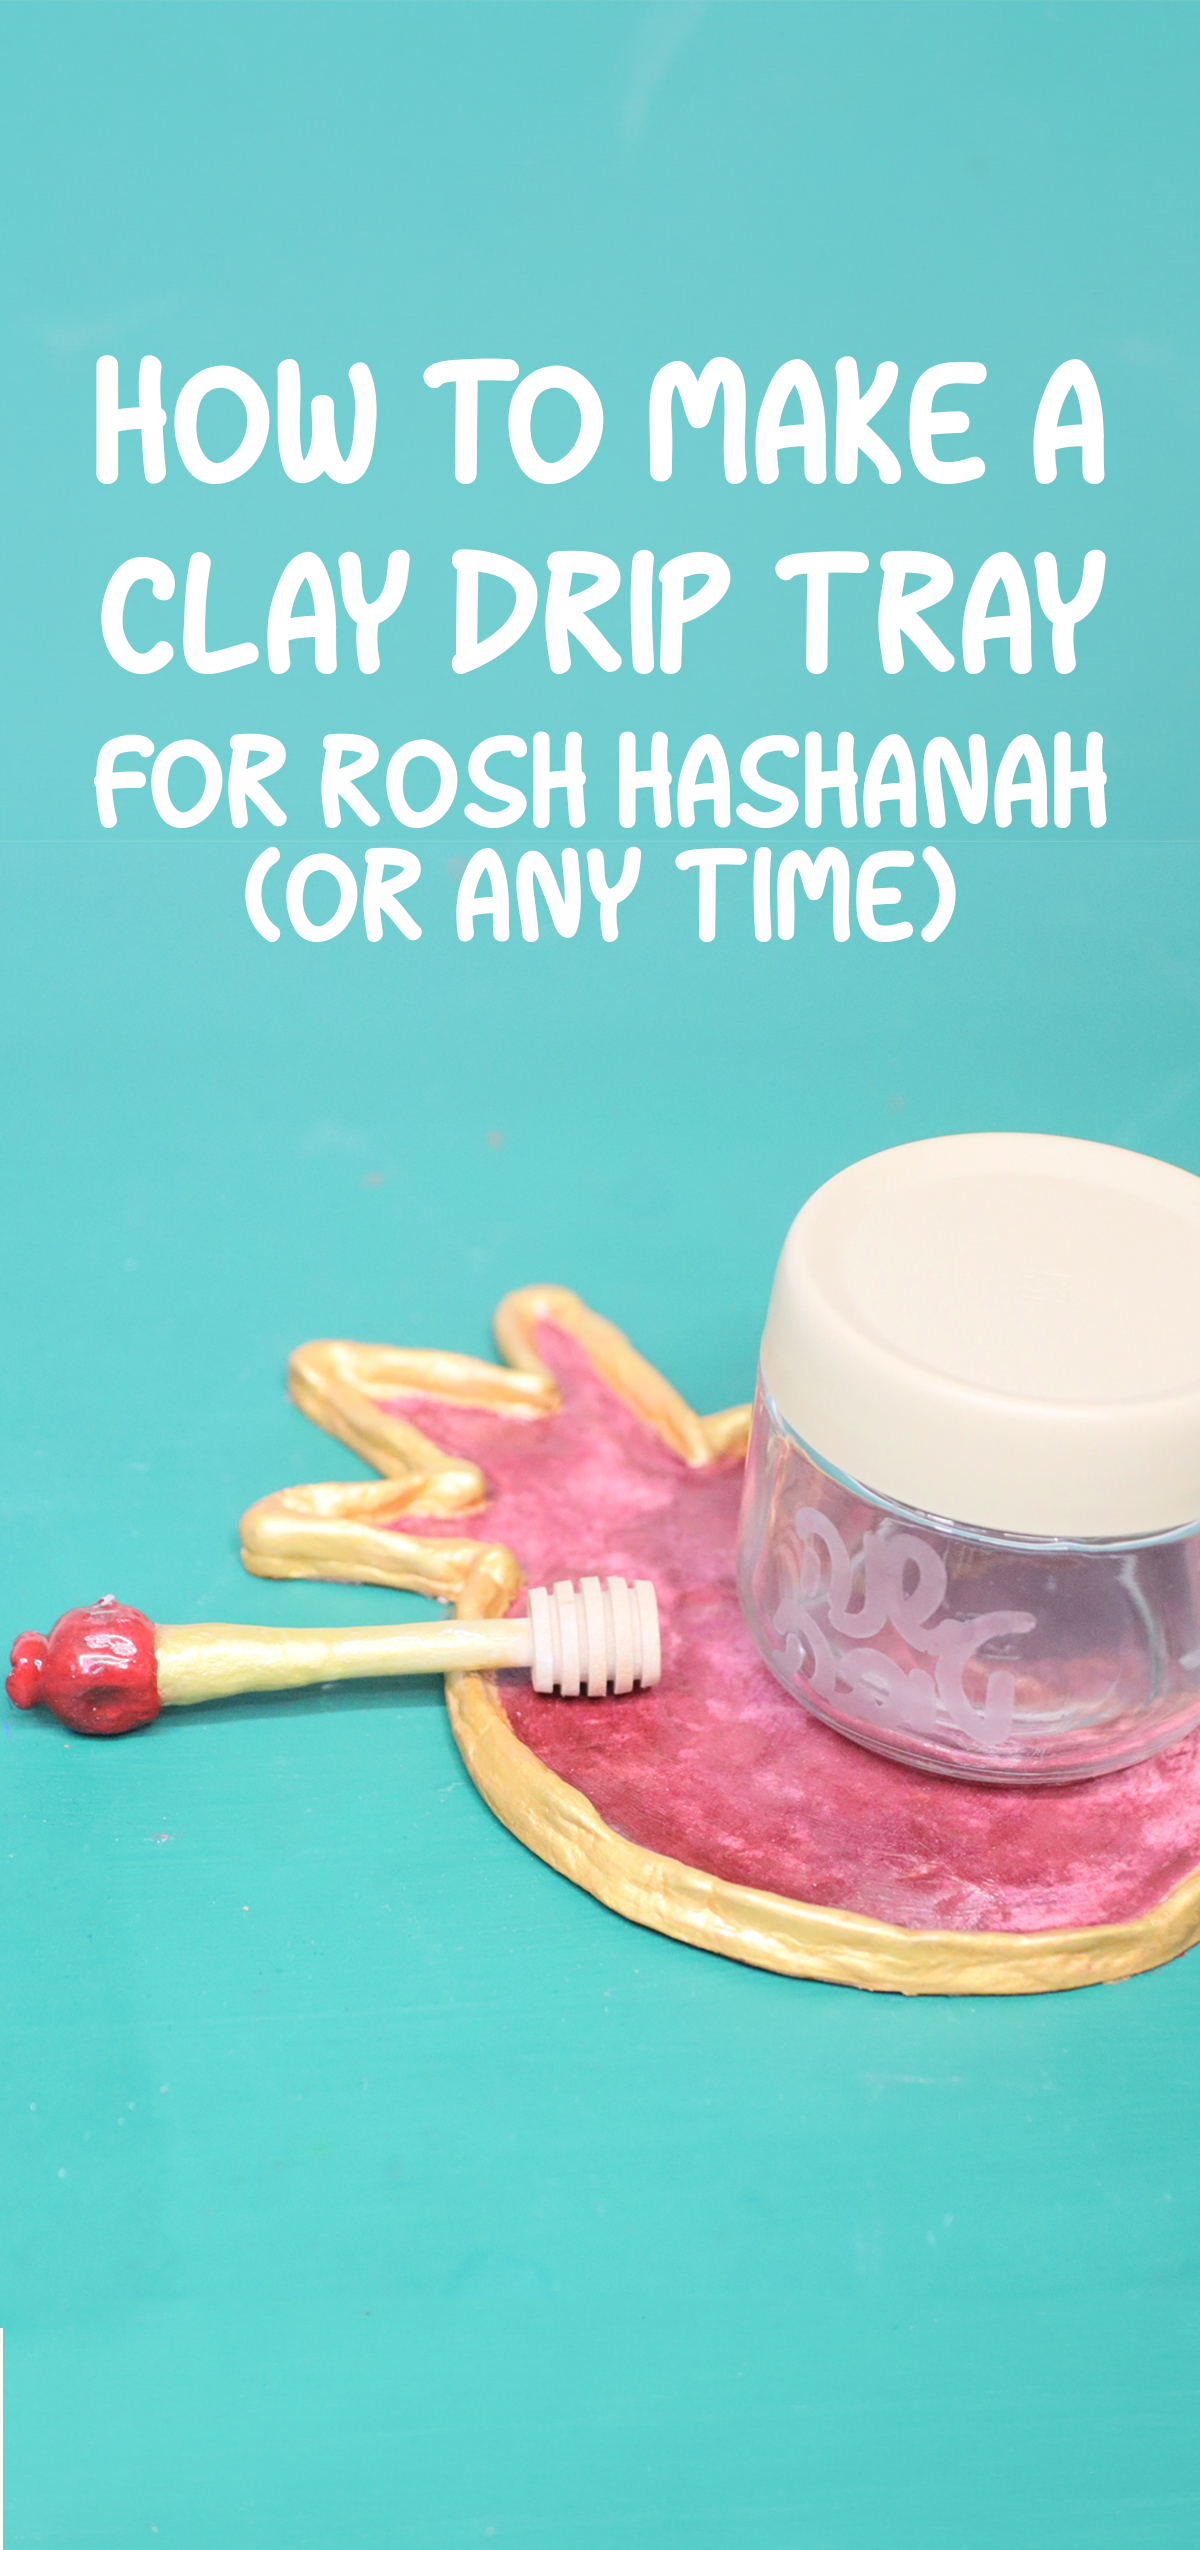
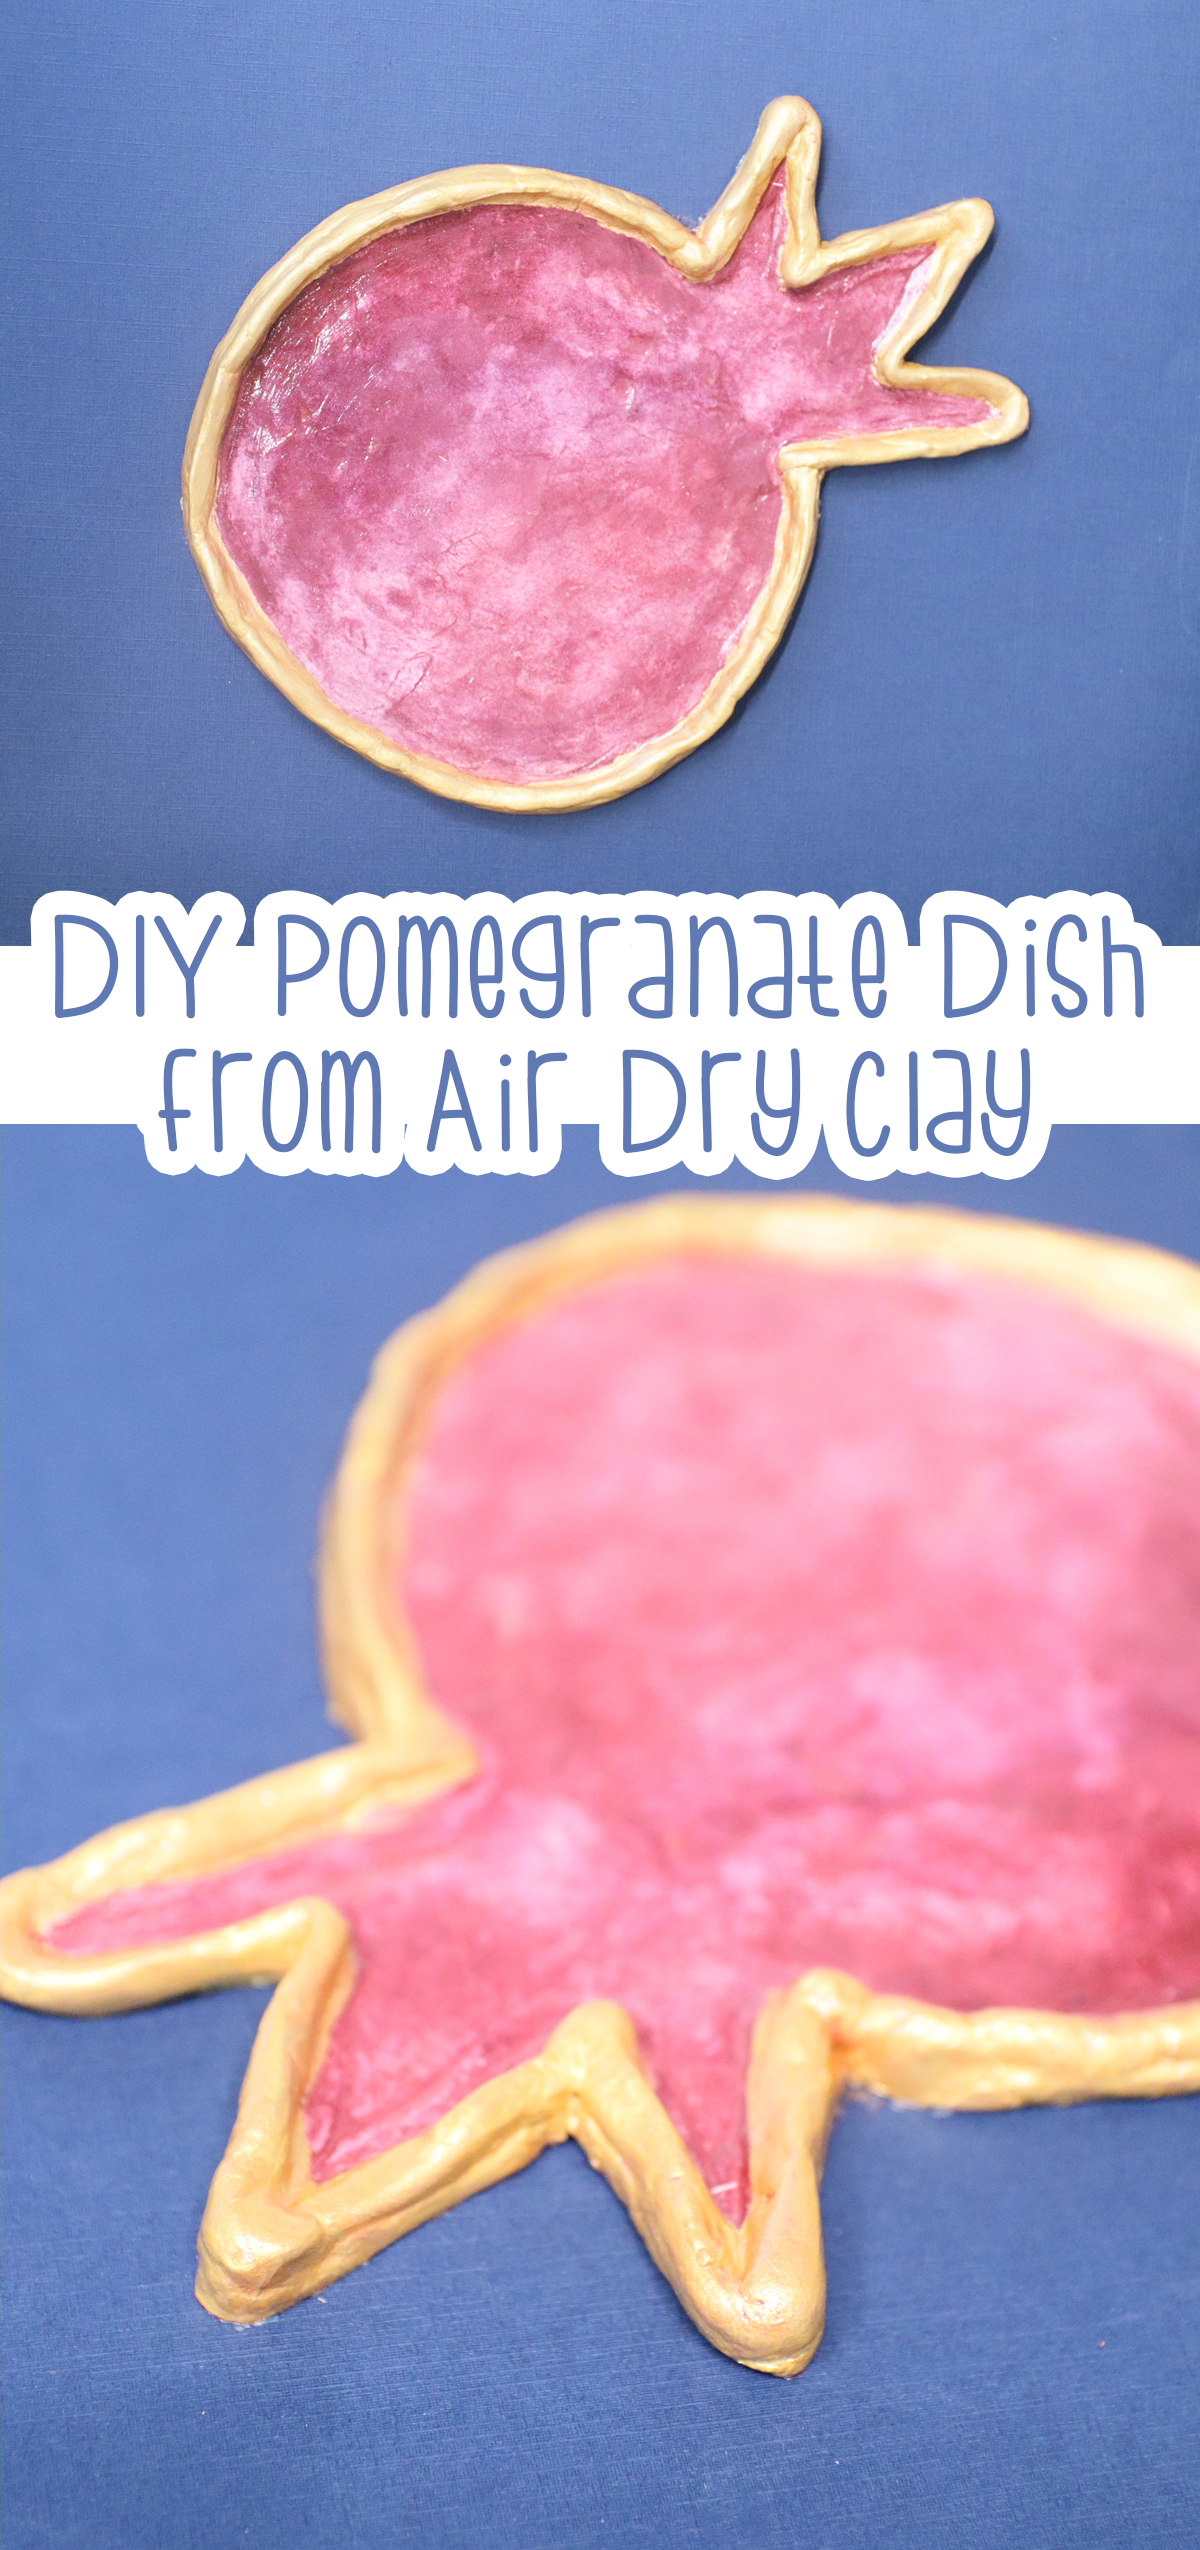
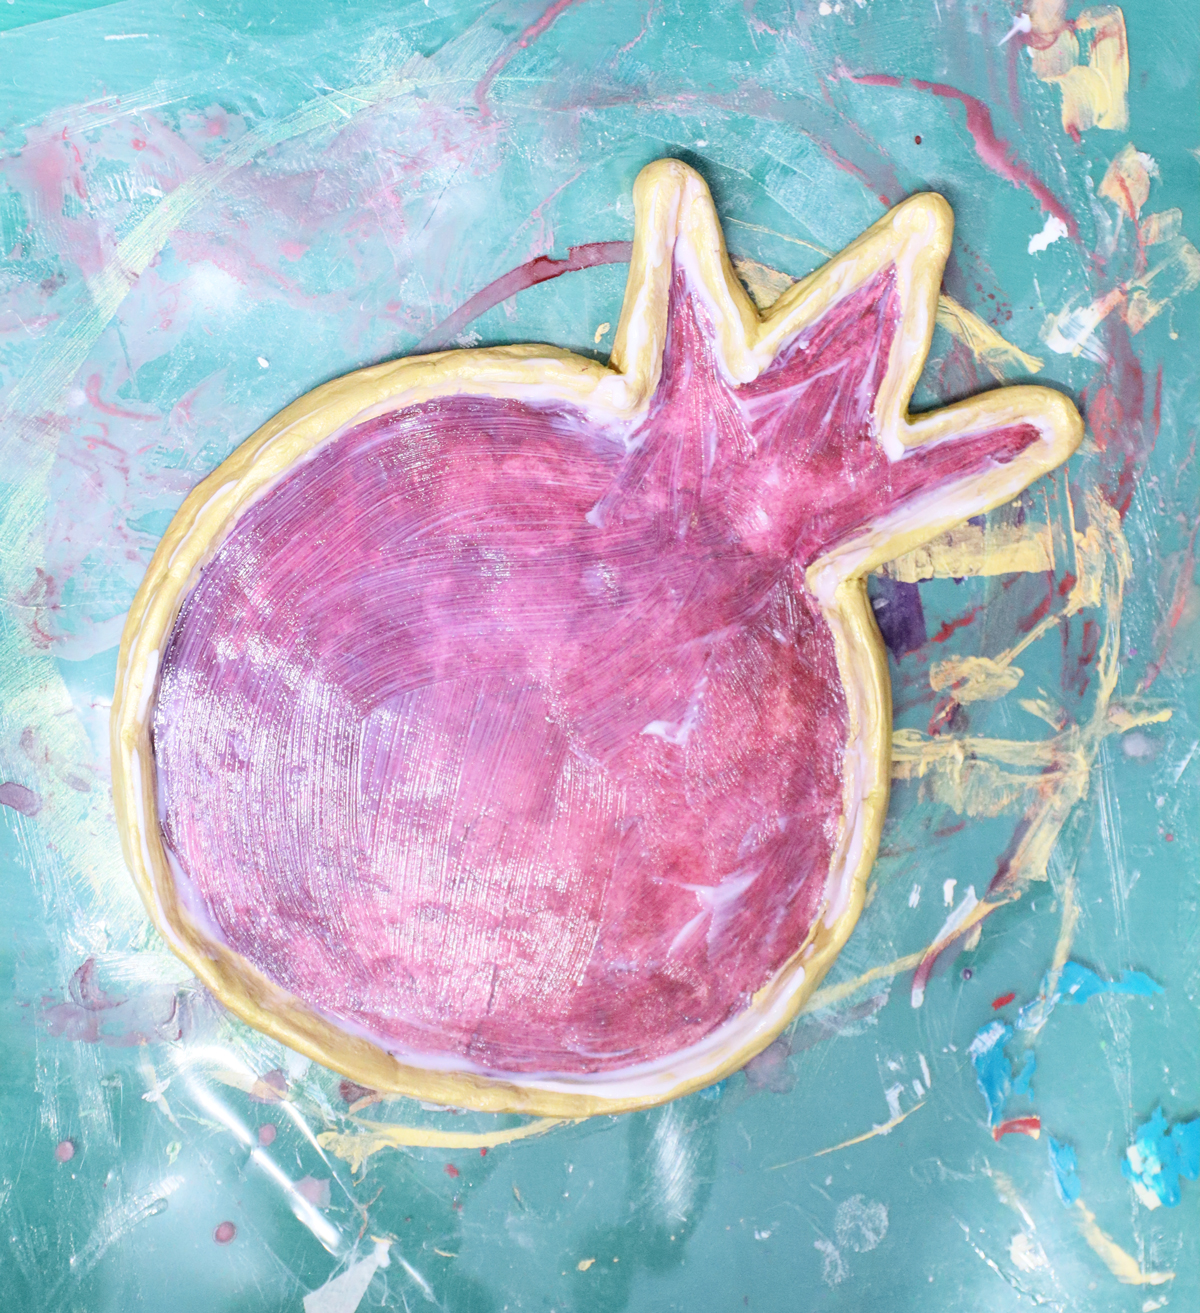
Air Dry Clay Drip Tray – Pomegranate Shaped!
Craft an air dry clay drip tray – perfect for your Rosh Hashanah honey jar! When you’re done check out this adorable honey wand craft too. This post contains affiliate links.
I love taking holiday crafts beyond the basics, and so I figured – why not make an air-dry clay drip tray for honey?
Our preschoolers tend to come home with a laminated apple to place under the honey, but I wanted something that older kids and even adults can make that can look as nice as you choose to make it, and as good as your skills are.
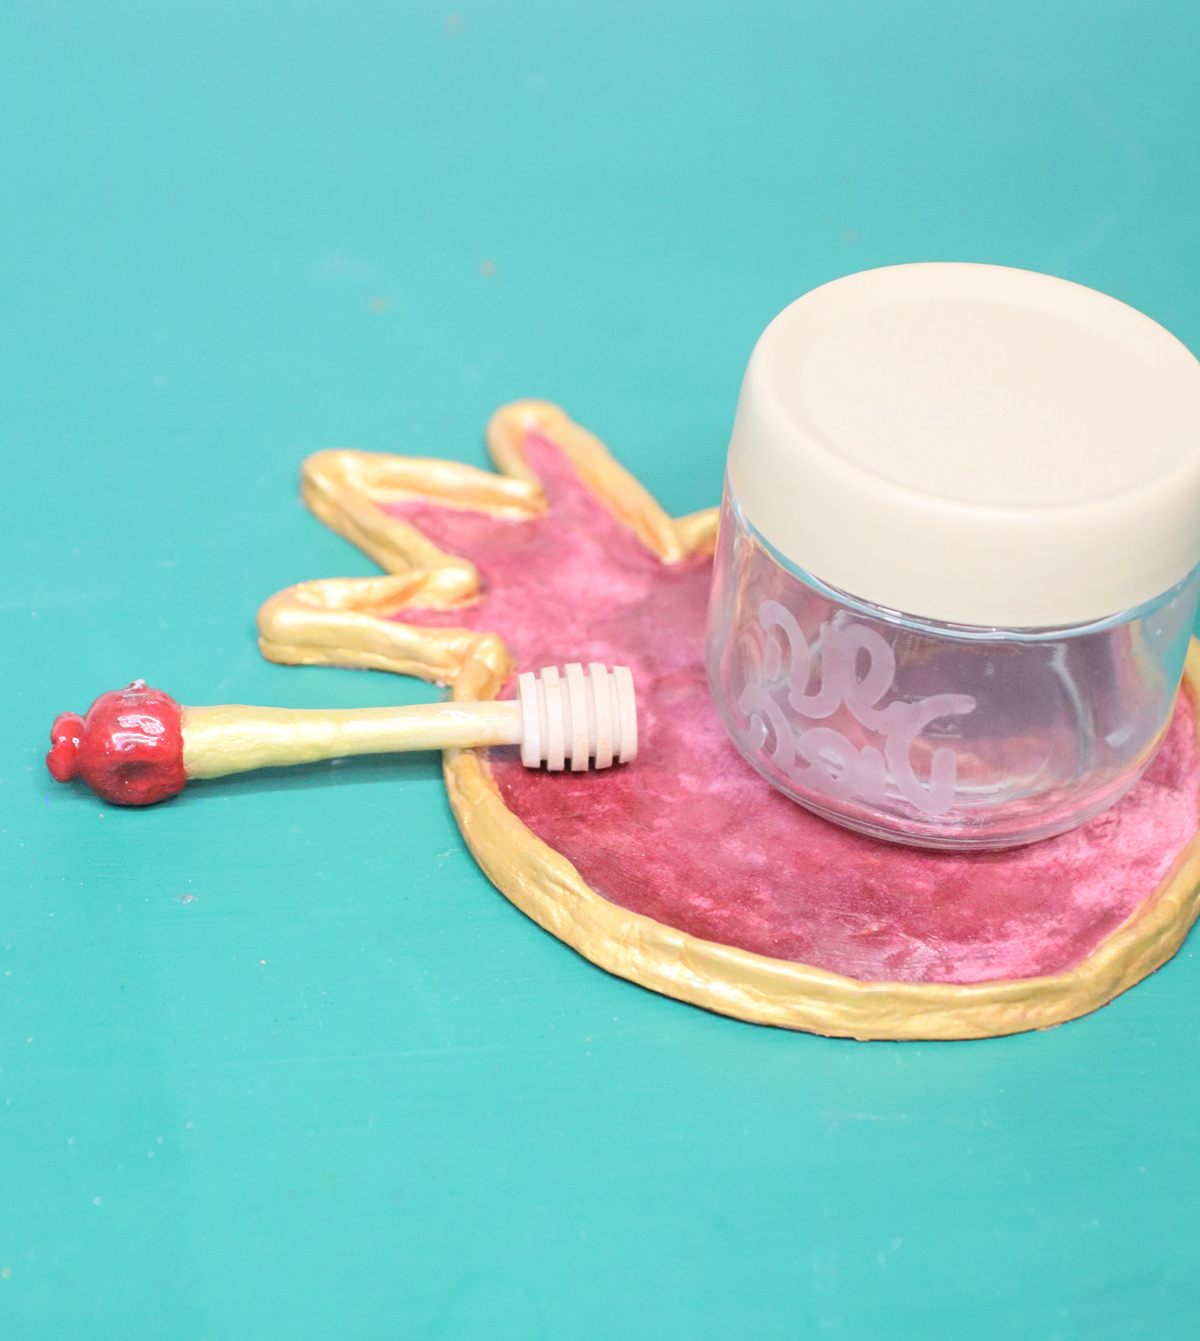
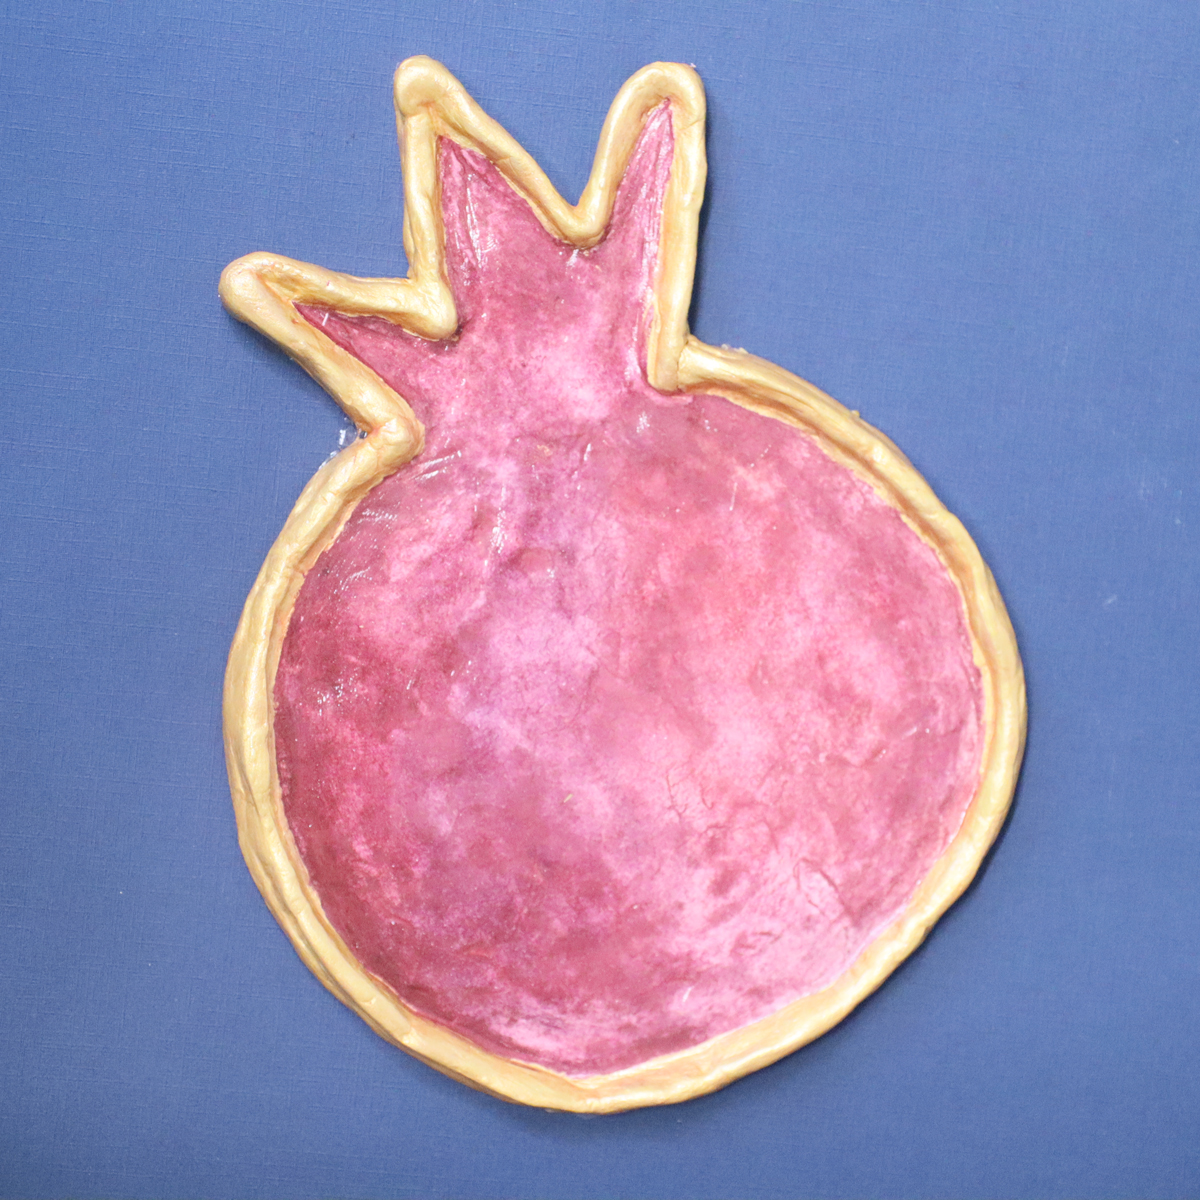
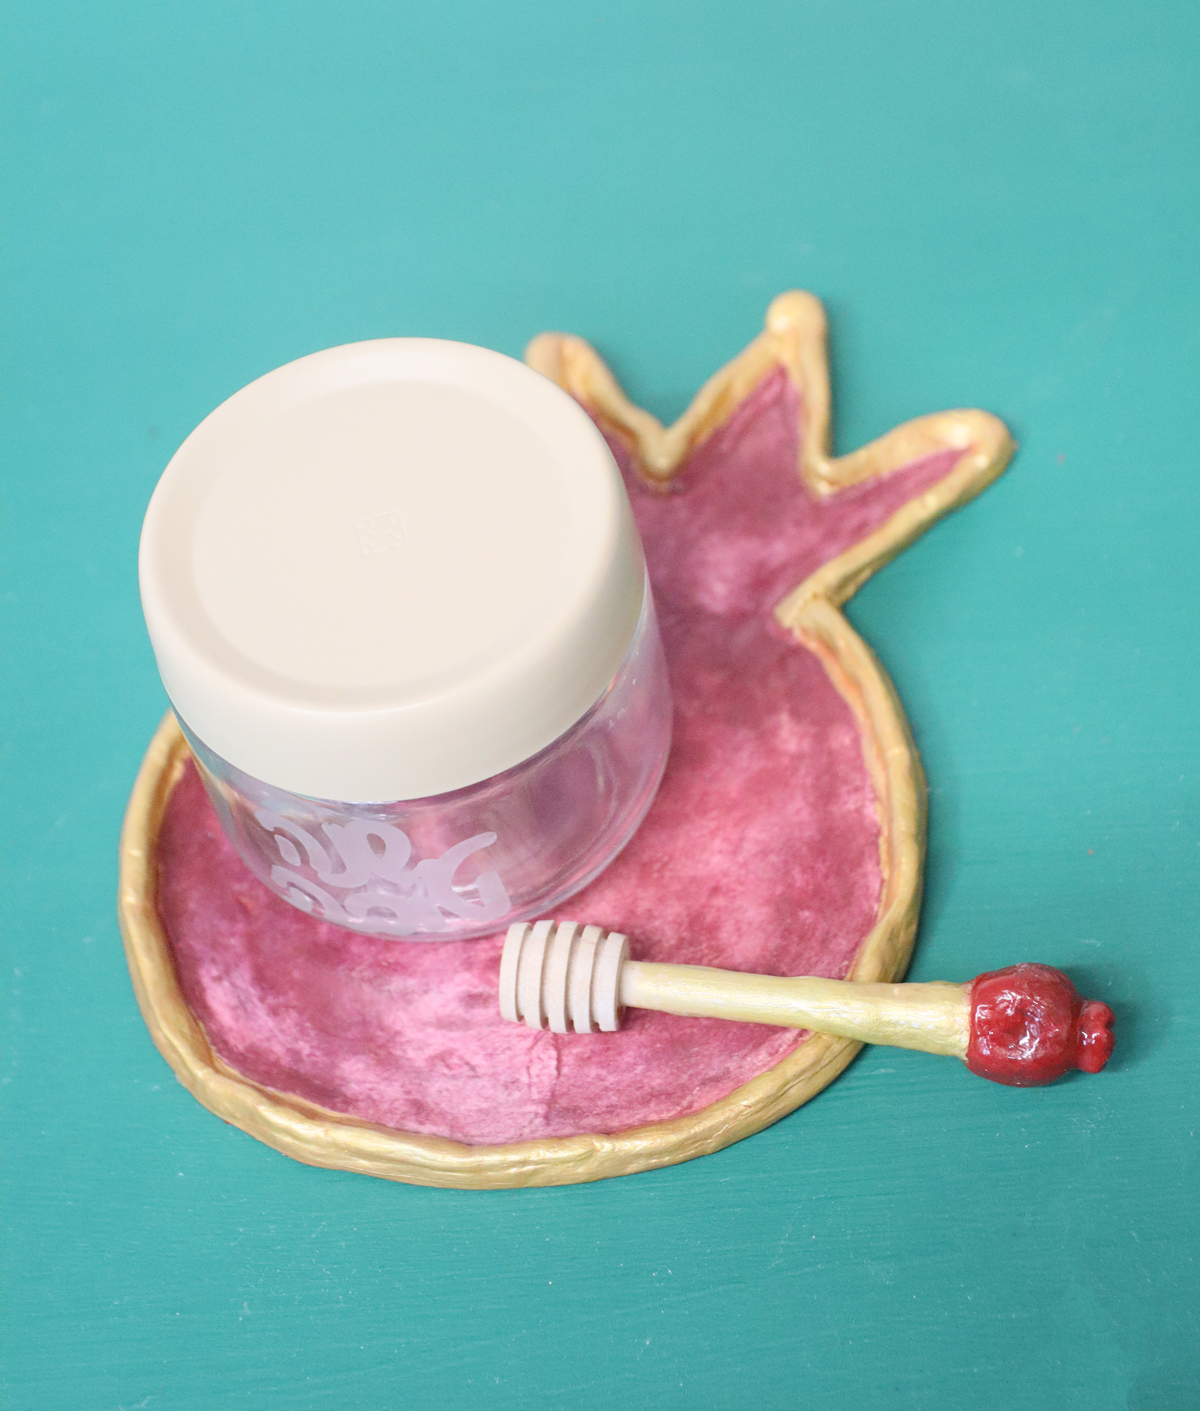
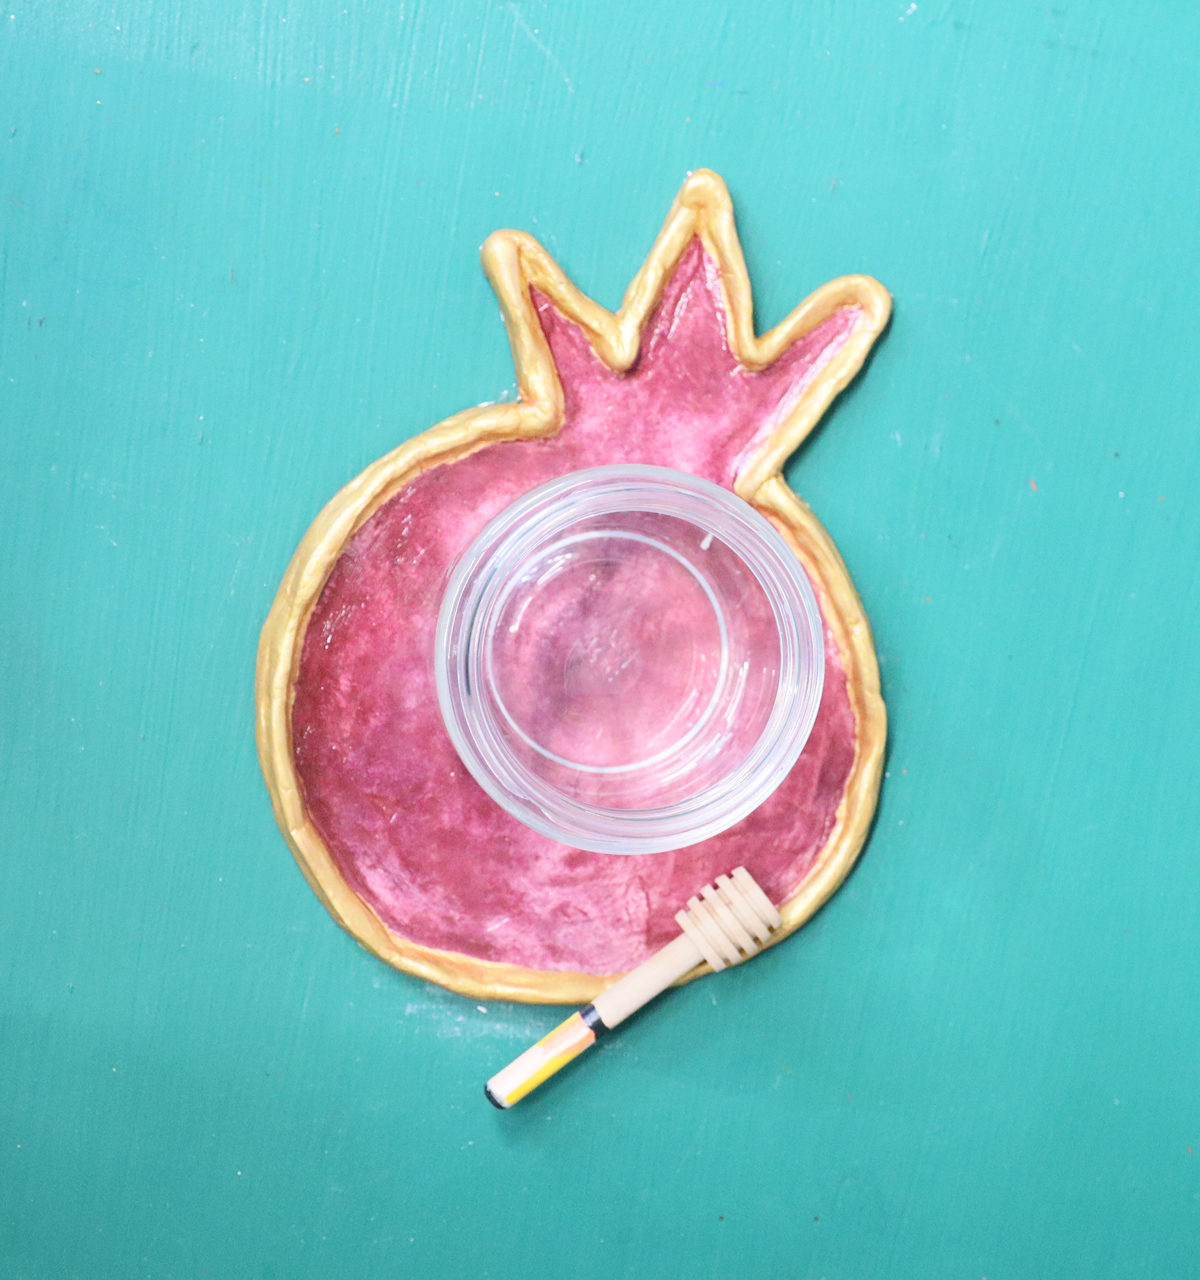
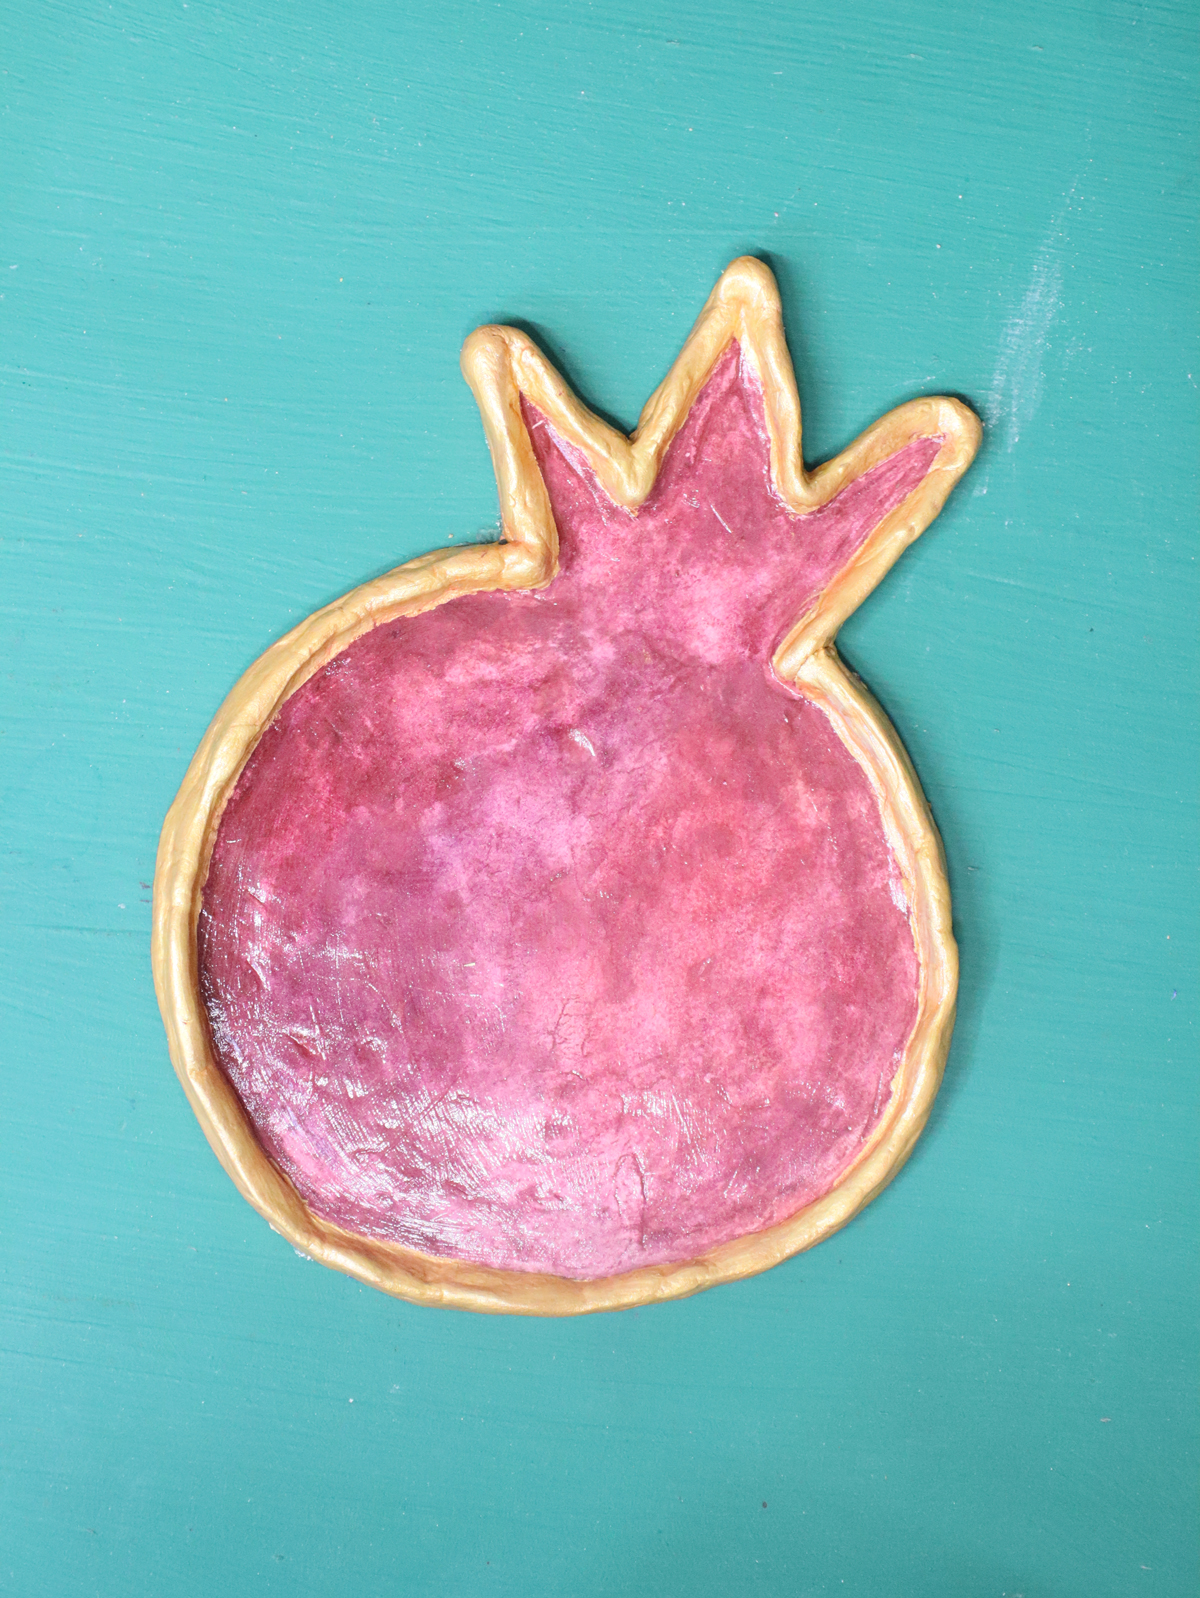
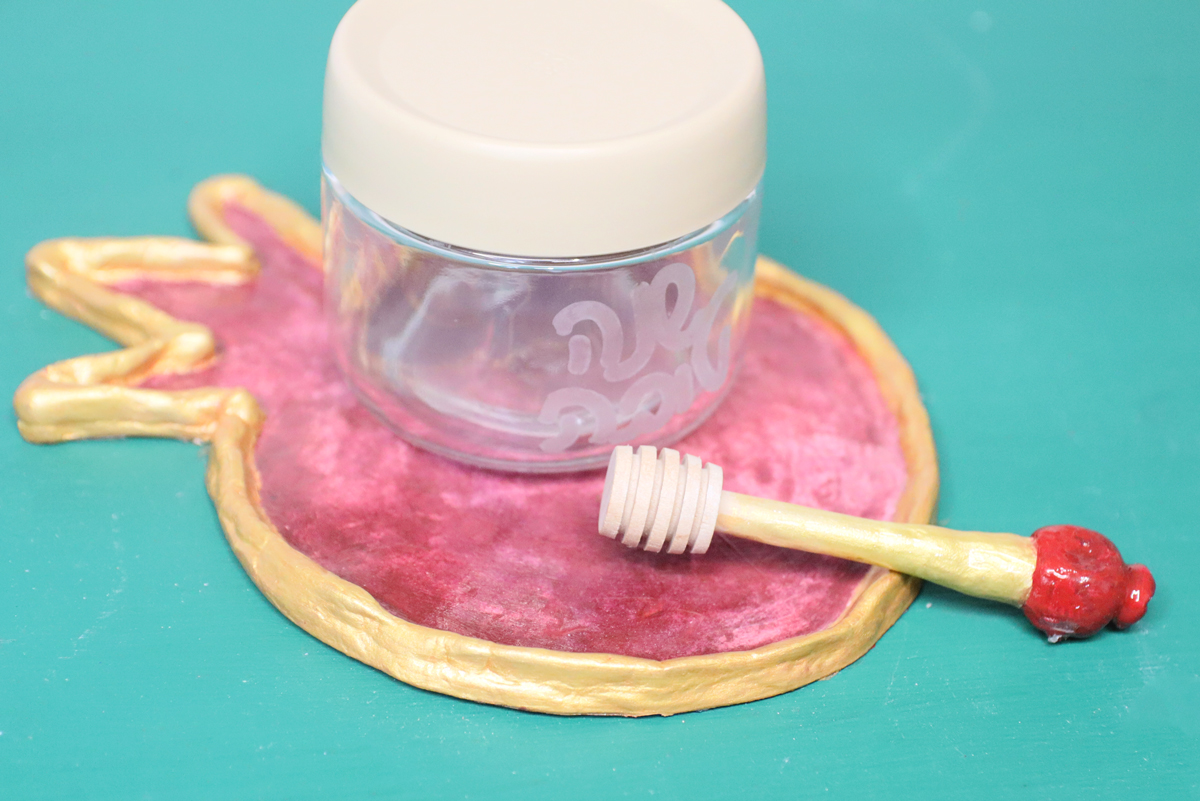
So I made this simple rimmed air-dry clay drip tray in a pomegranate shape. Beyond Rosh Hashanah, it can be used in other ways, as I’ll list below. But meanwhile, it’s the perfect accessory for these air-dry clay honey stirrers and these etched glass honey dishes!
Whether you’re making these for Rosh Hashanah or any other occasion, these air-dry clay drip trays are super fun to craft and use.
The basic process of making an air-dry clay drip tray
There are so many ways to use air-dry clay to construct functional items, but here’s my basic process for this one.
Using a template
Did you know that you can use a template as your starting point for any air-dry clay project? Just print out the shape you’d like your project to be and cut around the template with a knife!
I prepared a free pomegranate template you can use at the end of this post, but you can really work with any simple shape you’d like.
Or, freeform it – and you don’t even need to do a shape. You can also make yours round or abstract, and if you’d like, paint Rosh Hashanah motifs on it.
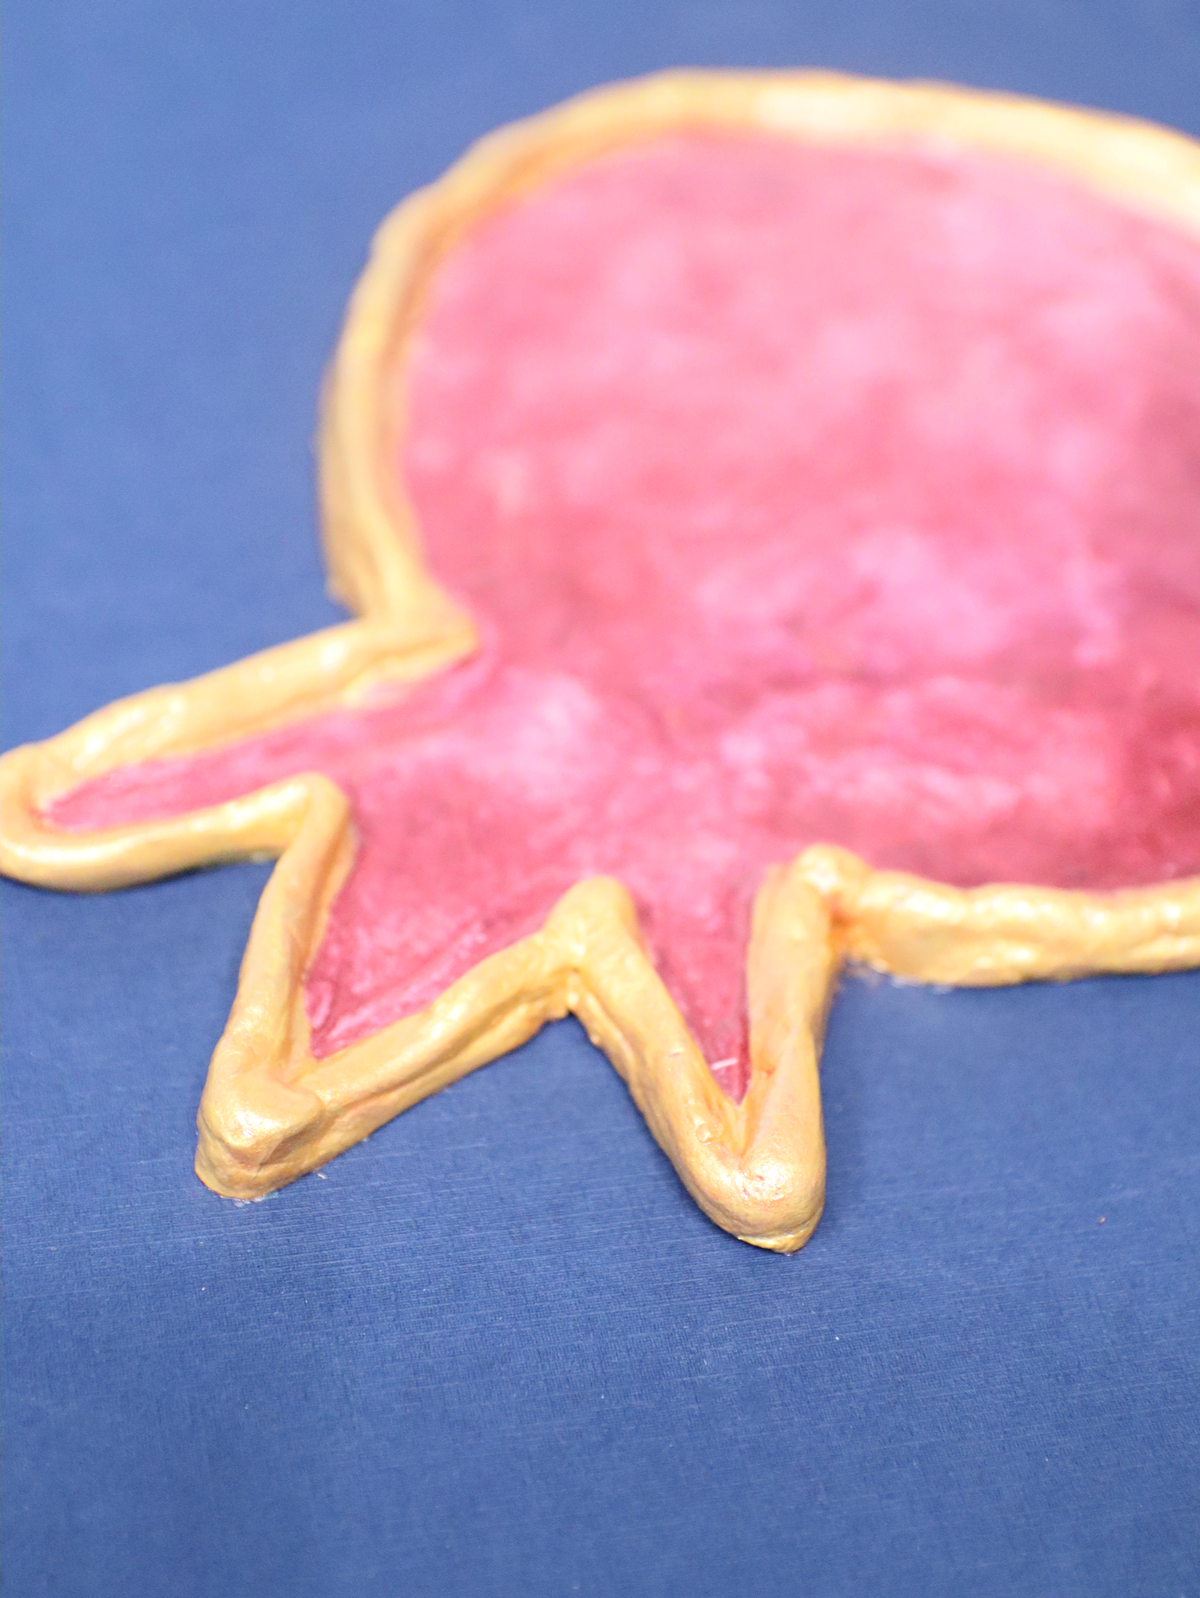
Building a rim
A rim is a great feature to have on an air-dry clay drip tray, because it just contains those drips a tad better.
It DOES up the level of your craft a bit. Connecting clay isn’t as simple as just putting it together. You need to connect it using various techniques, which I will share.
There is more than one way to do it. I used the “coil” technique, where you create a rope to go around it and then incorporate it into your project. The advantage of this method is that it’s easier to control the height of the end and stay consistent. It’s also easier to stay true to the shape of your air-dry clay drip tray.
This is the preferred method for slightly more skilled crafters.
The other way would be using the pinch pot method, where you pinch up the ends. The advantage of this is that you don’t need to worry about clay connecting techniques (and creating slip). This is preferred for crafters who are younger, elderly, or have special needs, where the end result is more forgiving and the process itself needs to be simpler.
How to use your air-dry clay drip tray
Using the pomegranate tray as a honey drip tray for Rosh Hashanah
I had this in mind as a honey jar tray for Rosh Hashanah, and so I made it in a Rosh Hashanah theme. The size is also perfect for a standard honey jar.
It has plenty of space to rest the honey wand. If you do this, keep in mind that you’ll want to clean it and not leave it sticky overnight to avoid ants. You’ll also need to worry about whether or not your finish is food safe if you use it in direct contact with food.

More fun ways to use it
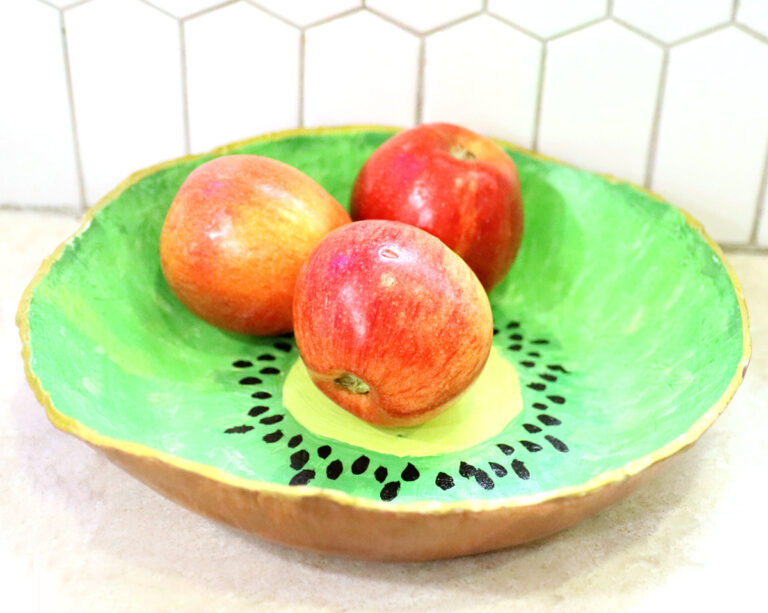
There are other ways you can use this air-dry clay drip tray!
- As a base for candles
- As a glorified coaster
- Without the rim, it can make a great trivet too
- As a drip tray for salsas and other dips
- As an ashtray (note: make sure materials aren’t flammable)…
This is one of those crafts that follows a simple enough structure that really anything goes!
Coloring and completing your air-dry clay drip tray
The finishing touches are everything, but the way you do them can vary, and there’s no right or wrong way!
How to color it
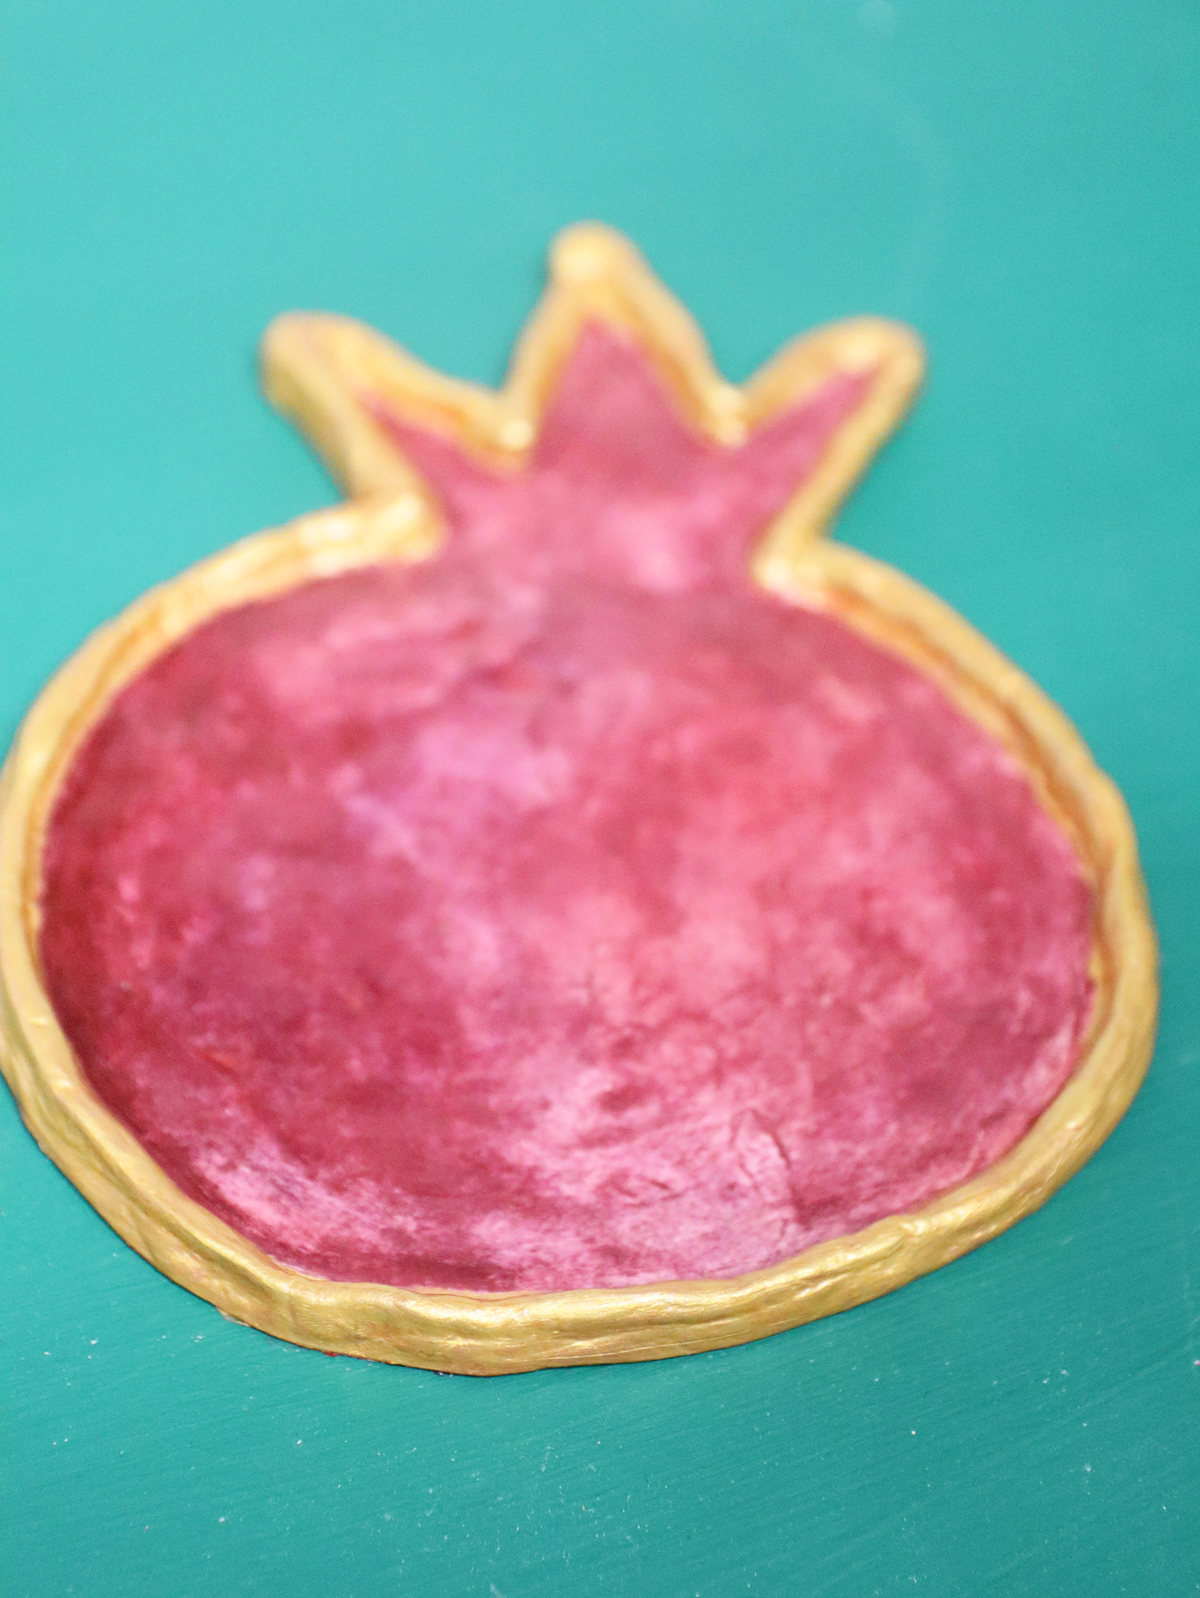
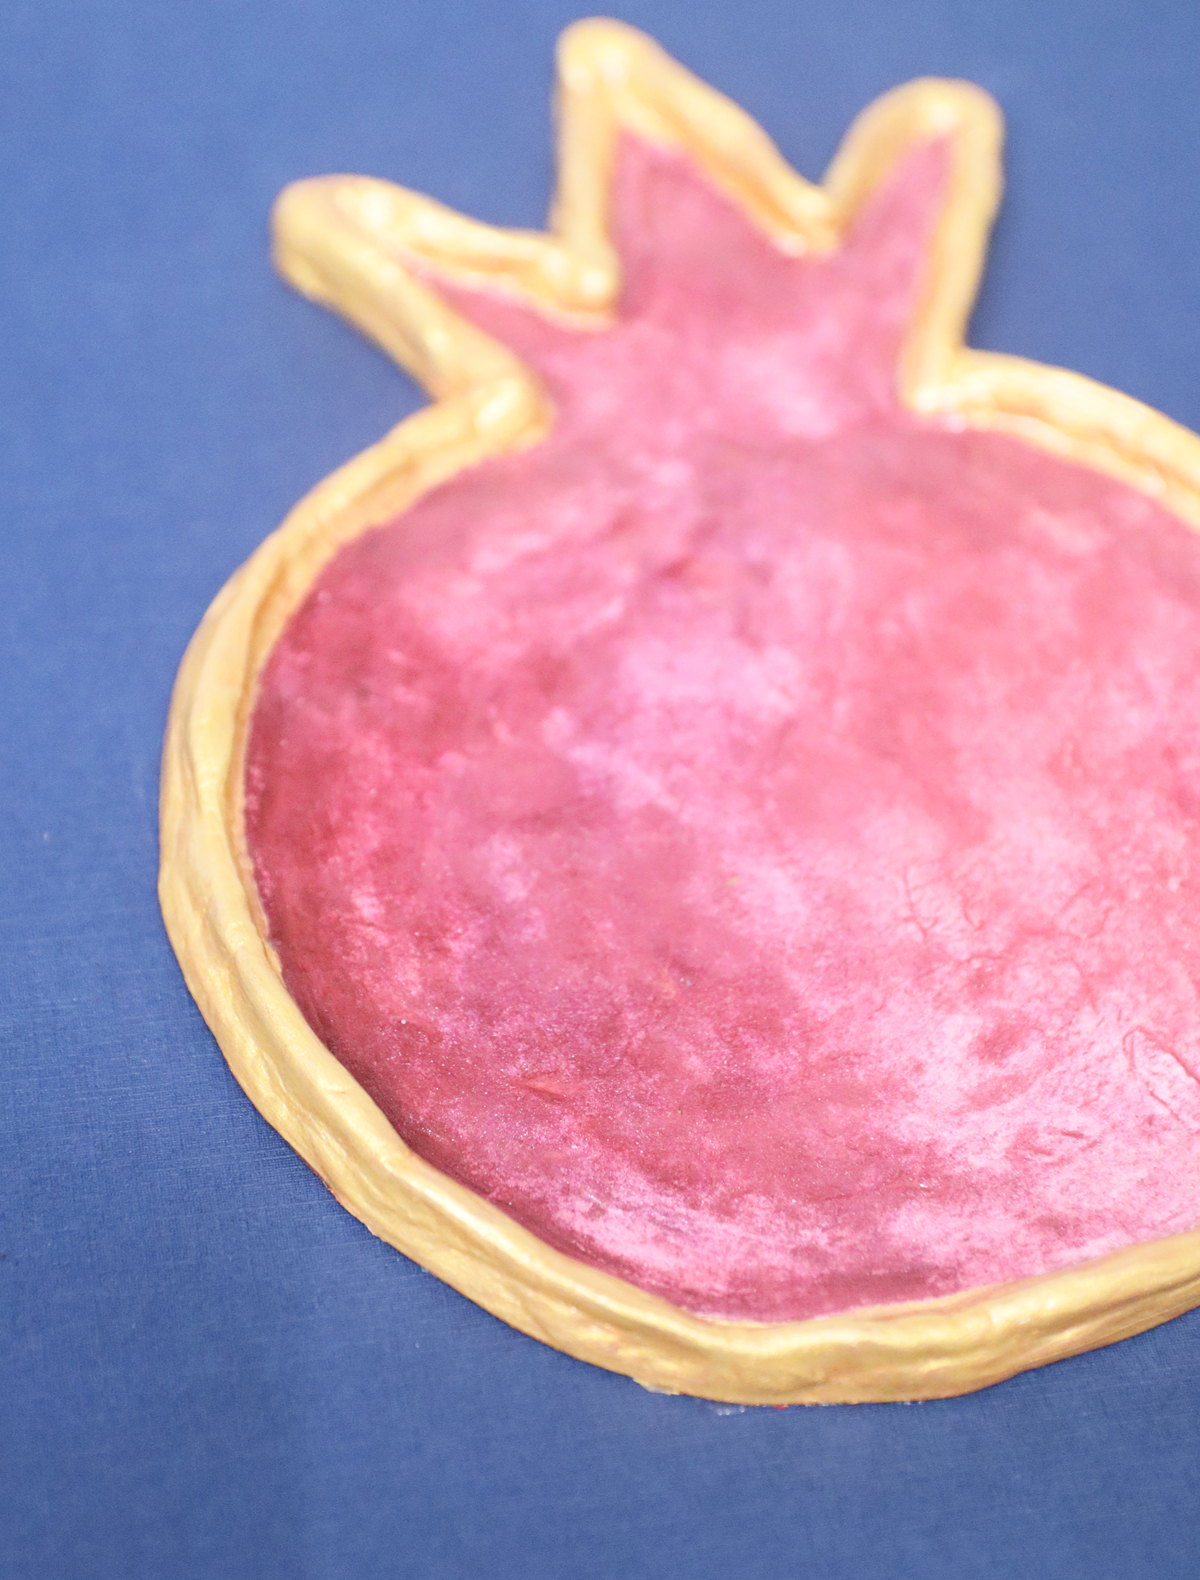
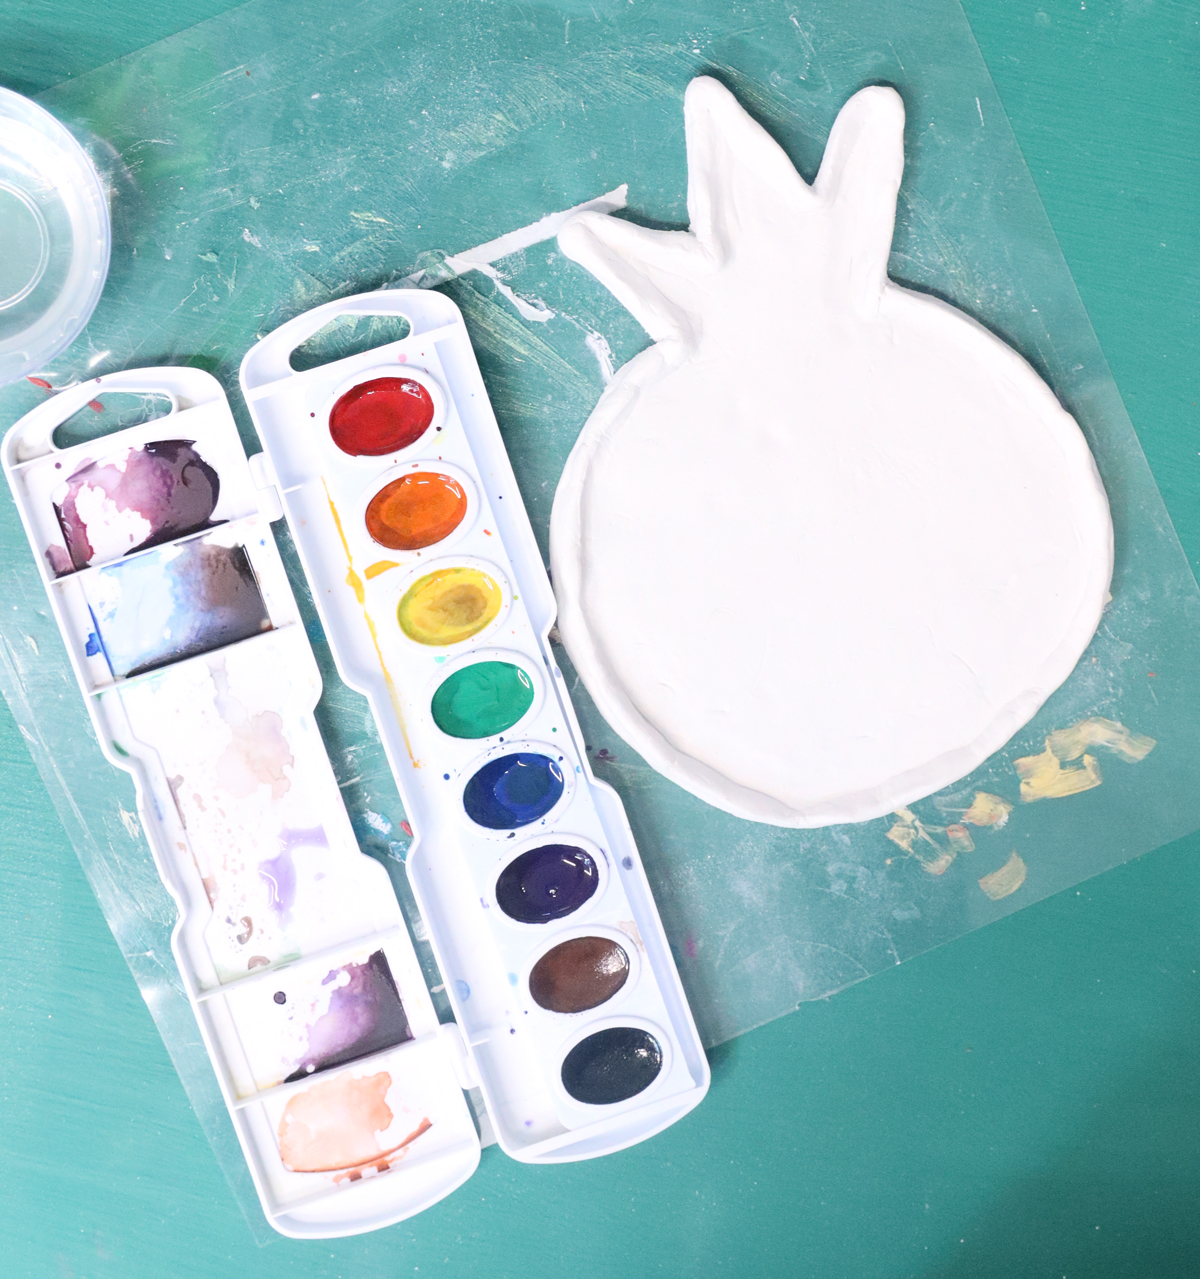
I chose to use watercolors to paint my air-dry clay drip tray. Watercolors absorb right into the clay, leaving whichever finish you have on the tray very visible. In fact, it tends to gather in any grooves, highlighting them.
That makes watercolors the perfect finish for when you have a texture you want to highlight, and the worst finish for when you have one you don’t want to highlight.
For this air-dry clay drip tray, it was a fabulous way to get a beautiful, mature, and organic finish. However, I did need to work it a few times, and overworking it becomes problematic as it very much wets the clay. (You can read more of my tips for watercolors on air-dry clay here.)
For a more beginner-level finish, you can simply paint it with acrylic paints! This acrylic paint finish sits at the surface and is much more forgiving. You can also mix paints into the wet clay itself if you prefer.
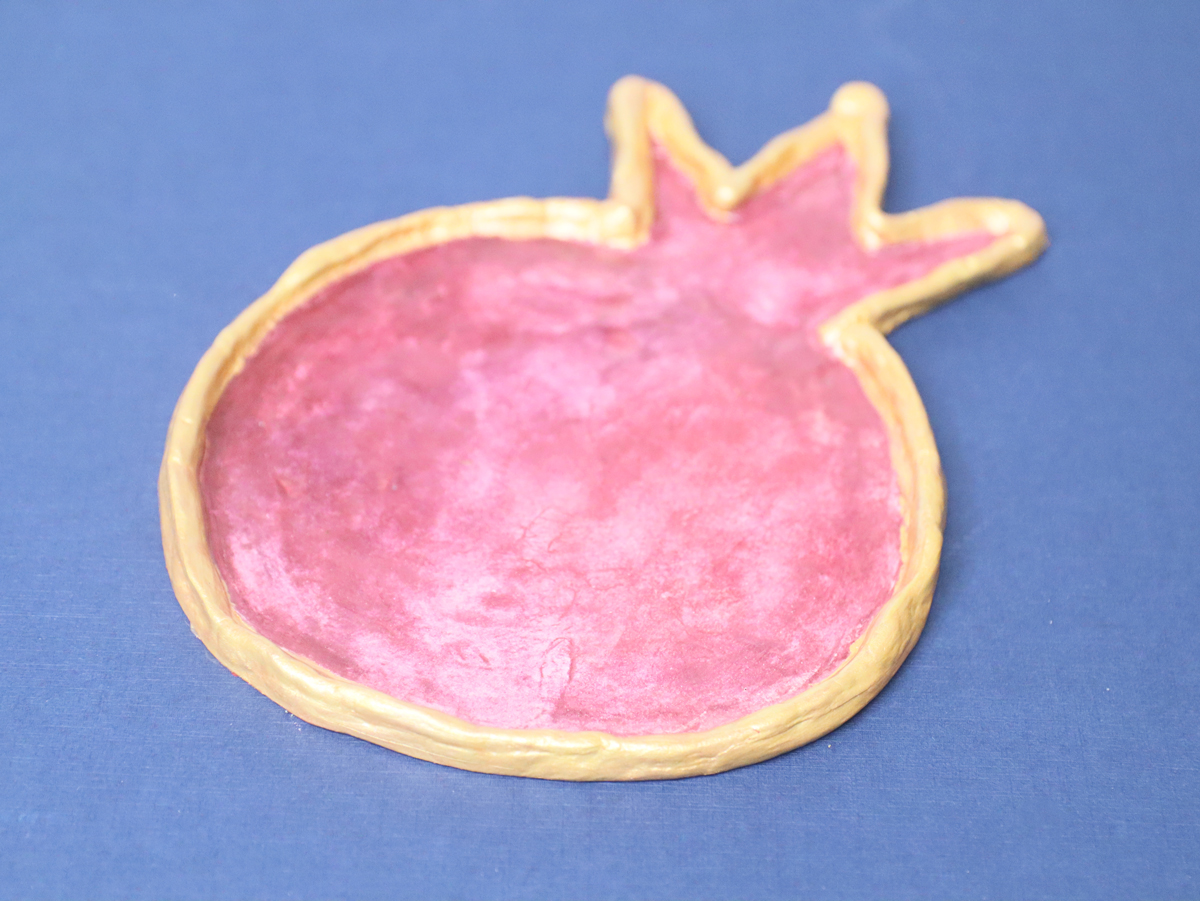
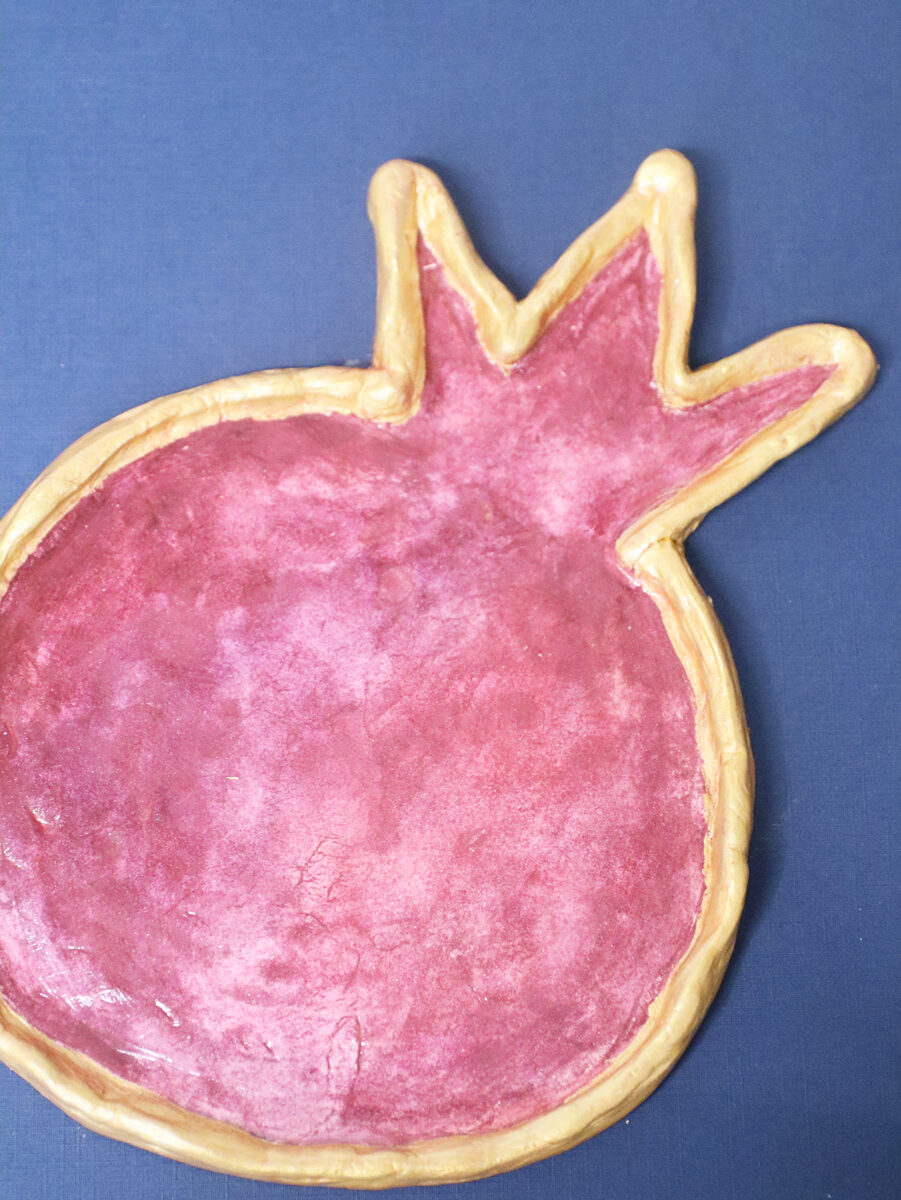
Finishing off with a gilded edge
Gilded edges are a popular design choice for many crafters, and I figured it’s a great way to complete this project, too! It dresses it up a little too!
You can, of course, skip it, or paint your edges a solid color just to add a little interest.
Sealing your air-dry clay drip tray
If you’re using this as a drip tray in real life, you’ll need to seal it. Sealing it with thorough layers of dishwasher-safe Mod Podge or with resin on all sides will allow you to properly hand wash it. You can put it in the dishwasher with Dishwasher Safe Mod Podge; however, I don’t recommend it – it requires 28 days to fully cure to dishwasher safe, and even then, if you missed a microscopic spot, the whole thing will melt…

You can also seal it to make it “wipeable” using other finishes, such as glossy acrylic paint, outdoor Mod Podge, hard acrylic sealers, or clay glaze.
How to make a pomegranate air-dry clay drip tray
Materials used
The supplies list on this one is a bit long, but you should be able to repurpose, pull from what you have already for some of them. I’ve broken it up into sections for which part of the project they’re needed for.
For forming the clay tray
- Air dry clay – I like DAS brand for an easy-to-use and durable finish. Other good brands include Sculpey Air. Crayola will work, too, but I find it to be a bit more brittle.
- The template – download at the end of this post – printed and cut out.
- A rolling pin dedicated to clay
- Clay height guides (thin books of the same height can work)
- A protective surface (I use a large silicone mat)
- A craft or utility knife (I recommend dedicating a cheap one to clay since it gets residue on it).
- A jar with a bit of water
- A small, cheap paintbrush dedicated to clay (or that you can toss after)
- Clay tools (I have this set from DAS)
For finishing your project
- A scrap of coarse sandpaper
- Watercolor paints (I like PRANG’s inexpensive basic palette – it has good, rich color)
- An absorbent watercolor paintbrush
- A bowl or jar of water for your paints
- Optional: a heat gun to expedite drying
- Masking tape
- Gold paint (I used FolkArt Brushed Metal)
- A flat paintbrush for the acrylic paint
- Dishwasher Safe Mod Podge or your favorite sealer for clay
Watch the Video
Watch the full-length video on YouTube if you prefer to learn that way! Or scroll down for written instructions with photos.
Process
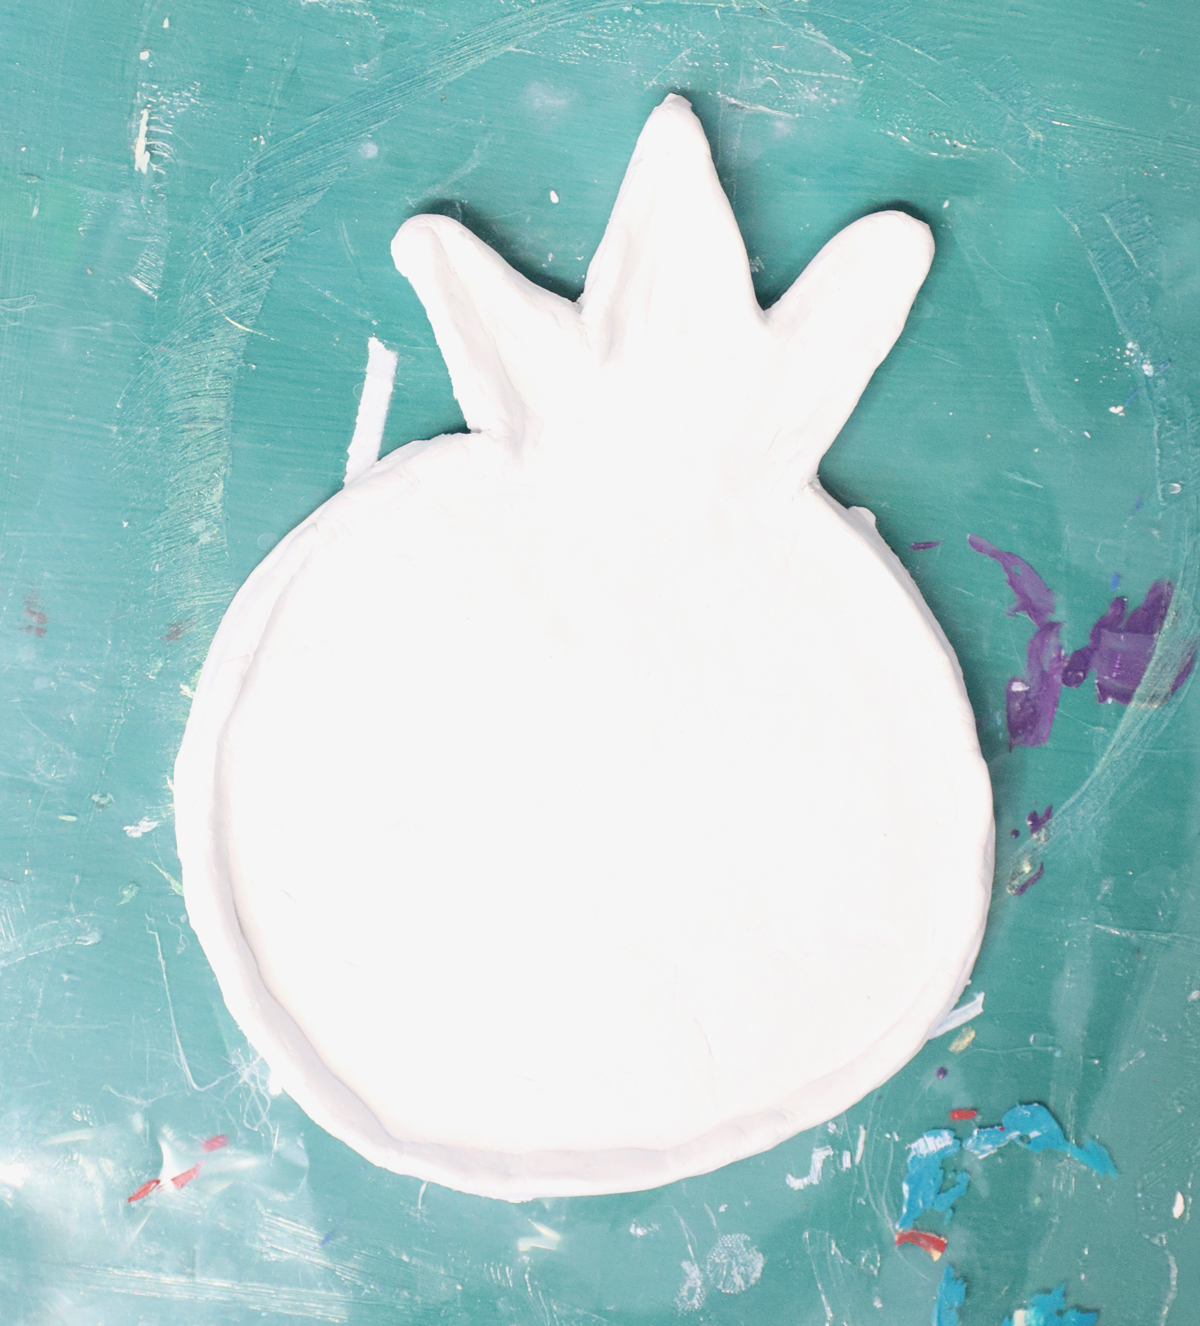
Shaping your pomegranate tray
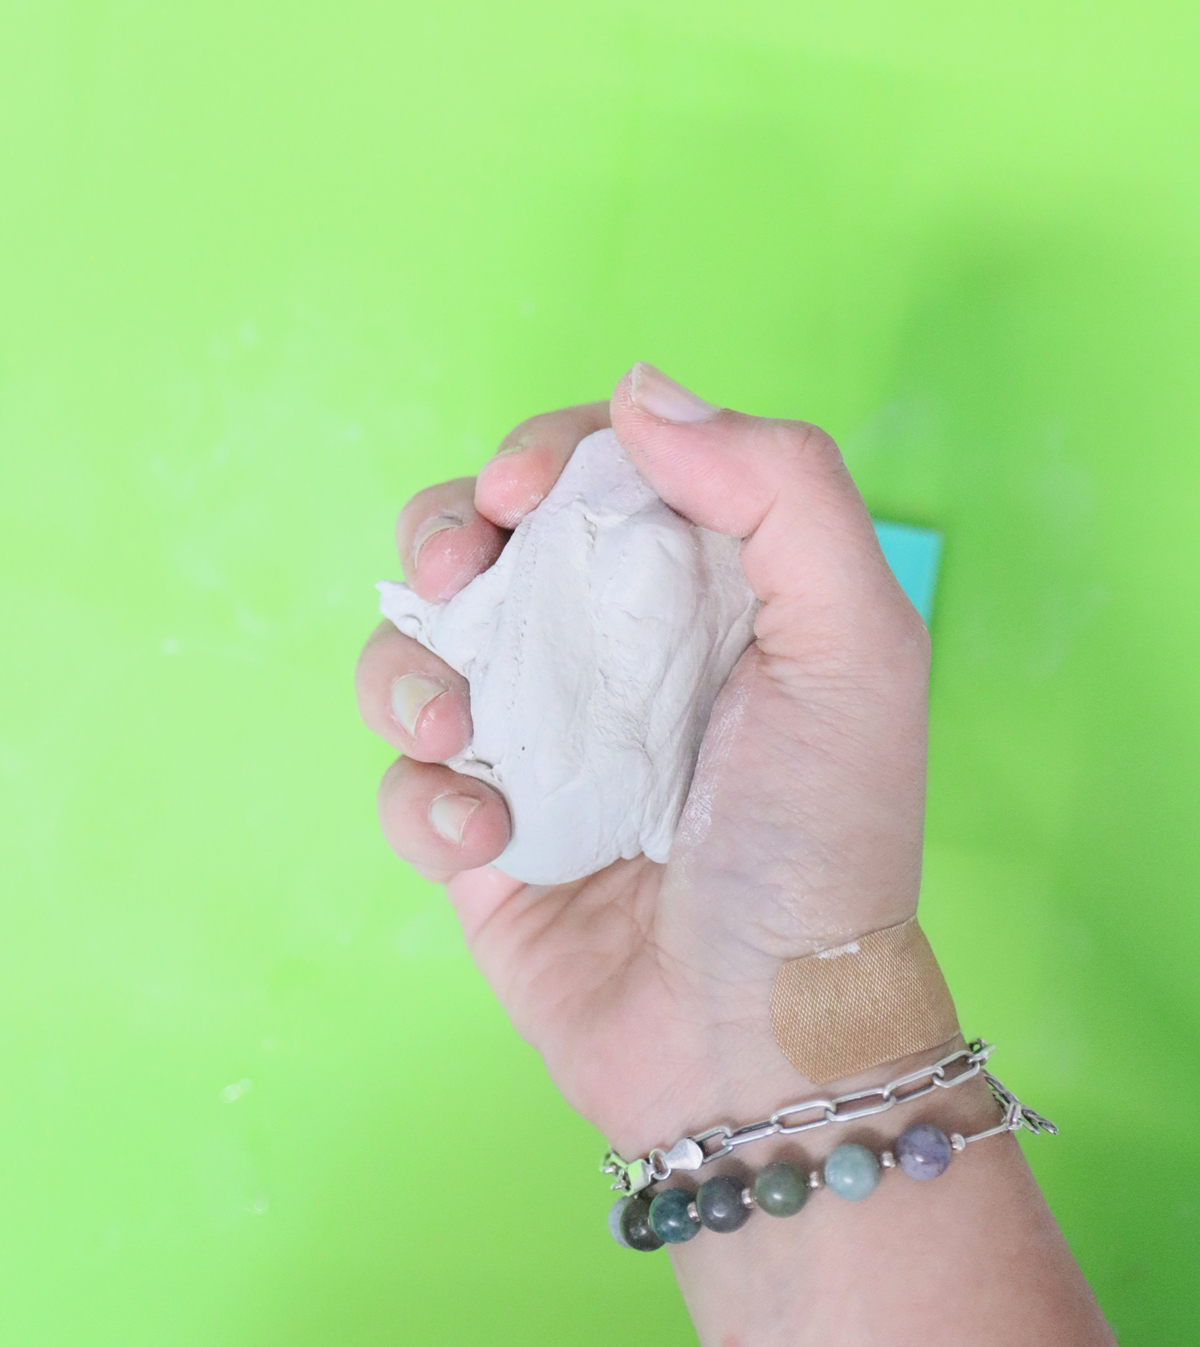
1. Pull off a fistful of clay (about the size of a baseball).
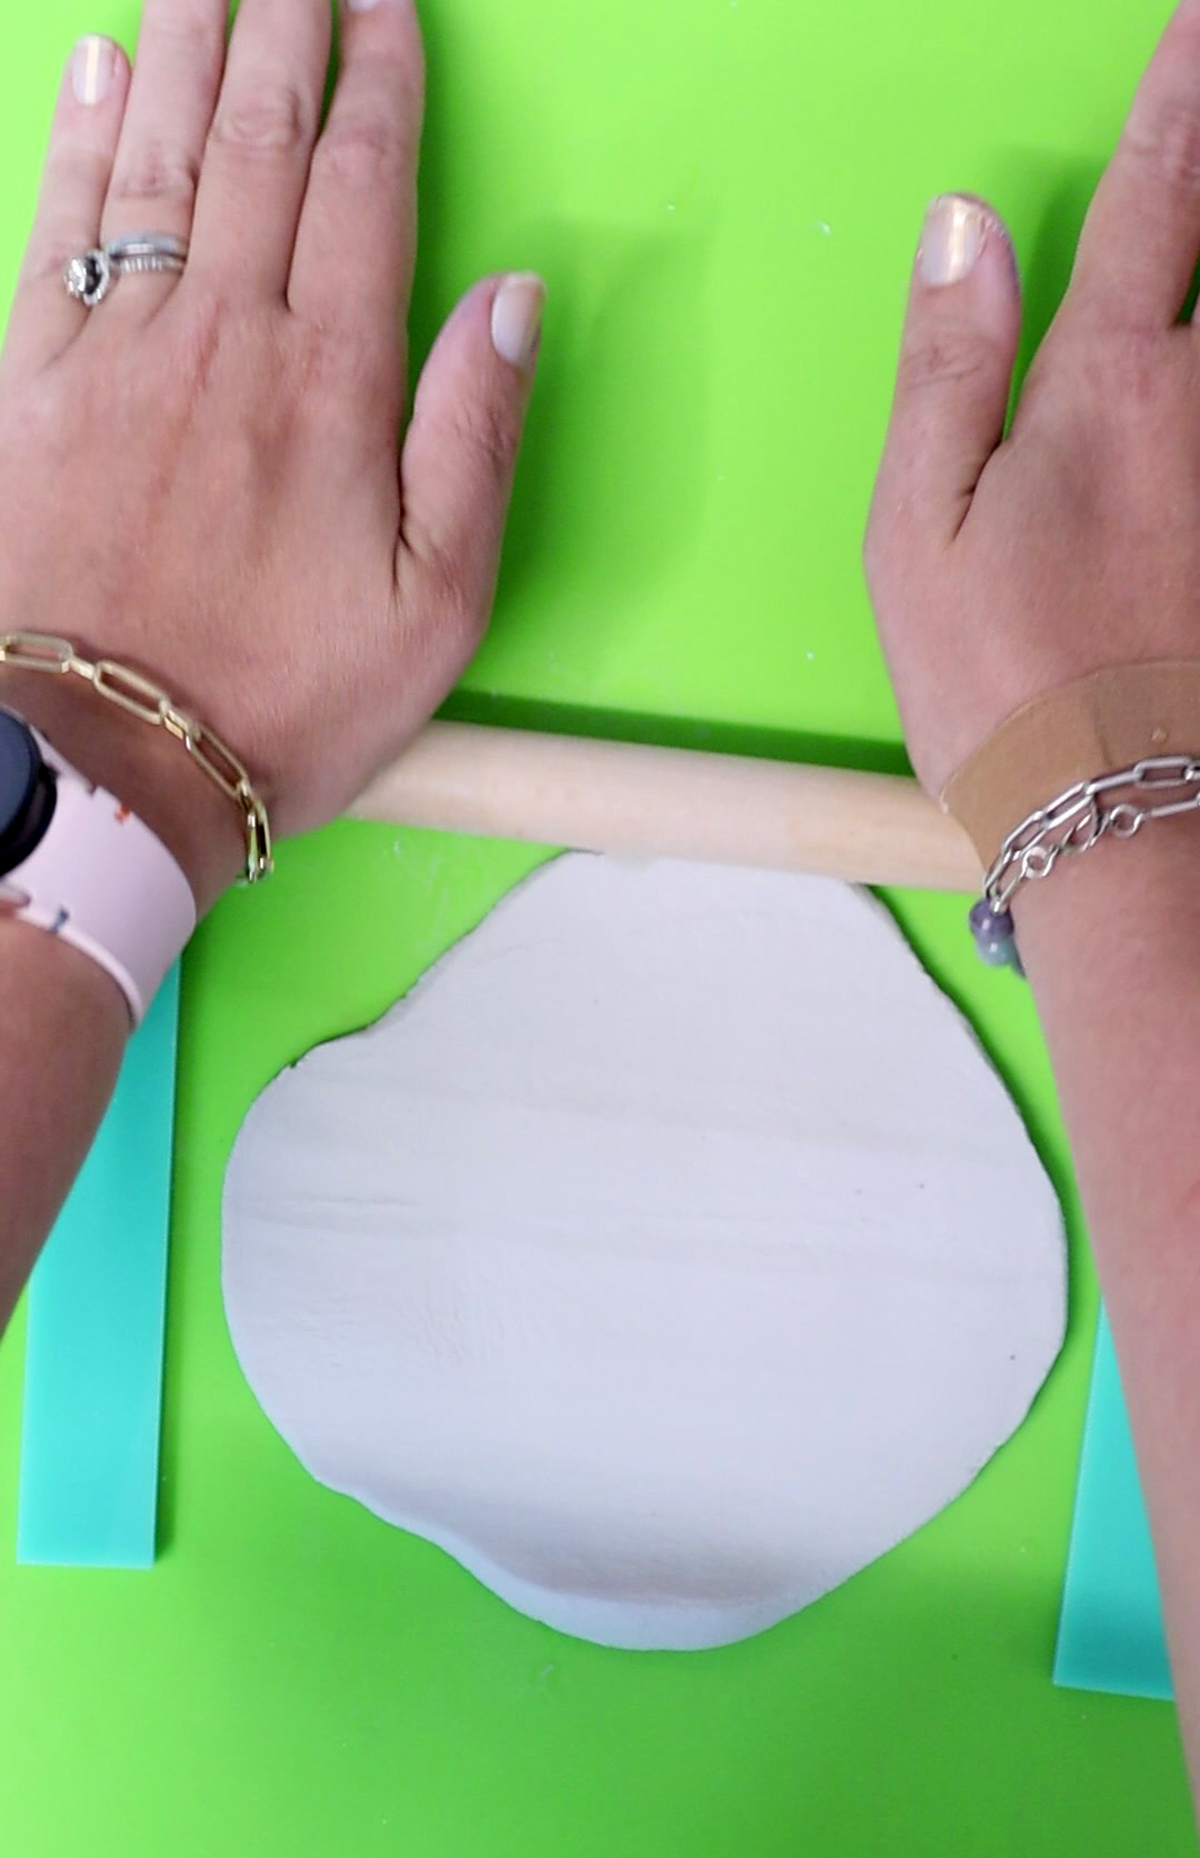
2. Place it on your surface between two clay height guides. Roll it out large enough for your template.
3. Cut out the template and place it on your clay. You may want to move the clay around a little as needed if you need more in some spots to form your pomegranate – just make sure to smush it into the rolled out clay well enough that it becomes part of it, and roll that part out again.
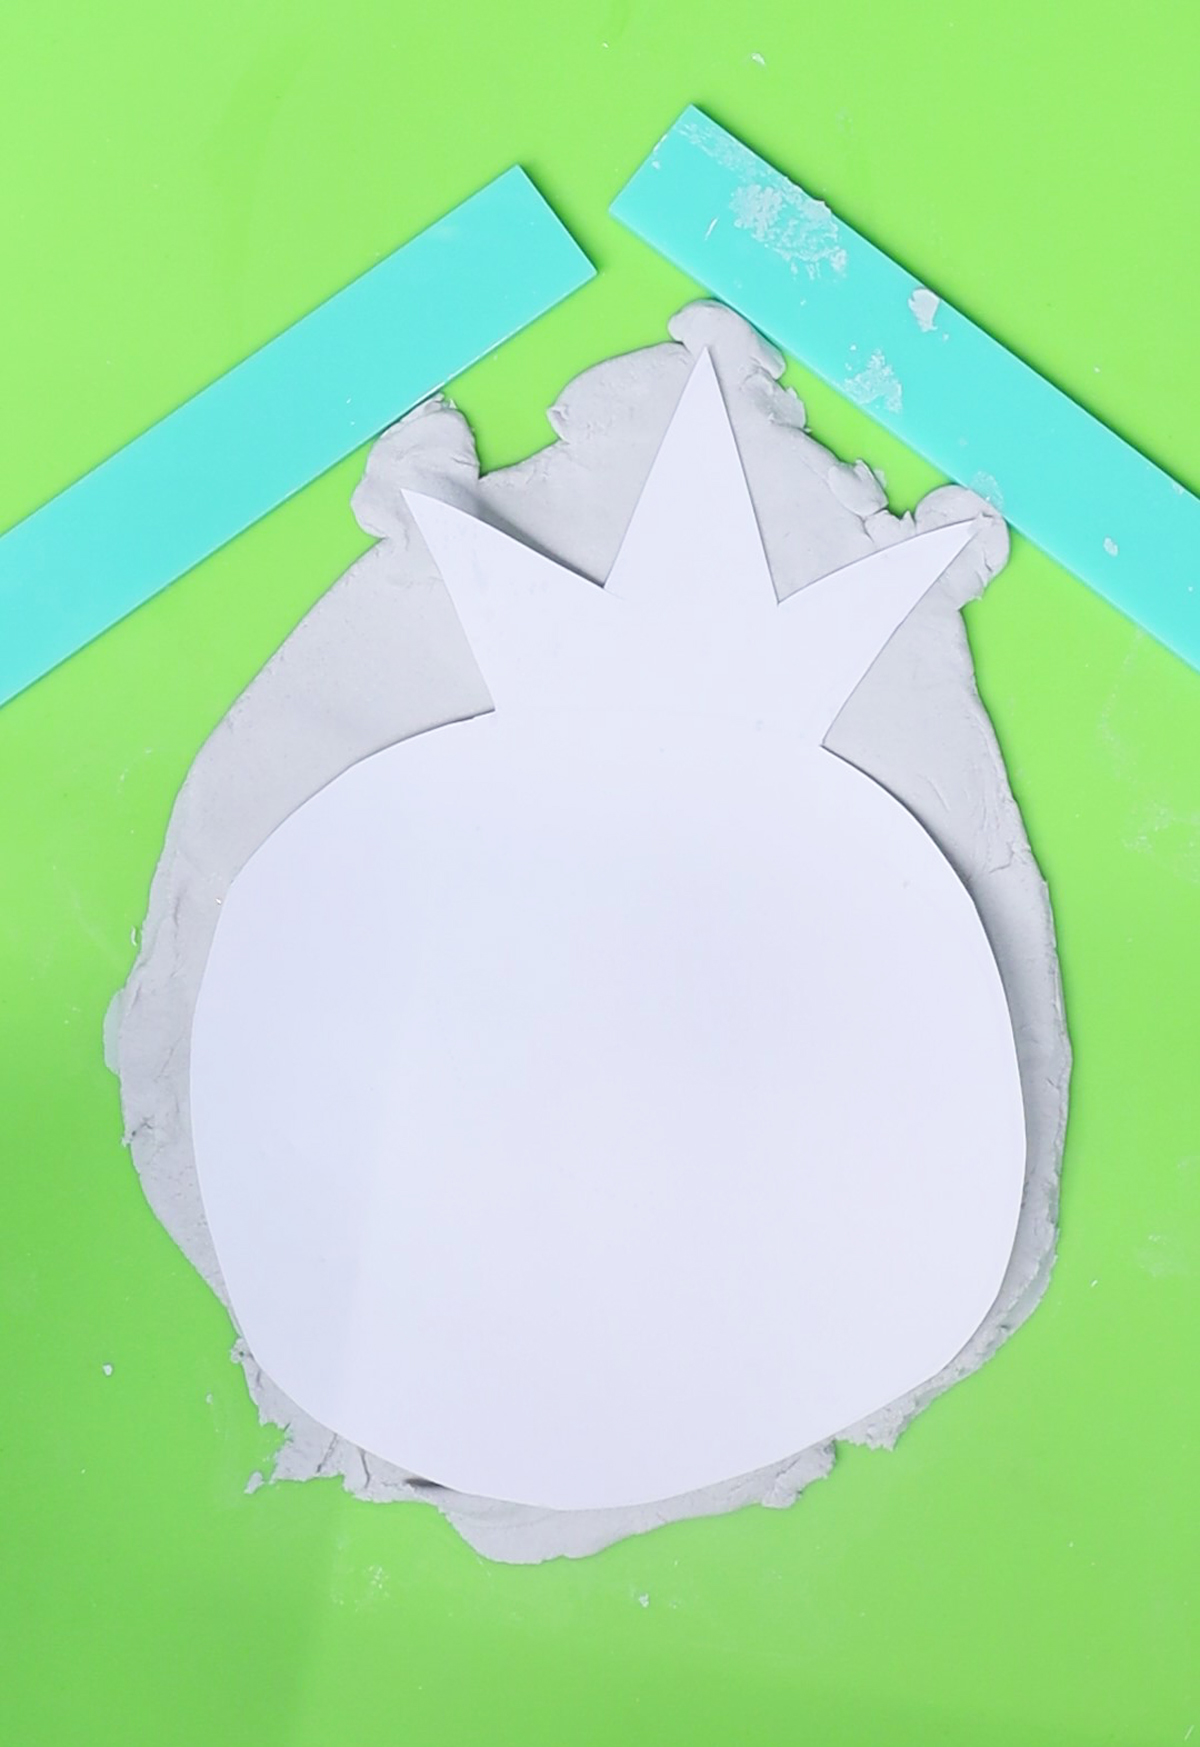
4. Cut around the shape of the template.
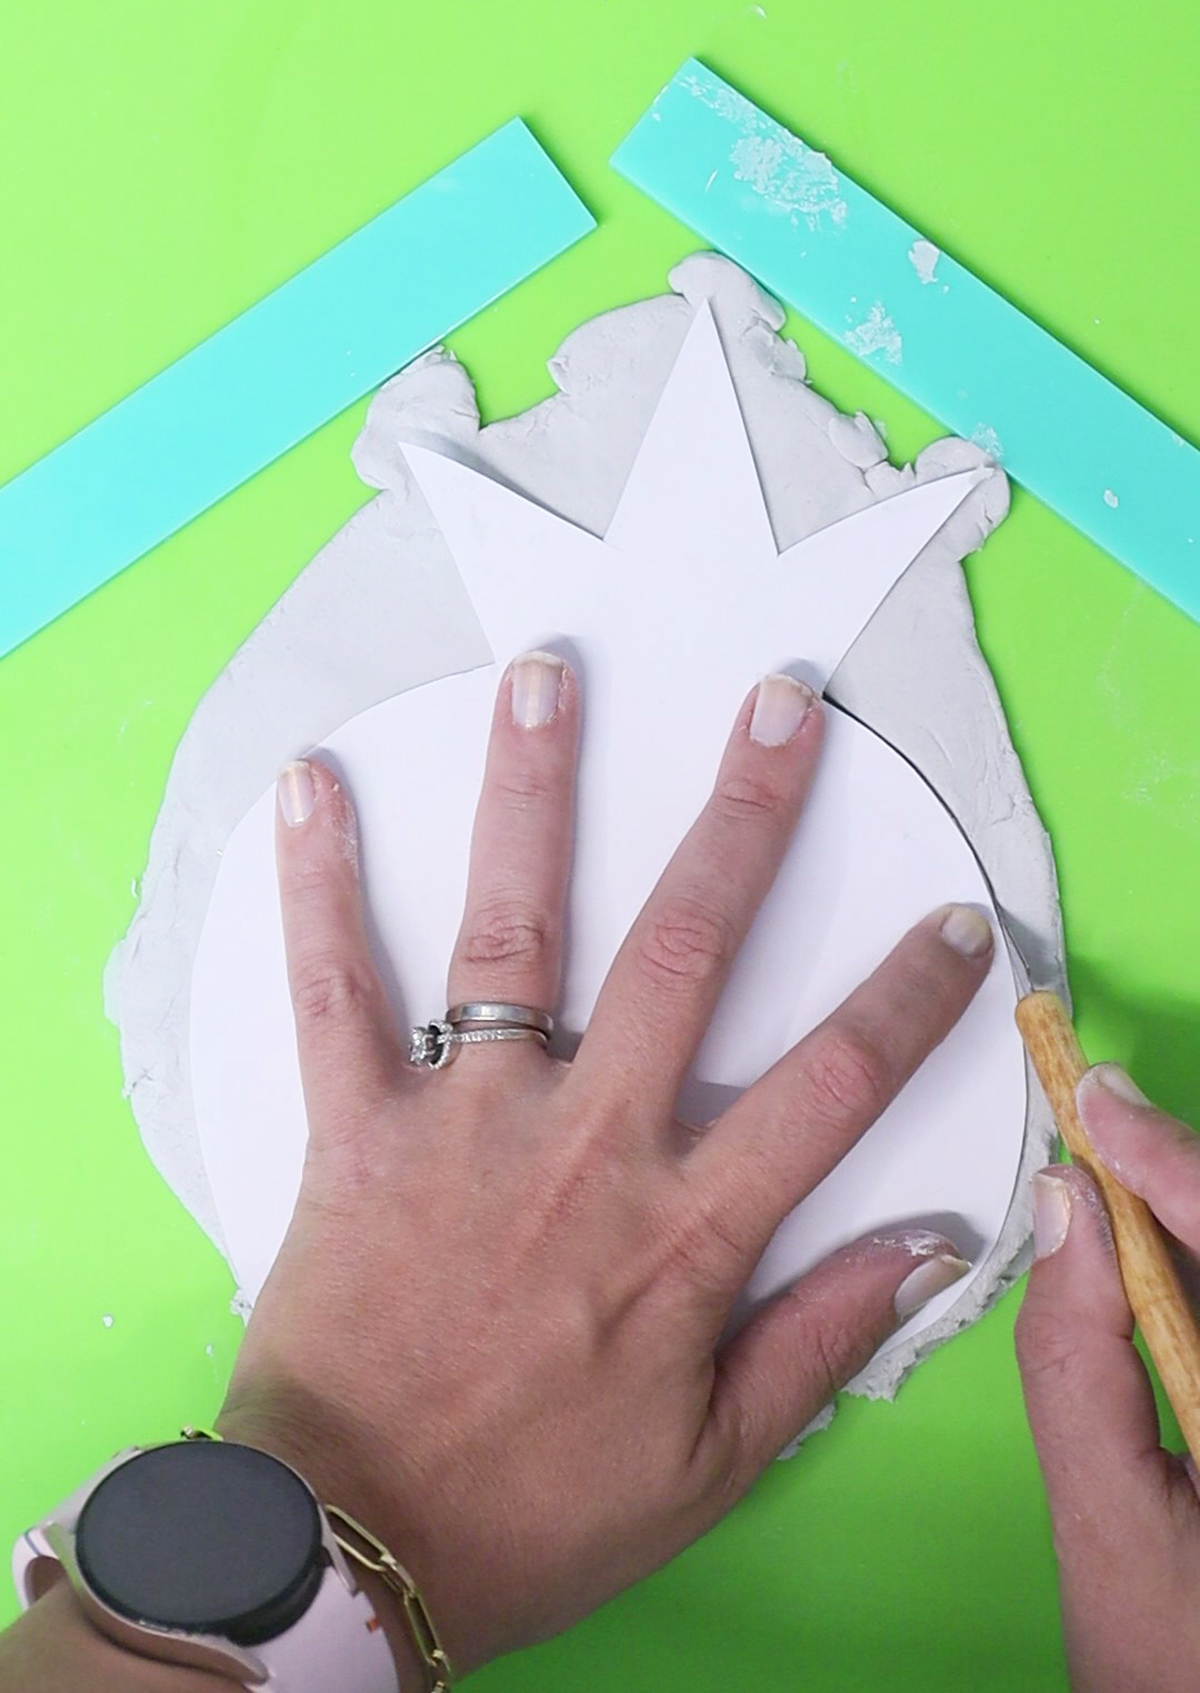
5. Pull away the excess clay.
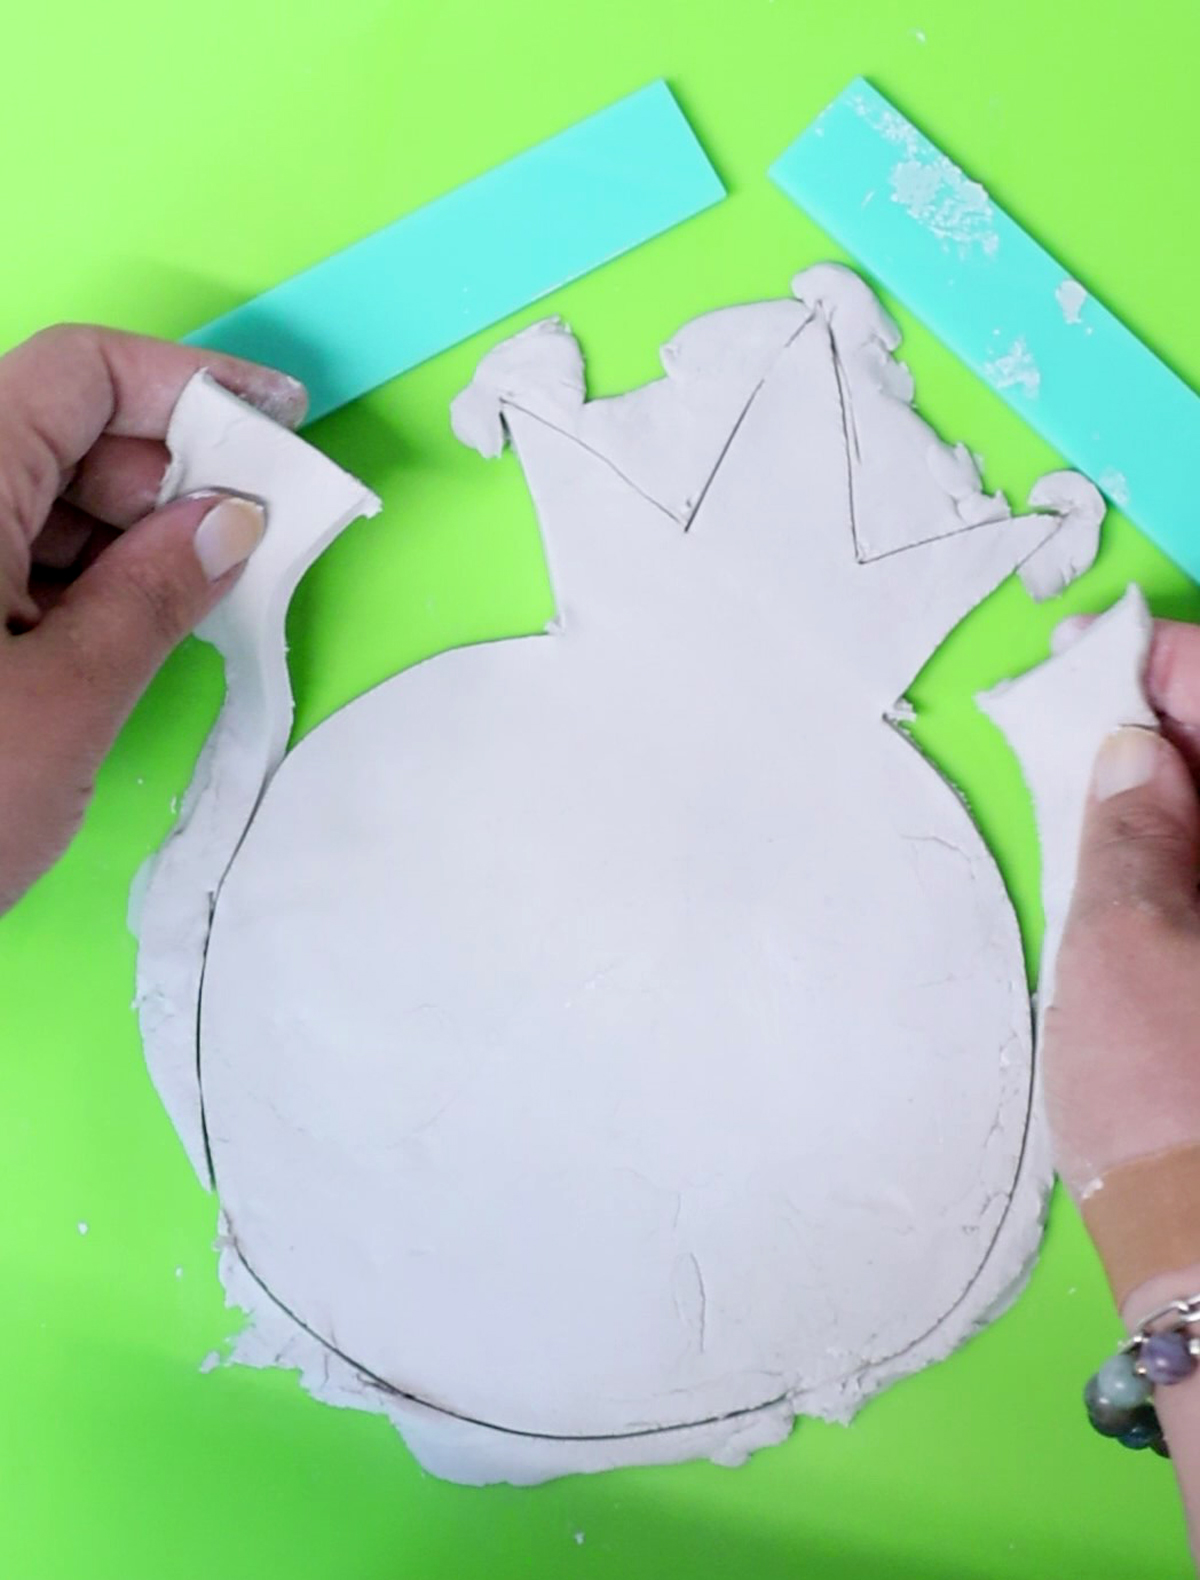
6. Roll the extra into a rope. It shouldn’t be crazy thick – maybe about 8-10mm in thickness – but should be mostly even all the way around. It should be long enough to fit all around your pomegranate – extra is better.

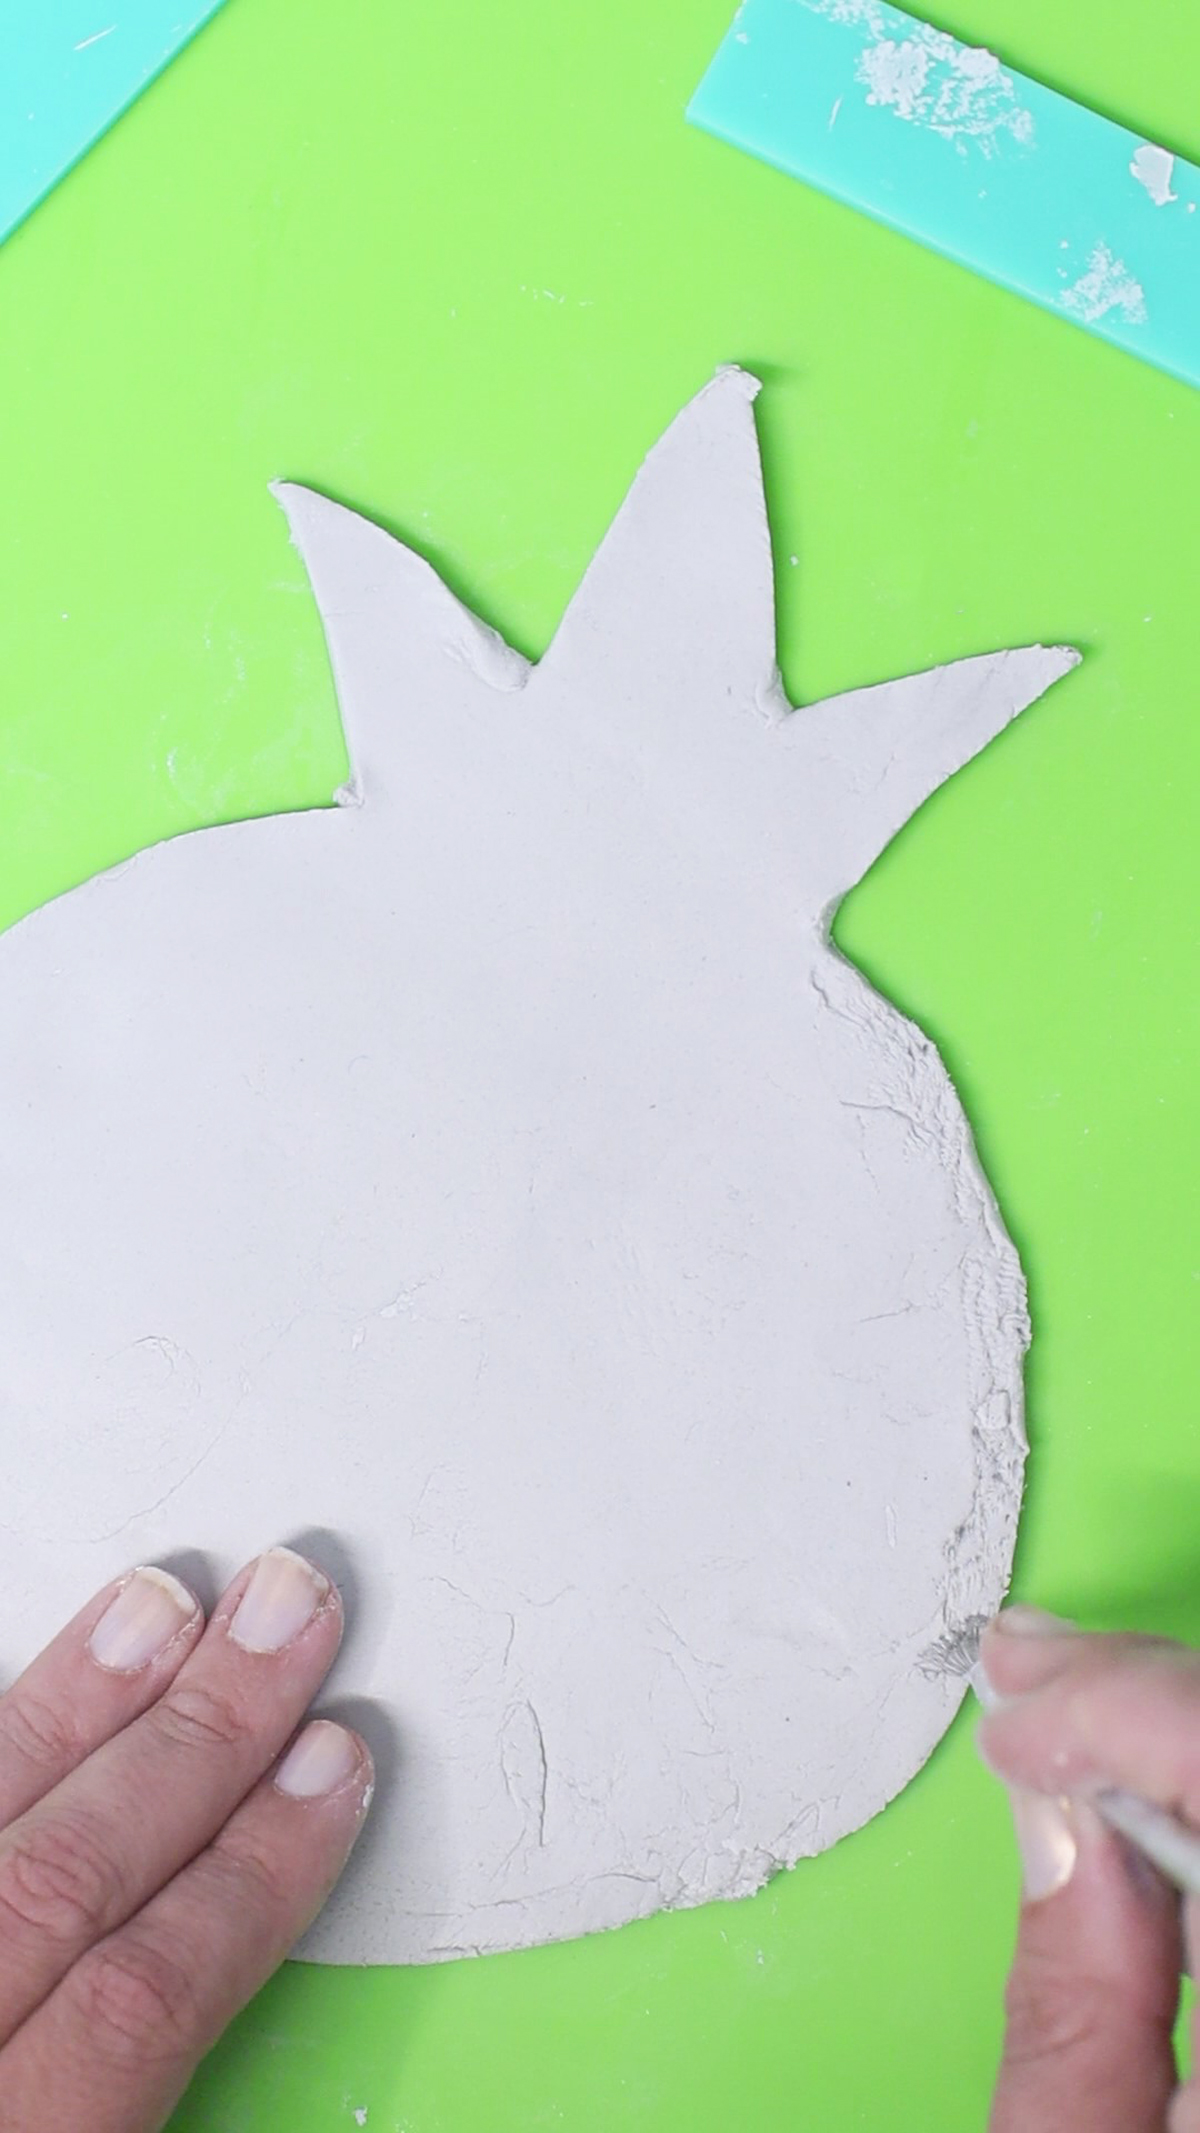
7. Using a craft knife or rake clay tool, distress the edges all around your pomegranate.
8. Paint on some slip (make this by thinning clay with water until it reaches a paste-like consistency).
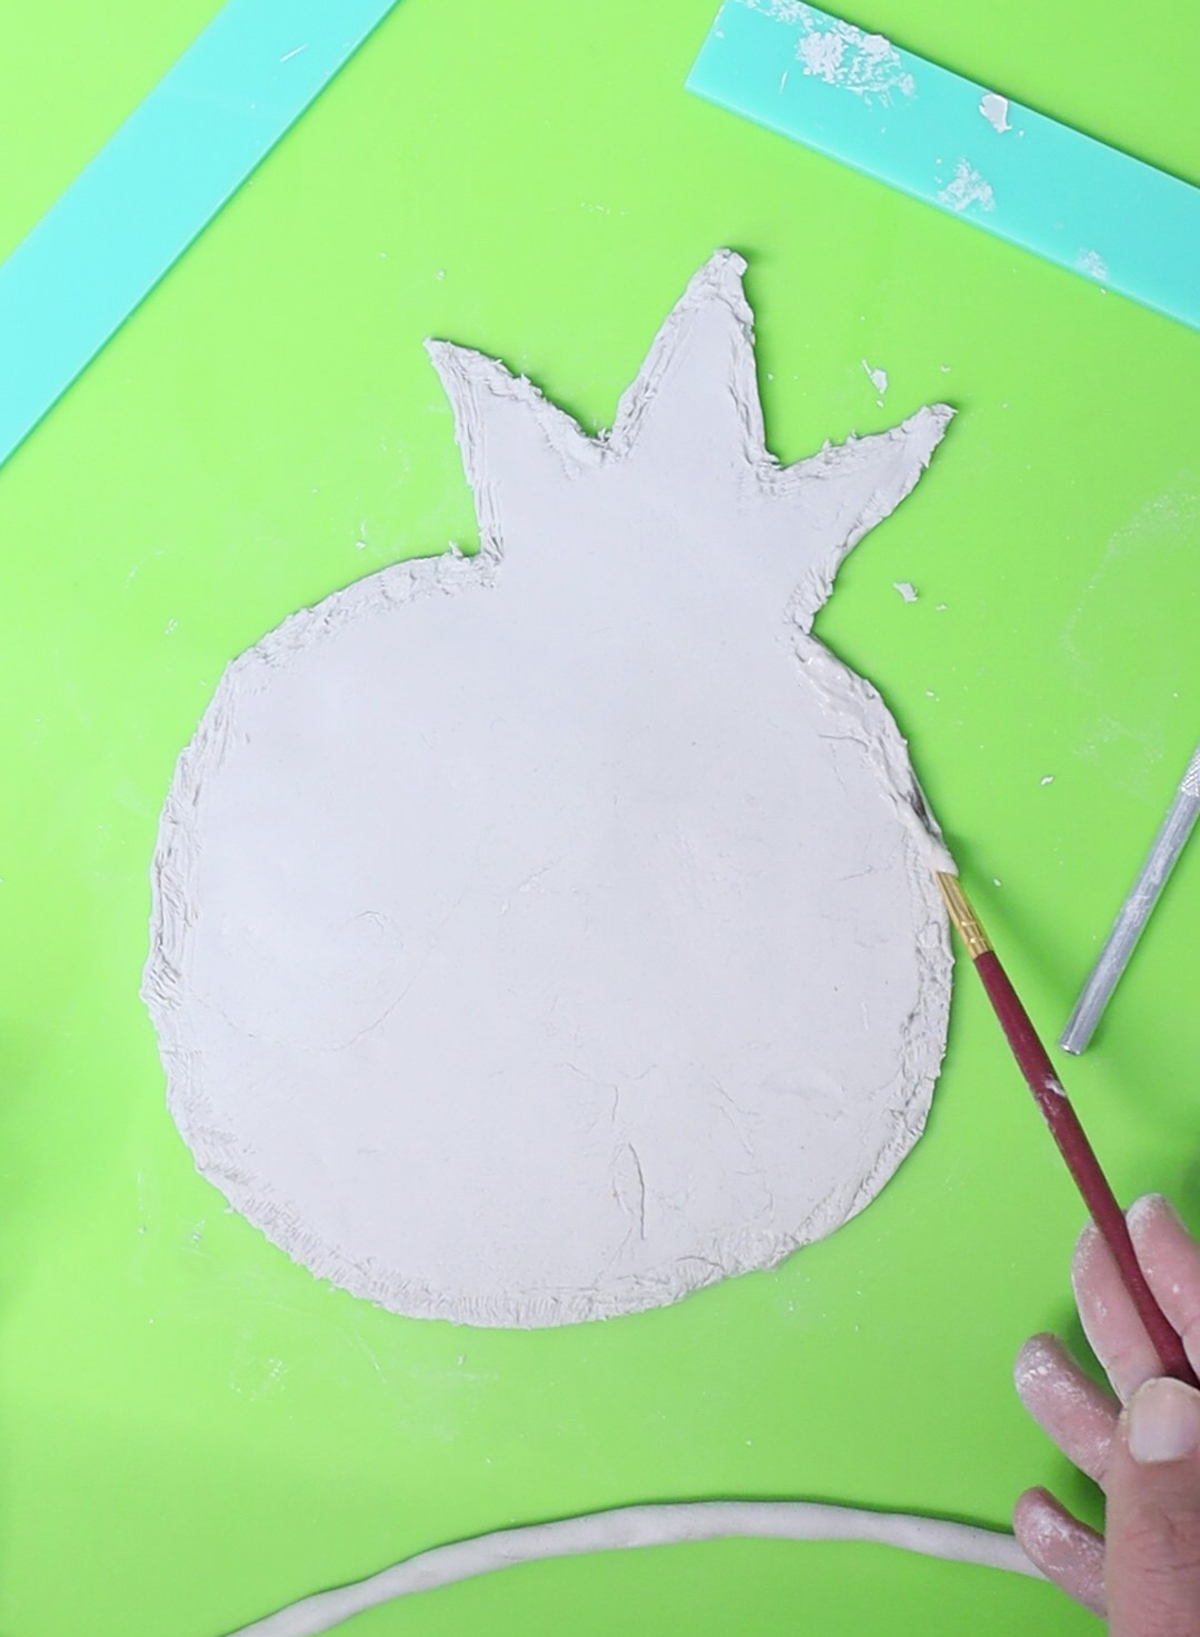
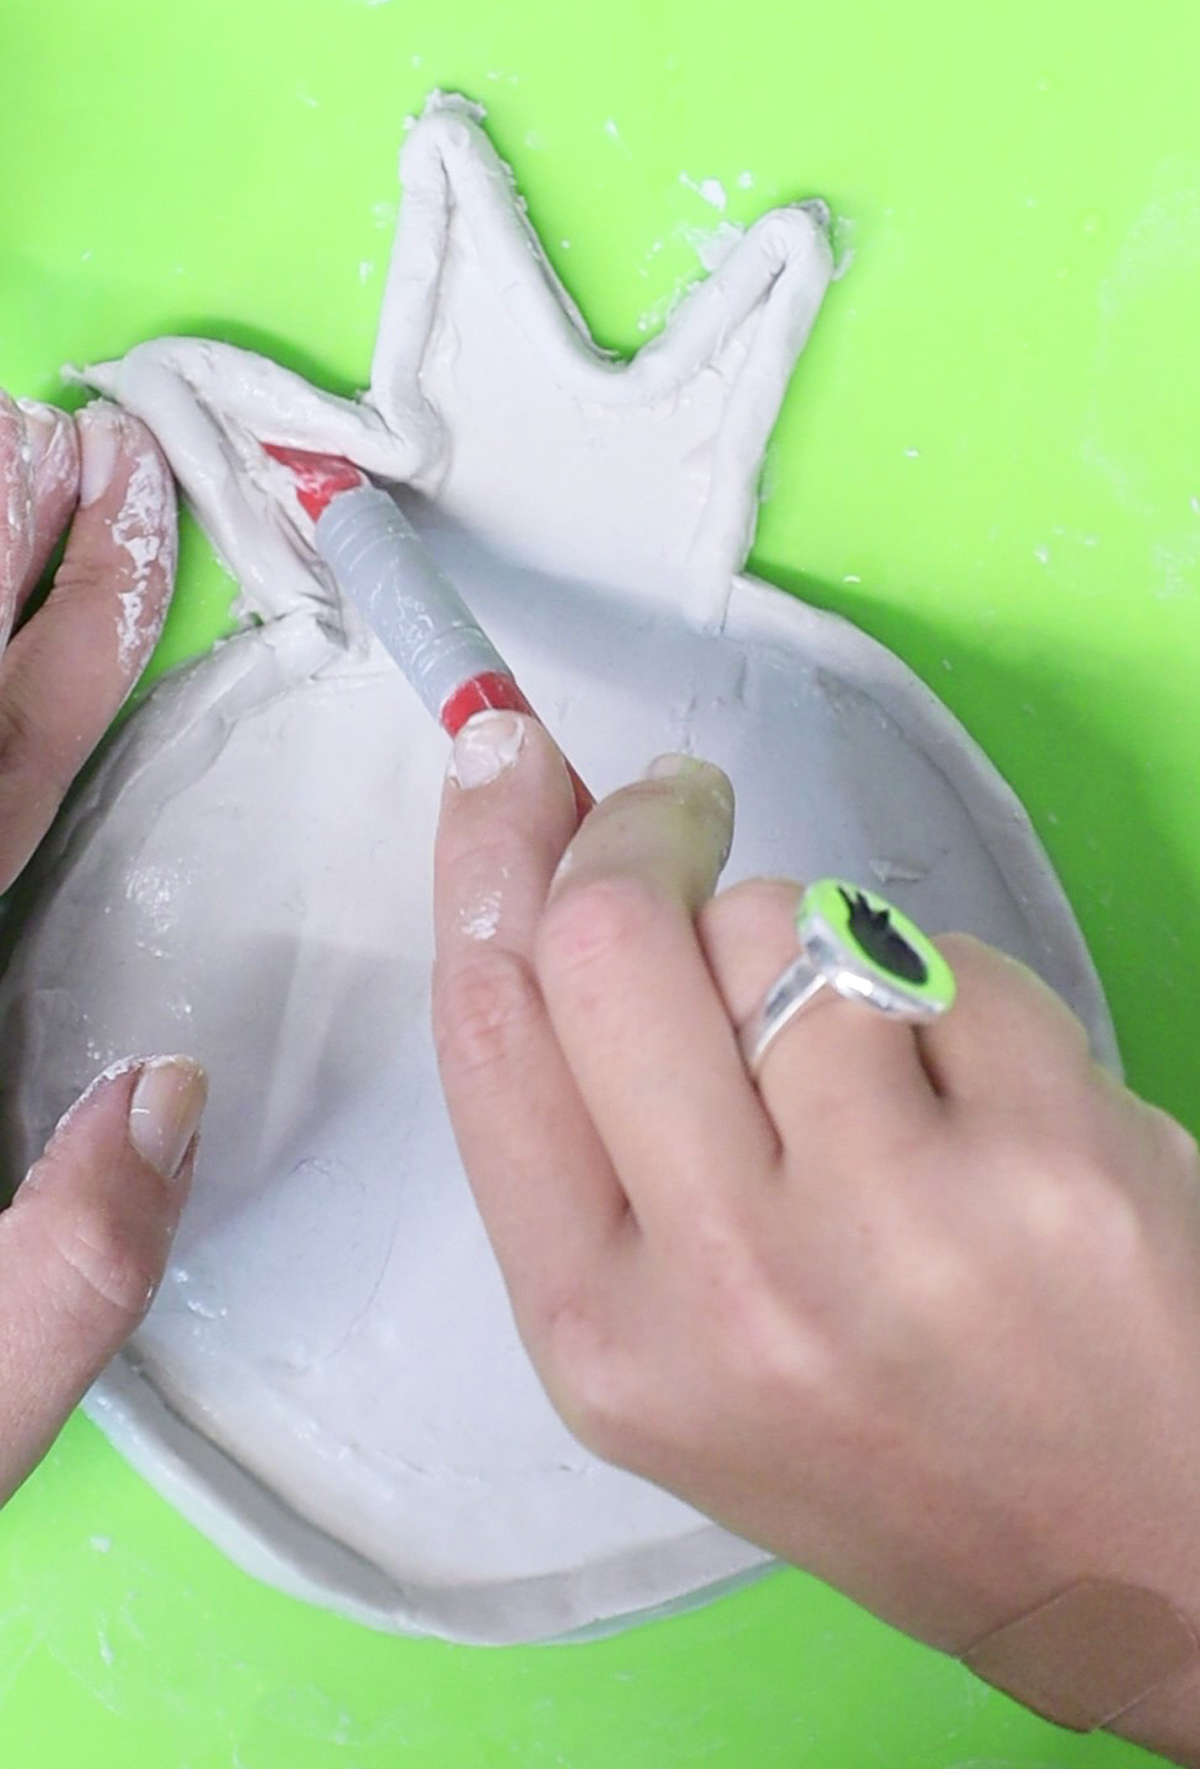
9. Now comes the most challenging part: creating the rim. Start connecting your coil to the edge using the slip as a “glue”. This will work better if you distress the coil side as well, but that can be challenging and isn’t a must. Smooth the edges together with water as you go along.

10. When you reach the end, trim your coil and distress the ends, connecting the two ends of the coil with a slip as well. Then, using water and a clay tool as needed, smooth the coil into the base.
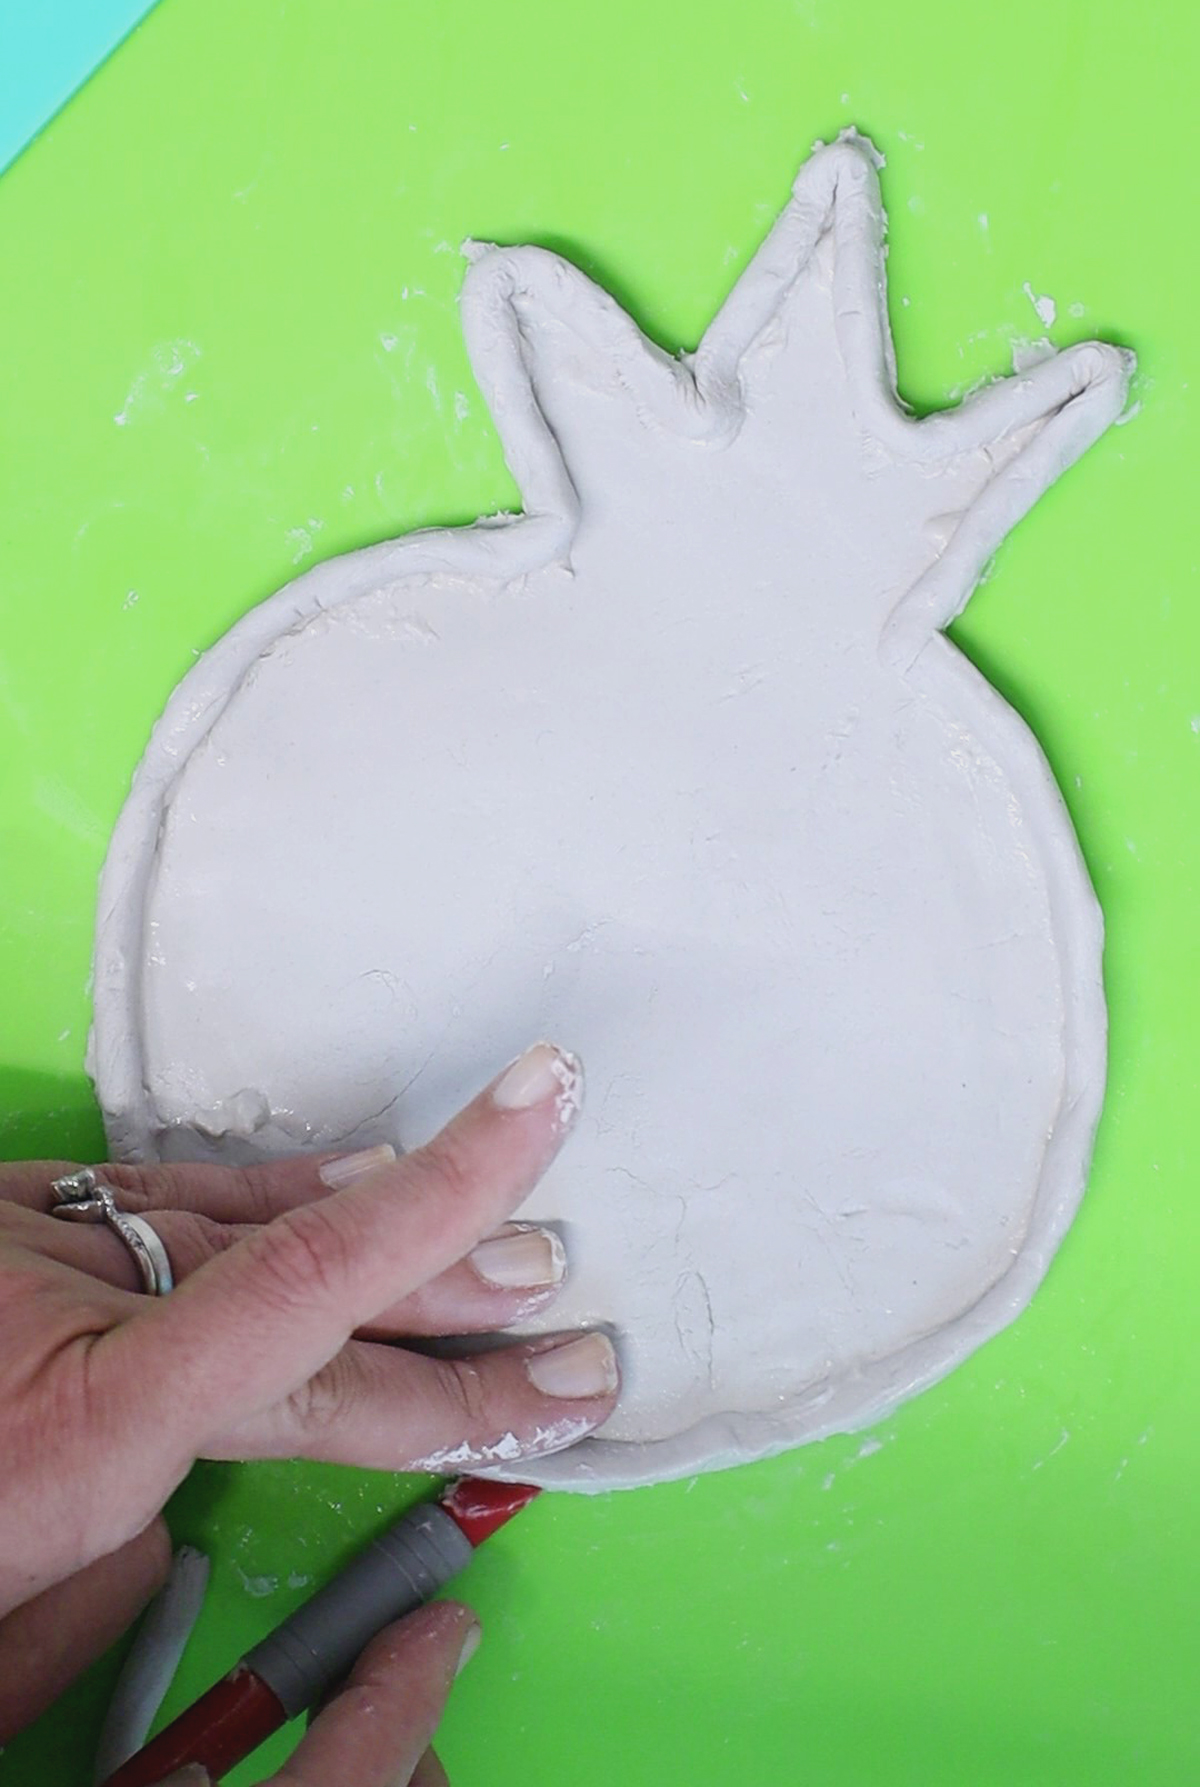
Work carefully, as while the slip is wet, the coil can shift a bit – if it does, just wiggle it back into place. You can use your tools to get into the corners.
You’re done when all your seams are smoothed together.
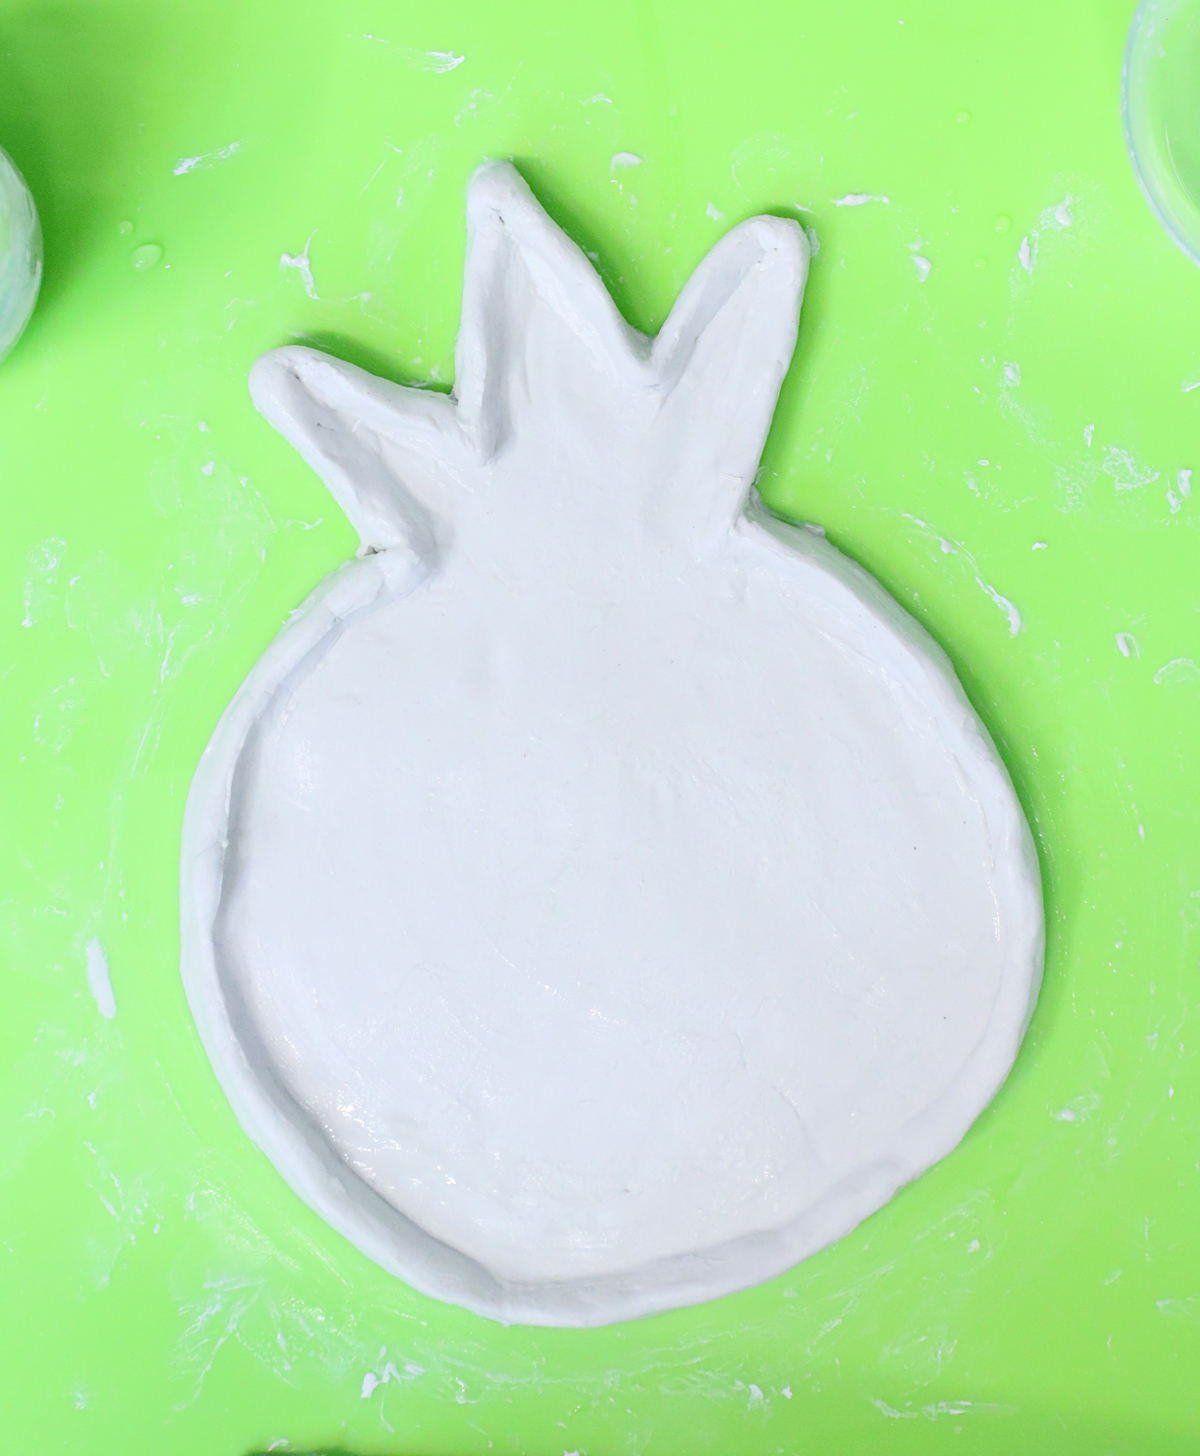
11. Allow your air-dry clay drip tray to dry thoroughly on both sides. Depending on atmospheric conditions, you’ll probably want to let each side dry overnight separately. When flipping it to dry back-up, I recommend propping the center so that it doesn’t droop (as it’s not fully dry) – I used paper towels folded to the necessary height to do this.
Finishing off your air-dry clay drip tray
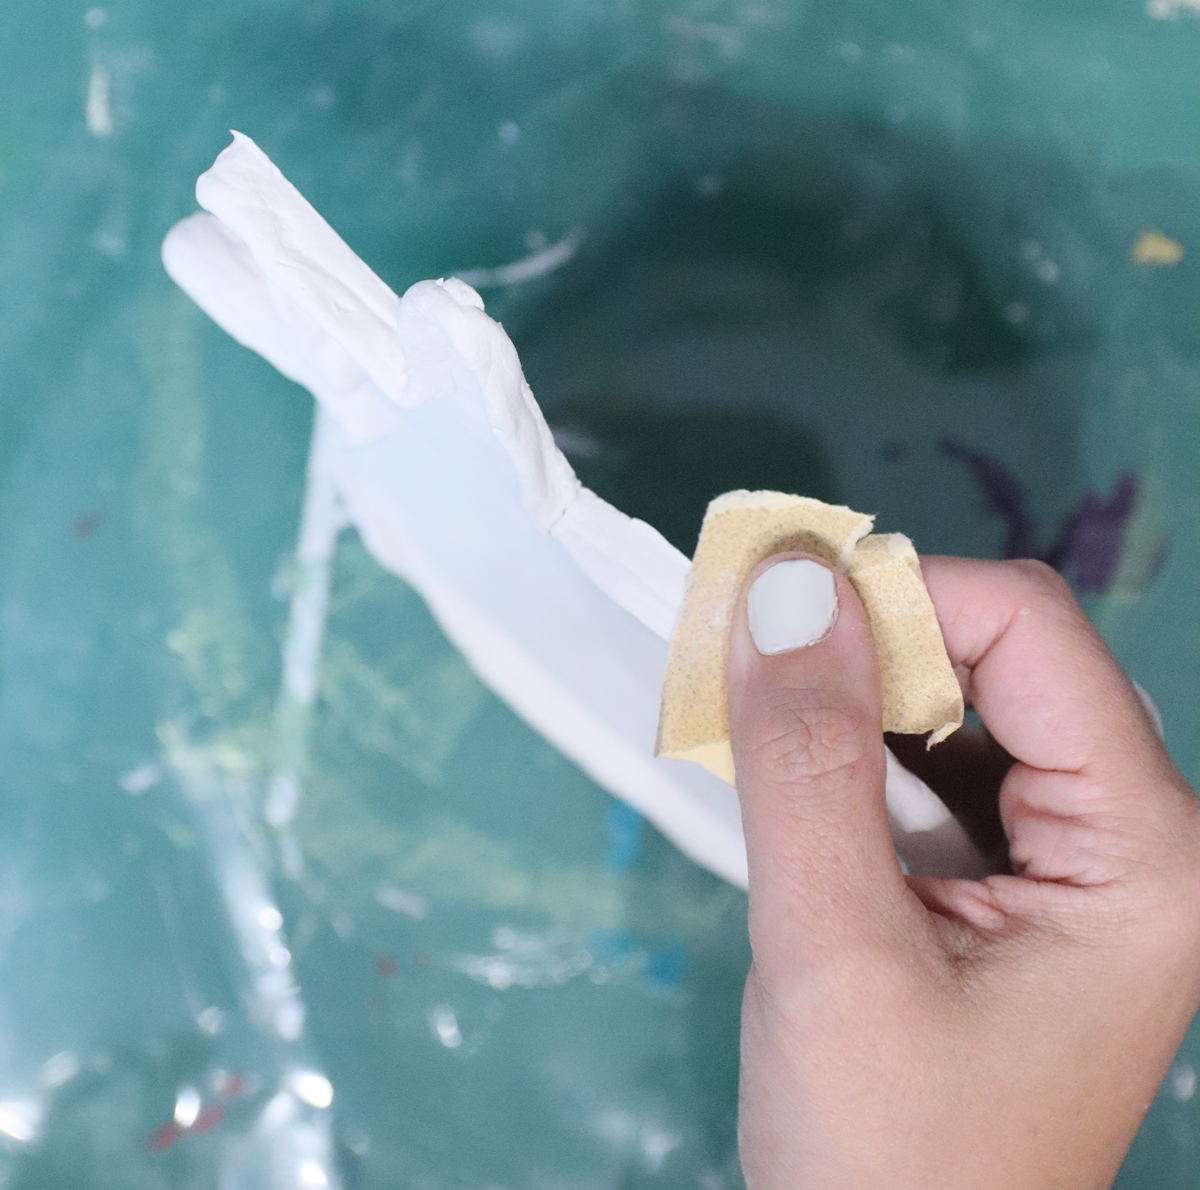
12. When it is totally dry, sand around the base of the tray where you’ll have some spread from the wet clay. No need to go crazy making this perfect – just take off those main pieces that stick out – it should take a minute.
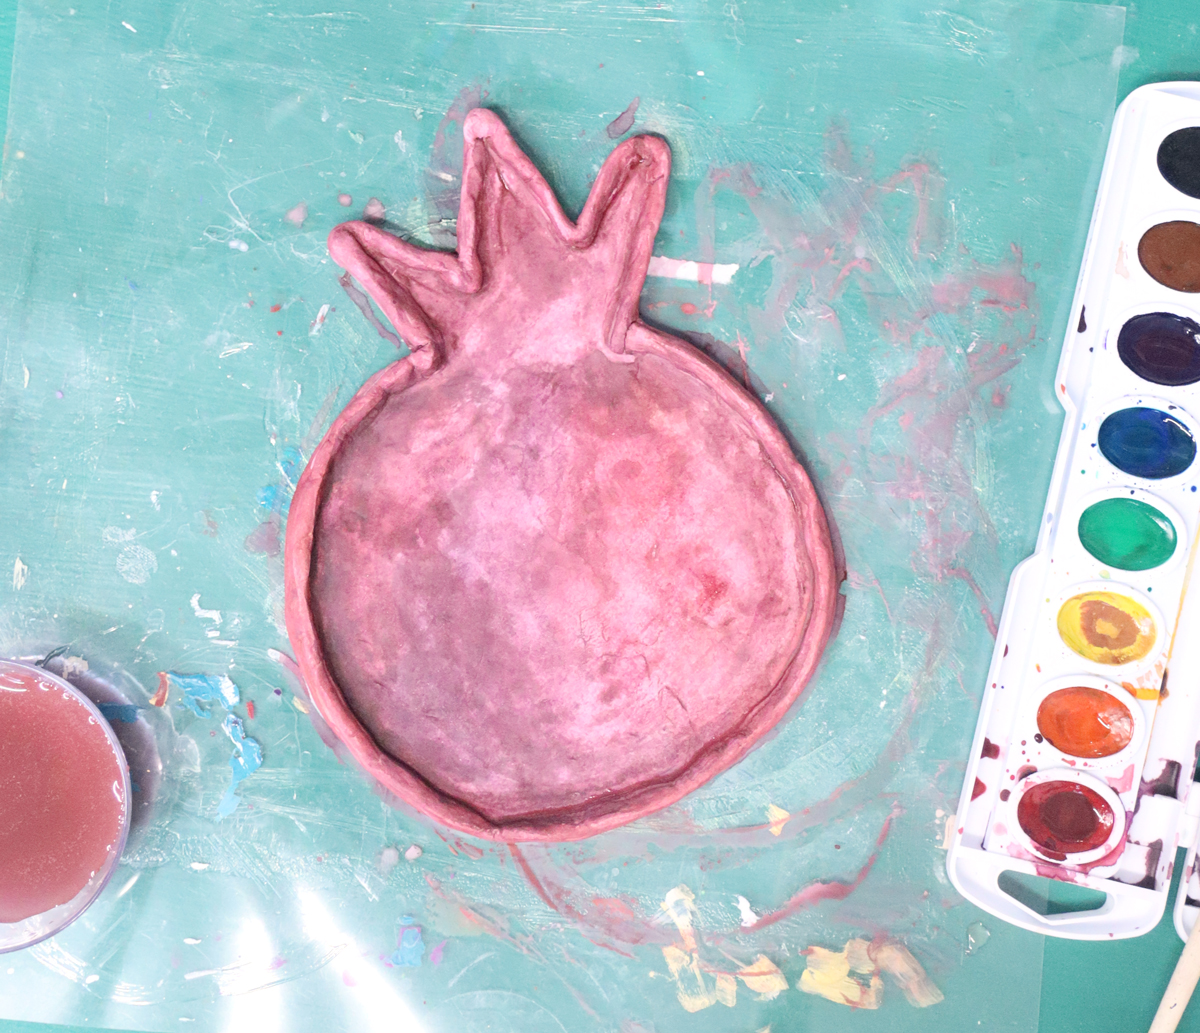
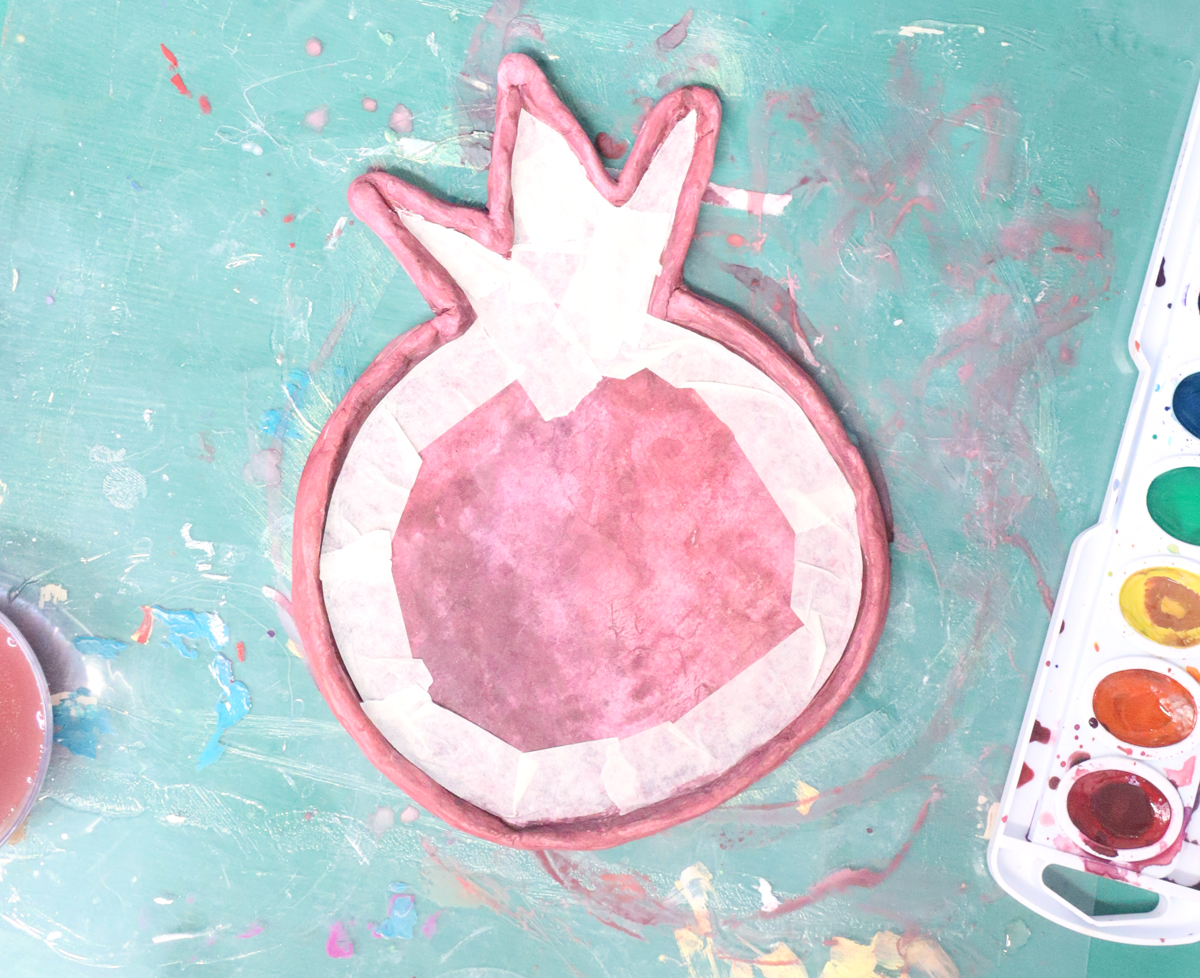
13. Paint your tray! Wet your palettes and mix up some of your favorite shades of red with touches of purple, orange, and yellow.
14. Paint your tray, being careful not to allow too much to pool. If you’d like, you can zap it with a heat gun to help it dry faster. Wait until it’s completely dry before proceeding.
15. When it’s dry, tape off your edges. Use a craft knife to trim the tape in the crown of the pomegranate.
15. Paint a layer or two of gold paint around the edges. This is layer one:
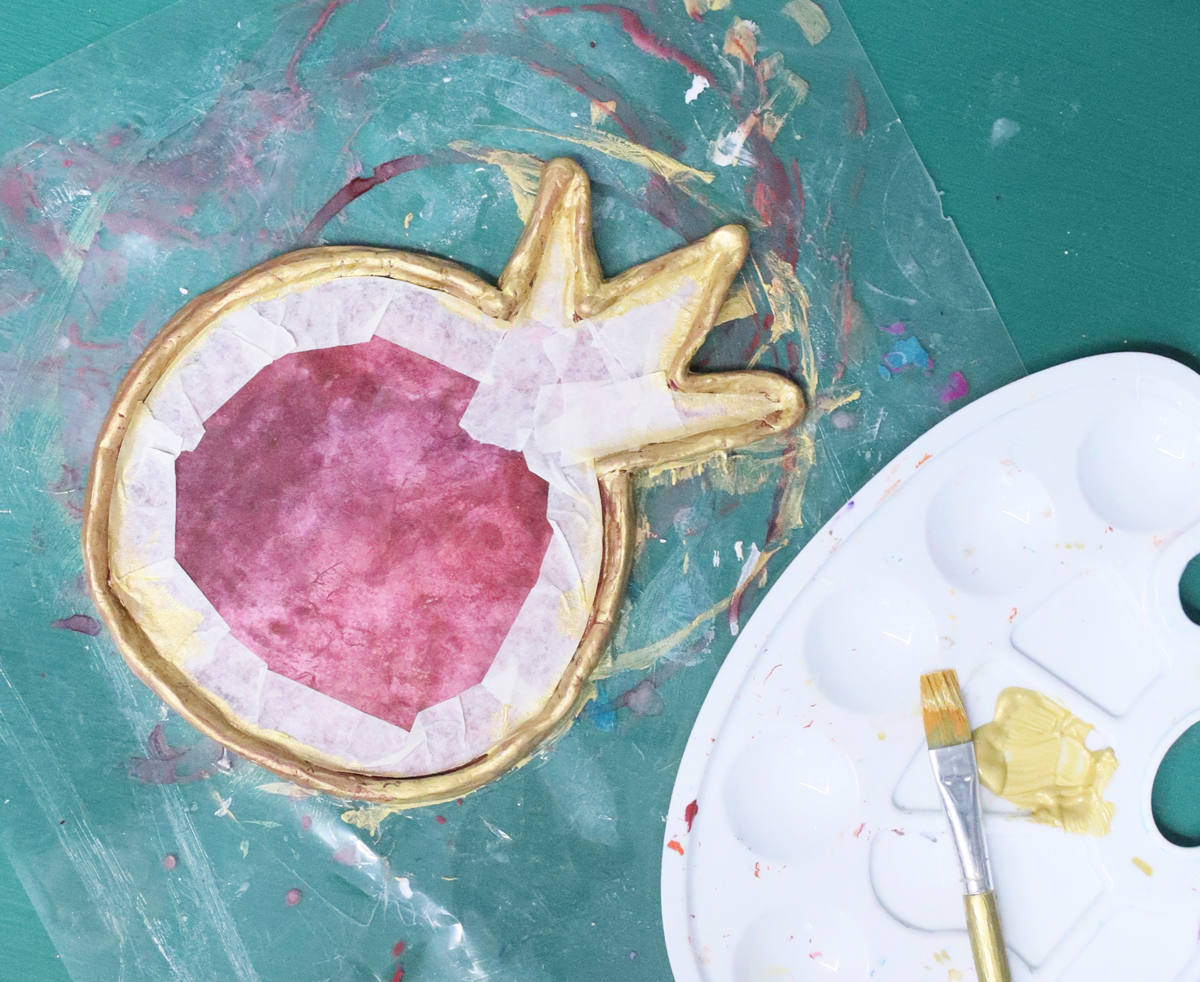
And a second layer gave it a nice, opaque finish.
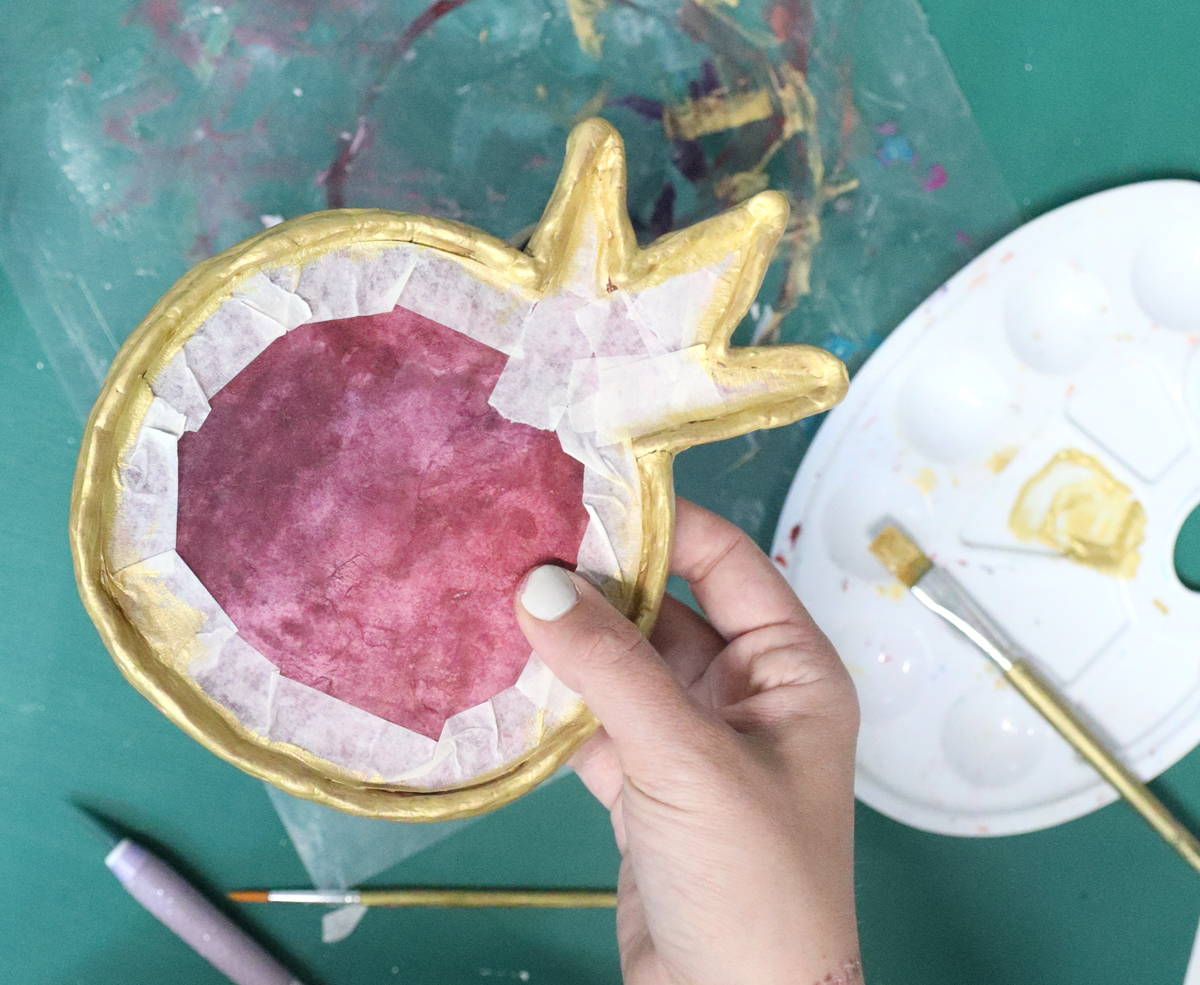
16. Peel off the tape while the second layer is still wet.
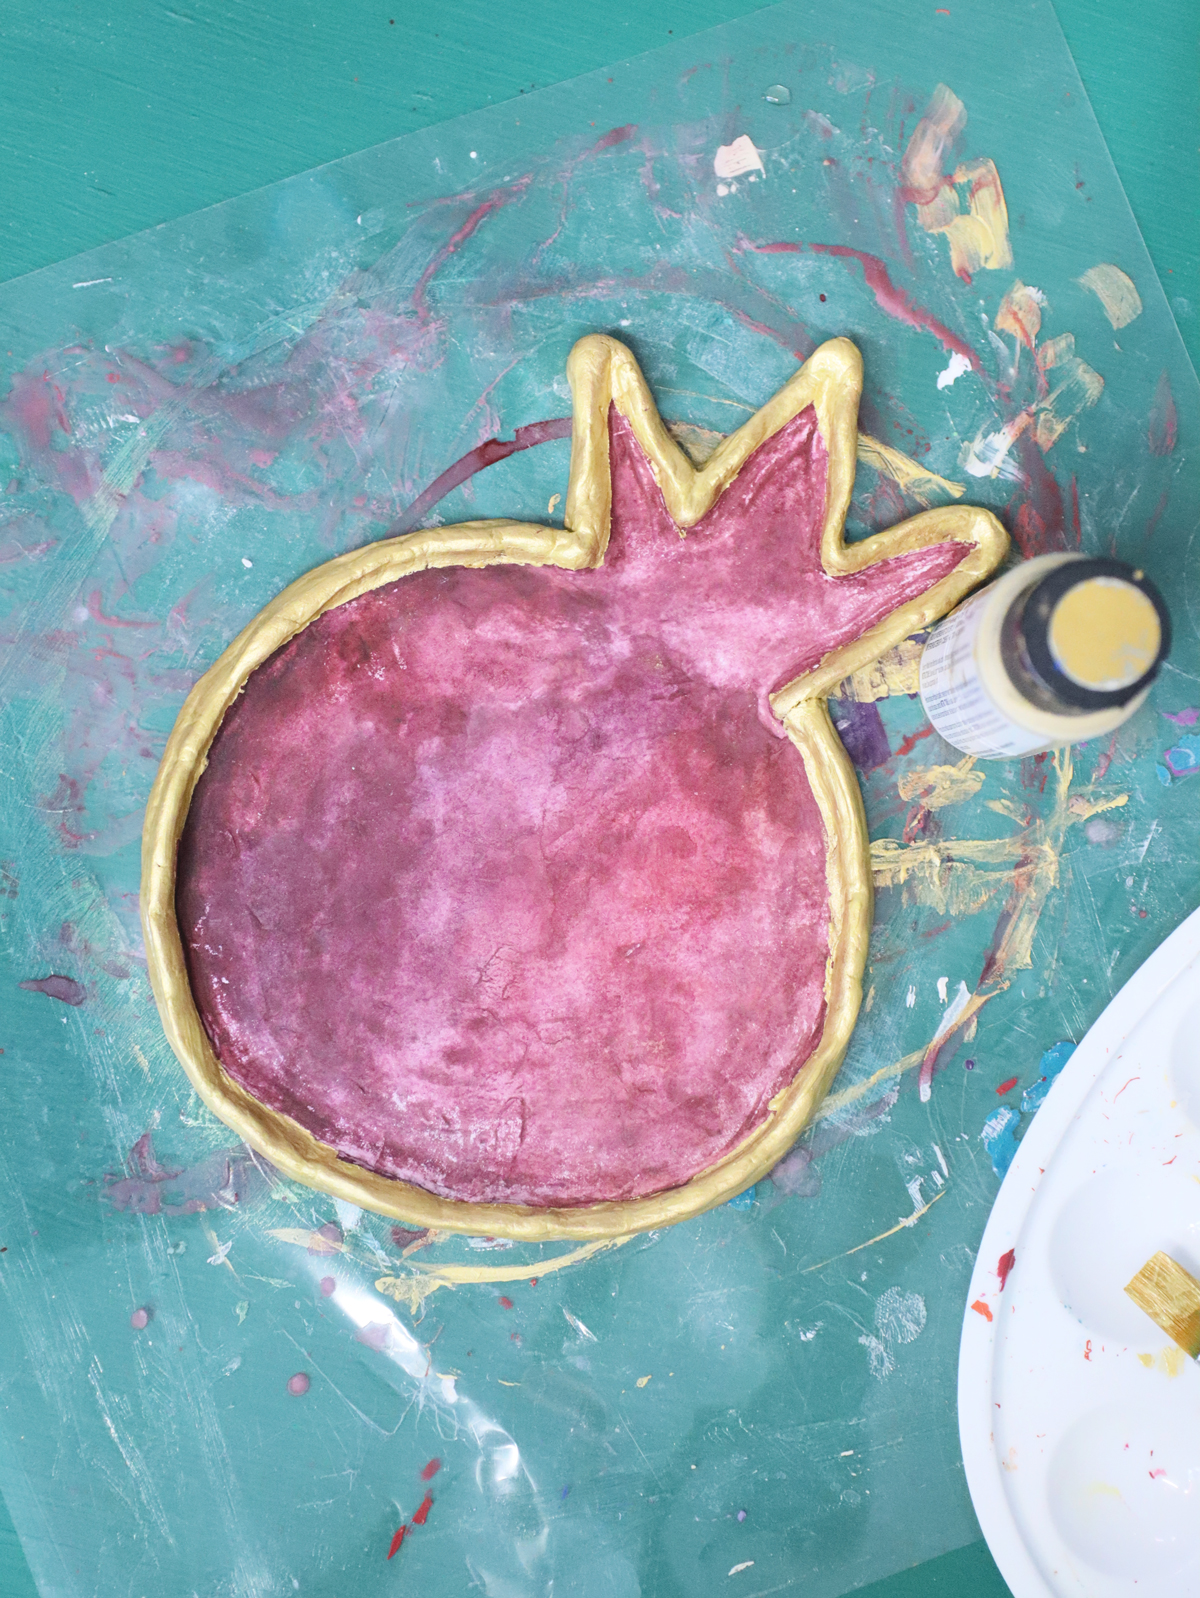
17. When all your paint is totally dry, seal it with two layers of dishwasher-safe Mod Podge (allowing for appropriate dry time in between).
Your air-dry clay drip tray is complete!
Download the free pomegranate template
Download your free template! It’ll arrive right in your inbox. By downloading, you’re subscribing to our FREE newsletter with updates on cool printables like this, ideas to simplify Jewish life, and more. You can unsubscribe at any time by clicking the unsubscribe link at the bottom of my emails. I respect your privacy and the law, and won’t share or sell your email address.