DIY Mosaic Coasters for the Passover Seder (or any time!)
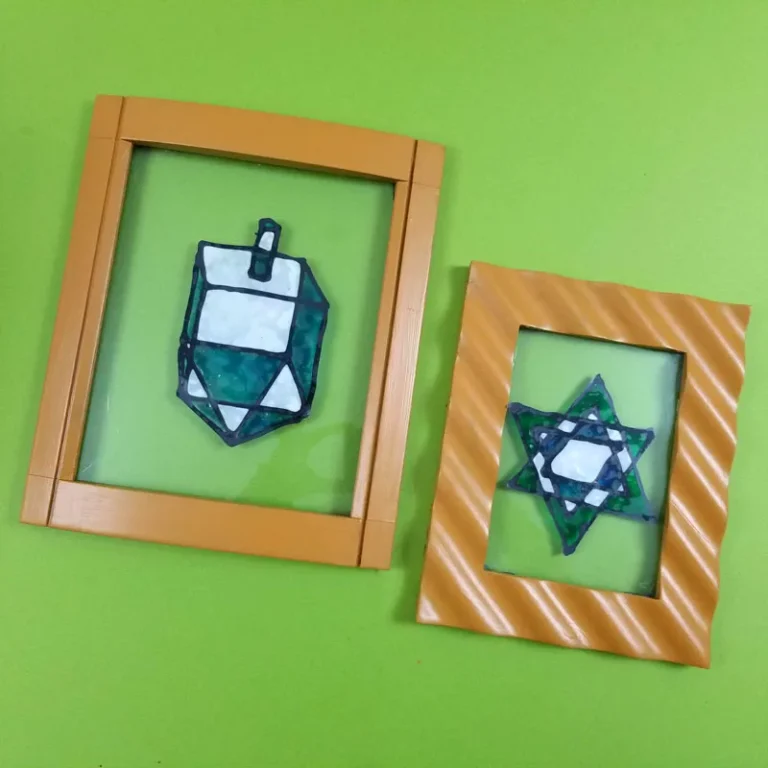
Craft these adorable DIY Mosaic Coasters for the Passover Seder! When you’re done, you can try making this DIY Afikoman bag too. This post contains affiliate links.
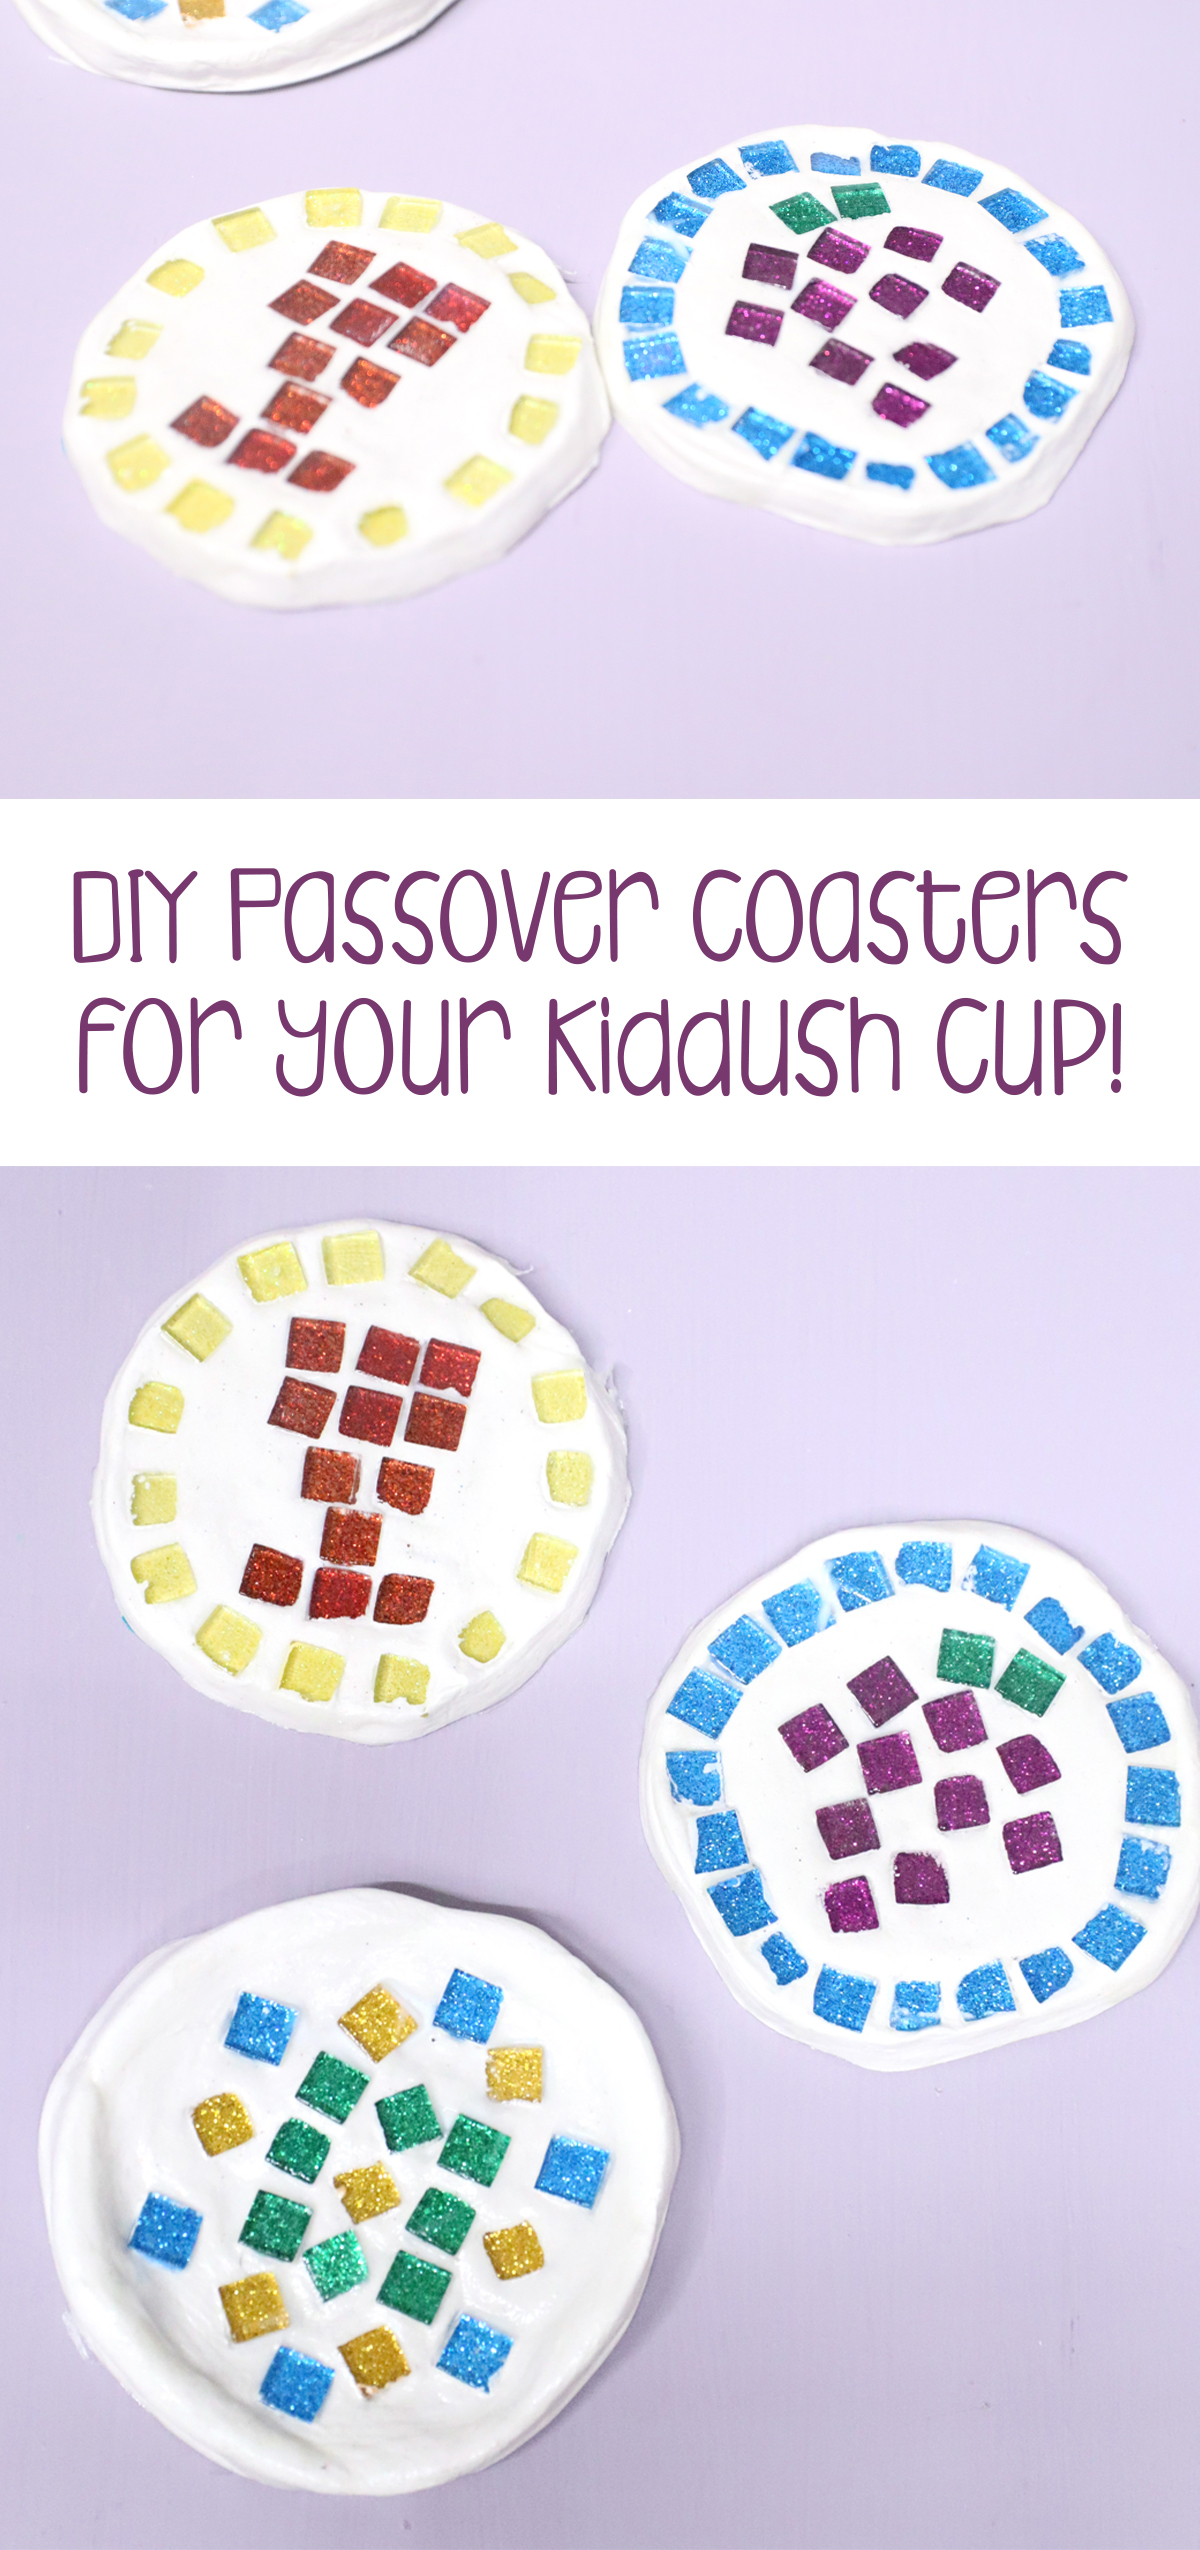
Of all the Passover crafts you might try, coasters are often overlooked. But everyone in the family has a Kiddush cup for Passover, so why not craft a coaster to go underneath it?!
And yes, if you’re not here for the Passover content, this is good for any time you want to make a coaster – it doesn’t need to be Passover themed!
The cool thing about it is it’s a really neat craft that pretty much uses two – okay, three supplies (plus a paintbrush). And it uses a small amount of each one, plus it’s practical and durable, and can be saved from year to year. And it can even look great!

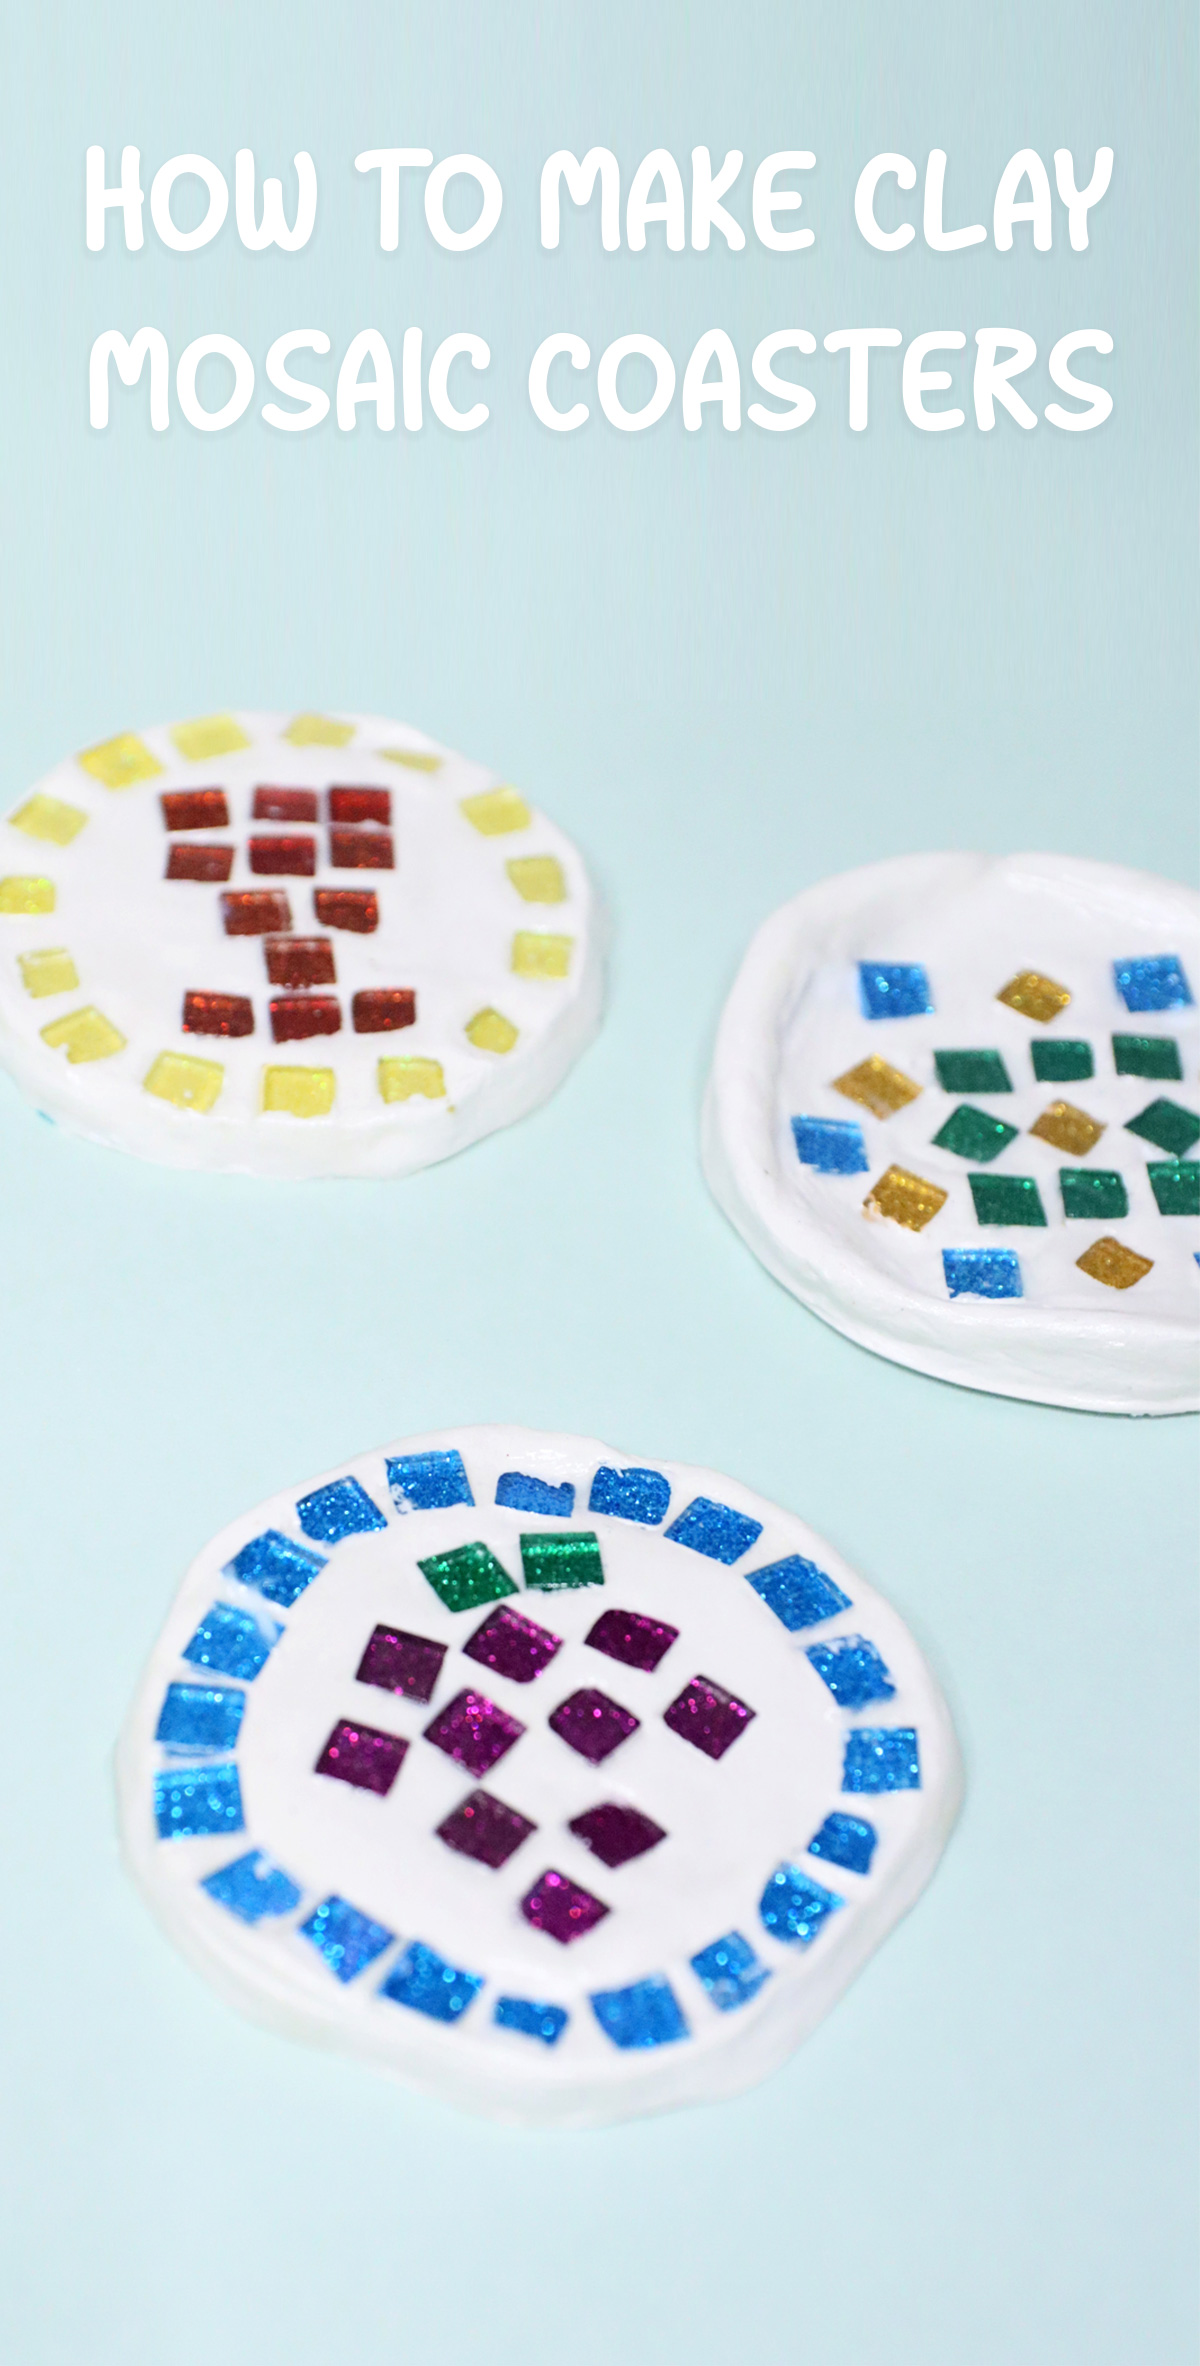
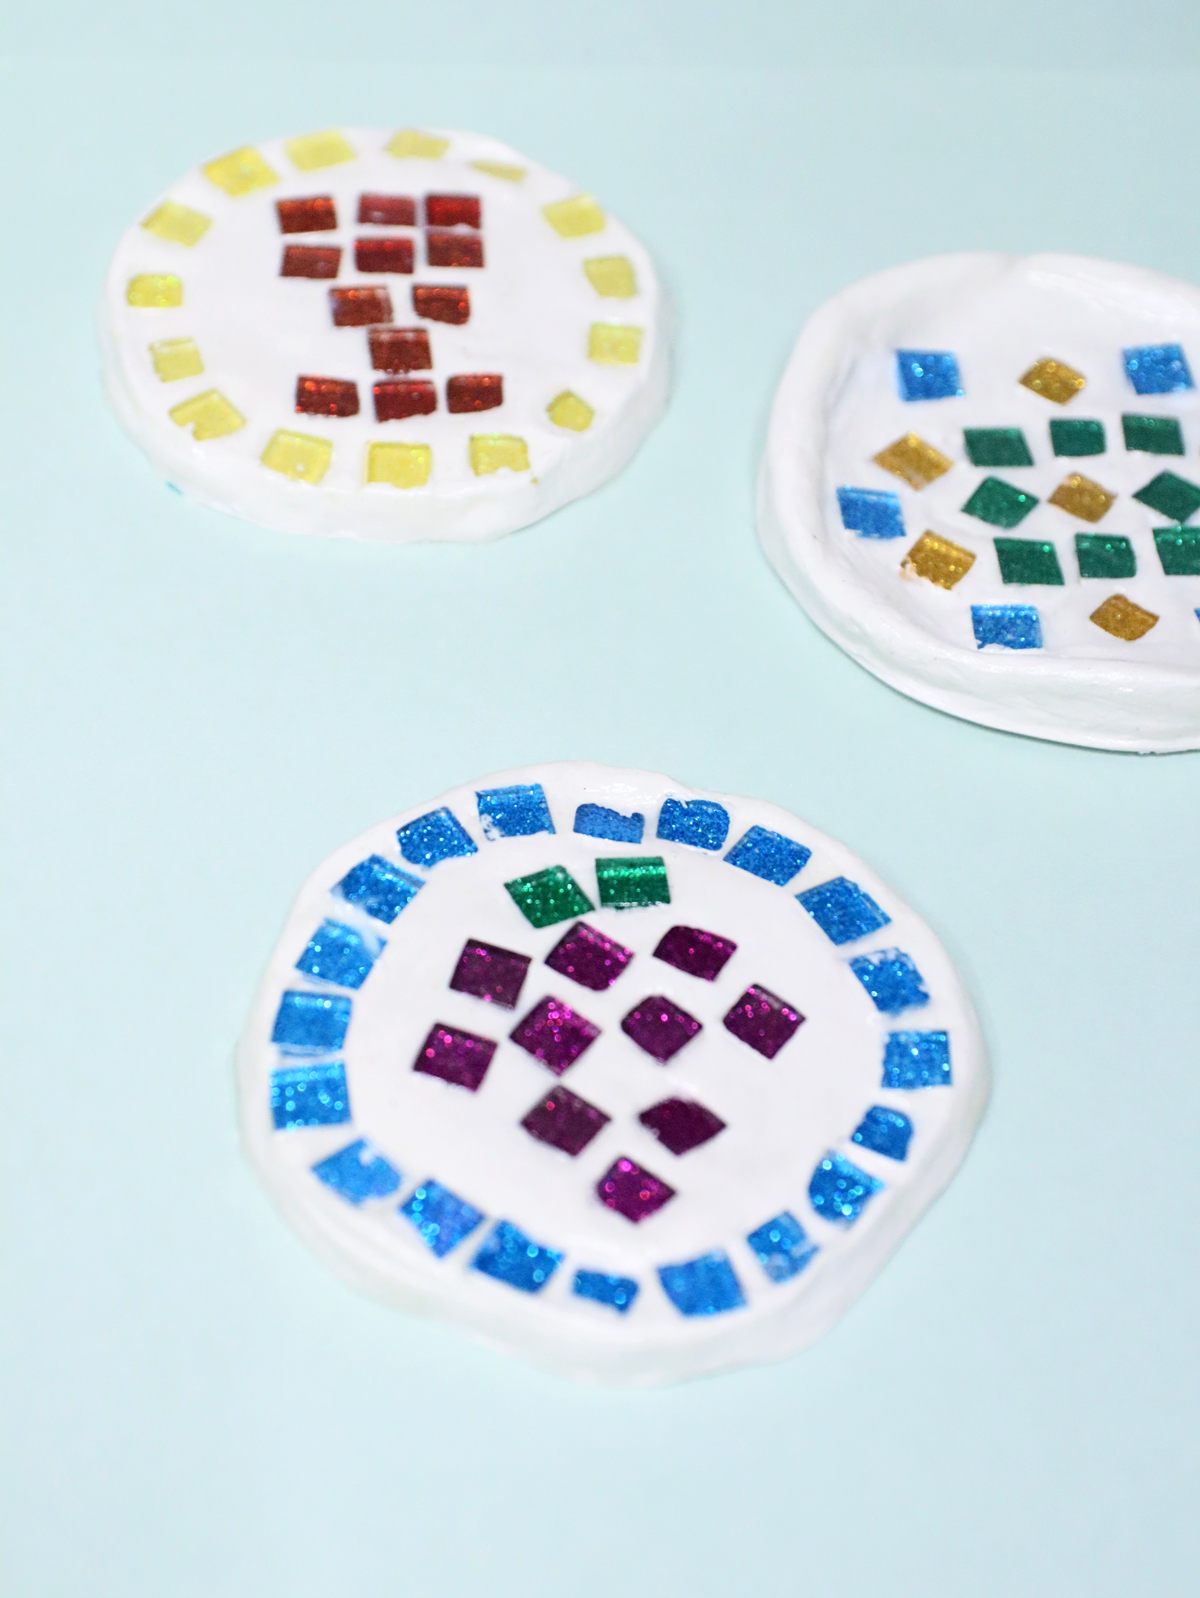
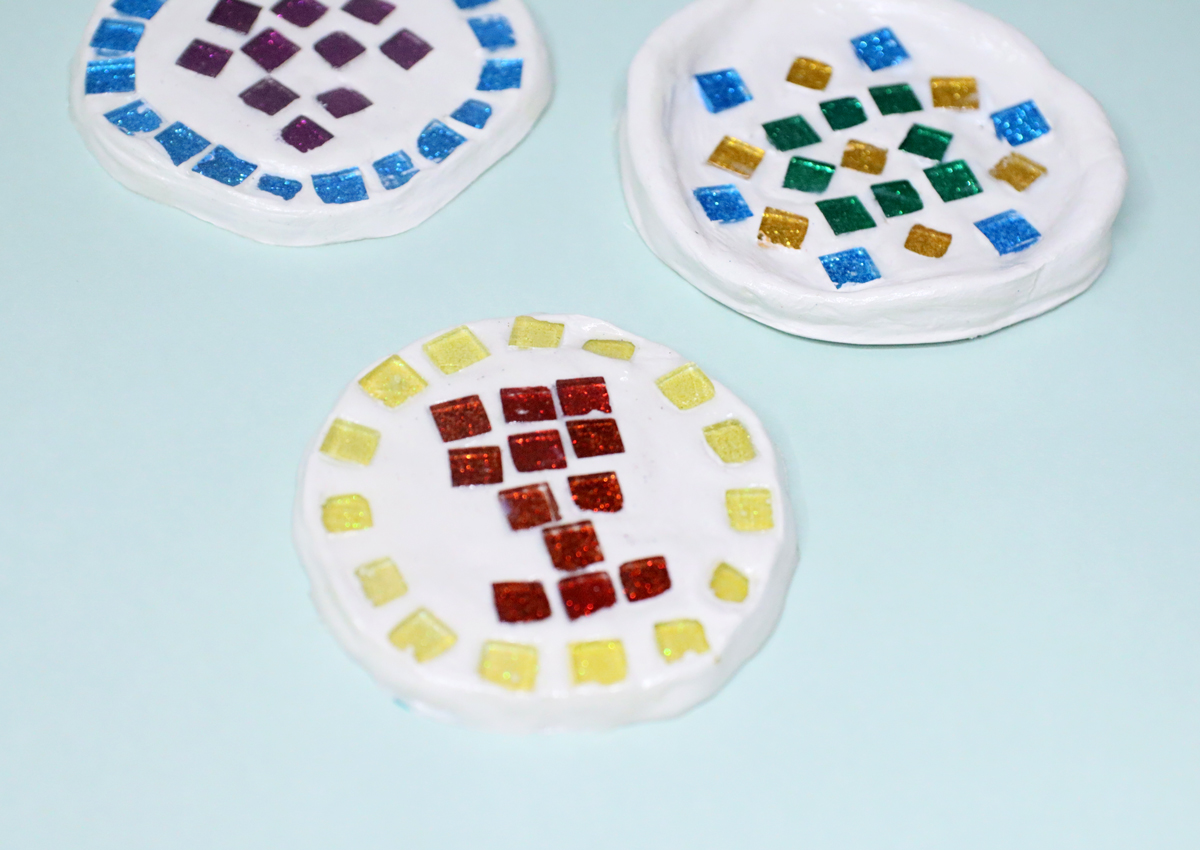
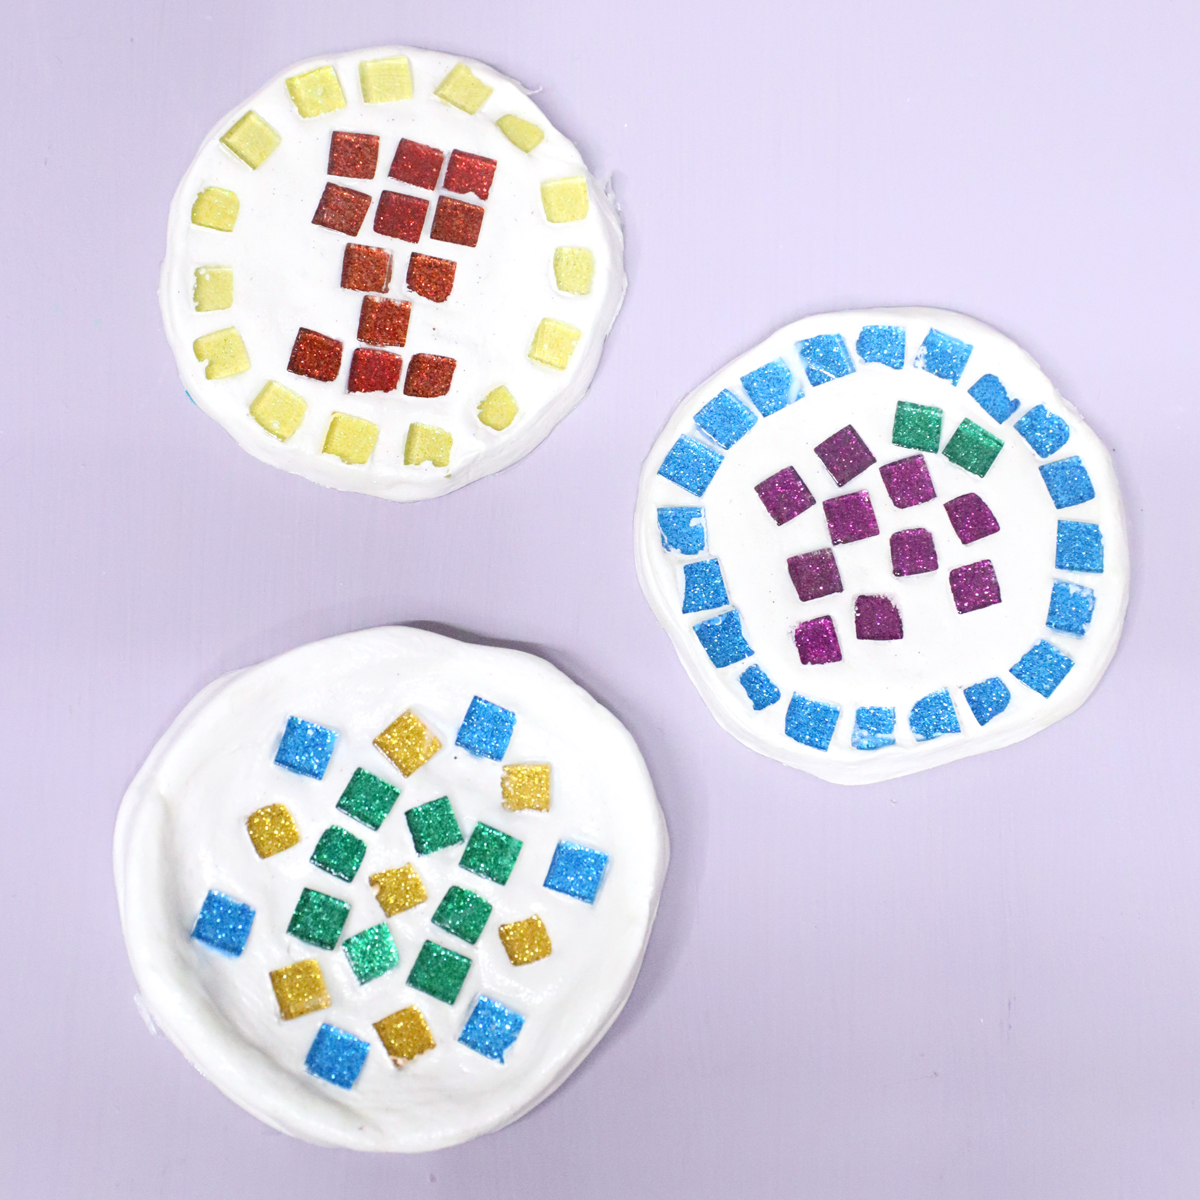
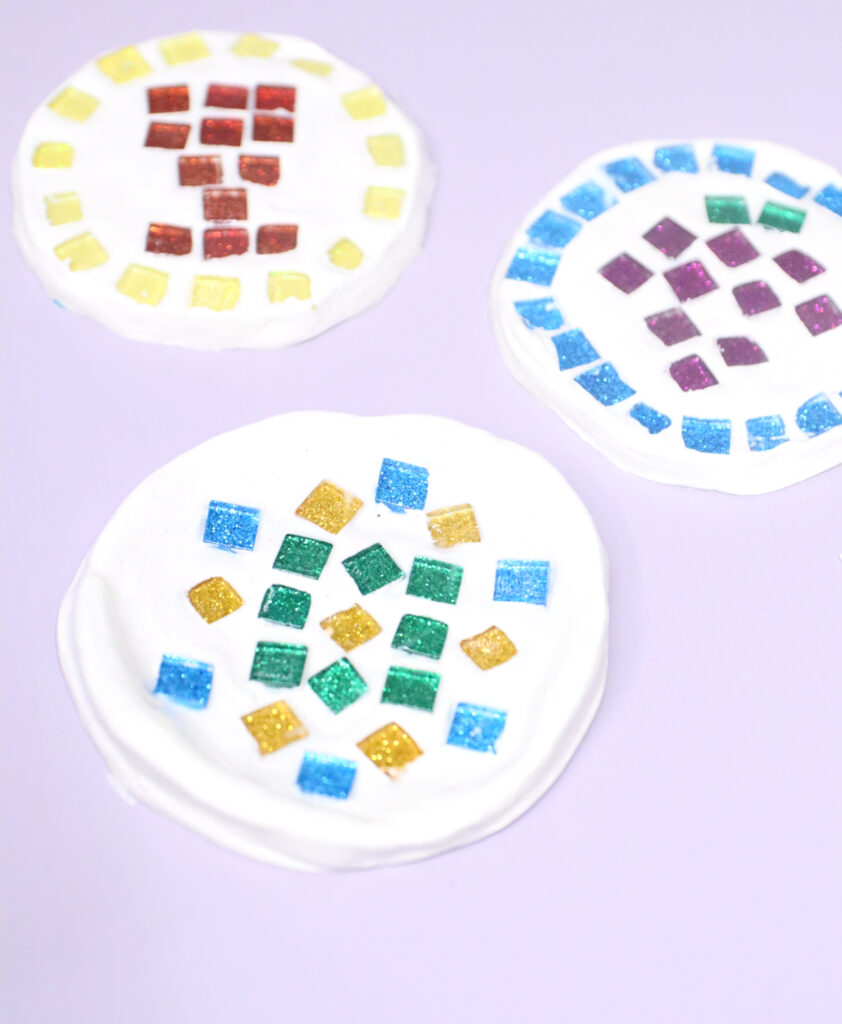
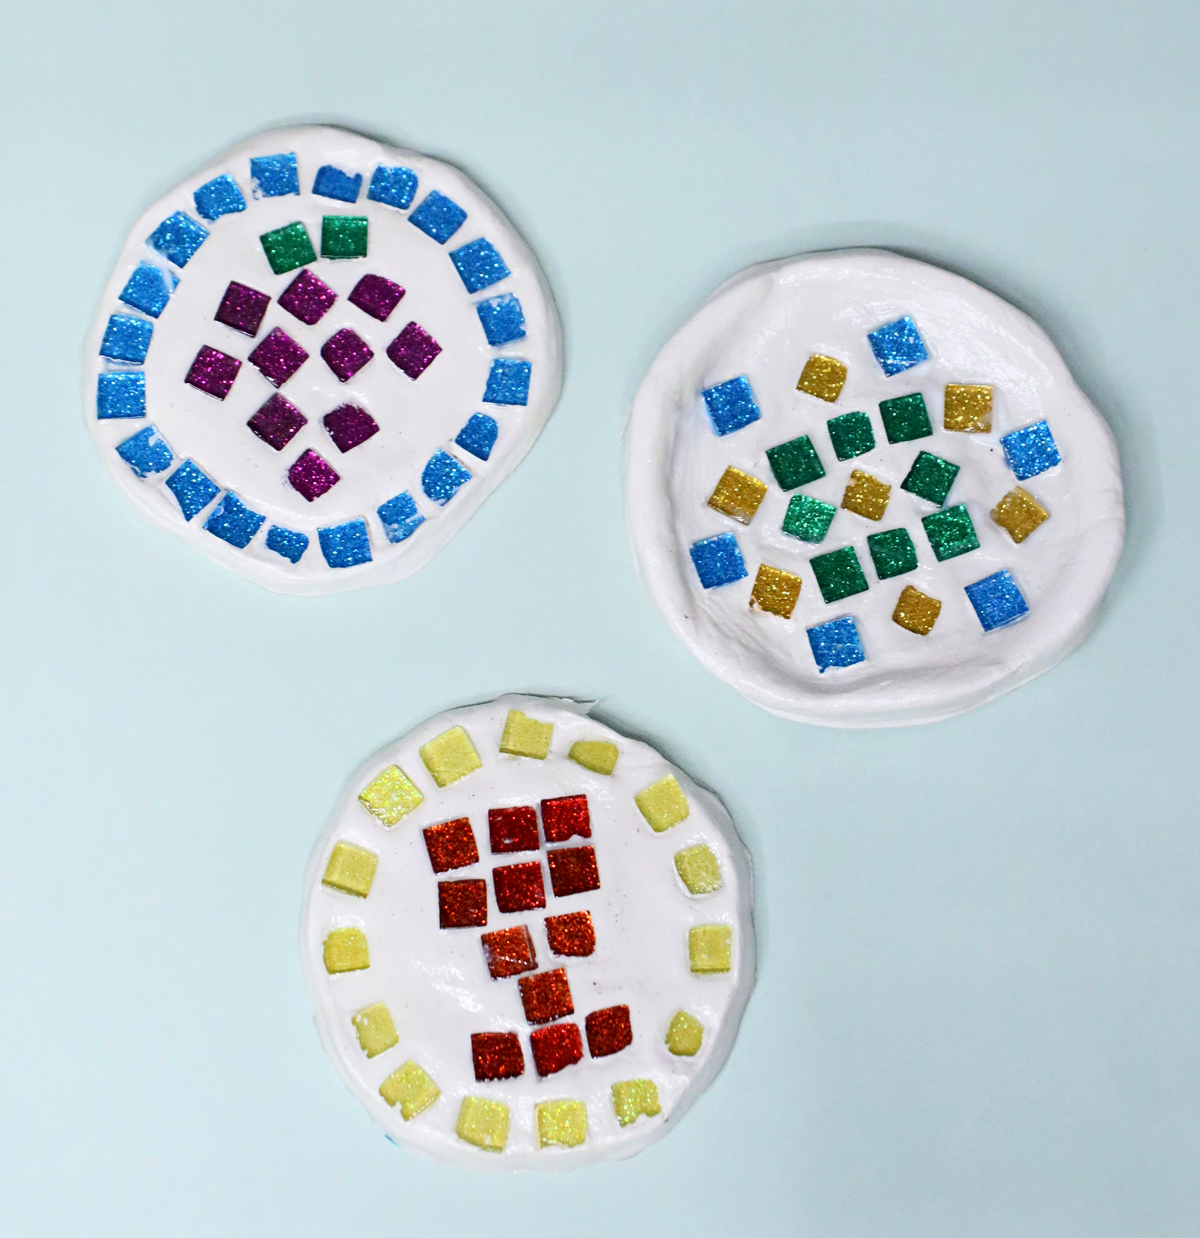
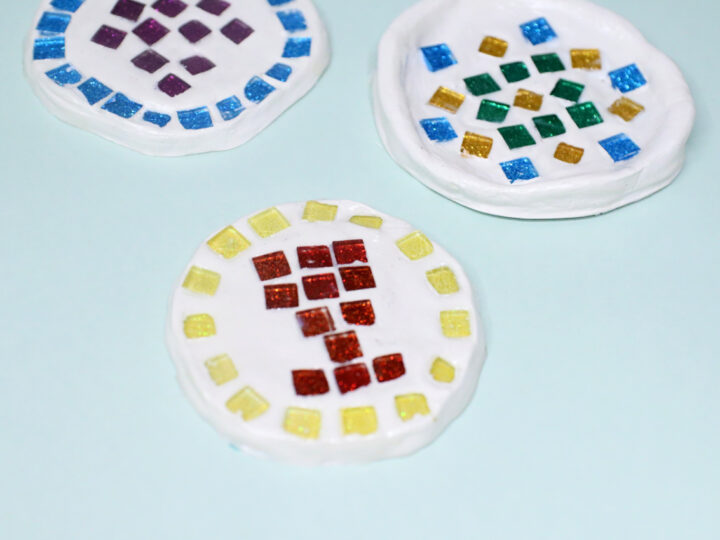
I did some with “images” – very simple ones – of grapes and a goblet, and one with an abstract mandala-style pattern to show you where you can go with this.
Age range/level for DIY mosaic coasters
There are a few different types of crafts I share here – paper crafts that are obviously totally kids’ crafts, adult crafts that are totally designed for adult crafters of any skill level. And then there are those that are more ambiguous – like these DIY mosaic coasters.
The reason I’m sharing this is so that you can understand my goals with this craft and why the results are as they are: the point of this craft was to design a classroom craft for this. That means that I “dumbed down” the process to make sense as a classroom craft for kids.
Of course you can do these DIY mosaic coasters as an adult craft too – polish it up, use cutters, etc. But I wanted to show how it’s done with kids, and to do that, I had to be honest in my replication of it for kids, doing it how it might be done in a classroom.
I didn’t necessarily have this in mind for young kids, though you can craft it with preschool age kids with … messier results, and more assistence.
It’s designed more as a grade school/tween project.
Making this with younger kids
To keep it super kid-friendly, I used air dry clay, and then pressed the mosaic tiles into it. I made it pinch pot style – that is, forming it with my hands and pressing it into the shape I wanted to. I used water to smooth it out – a skill that’s worth teaching kids.
Teach kids to plan their design off-project and then place it on the project. I first arranged the tiles on the project and then pressed them into place. The kids can definitely just press them in, especially with younger kids and abstract designs.
How to bring it up to “grown-up” level
The best way to grow this up a bit would be to find a base and do real mosaics with grout on it. I share how to do this in this mosaic Menorah tray tutorial.
You CAN however do it neater with clay. Roll it out, use a 4 inch circle cutter, or a cardboard template and craft knife to cut a base.
You can see that I made one coaster with a bit of a rim.
You can do that more naturally by making a walled rim to attach to the edge of your cut-out coaster. Do this either by cutting a long strip and attaching it around the edge, or by making a rope and connecting it on top, smoothing the edges.
You’ll need to connect it properly by distressing both halves, making slip, and smoothing the pieces together.

Keep in mind that when you add your mosaic tiles, it’ll deform the shape a bit and you WILL need to reshape it.
While I did sand these gently to get off the worst of the edges, if I was making these “for real” and not to design a kids’ craft, I’d do better sanding and polishing with a rotary tool.
Finishing them off
It’s VERY important to finish them off properly if using them as actual coasters. Keep in mind that you dip your finger and spill actual grape juice/wine on it while reciting the ten plagues!
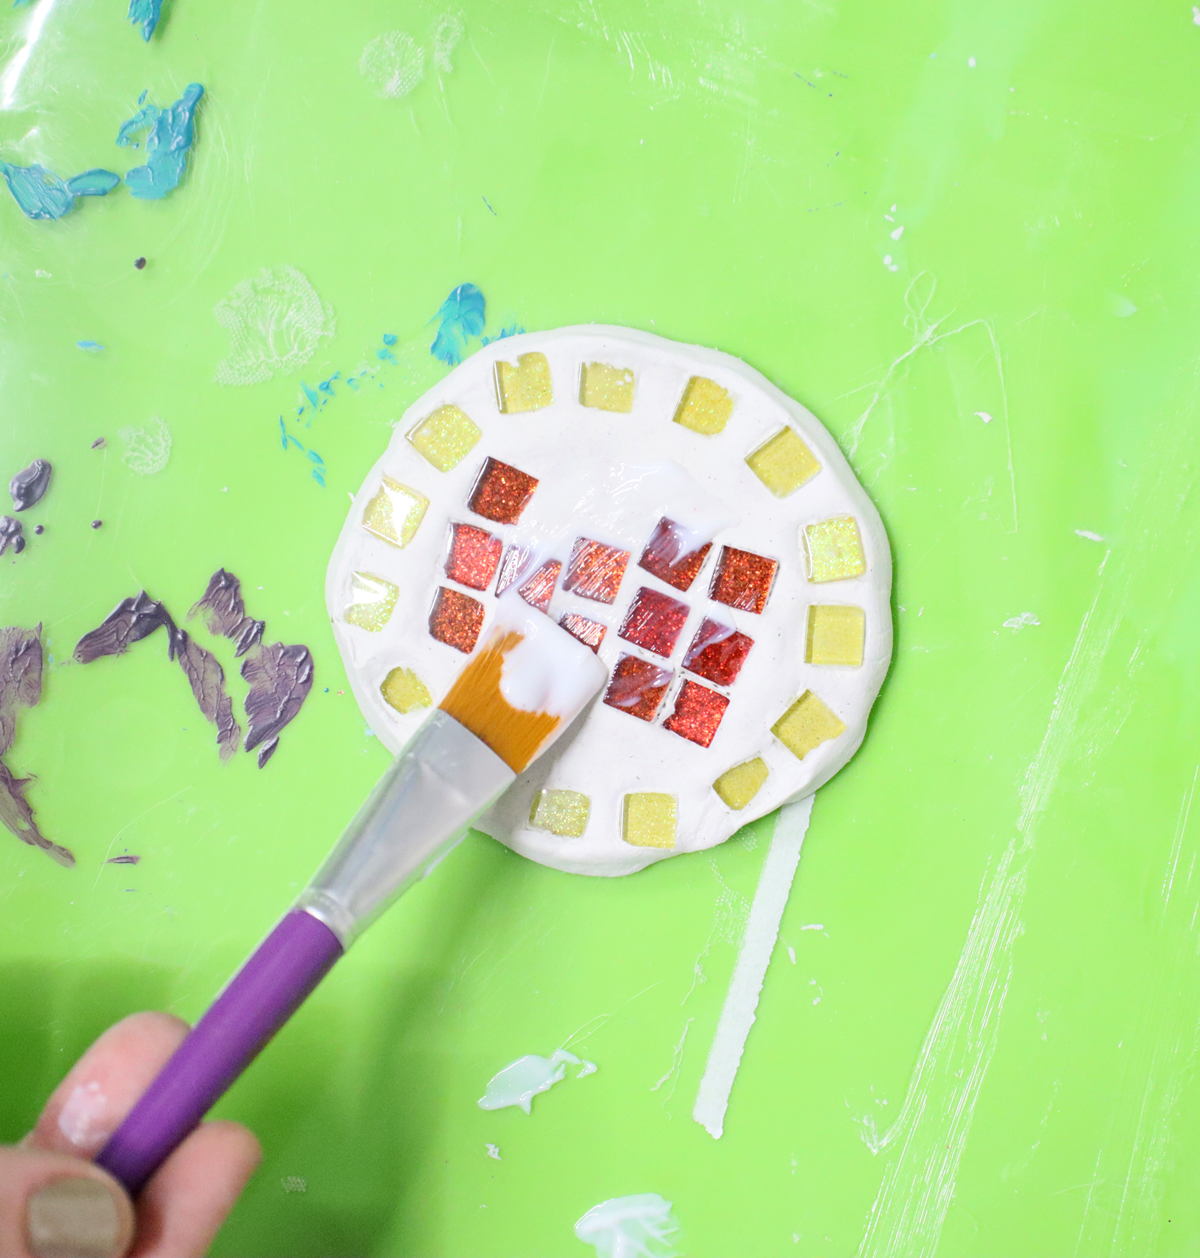
I used dishwasher safe Mod Podge (which by the way takes about a month to cure to dishwasher safe, but will be wipable after a few days). You’ll want to paint it in batches so that you can get every spot, including the bottom.
Other ideas: paint it with resin, an acrylic sealer, or anything waterproof really.
If you think kids might spill the poured grape juice back into their cups, it needs a food safe finish. Our custom is NOT to do that.

How to make DIY Mosaic Coasters for Passover
Watch the full-length video on YouTube
If you’re more of a visual person, you can watch the full-length video on YouTube or scroll down for step by step written instructions with photos, and a printable version of the tutorial.
Supplies needed
- Air dry clay – I used DAS
- Mosaic tiles – I used these fun sparkly ones from Michaels
- A jar with water and your fingers 🙂
- Sealer such as Dishwasher Safe Mod Podge
- Paintbrush
- Optional: coarse sandpaper
- Sponge to clean it with
How to make clay mosaic coasters
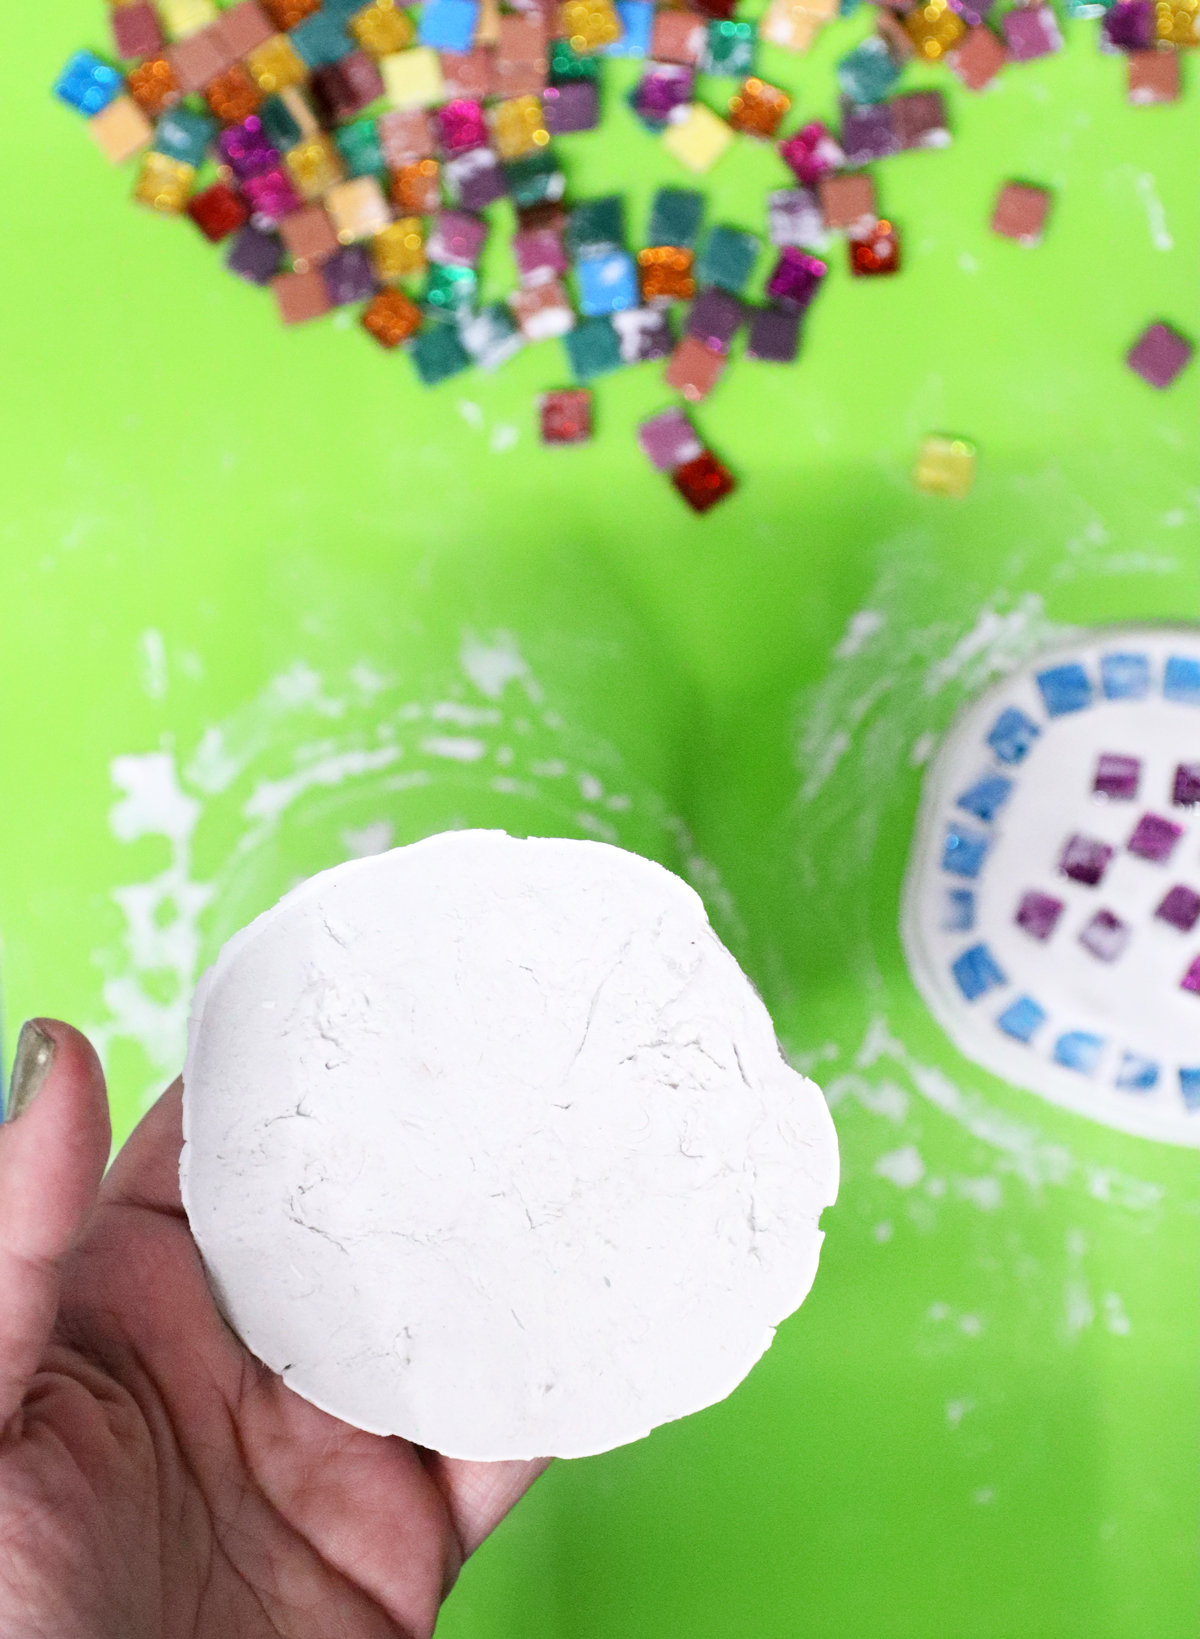
1. Take a clump of clay…
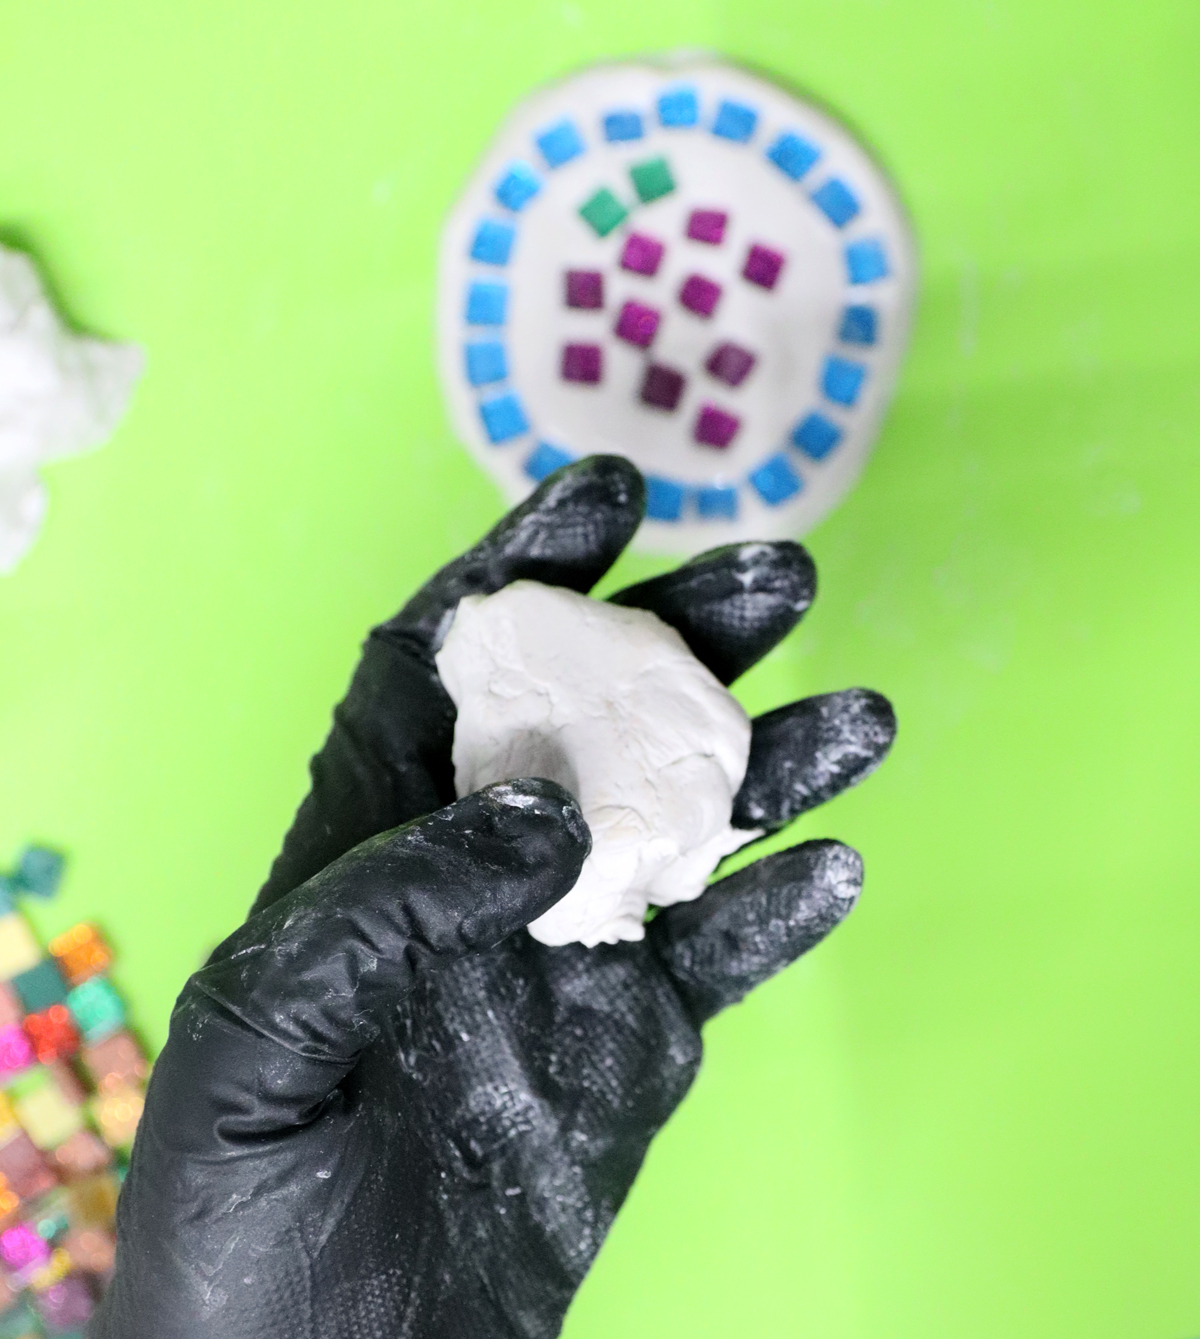
And roll it into a ball.
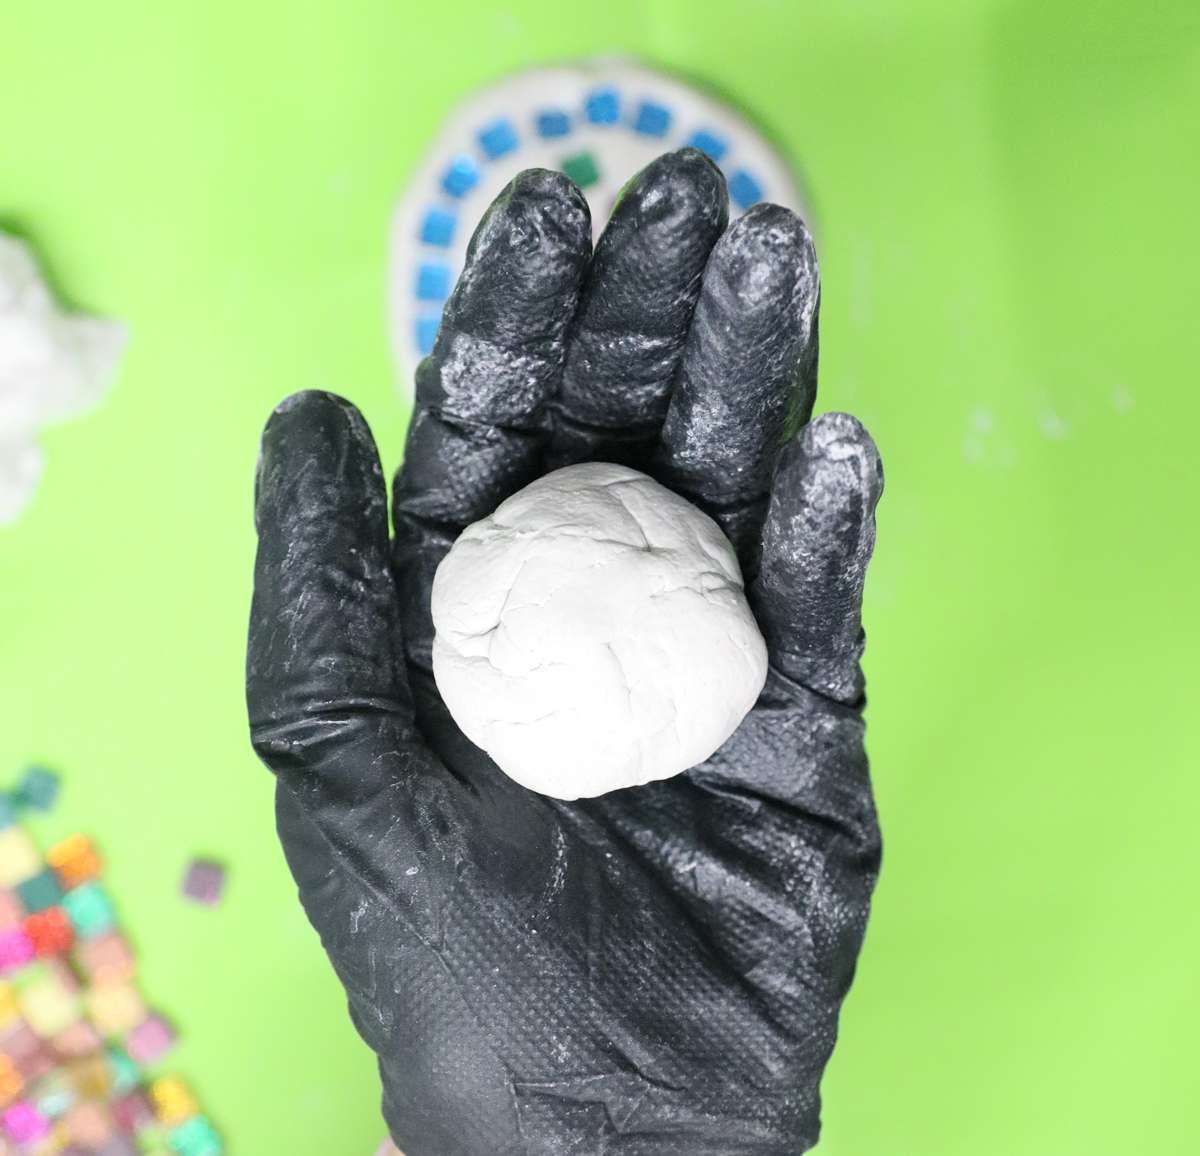
2. Flatten it into a disc-shape on your surface. Keep it 1/4-1/2 an inch thick.

3. Smooth the top and edges with some water.
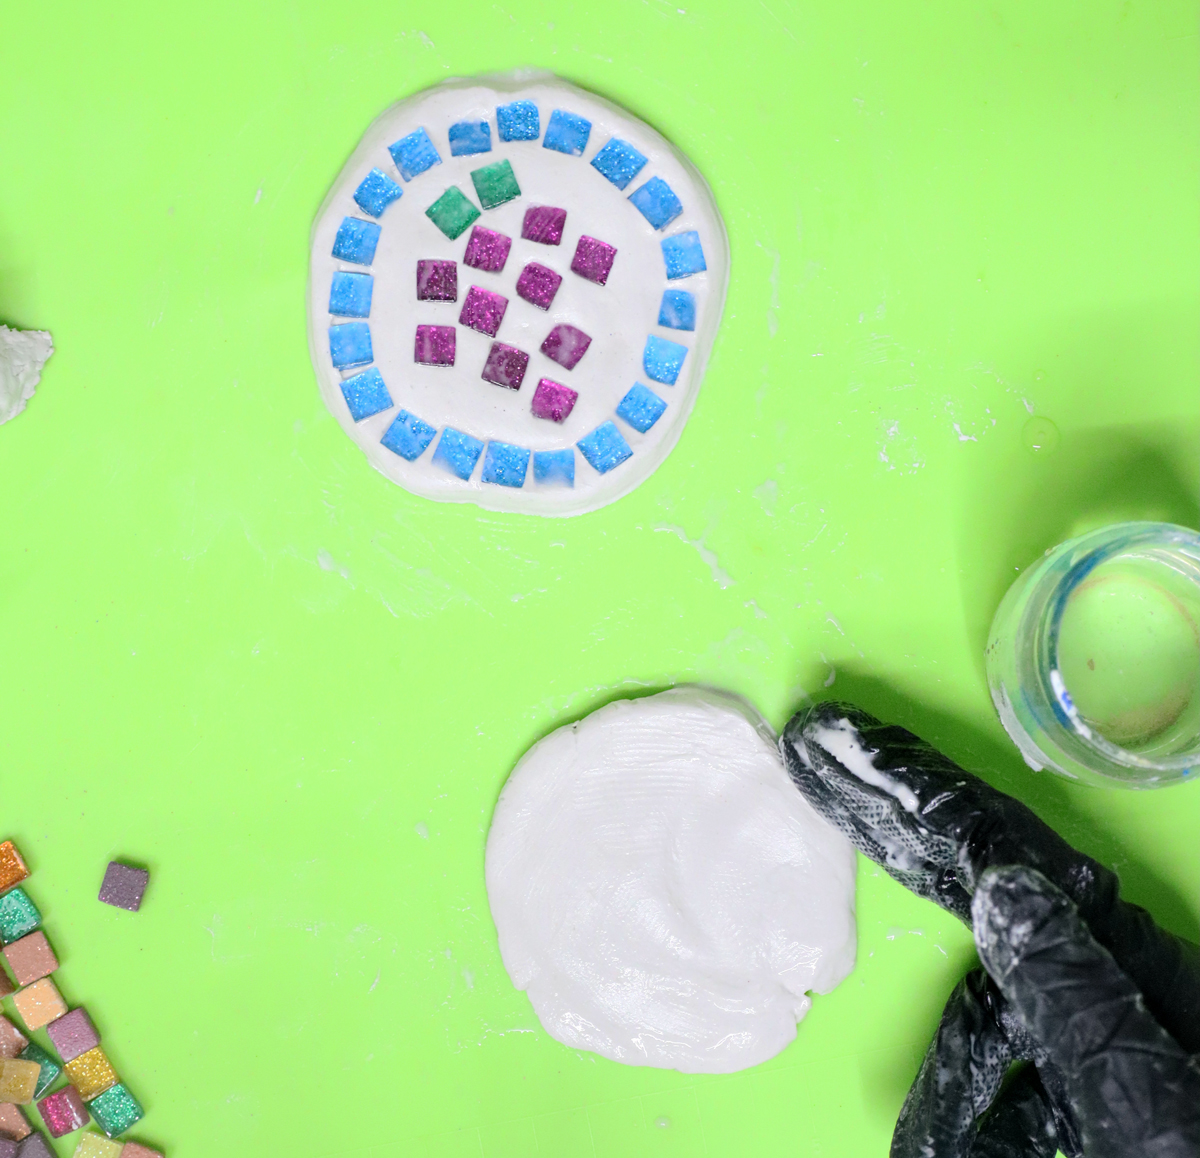
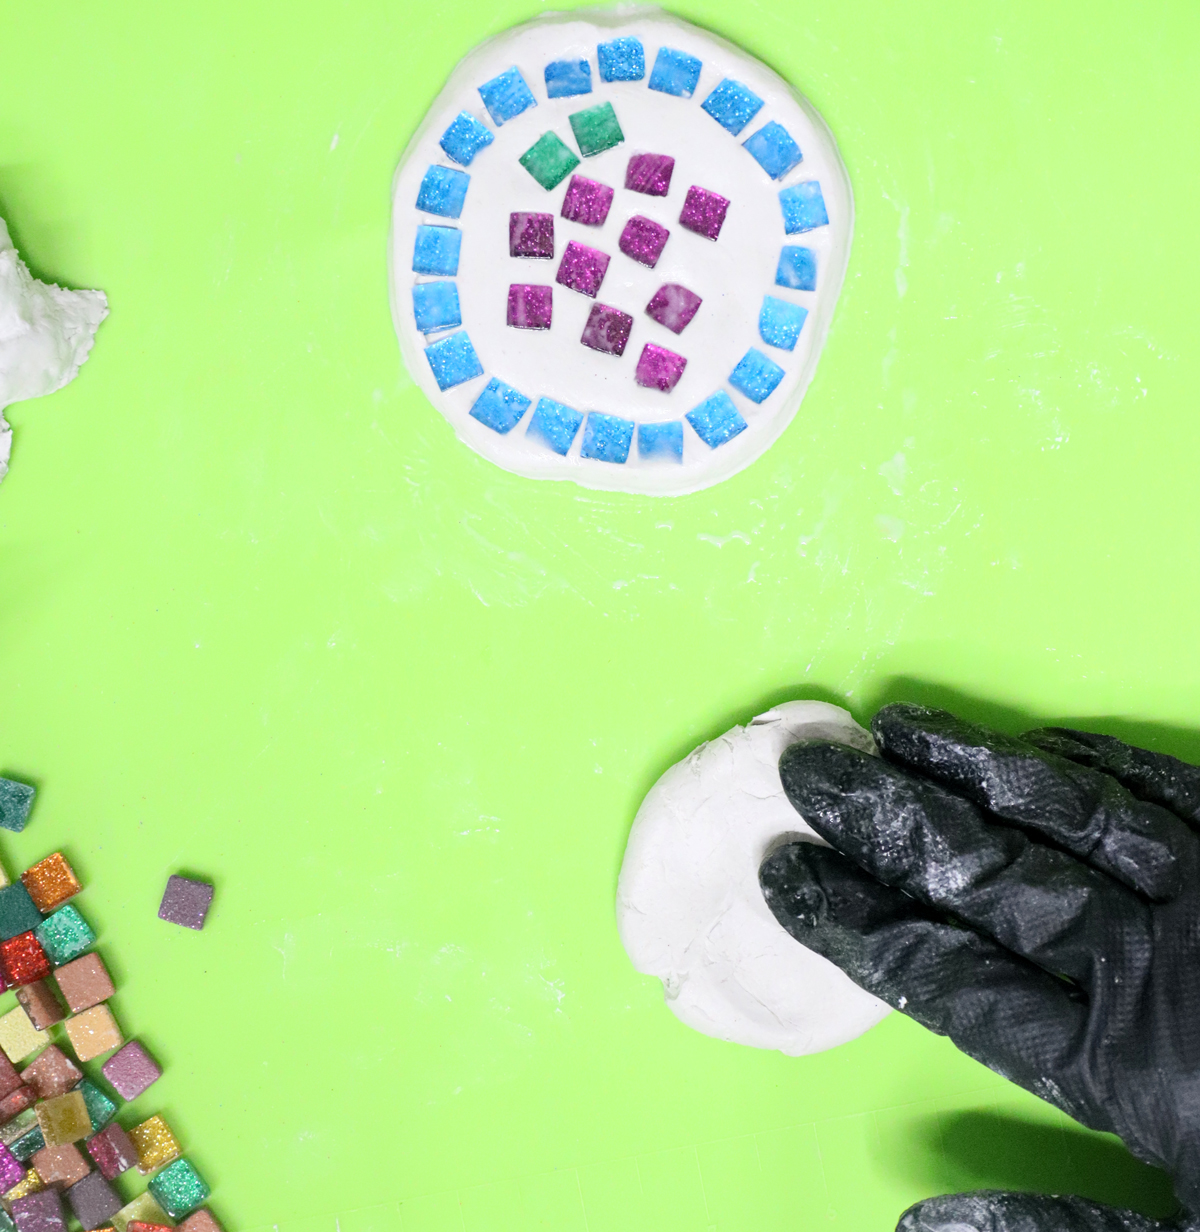
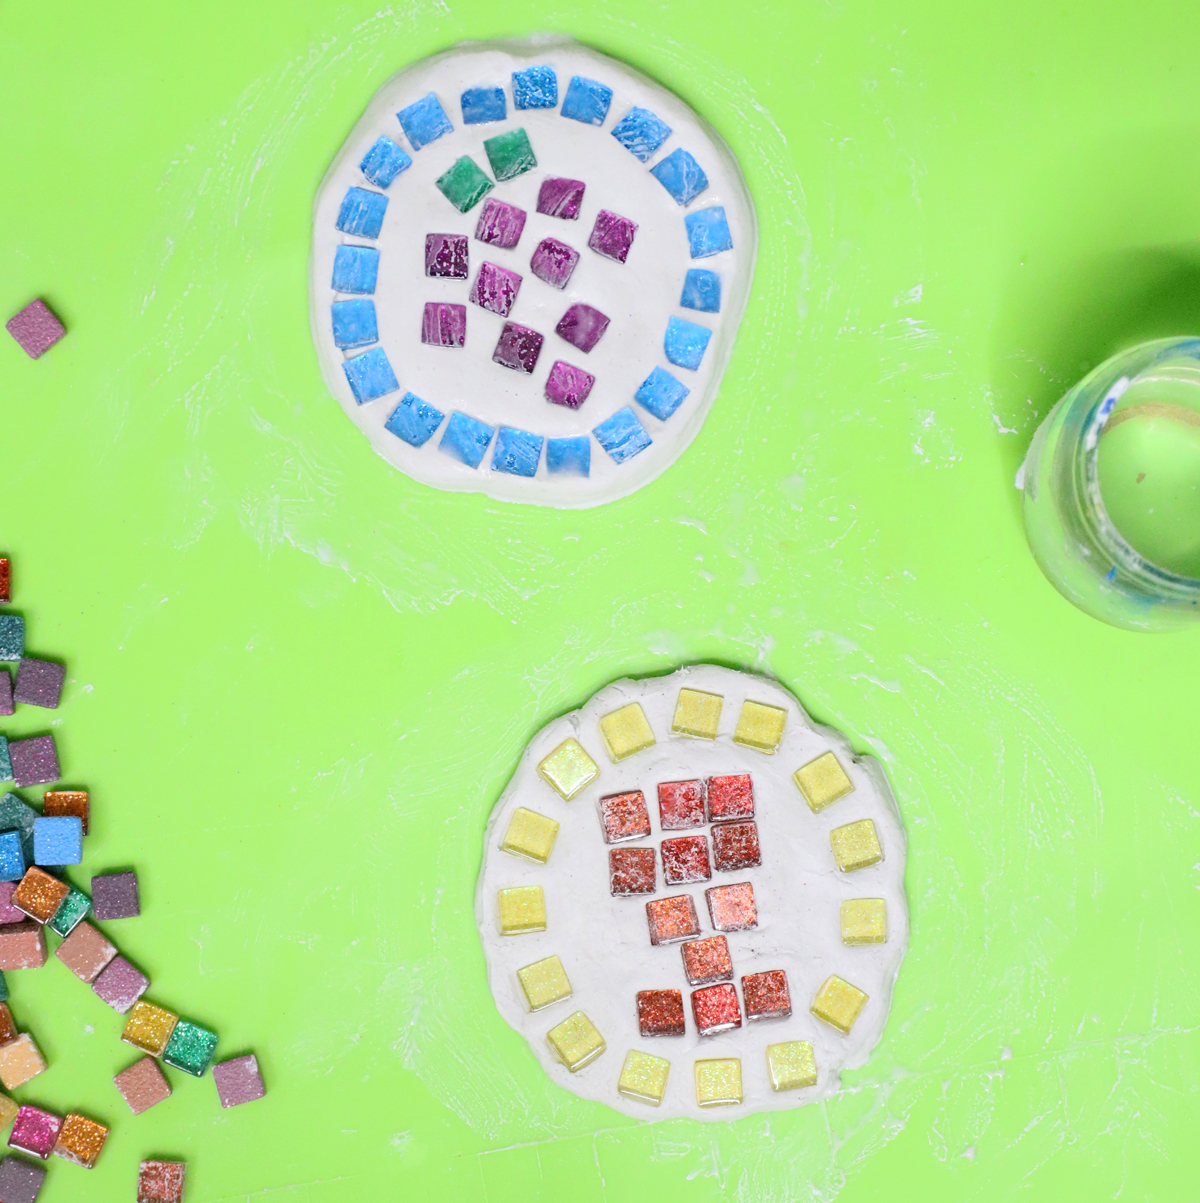
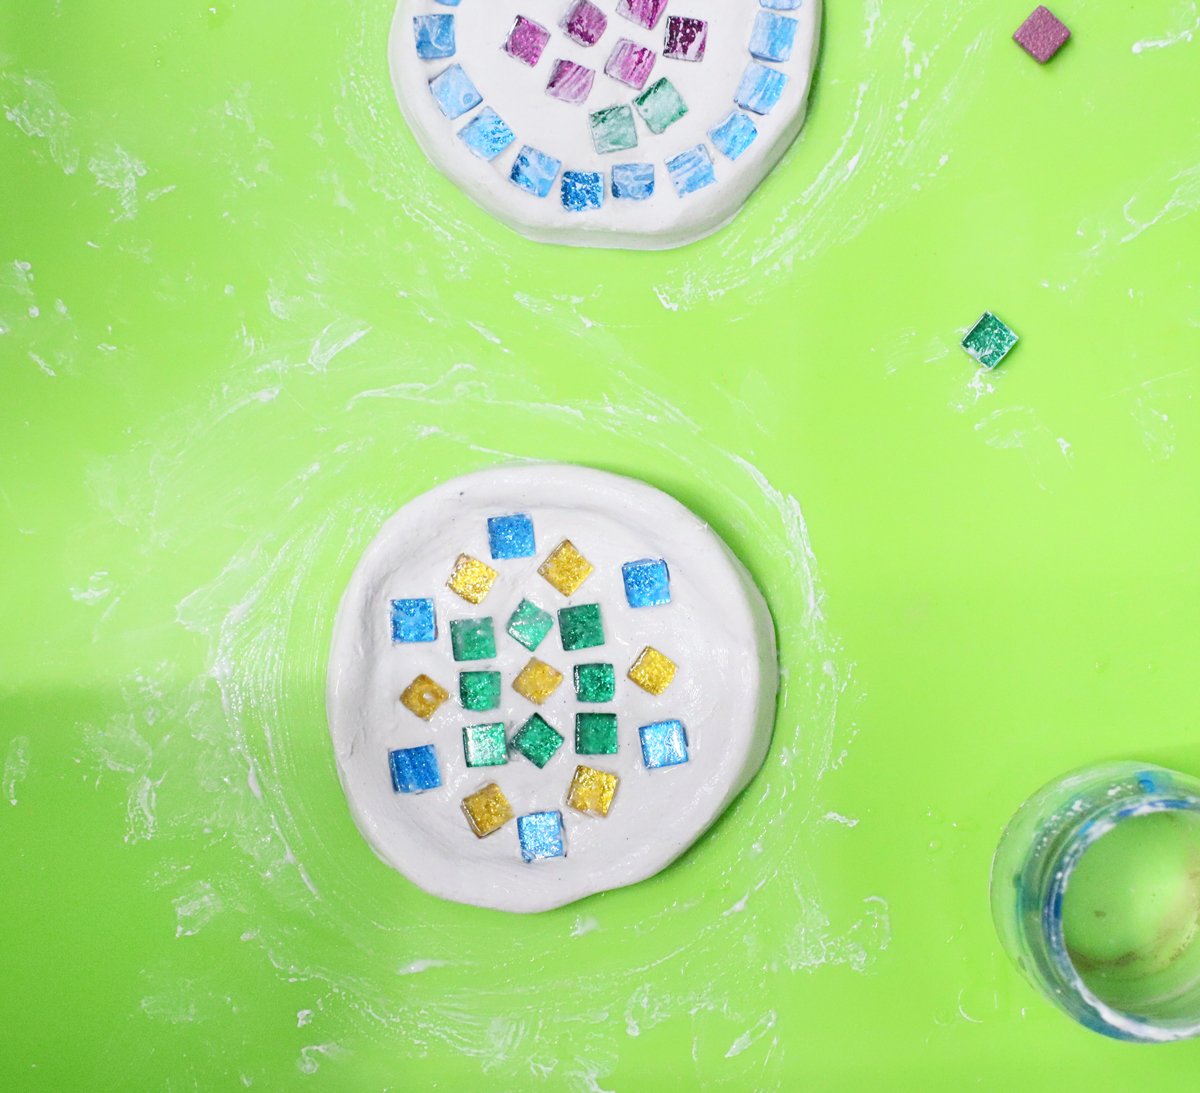
4. Arrange your mosaic tiles on top and figure out your design. I recommend leaving a bit of space between tiles and not fitting them in too tightly.

I started with a center design and then added a border.

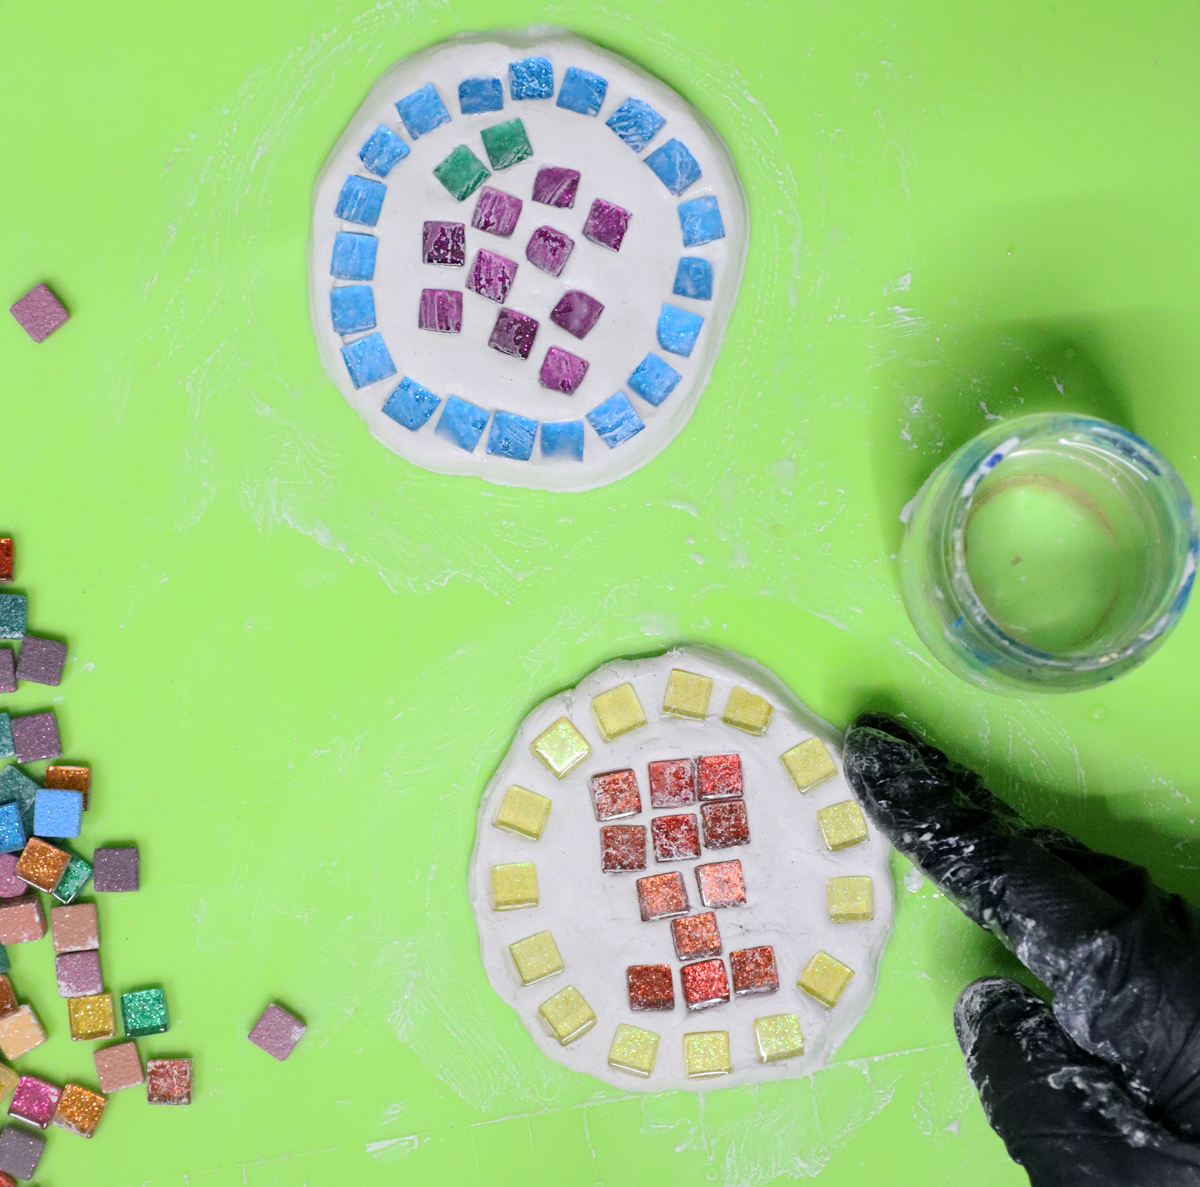
5. Press the tiles into the clay in place.
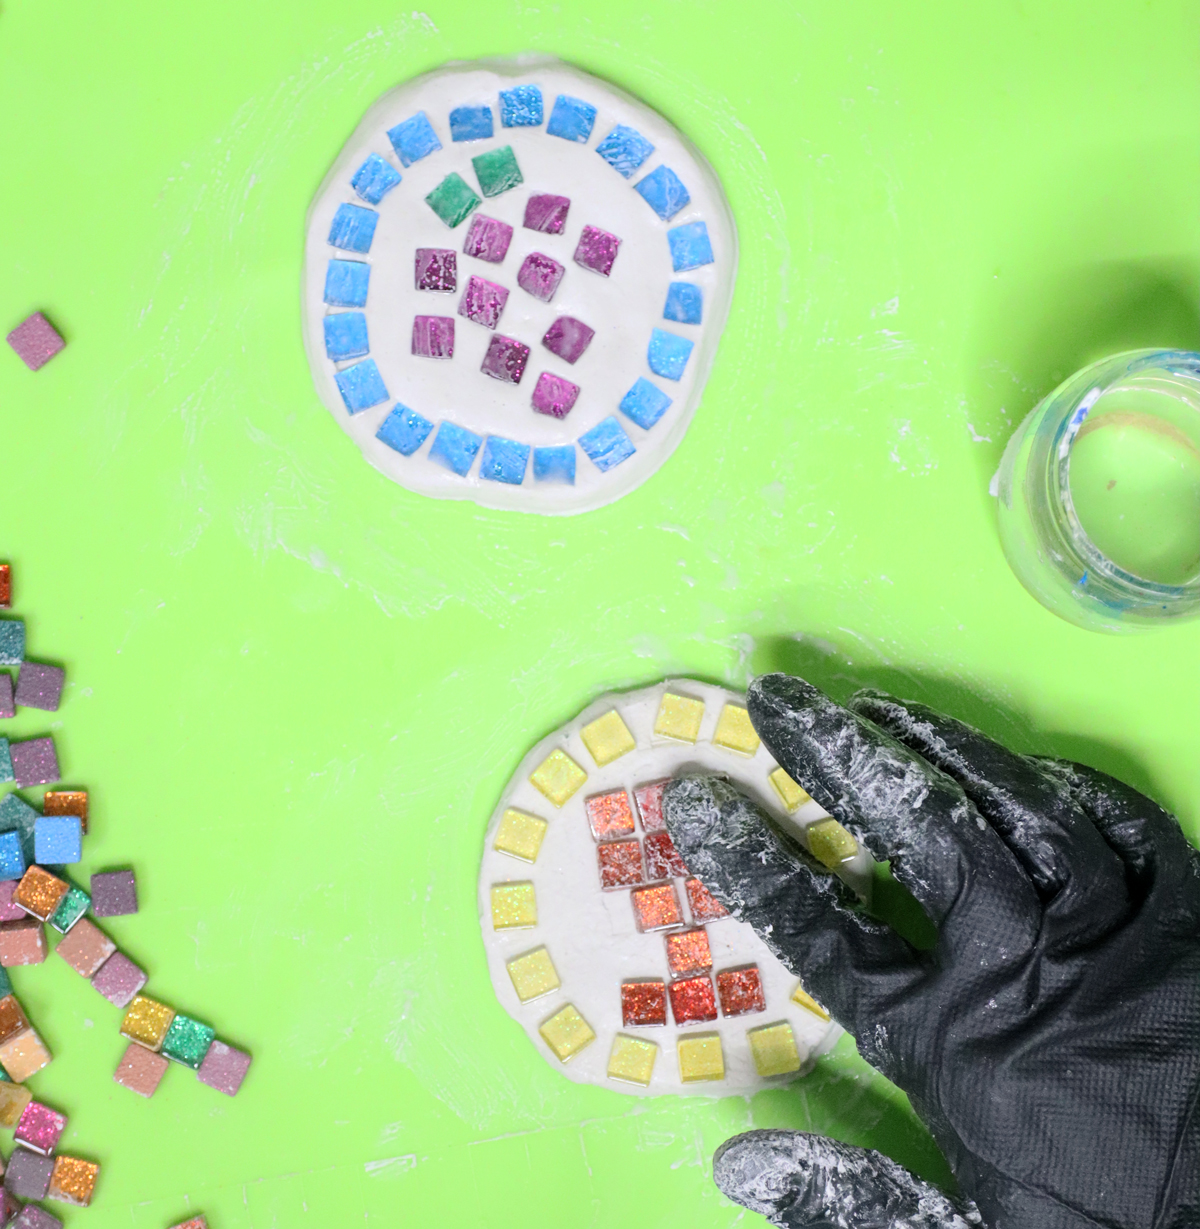
6. Fix it up with water as desired.
7. You can also try one with a rim – just pinch up the ends when you form your original design.
8. Allow it to dry completely! You may need to flip it over after a day to allow the back to dry.
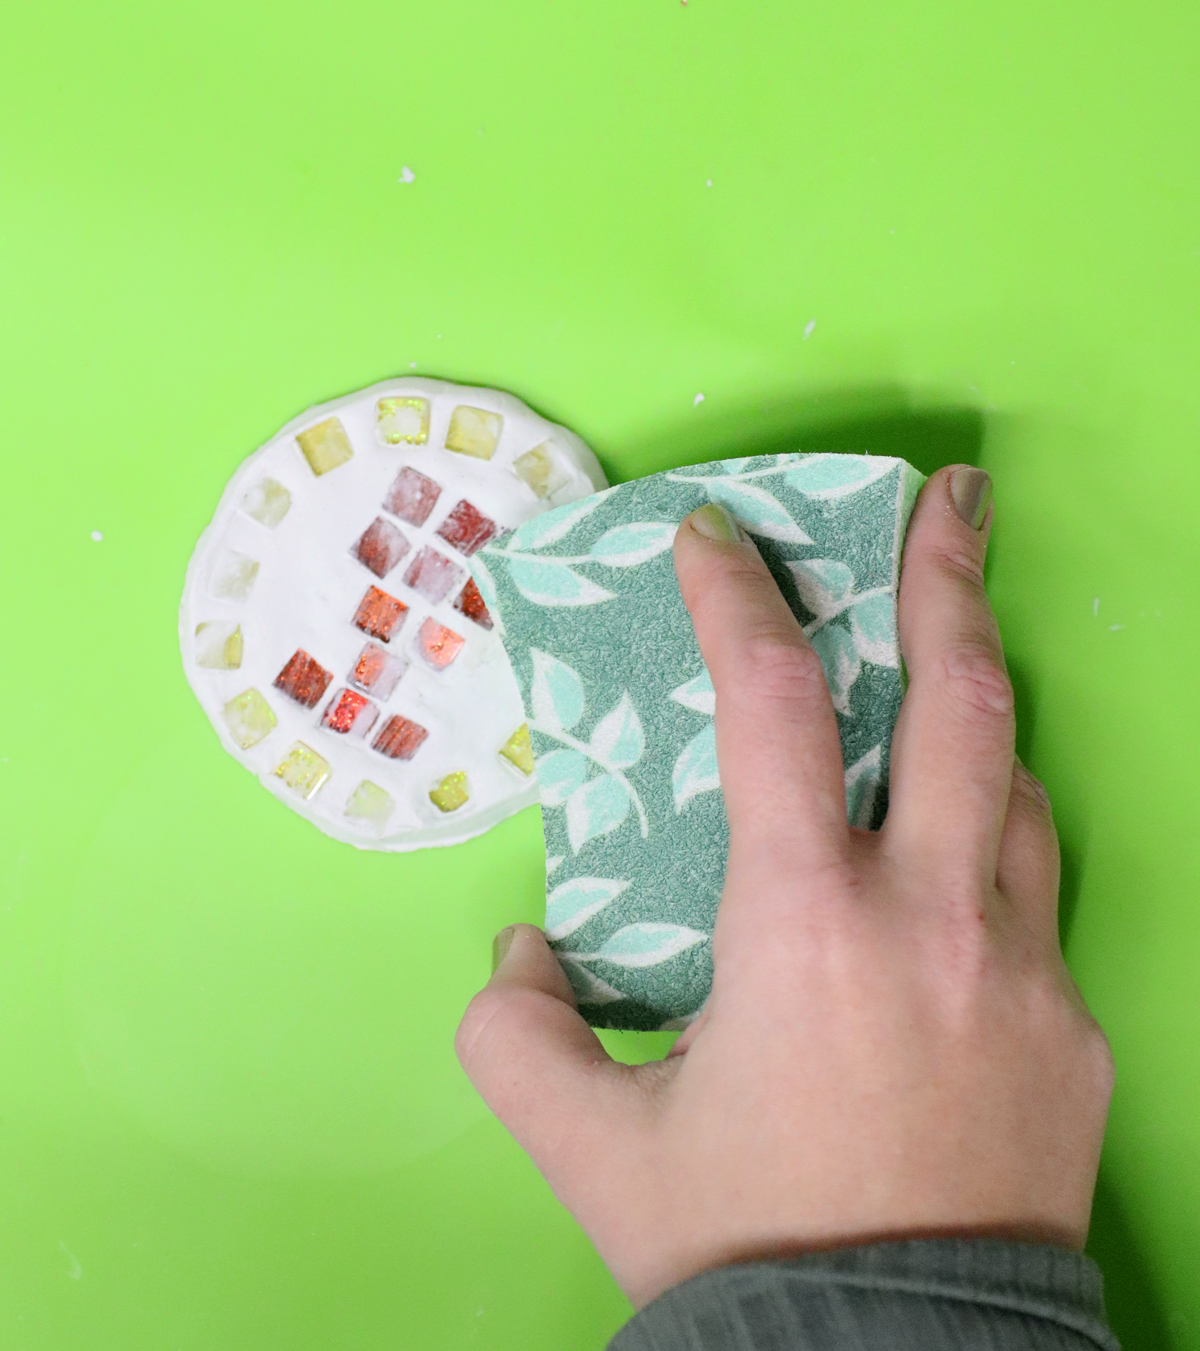
9. Clean off the clay residue from the top of the tiles by wiping it gently with a damp sponge.
10. I recommend sanding the small burrs and overflow seams on the edges even if not making this super polished. A grown-up can do this for the kids and it takes half a minute per coaster, and really makes it look nicer.
11. Seal it with a layer or two of Dishwasher Safe mod podge.
Your mosaic passover coasters are complete! Which design will you be making on yours? Comment below!
How to Make Mosaic Coasters for Passover
Of all the Passover crafts you might try, coasters are often overlooked. But everyone in the family has a Kiddush cup for Passover, so why not craft a coaster to go underneath it?!
Materials
- Air dry clay - I used DAS
- Mosaic tiles - I used these fun sparkly ones from Michaels
- A jar with water and your fingers 🙂
- Sealer such as Dishwasher Safe Mod Podge
- Paintbrush
- Optional: coarse sandpaper
- Sponge to clean it with
Instructions
1. Take a clump of clay and roll it into a ball.
2. Flatten it into a disc-shape on your surface. Keep it 1/4-1/2 an inch thick.
3. Smooth the top and edges with some water.
4. Arrange your mosaic tiles on top and figure out your design. I recommend leaving a bit of space between tiles and not fitting them in too tightly.
I started with a center design and then added a border.
5. Press the tiles into the clay in place.
6. Fix it up with water as desired.
7. You can also try one with a rim - just pinch up the ends when you form your original design.
8. Allow it to dry completely! You may need to flip it over after a day to allow the back to dry.
9. Clean off the clay residue from the top of the tiles by wiping it gently with a damp sponge.
10. I recommend sanding the small burrs and overflow seams on the edges even if not making this super polished. A grown-up can do this for the kids and it takes half a minute per coaster, and really makes it look nicer.
11. Seal it with a layer or two of Dishwasher Safe mod podge.
Notes
It's VERY important to finish them off properly if using them as actual coasters. Keep in mind that you dip your finger and spill actual grape juice/wine on it while reciting the ten plagues!
I used dishwasher safe Mod Podge (which by the way takes about a month to cure to dishwasher safe, but will be wipable after a few days). You'll want to paint it in batches so that you can get every spot, including the bottom.
Other ideas: paint it with resin, an acrylic sealer, or anything waterproof really.