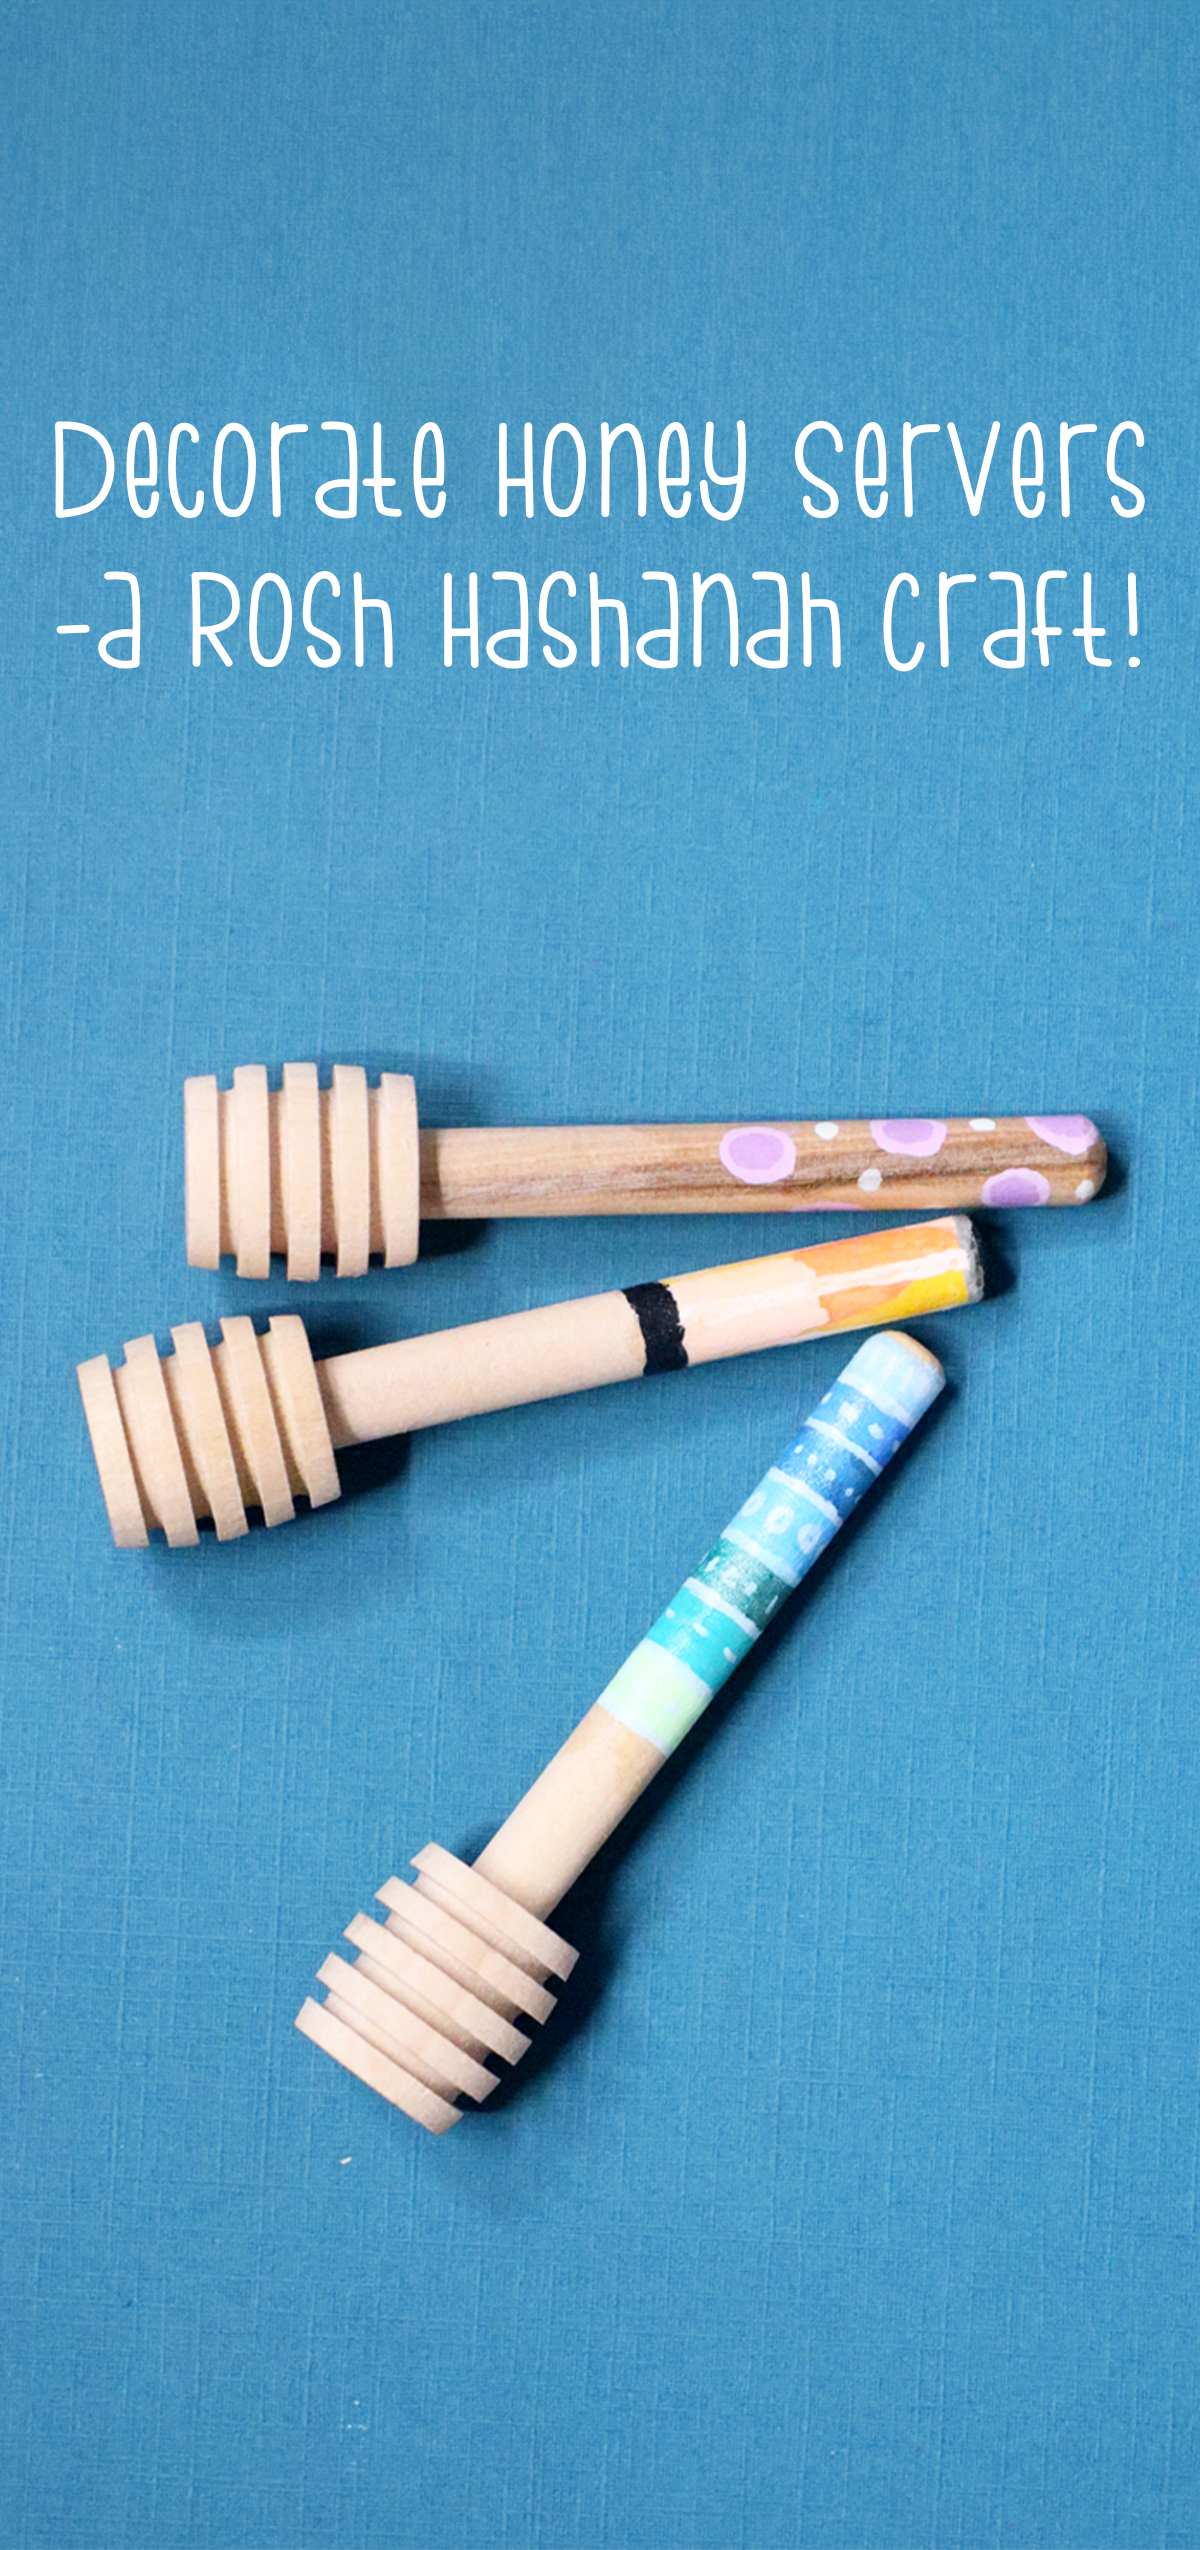
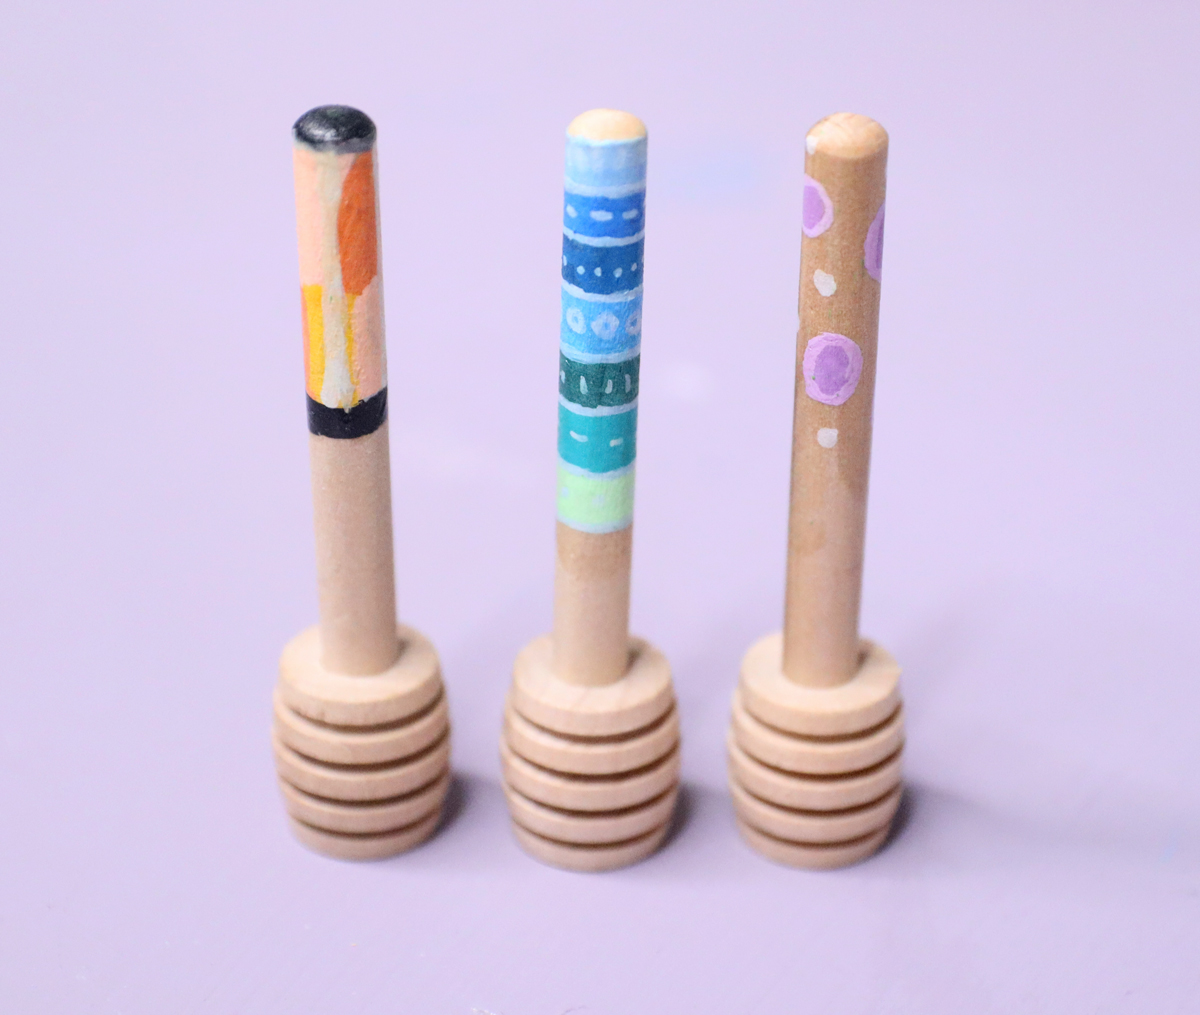
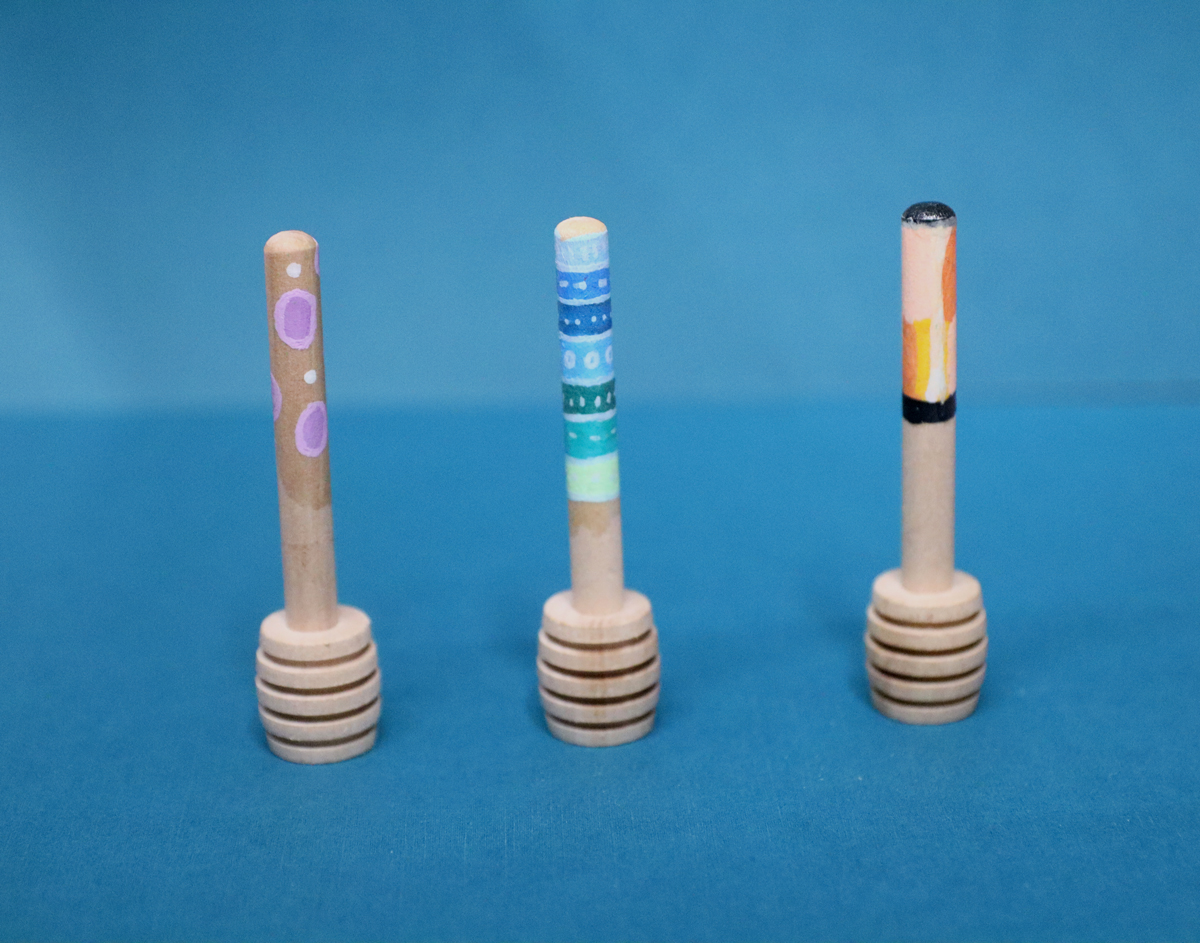
Color Your Own Honey Wand Craft
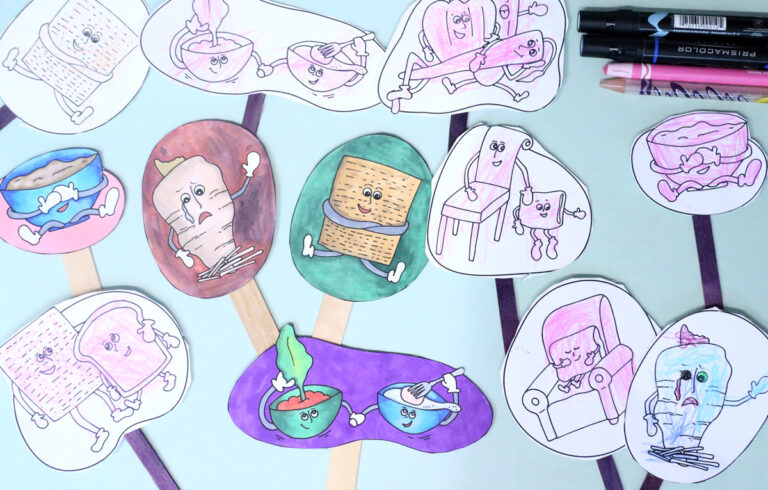
Color your own honey wand to make a super fun craft for Rosh Hashanah – the Jewish New Year! When you’re done, try these shofar craft templates too. This post contains affiliate links.

When I plan new crafts for the holidays, I always try to create a balance of more DIY-intensive items, and things that you can do on the fly.
This color-your-own honey wand craft is perfect for quick crafting and a huge variety of age groups. I’ll share all my tips below, including the best supplies to use, crafting it in groups and with younger kids, and more!
Choosing materials for this honey wand craft
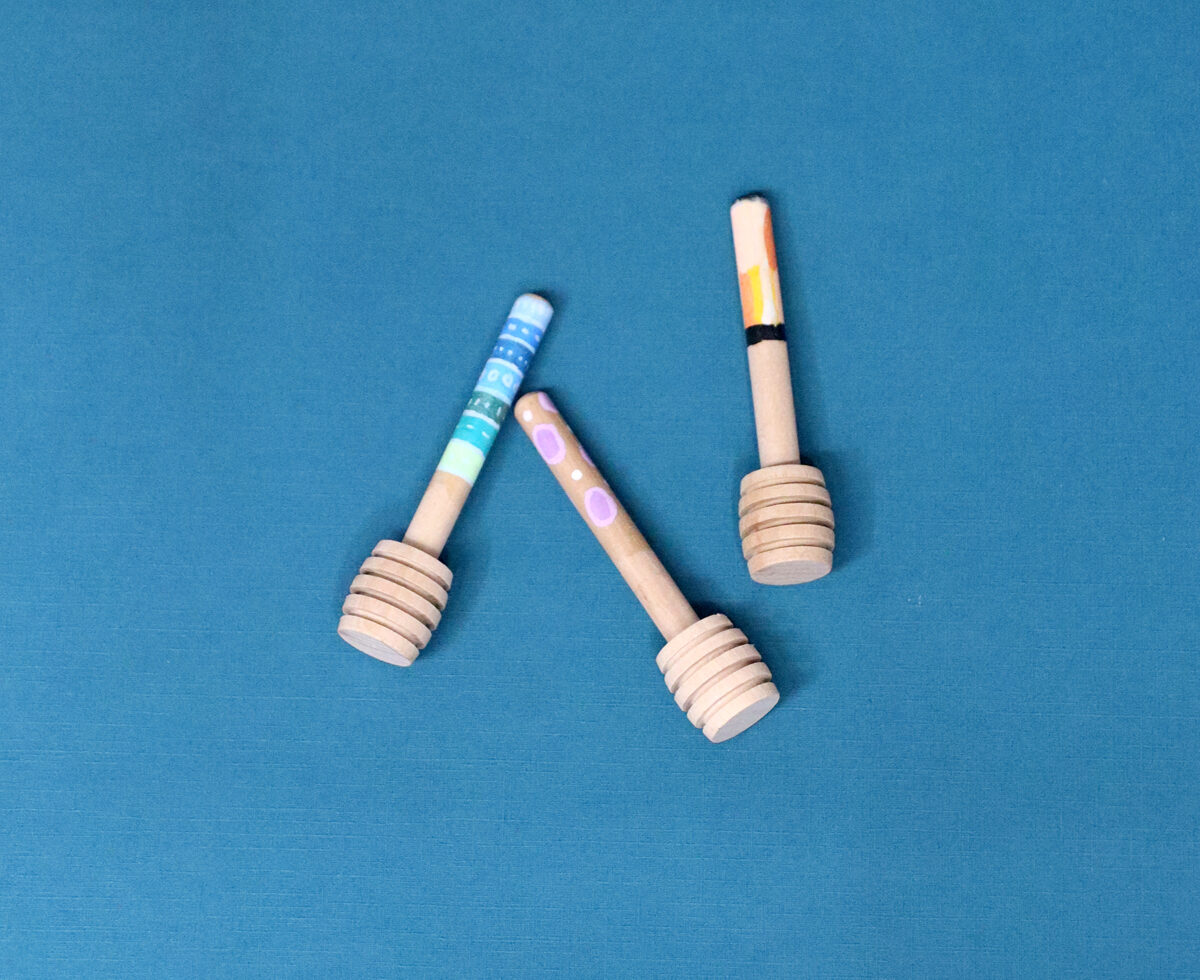
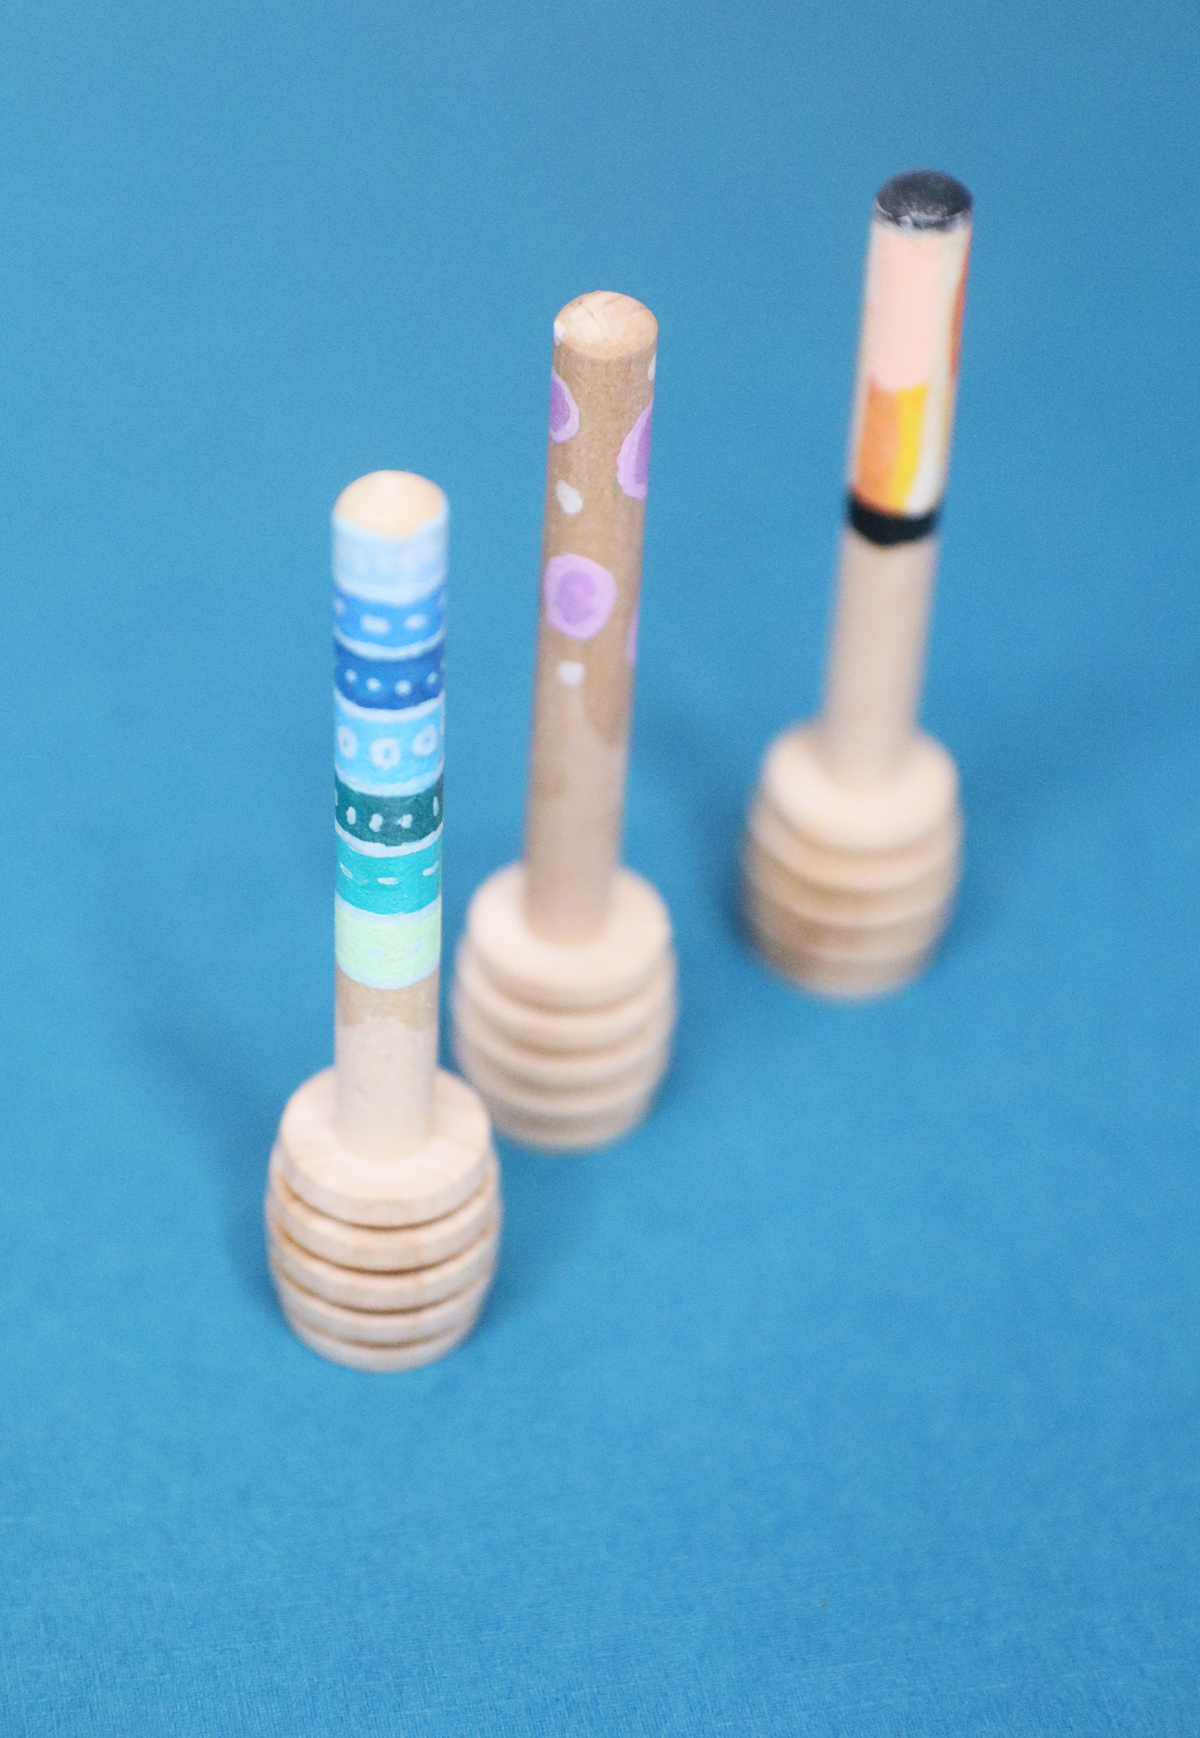
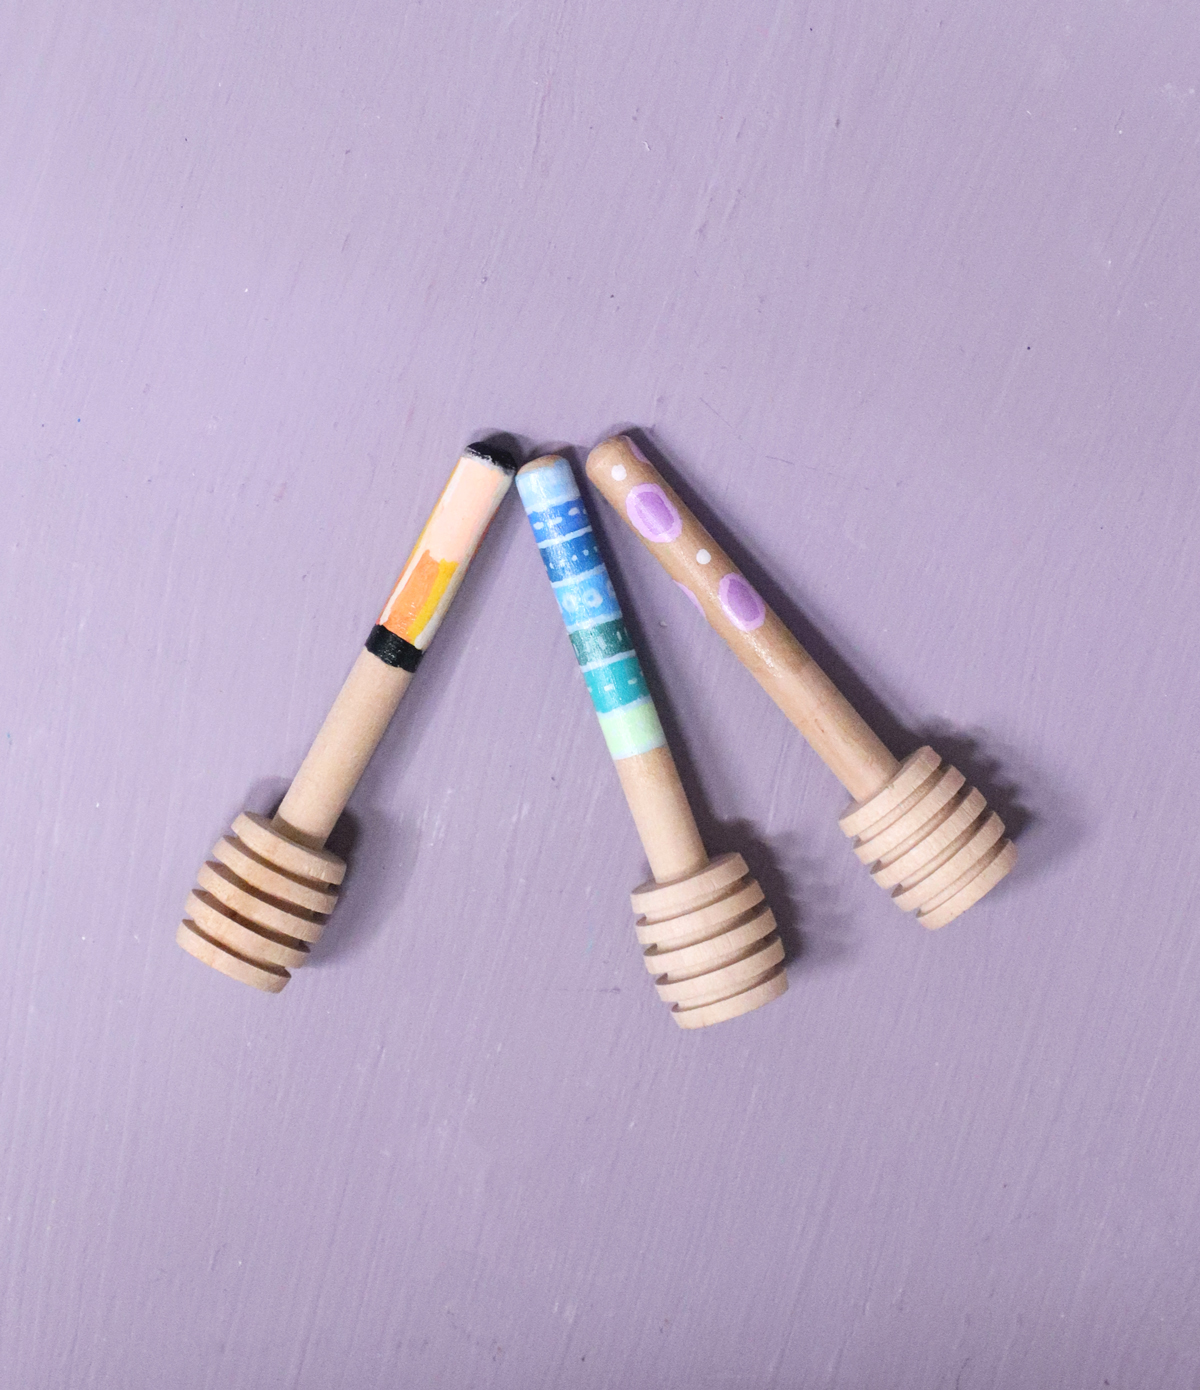
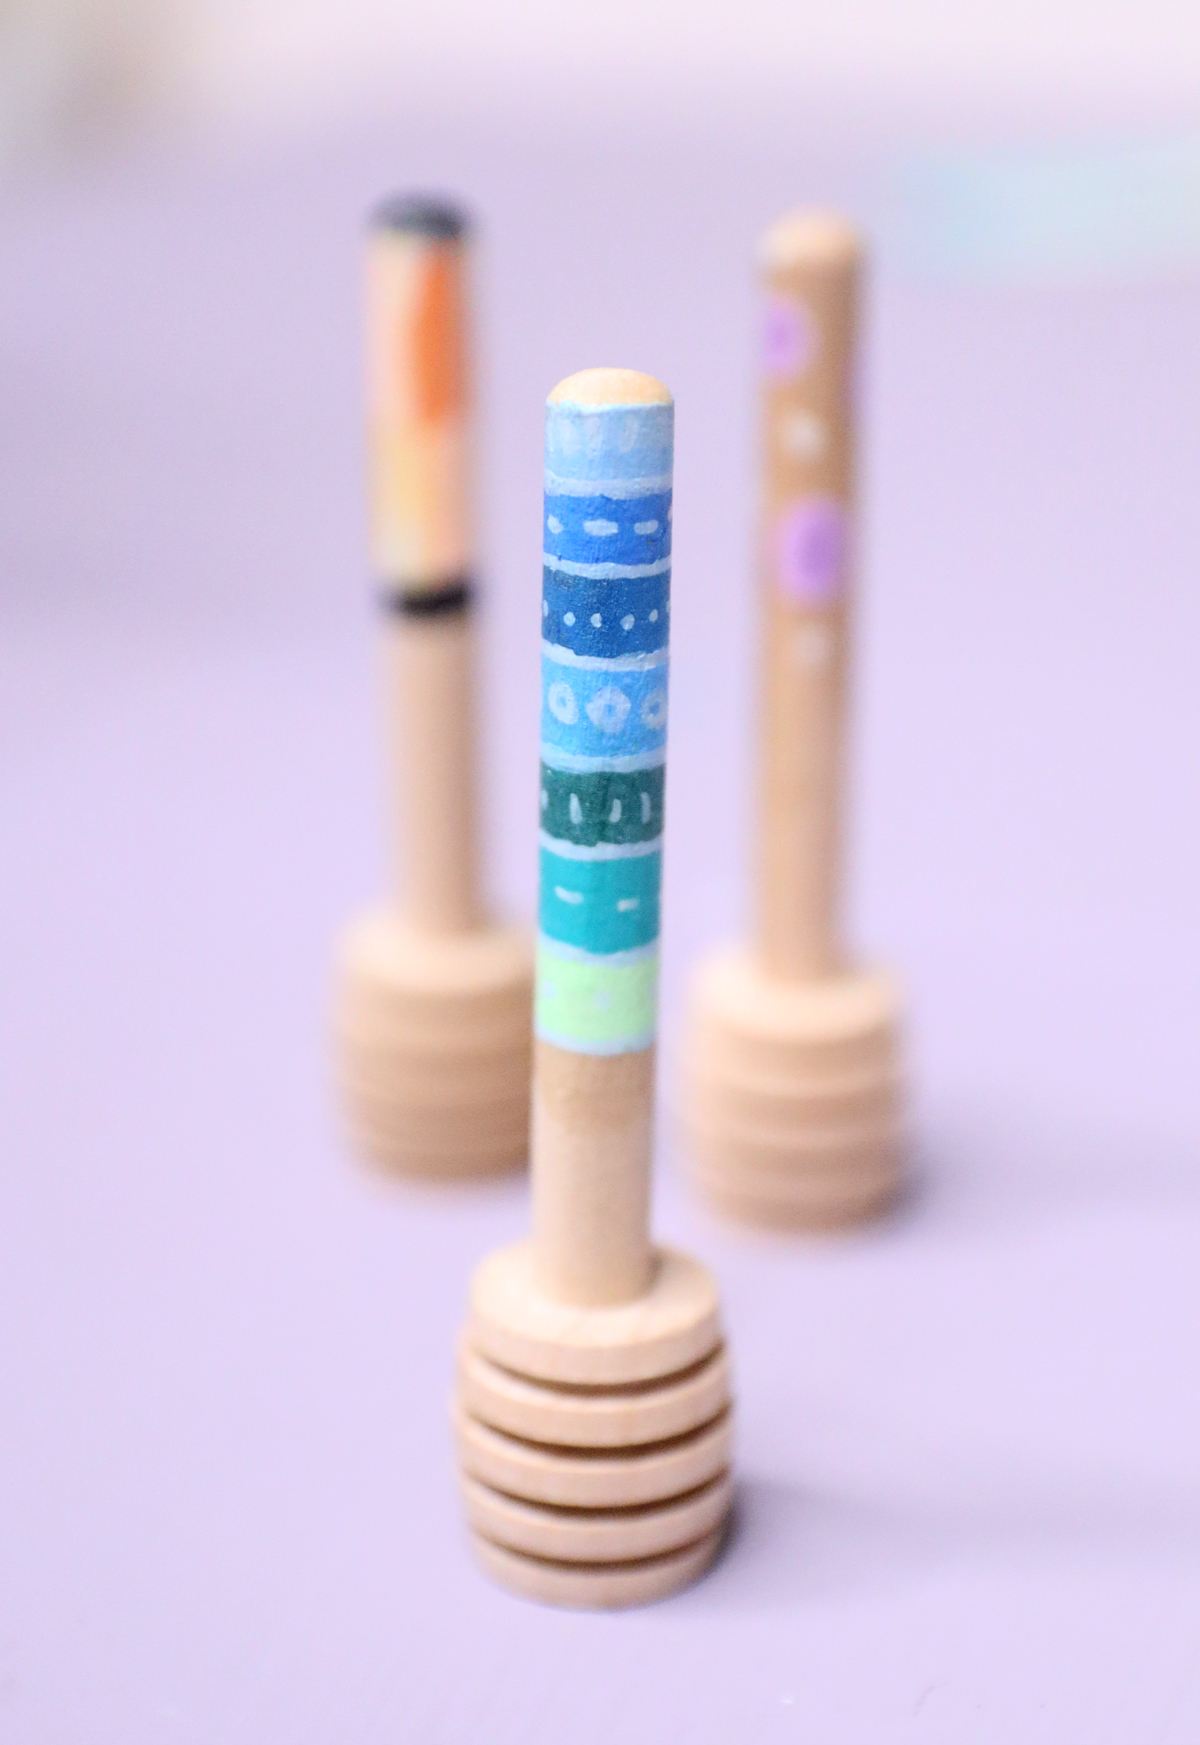
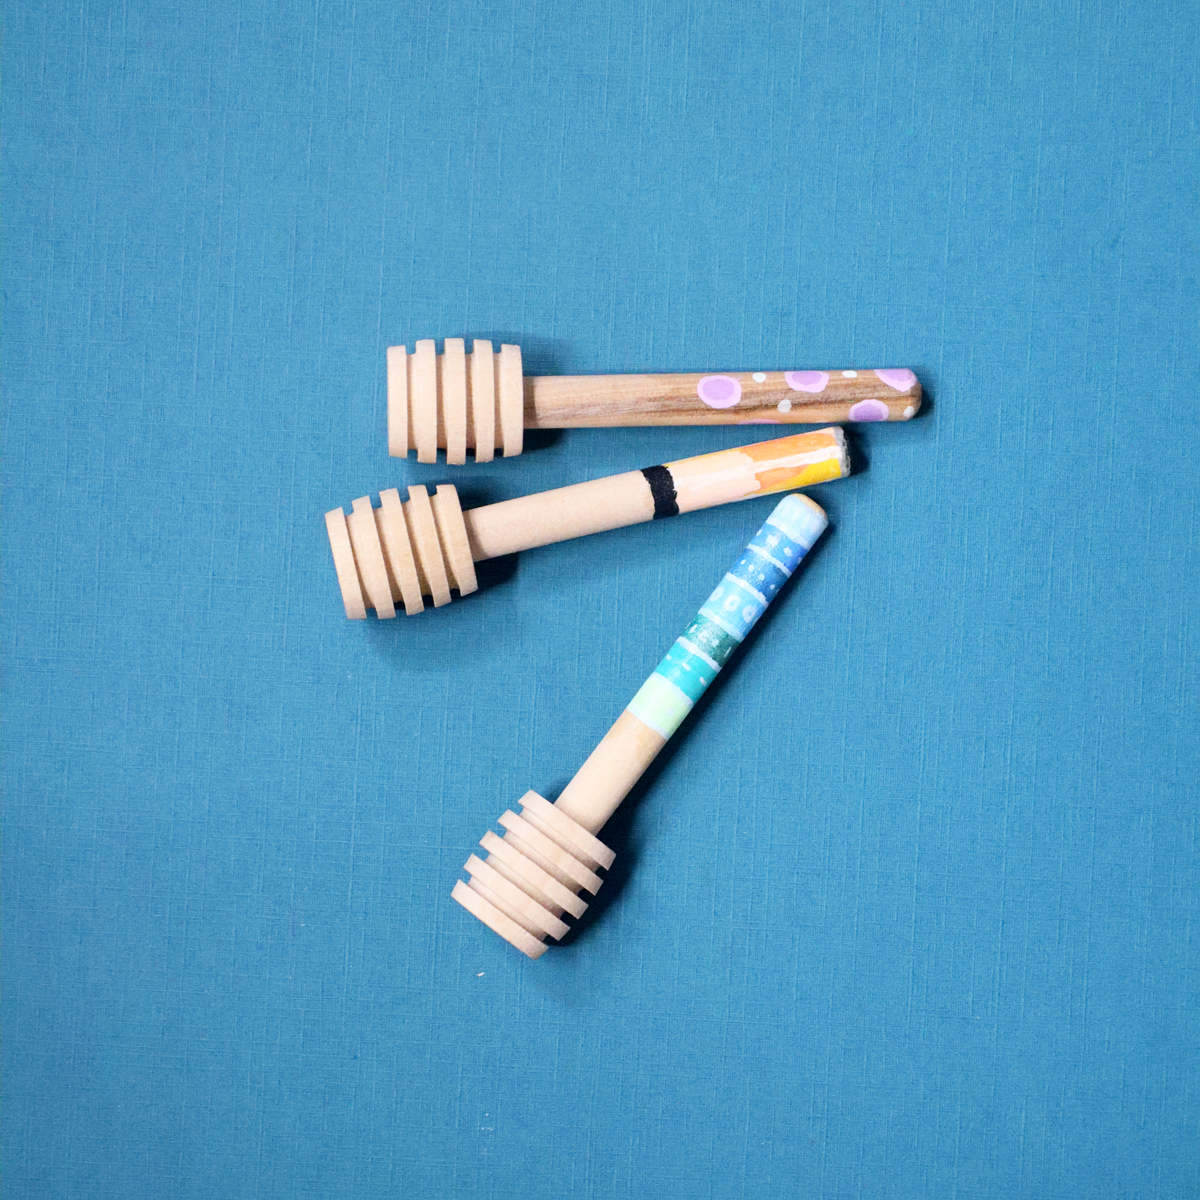
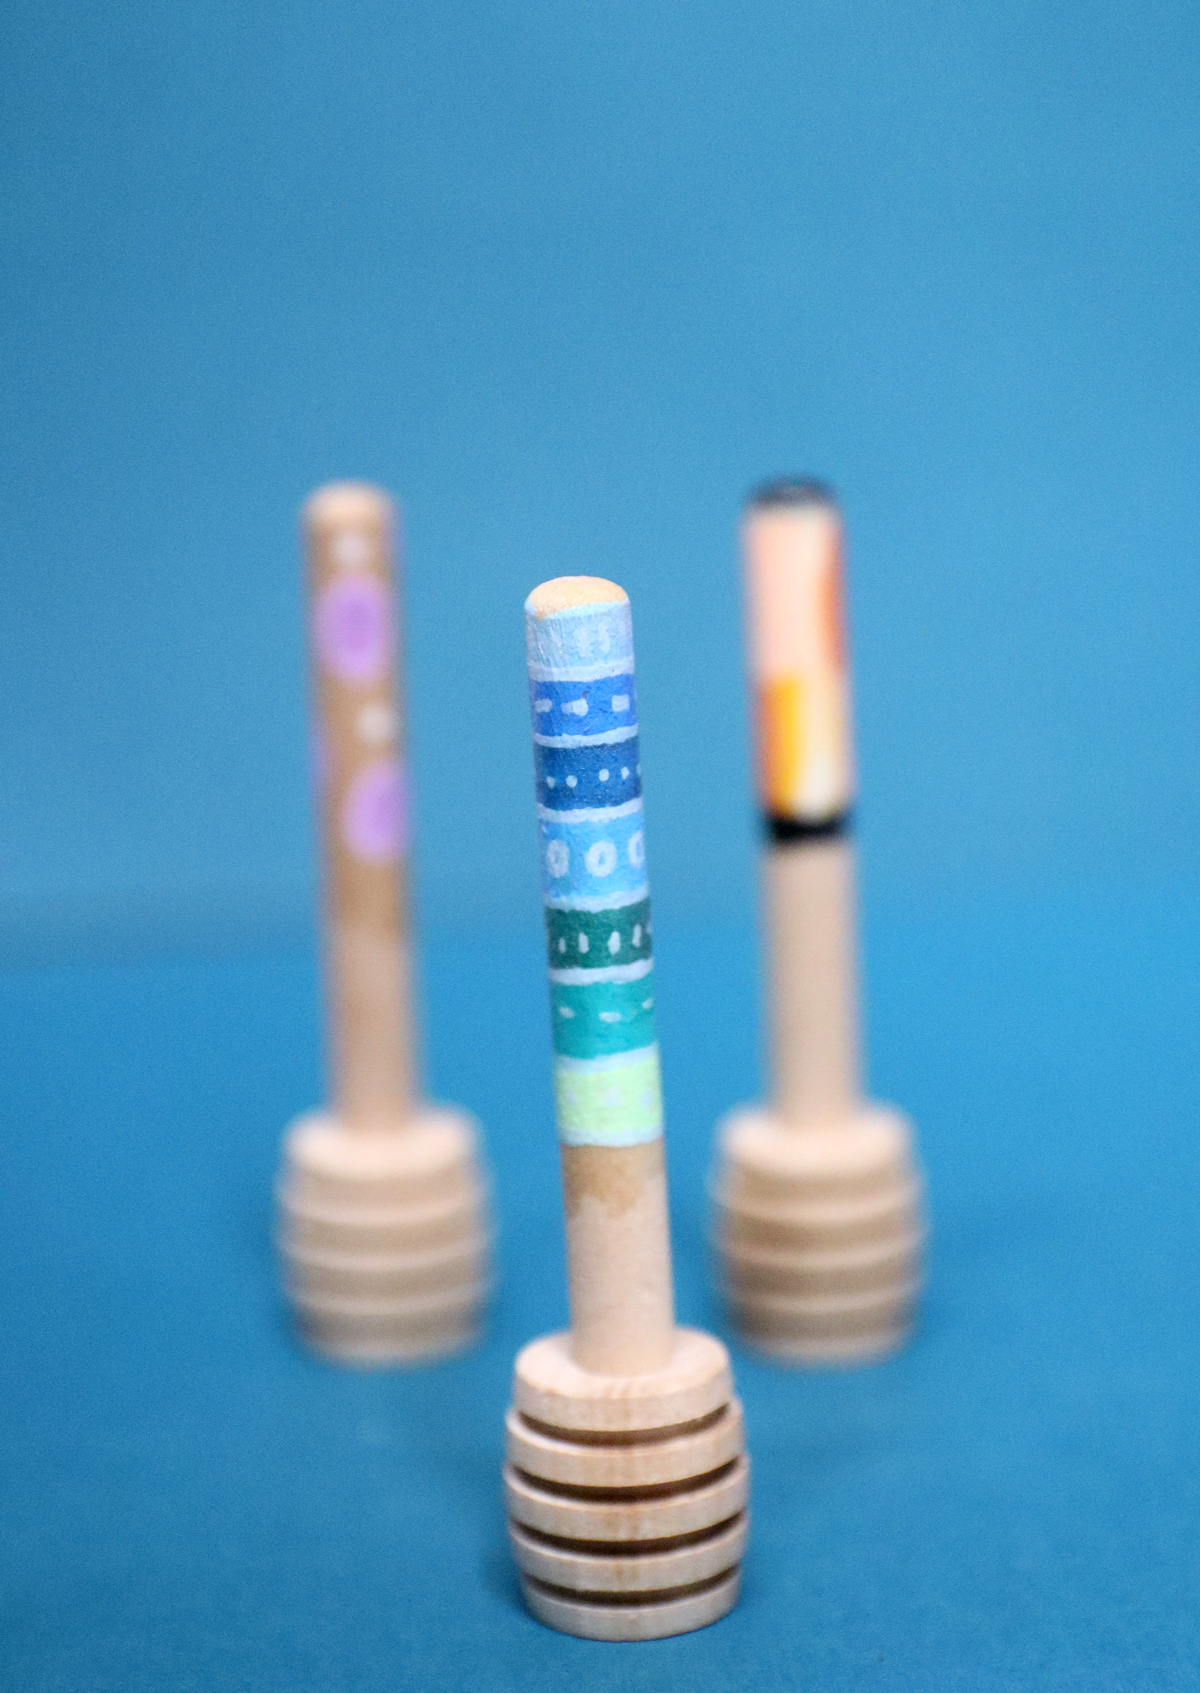
The honey stirrers
I purchased these honey stirrers to make this DIY etched glass honey dish into, well, a honey dish.
They are small and were purchased to fit inside the jar with the lid shut (bye, ants!) They offer quite a small working area. If you want to offer more opportunities for decorating, you can purchase larger ones as well.
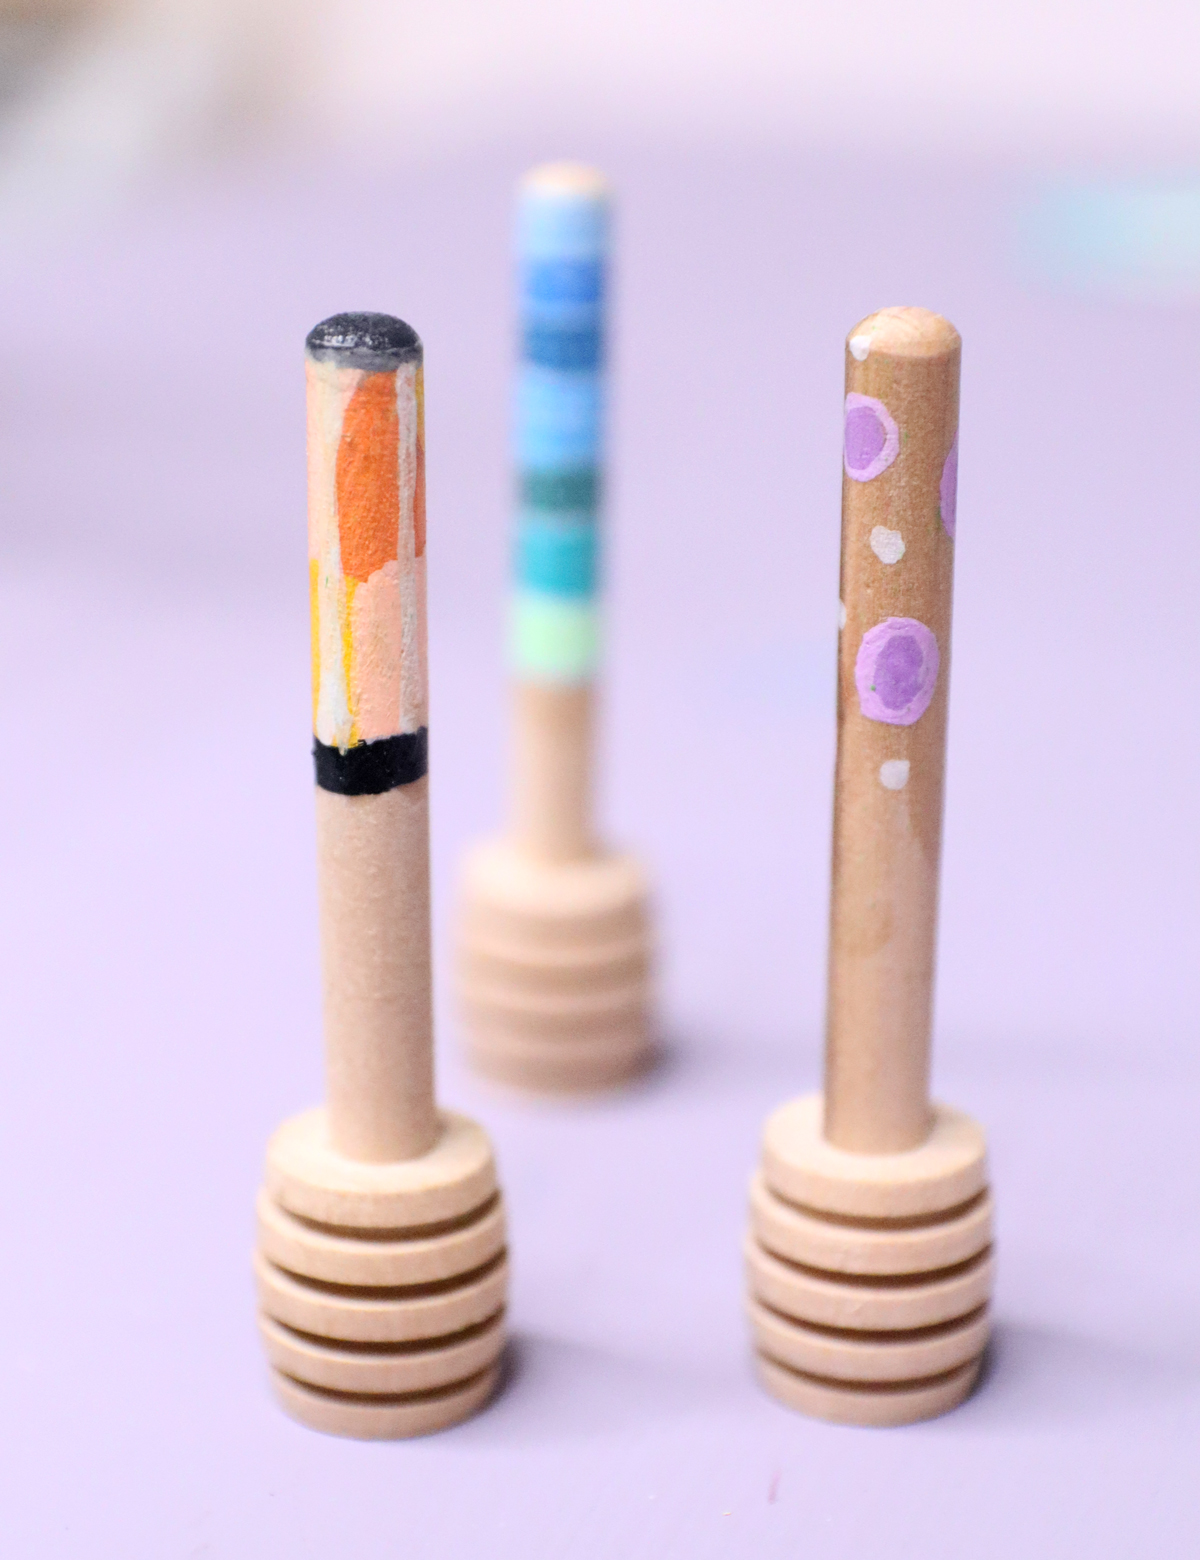
Wood is a pretty, affordable, absorbent material that holds markers well, and so I recommend sticking to that.
Which markers should you use?
I used Ohuhu’s double-tipped acrylic paint markers for this. That allows me to add both finer and broader detail.
It’s also an affordable option when putting this out for a group.
I did also test the craft using Sharpies, and yes, it’ll work! You don’t get the same opaque color, but it works great and is another affordable option, especially when crafting with younger kids.
You can even use washable markers such as Crayola Supertips on this, however, it’s much more likely to leech when finishing or if it gets wet. An initial test did not produce any smudges.
I don’t recommend paint sticks for a project like this, as it doesn’t absorb into the wood like other materials do. And while acrylic paint is a great option, it can get messy, and you don’t want it to get on the “edible” parts.
Sealing it
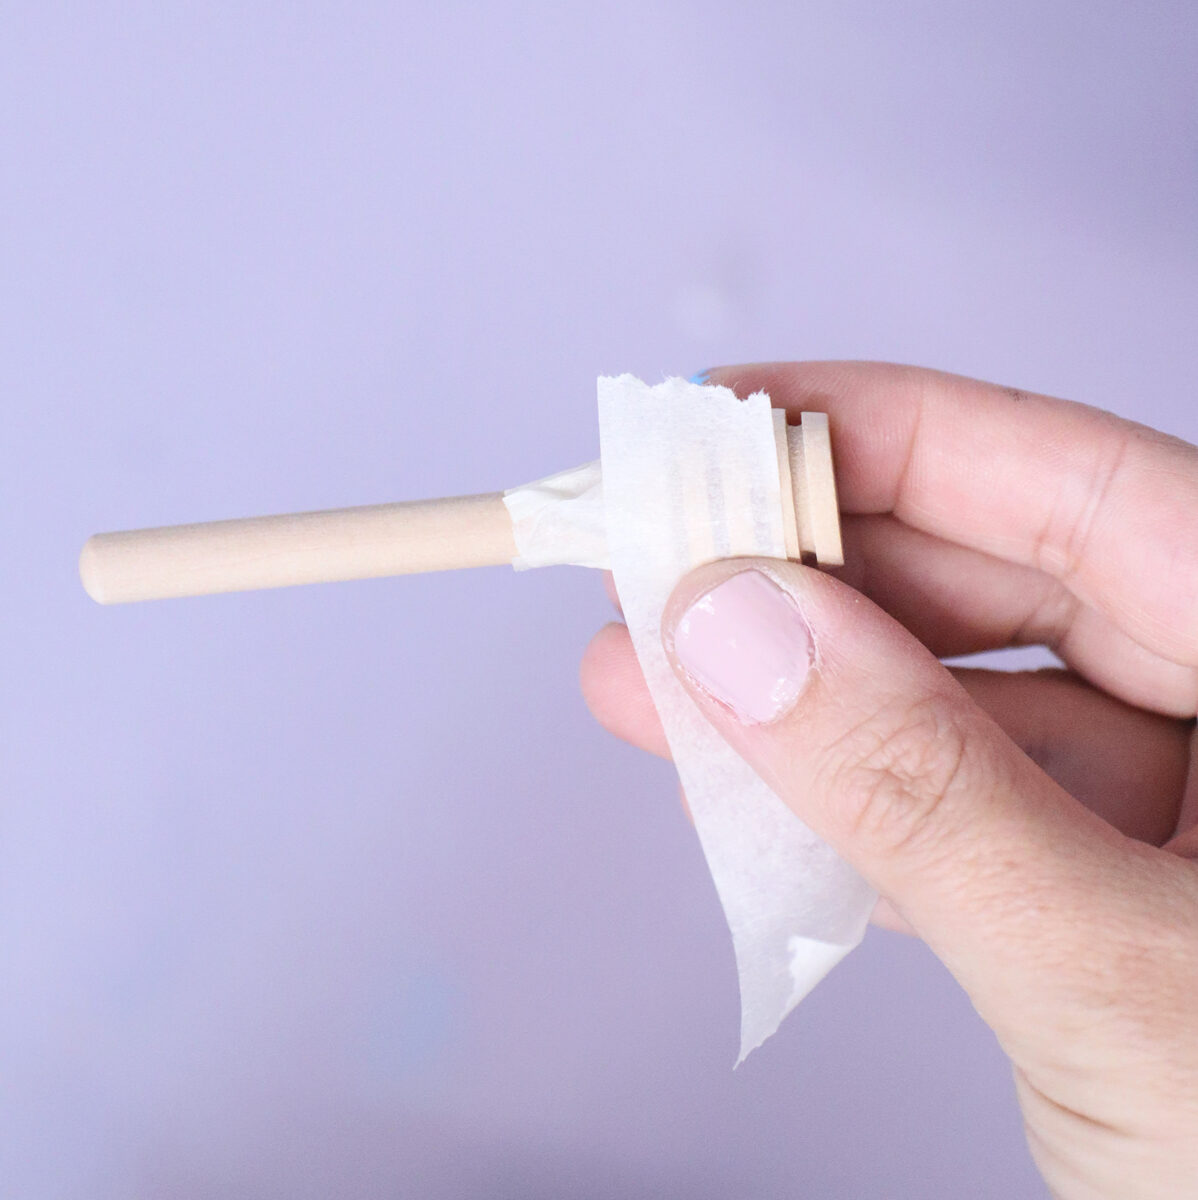
A project is always more secure once it’s been sealed, but it’s really not a must. In the process, I recommend covering up the parts that get close to the actual honey with tape to protect them. When crafting food-adjacent items, you always want to make sure that parts that touch the food are food-safe.
There are loads of wood sealers (look for butcher block sealers) that are food safe. I’m not sure how well they’d perform over paint. However, you can first seal your paint and then go over the whole thing with an additional sealer.
I used Mod Podge to seal mine just over the paint. You can use clear resin for a more professional finish that is food safe (if you use a food-safe resin, such as Alumilite ClearCast). Then, you can go over the whole thing – just don’t put too much over the server part so that you close off those ridges!
Color-your-own Honey Wand craft tips by crafter-type
Creating it in a group
This honey wand craft is so fabulous for group crafting, because you can just spread out supplies and let people craft with little instruction.
Set out a good selection of markers and honey stirrers and a few sample patterns, and watch how creative people get! You may want to cover up the stirrer part with tape in advance so that people don’t color over those – unless you plan to seal the whole thing in a food-safe finish for them.
The tricky part will be sealing it for group crafts. You can skip that part, share tips for how to do it with your crowd (a small handout works great), or have them leave their craft for finishing on your part.
Making it with young kids
When crafting with young kids, it’s harder to work with very specific instructions. So the whole food safe/sealing bit will go over their heads.
I recommend just letting them have fun with it, covering up the bottom portion in advance. You’ll also probably want to offer full-sized honey stirrers instead of the mini ones that I used to make it easier for their more primitive fine motor skills and give them more surface area to color away from the serving point.
Big Kid & Adult crafting tips
For older kids and adults, you can really get creative (and seal it properly).
Try this:
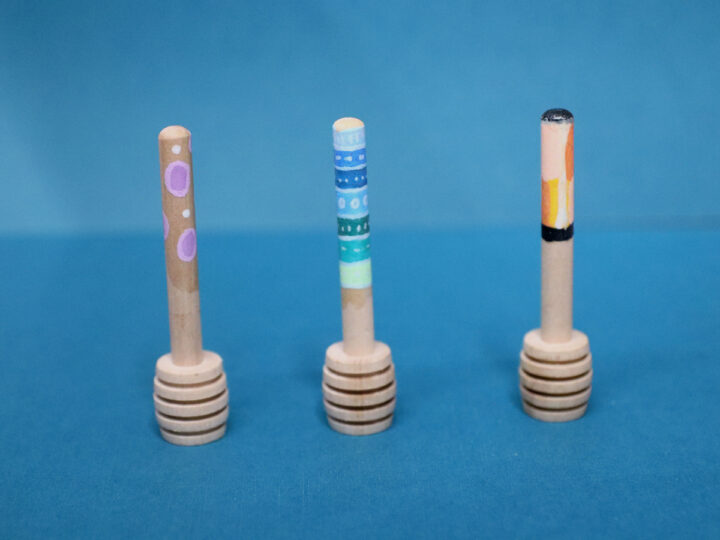
- Write “Shanah Tovah” along the wand handle.
- Go beyond patterns into images – pomegranates, apples, bees, or even a “honeycomb” print.
- Personalize it with the family name.
- Personalize them as name cards for each spot, like I did for this Rosh Hashanah tablescape
That’s just a few ideas – there are so many others where these came from!
How to make this color your own honey wand craft
Supplies needed
- Wood honey wands – I used these, but you can go for bigger ones
- Paint markers
- Masking tape
- Mod Podge or a food-safe sealer
- Paintbrush
YouTube Video
Watch the full-length video on YouTube if you prefer to learn that way! Or scroll down for written instructions with photos.
Process
1. Especially if crafting this with young kids, tape off the parts that should not be painted.
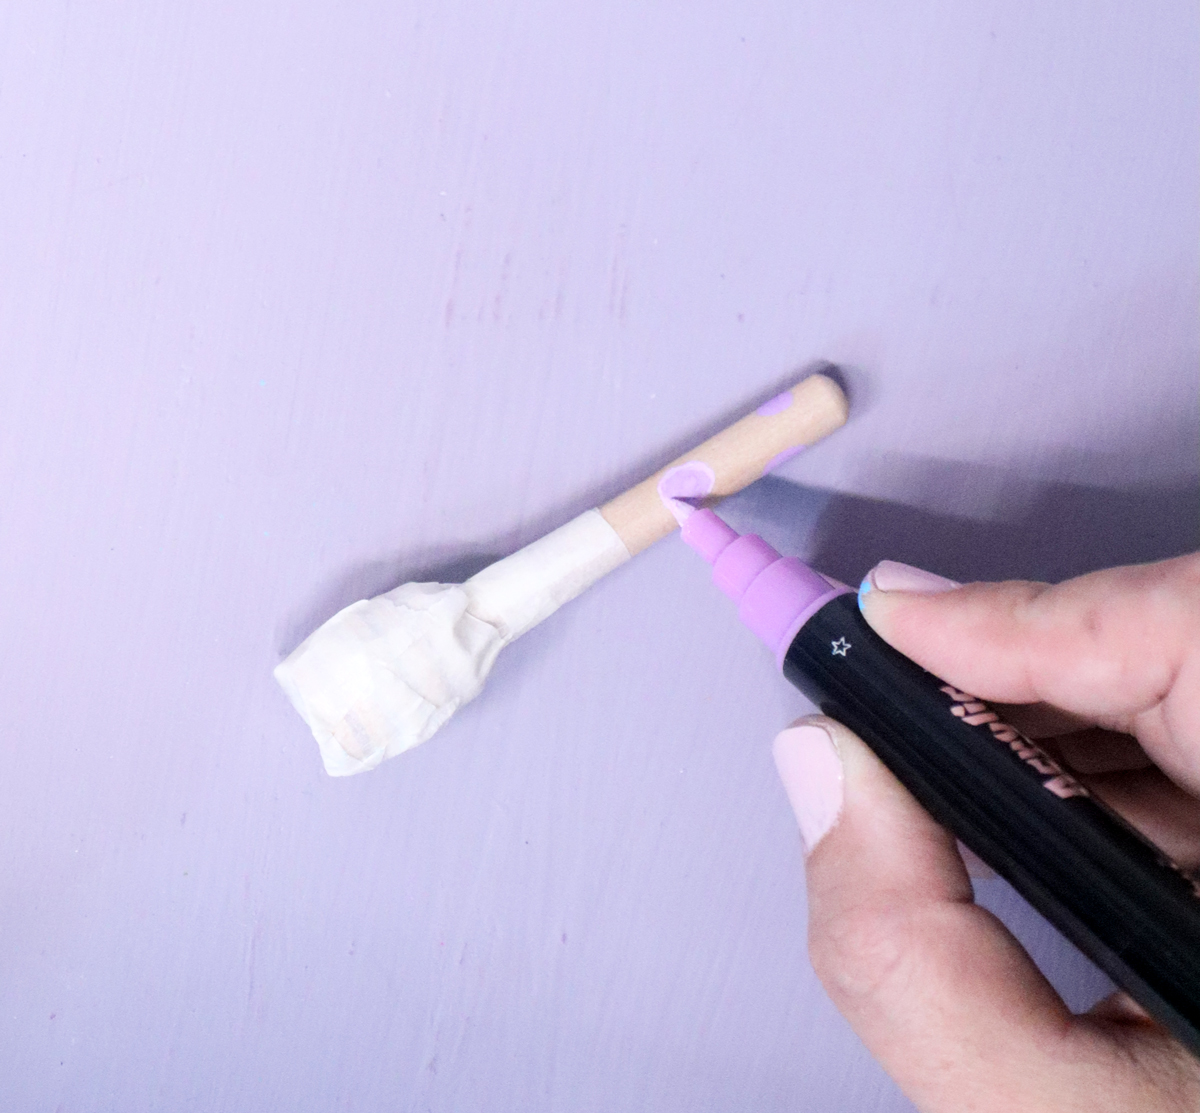
2. Draw your design. I recommend mixing larger filled areas with finer details.
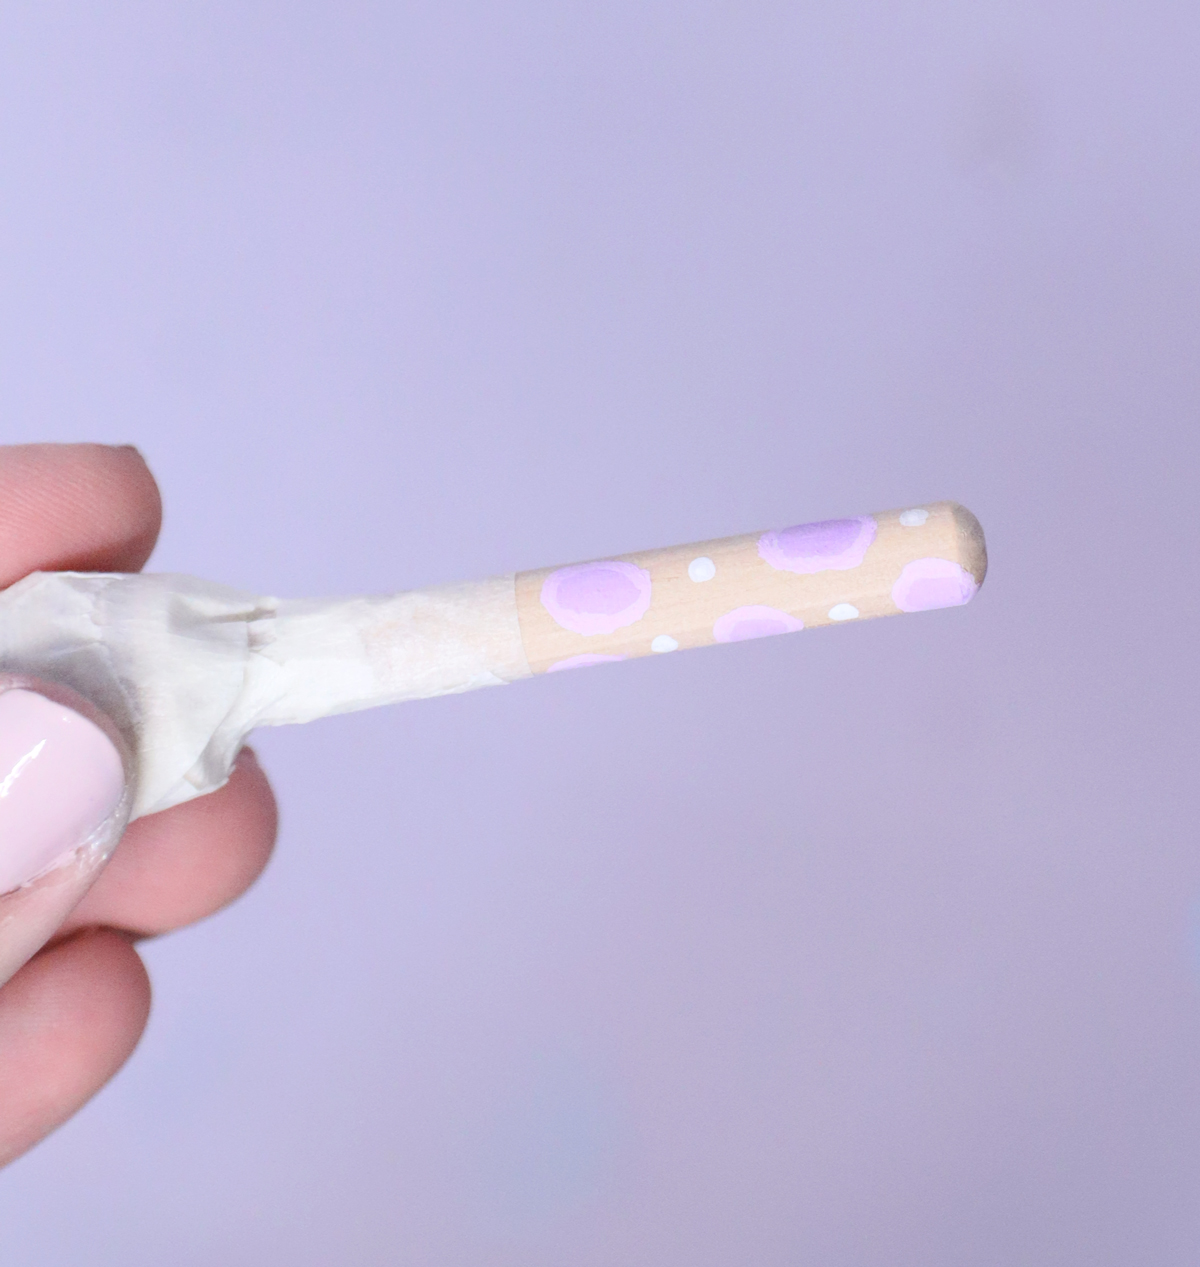
3. Important: allow your paint to dry completely before proceeding, or it’ll smudge. Gently paint over it with Mod Podge (or a food-safe sealer).
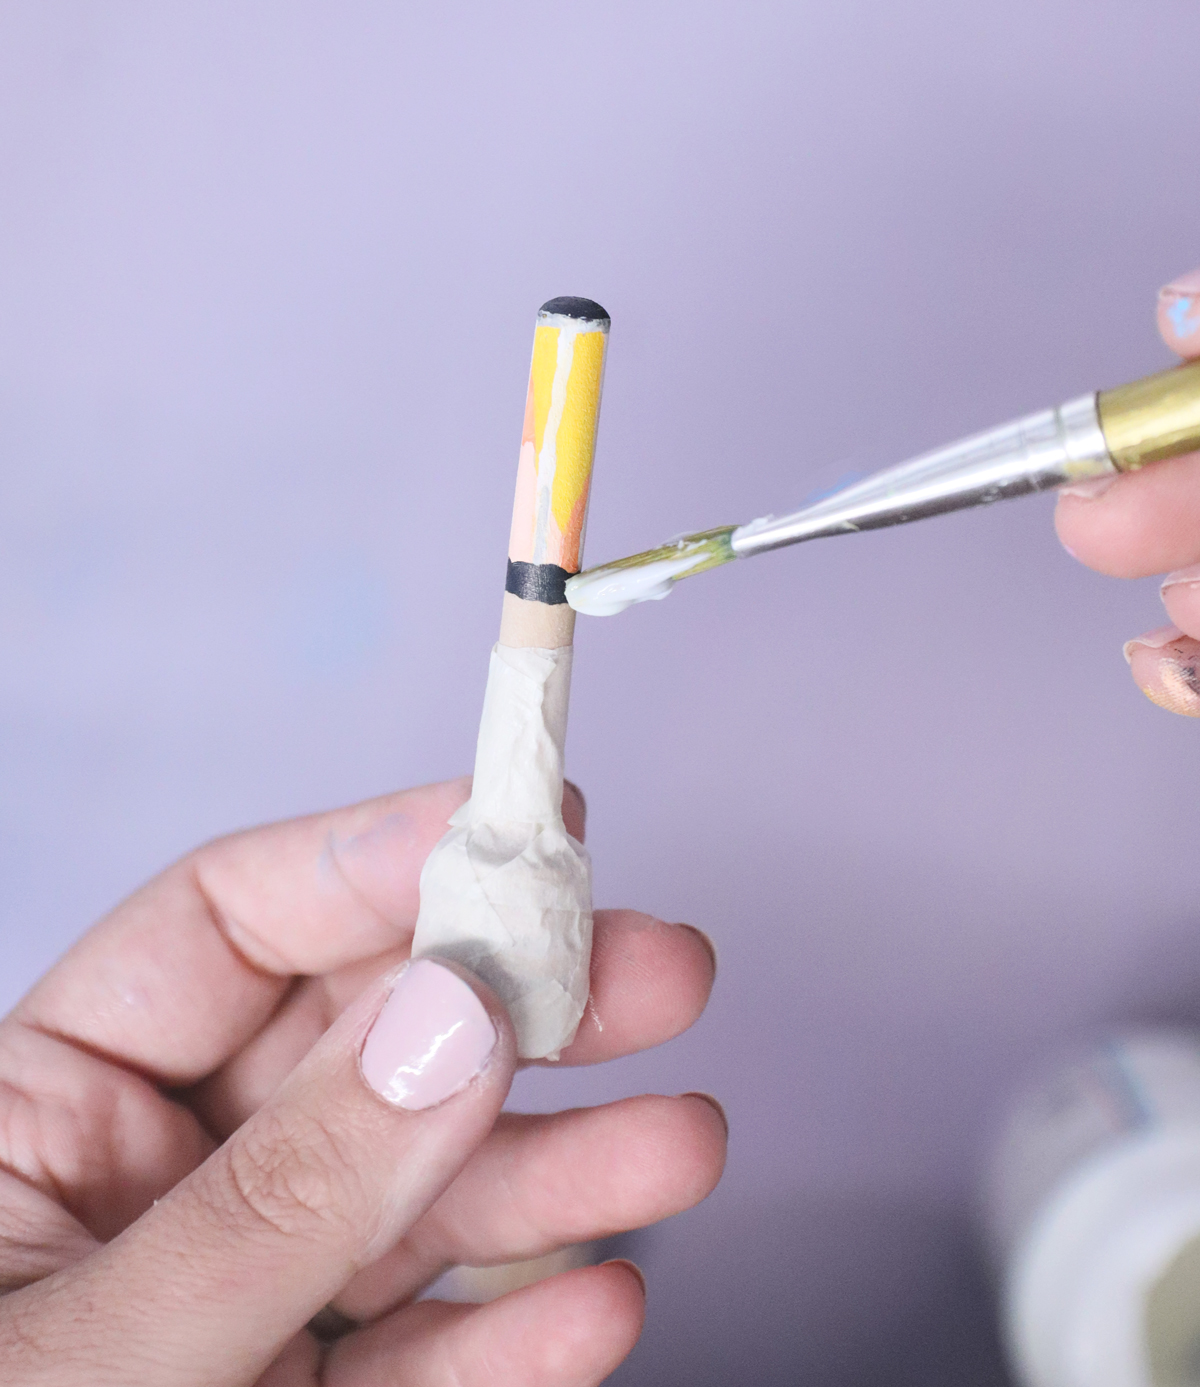
Peel off the tape when you’re done – and your color-your-own honey wand craft is complete!
DIY Honey Wand Craft
Color your own honey wand to make a super fun craft for Rosh Hashanah - the Jewish New Year!
Materials
- Wood honey wands
- Paint markers
- Masking tape
- Mod Podge or a food-safe sealer
- Paintbrush
Instructions
1. Especially if crafting this with young kids, tape off the parts that should not be painted.
2. Draw your design. I recommend mixing larger filled areas with finer details.
3. Important: allow your paint to dry completely before proceeding, or it'll smudge. Gently paint over it with Mod Podge (or a food-safe sealer).
Peel off the tape when you're done - and your color-your-own honey wand craft is complete!
Notes
I used Ohuhu's double-tipped acrylic paint markers for this. That allows me to add both finer and broader detail.
I used Mod Podge to seal mine just over the paint. You can use clear resin for a more professional finish that is food safe (if you use a food-safe resin, such as Alumilite). Then, you can go over the whole thing - just don't put too much over the server part so that you close off those ridges!
When creating in a group, set out a good selection of markers and honey stirrers and a few sample patterns, and watch how creative people get! You may want to cover up the stirrer part with tape in advance so that people don't color over those - unless you plan to seal the whole thing in a food-safe finish for them.
For older kids and adults, you can really get creative (and seal it properly).
Try this:
- Write "Shanah Tovah" along the wand handle.
- Go beyond patterns into images - pomegranates, apples, bees, or even a "honeycomb" print.
- Personalize it with the family name.
- Personalize them as name cards for each spot, like I did for this Rosh Hashanah tablescape