Mosaic menorah tray
Craft a beautiful menorah tray that is heat resistant and safe to use! When you’re done, you can check out this cool DIY air dry clay Menorah too! This post contains affiliate links.

Last year, one of the craft requests I received was to make a Menorah tray… so of course this year I made three!
The way it works is that once I have an idea, more ideas branch out from it. The cool thing is that we ended up with three crafting levels. One is a pro craft, this one is a “medium/adaptable” craft, and one is a more kid-friendly, basic craft.


So what do I mean by medium or adaptable?
This DIY mosaic Menorah tray can be made more or less polished and professional, depending on the setting that you’re crafting it in. It can cost more or less, depending on the supplies you choose. I’ll explain all that below.

Tips for crafting a mosaic Menorah tray
Choosing your base
The coolest thing about this DIY mosaic menorah tray is that it is heat resistant. I do have a bit of a pet peeve when it comes to Chanukah menorah and menorah-adjacent crafts. That is, many of them are flammable. That’s bad.
I am committed to at least trying to share more flame-resistant ideas.


So I was trying to figure out what to use as a base for the mosaic menorah tray. I scouted Dollar tree and other home departments, thinking that maybe I’ll find some sort of flat glass tray. I didn’t.
Then as I was about to give up I found this sheet pan! If you don’t have a Dollar Tree nearby, a sheet pan can be a bit pricey for this project, but I have some savings tips below. If you want a solid, polished project that is a great choice.


I was actually conflicted as to whether I need to make the base of the mosaic flame proof. Because I wanted a rim, I wasn’t sure if it made sense to use something that wouldn’t be. However, since the mosaic creates a completely new surface, it’s probably fine if your base isn’t. Think about it this way: your mosaic menorah tray will likely be on a wood table, with a plastic or fabric tablecloth – the tray is to ensure that if anything falls, it’s on a flame-proof surface. But the base (or even handles) of your tray are kind of like the equivalent of the table that is underneath anyway… as long as you grout it.
Whatever you do, make sure to keep all curtains and loose flammable items far from your fires, and to use something heat resistant directly under your Menorah.

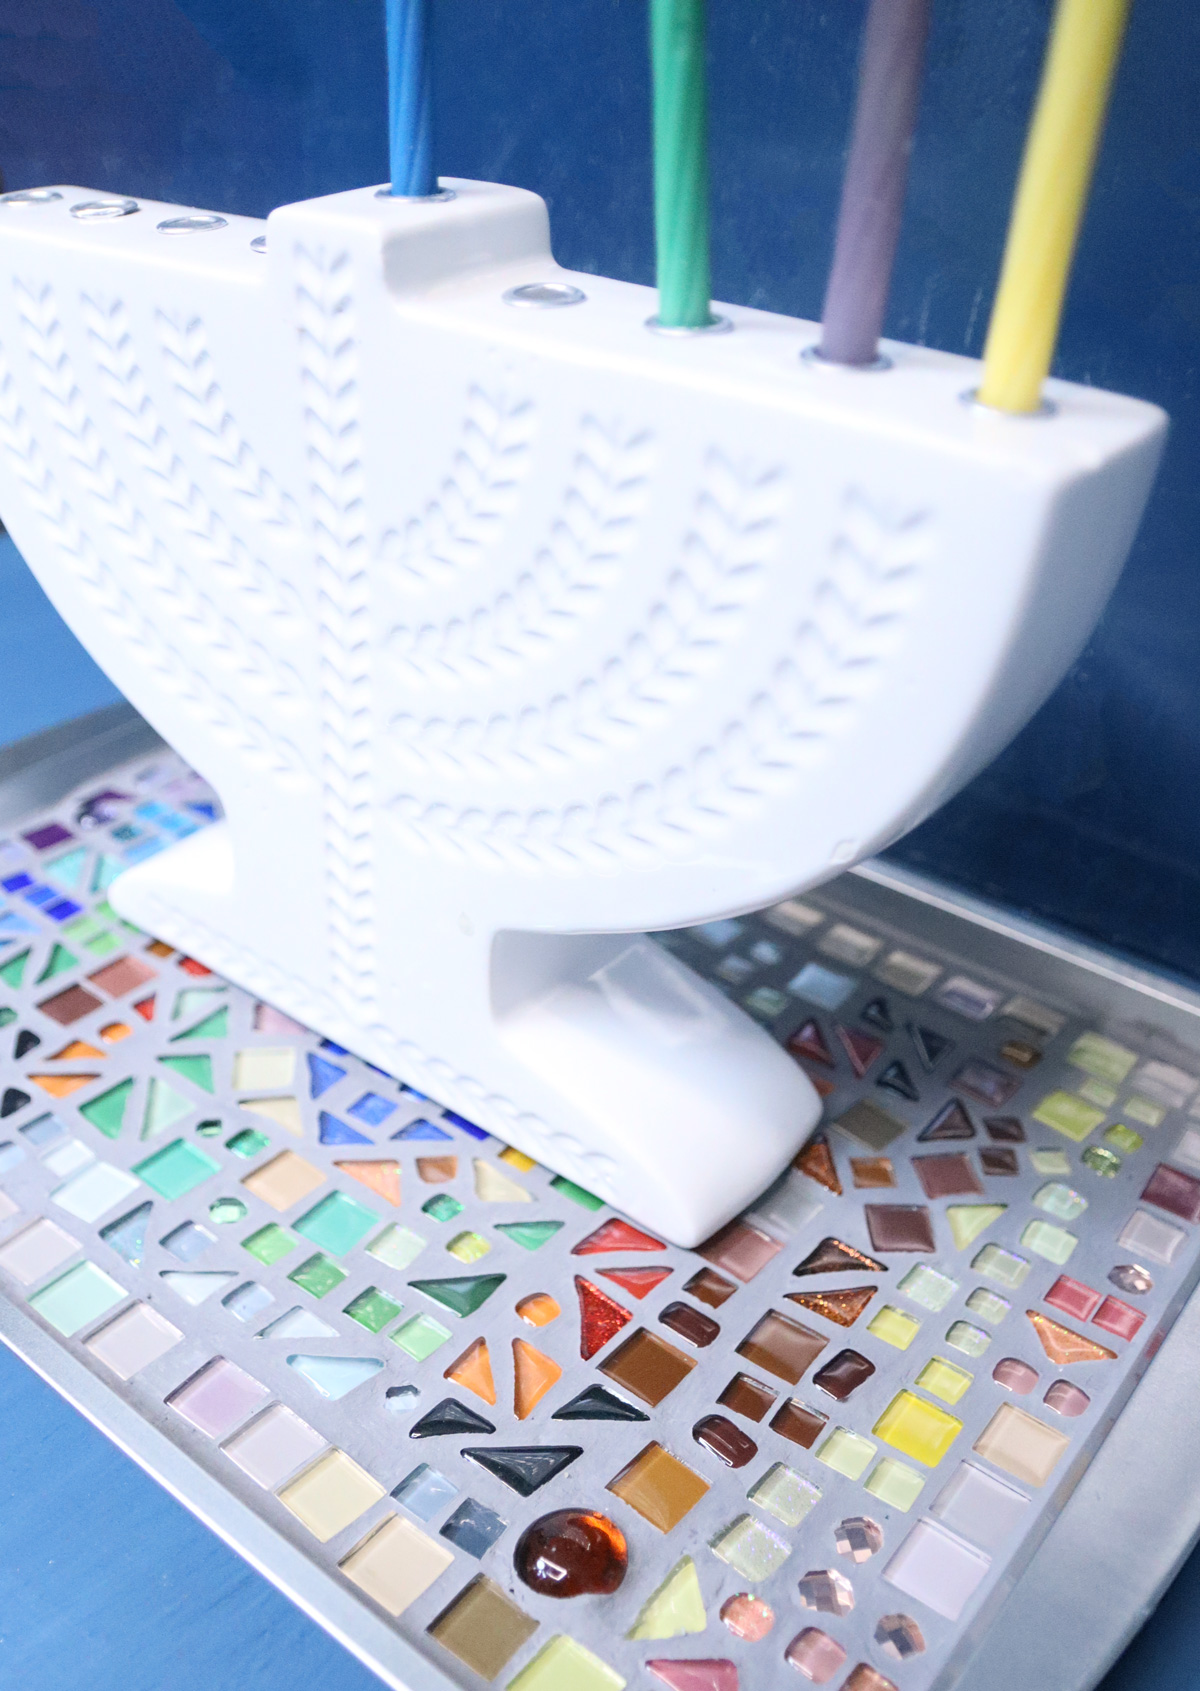
On that note, here are some other base options that are not all flame resistant. Pay attention to size:
- A piece of cardboard
- A plastic plate or tray
- A flat piece of wood
- A glass or ceramic tray
- A metal surgical tray
- A disposable aluminum pan – CAREFULLY cut off the rim


How to cut costs or make it more kid-friendly
To be honest, this mosaic menorah tray was a bit pricier to craft than I had hoped. If you’re making a nice gift for yourself or for a friend, it’s still reasonable and doable.
However, if you’re crafting this in a workshop, with younger kids, or just need to save a little or make it easier, here are a few ways to simplify the project:
- Use a smaller tray to save on mosaic tiles. Mine is quite large and can even fit two smaller menorahs. You can really go much smaller, especially if your base is fully fire-resistant. The one I linked has a higher edge.
- Skip the grout – while grouting the tiles makes it more polished and “real” looking, kids can glue on the mosaics and call it a day. You can also commission someone to grout and seal finished projects if you’d like. But you can really get away with skipping the grout, especially if tiles are placed touching each other (but even if not – it’ll hold the Menorah steady as long as the tiles are close in thickness). Only do this on a flame-proof surface!


- Keep it abstract to make it more kid-friendly. I tried making a dreidel in the center and it’s definitely challenging to stick to a shape. Younger kids can simply glue on mosaic tiles in whichever mess they’d like – it’ll still look cute.
- Use a disposable pan base (the bottom portion of it) or one of the alternatives I mentioned above.
- Use repurposed ceramics (tumble them to remove sharp edges) or remnants of mosaic tile collected from people’s renovations.
How to make a Mosaic Menorah Tray
Supplies Needed
- Mosaic tiles
- Glue – I used Weld Bond, however for younger kids I’d recommend a more basic glue (like Tacky). It might not last as long, however, it’ll be safer for them to use.
- Paintbrush (optional)
- A base such as a metal sheet pan

If grouting:
- Grout (I used gray grout because I had it leftover from home projects – you can stick with white if you prefer). Tip: you can get pre-mixed grout too!
- A container to mix the grout (if not using pre-mixed)
- A spoon to apply the grout with
- Something to scrape it (an old ID/credit-type card works great)
- Paper towels
Step by Step Instructions
1. Plot out your design, or the starting point of it (optional)

2. Start gluing on your tiles. I recommend using a paintbrush to paint a few inches at a time and add tiles on top.

3. Keep on going unitl your tray is mostly covered. Note: if your mosaic tile kit has some tiles that are significantly taller (like the round ones in my kit) skip them. It messes up the grouting and throws the menorah off balance a little.

Allow your glue to dry completely.
4. Read package instructions before grouting. Mix together some grout. I used about two cups of powder. Add a little water at a time till you get a peanut butter-like consistency.

5. Add your grout to every corner and crack using a spoon or something similar. Scrape as much as you can off, leveling the surface.

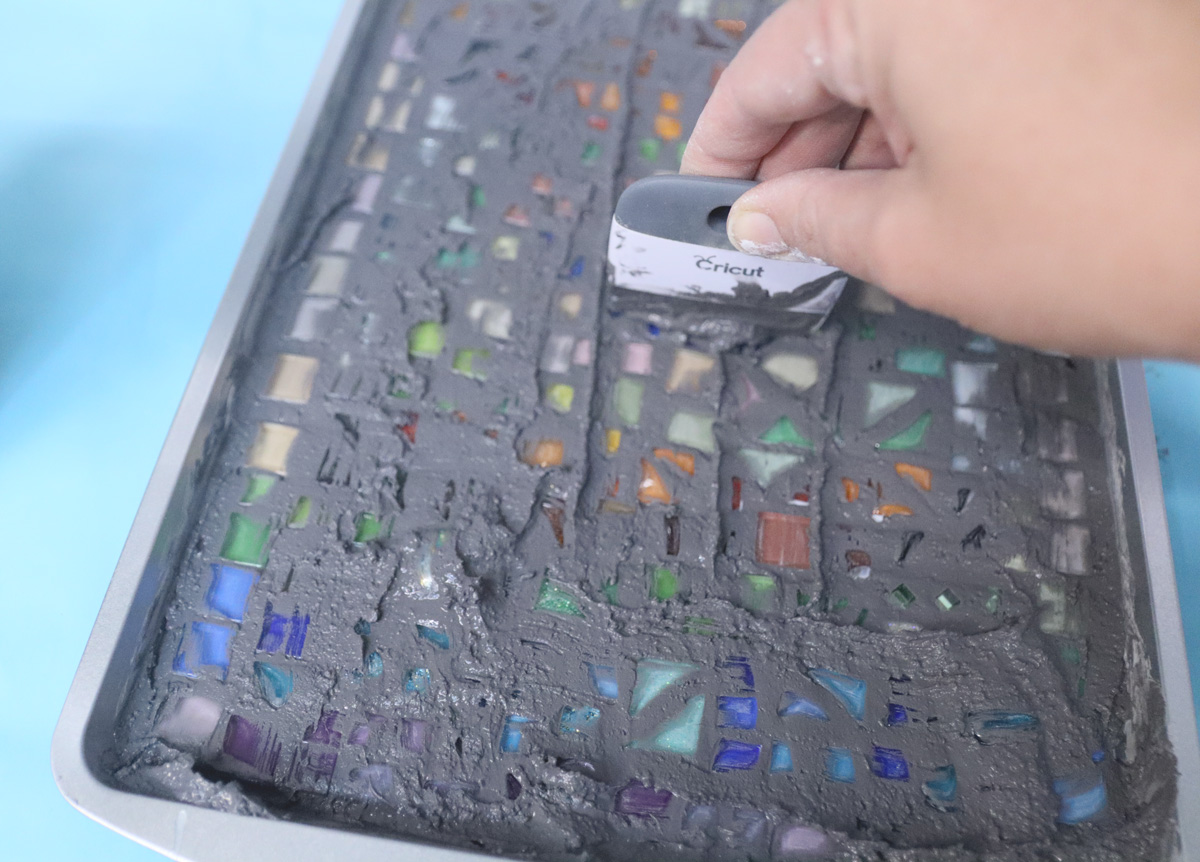
6. Wait the time your package says to wait and wipe off as much as you can.


7. Use a damp cloth to clean off extra grout when it has mostly dried.

8. Allow it to cure completely. Your DIY mosaic Menorah tray is ready to use and enjoy!

Your mosaic Menorah tray is complete! Which tutorial would you like to see next? Comment below!
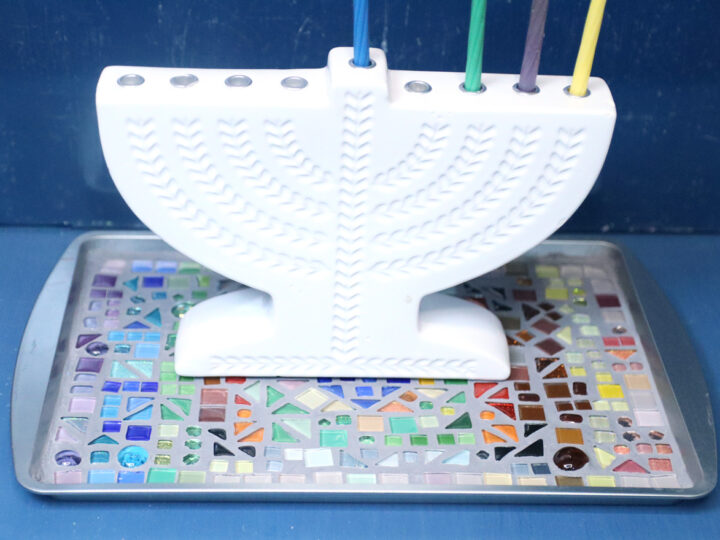
DIY Mosaic Tray for your Menorah
Craft a DIY tray from your Menorah using mosaic tiles and grout! The grout is optional and you can really simplify this for easier crafting if you want. It's safe to use with Menorahs an cleverly uses a sheet pan as a base.
Materials
- Mosaic tiles
- Glue - I used Weld Bond, however for younger kids I'd recommend a more basic glue (like Tacky). It might not last as long, however, it'll be safer for them to use.
- Paintbrush (optional)
- A base such as a metal sheet pan
If grouting
- Grout
- A container to mix the grout
- A spoon to apply the grout with
- Something to scrape it (an old ID/credit-type card works great)
- Paper towels
Instructions
1. Plot out your design, or the starting point of it (optional)
2. Start gluing on your tiles. I recommend using a paintbrush to paint a few inches at a time and add tiles on top.
3. Keep on going unitl your tray is mostly covered. Note: if your mosaic tile kit has some tiles that are significantly taller (like the round ones in my kit) skip them. It messes up the grouting and throws the menorah off balance a little.
Allow your glue to dry completely.
4. Read package instructions before grouting. Mix together some grout. I used about two cups of powder. Add a little water at a time till you get a peanut butter-like consistency.
5. Add your grout to every corner and crack using a spoon or something similar. Scrape as much as you can off, leveling the surface.
6. Wait the time your package says to wait and wipe off as much as you can.
7. Use a damp cloth to clean off extra grout when it has mostly dried.
8. Allow it to cure completely. Your DIY mosaic Menorah tray is ready to use and enjoy!
Notes
I used a dollar tree sheet pan as the base. Some other base options that are not all flame resistant. Pay attention to size:
- A piece of cardboard
- A plastic plate or tray
- A flat piece of wood
- A glass or ceramic tray
- A metal surgical tray
- A disposable aluminum pan - CAREFULLY cut off the rim
You can save on costs for this project by skipping the grout - it's totally pretty without, just not as polished! Use a smaller tray if you want - it'll use fewer tiles and be more cost-effective.

