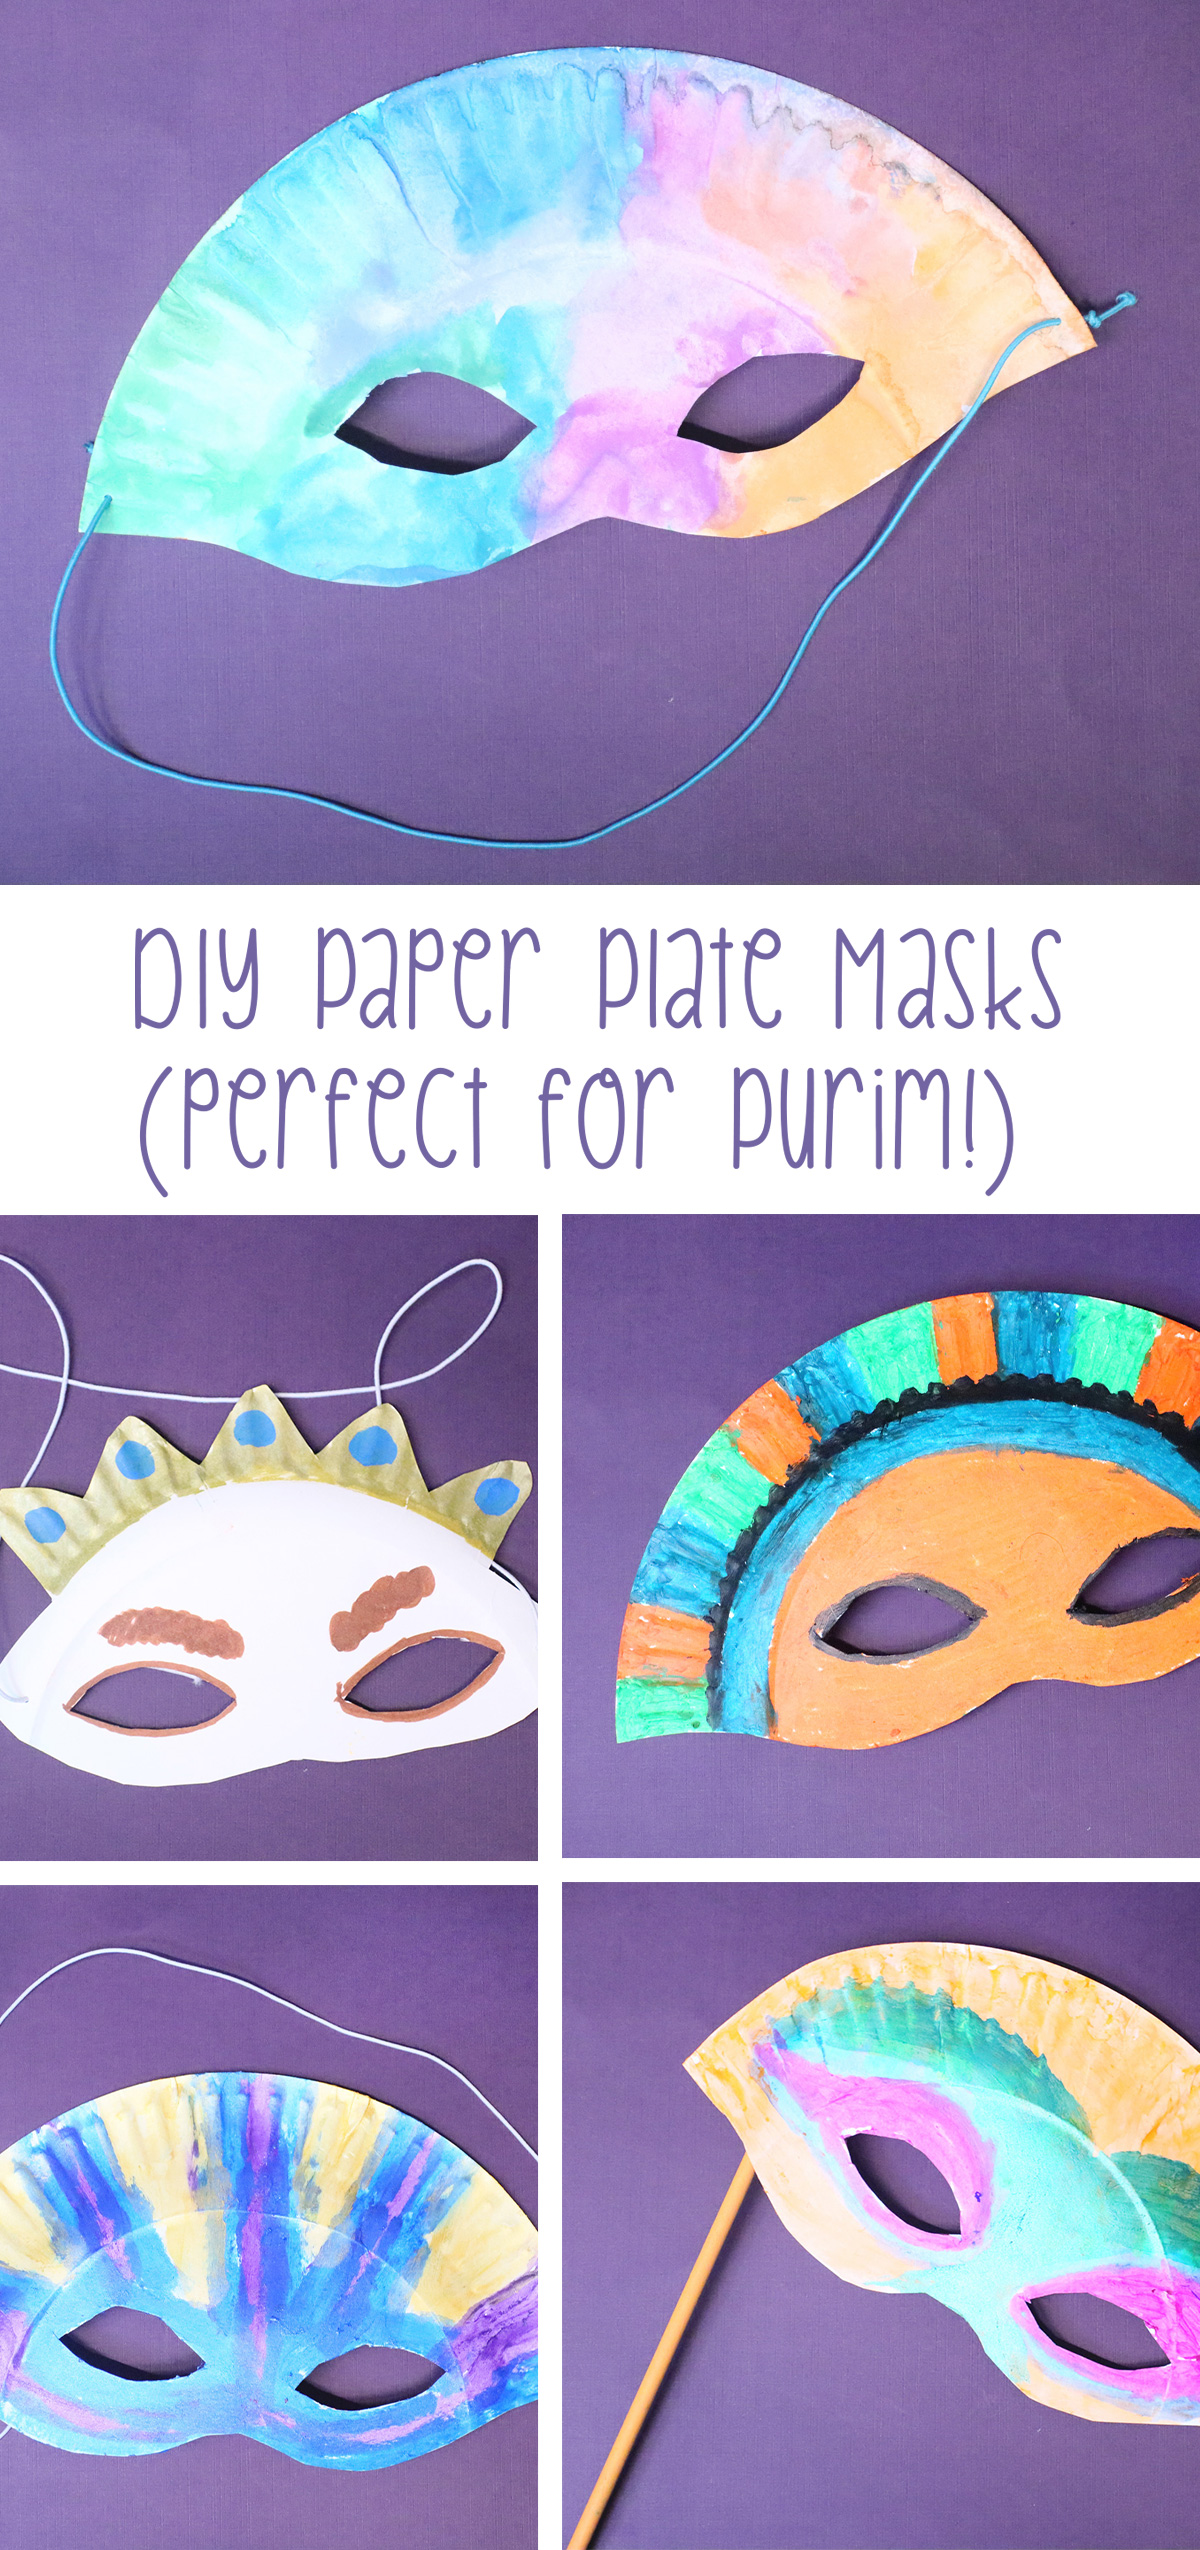
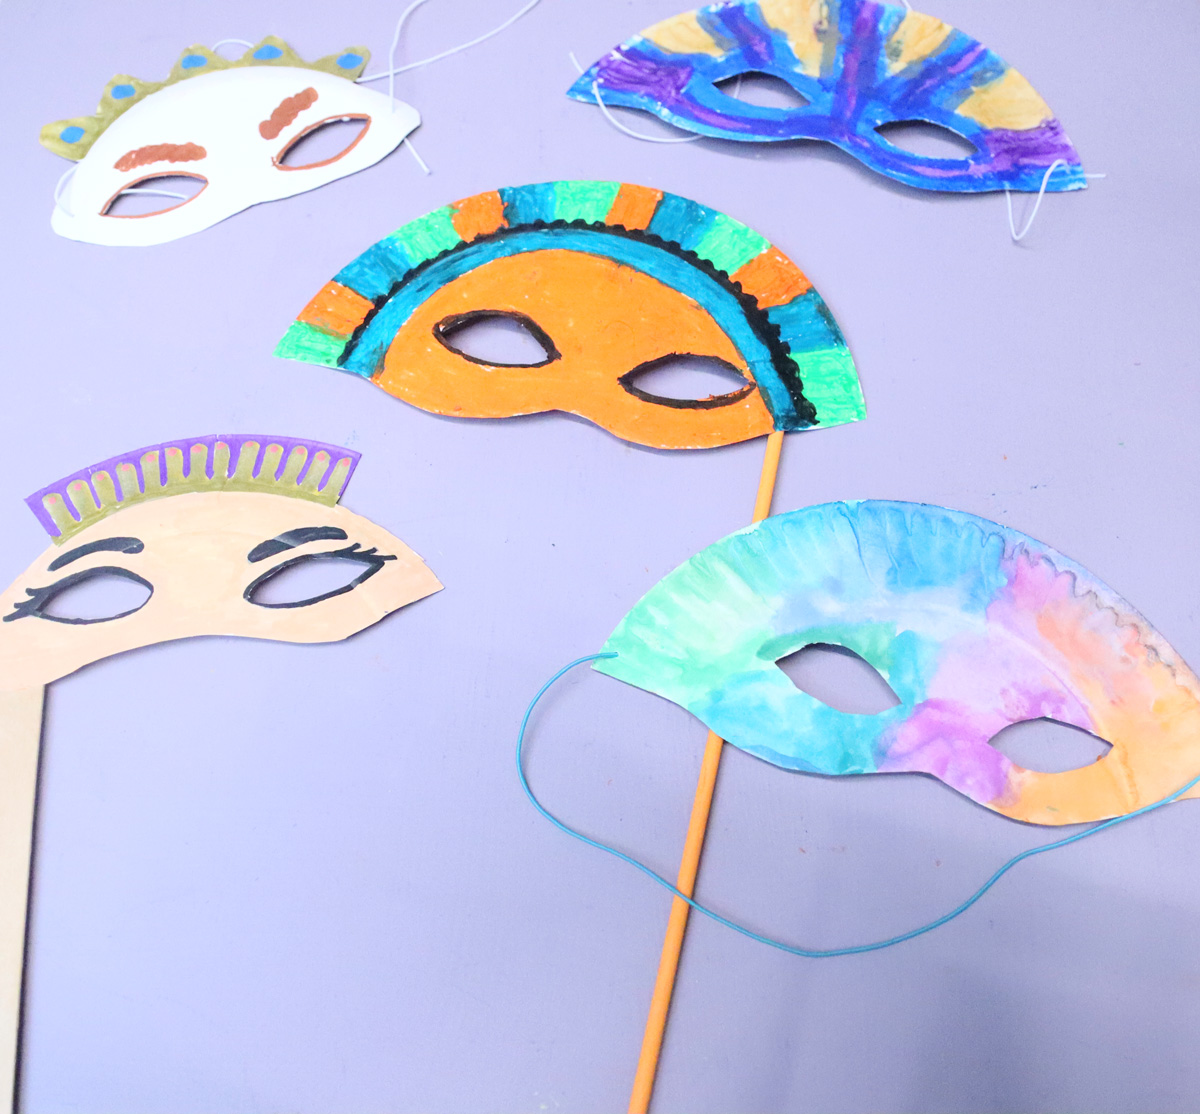
Paper Plate Masks for Purim
Let’s craft some paper plate masks for Purim – or anytime masks are in order! When you’re done, you can check out my big list of Purim crafts. This post contains affiliate links.
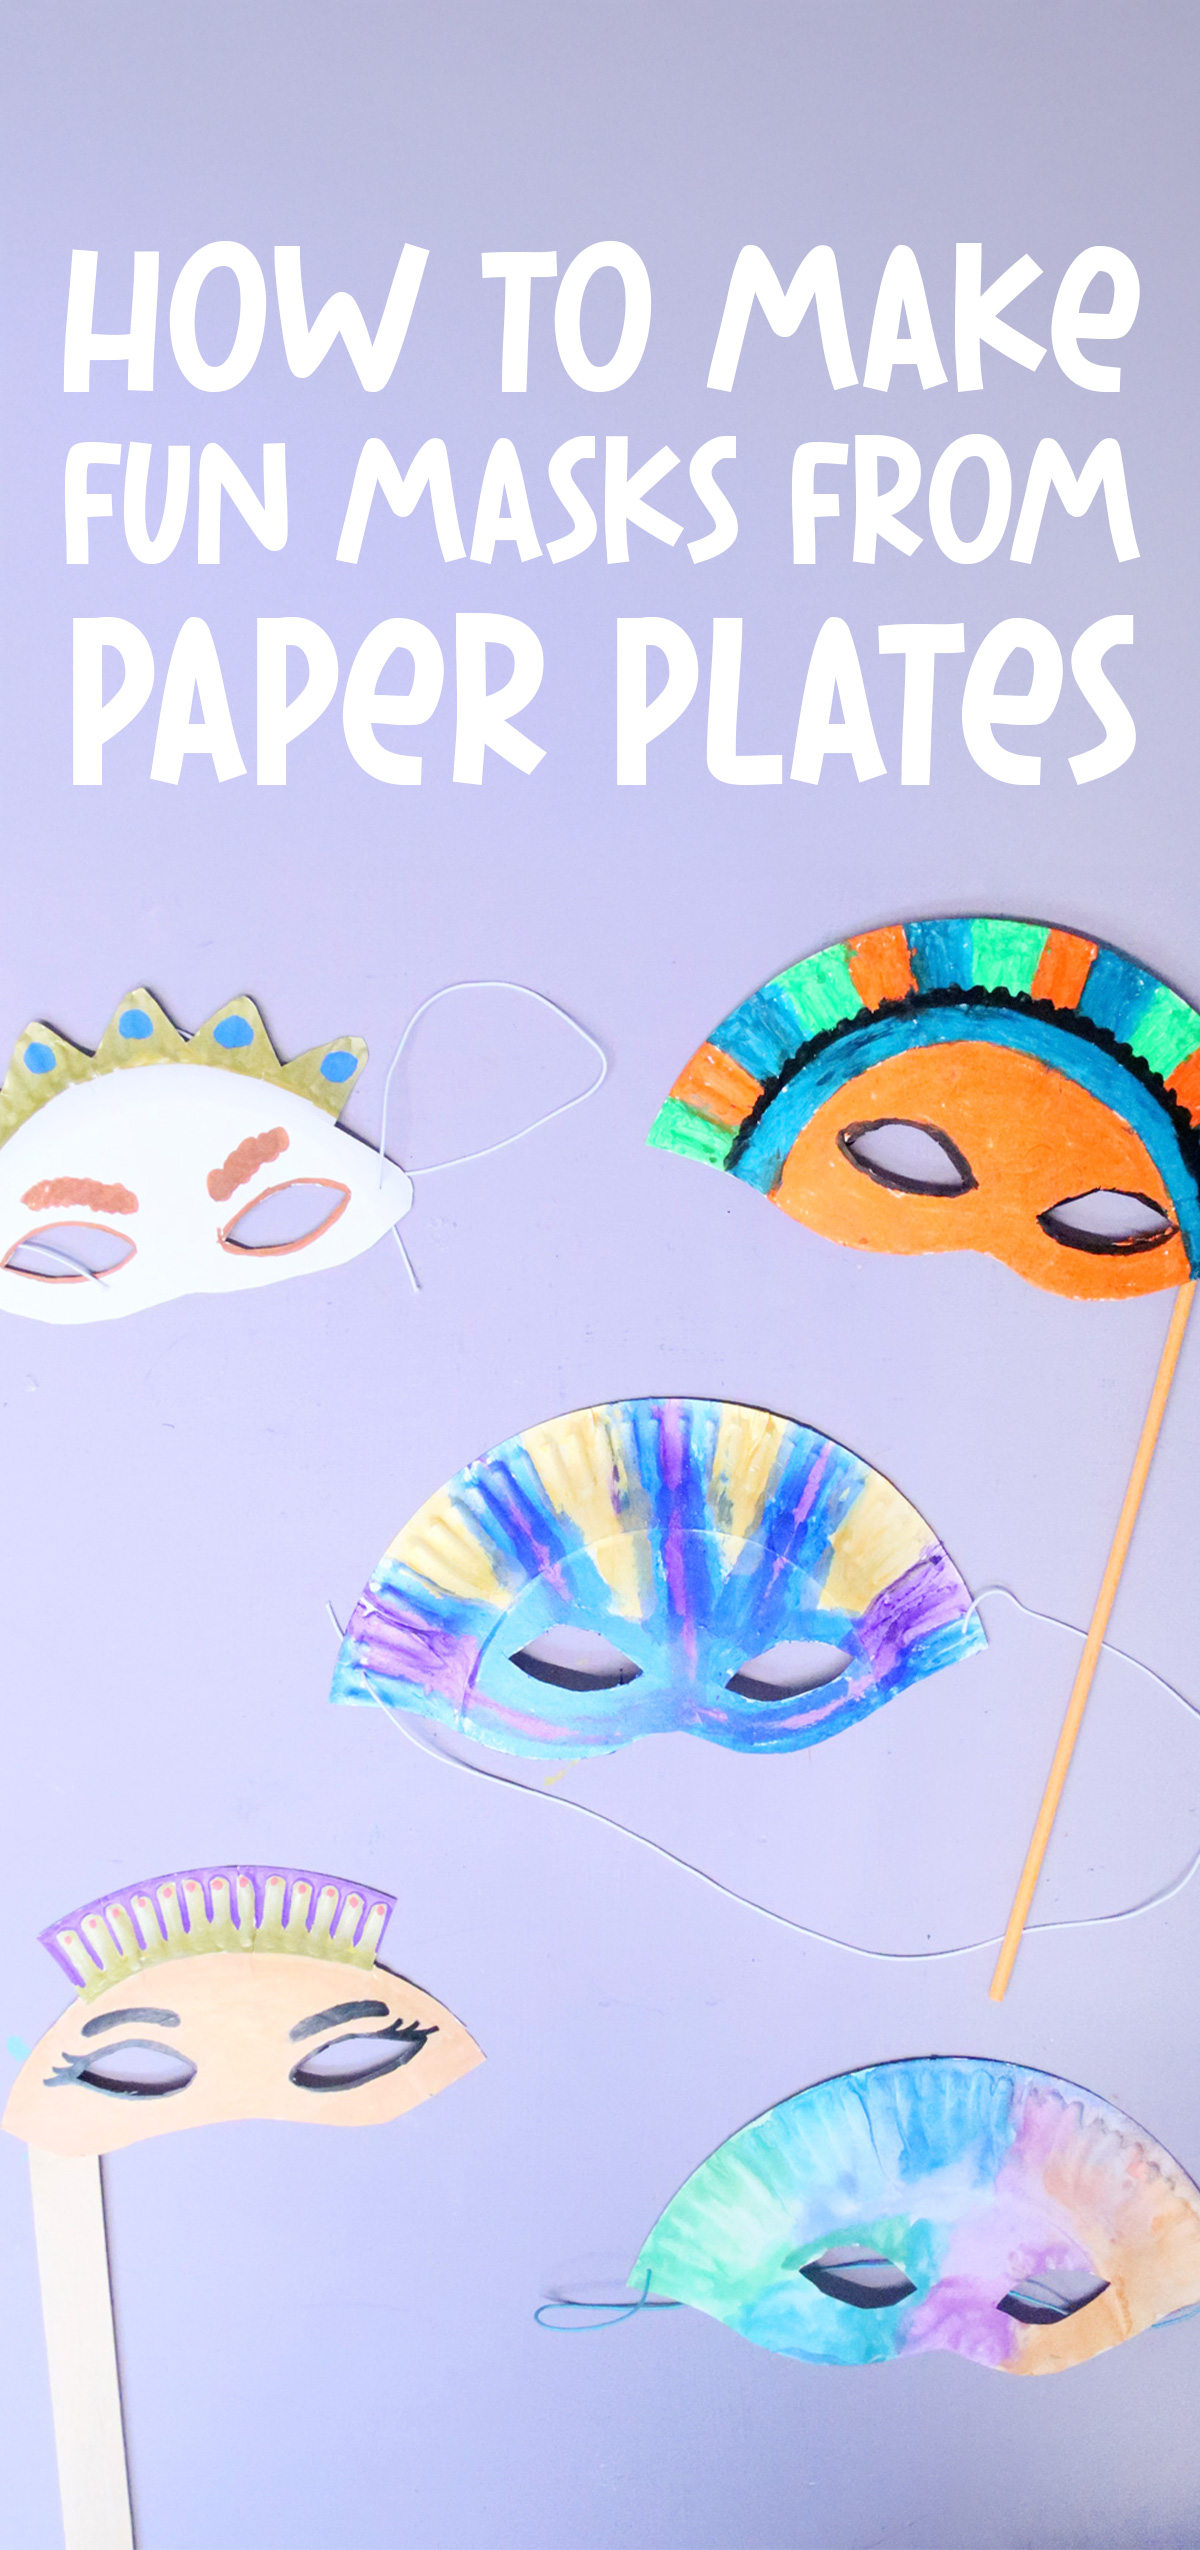
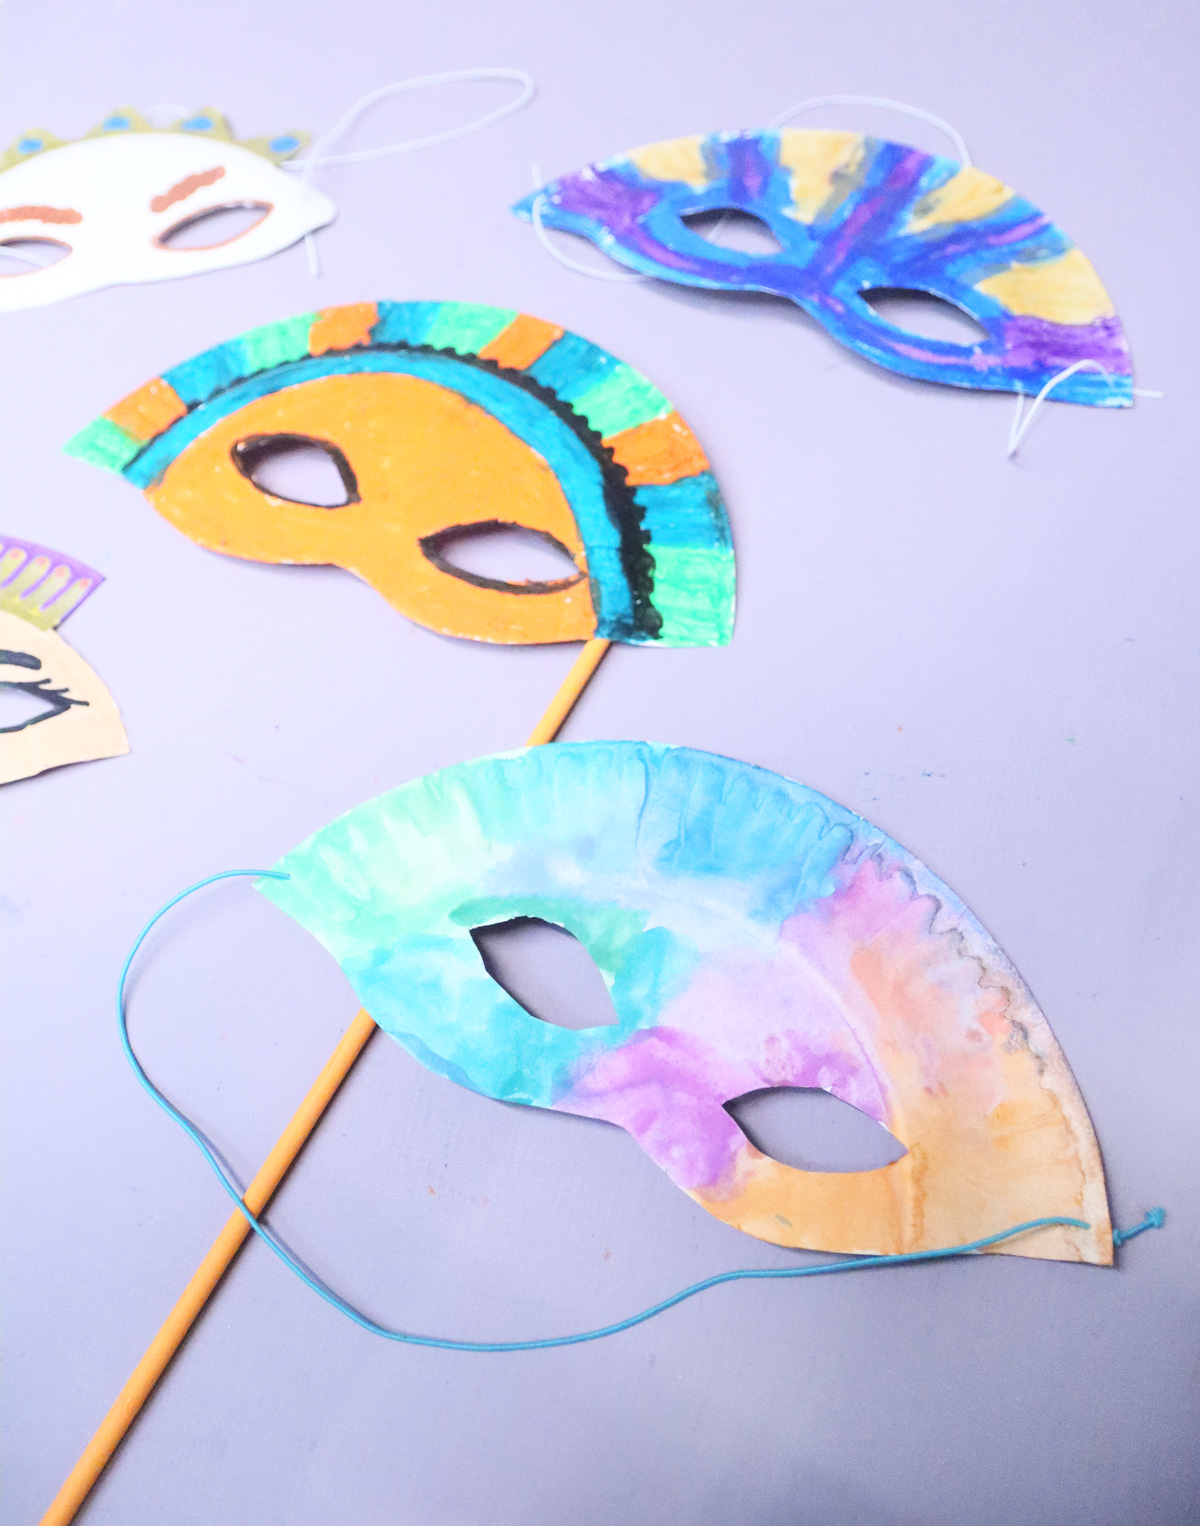
Paper plates are the perfect medium for making masks – because you have the round shape, in the right size, and the curvature that fits over the face! Today I’m going to share with you some of my best tips for making them with kids of all ages.
We’re going to explore different shapes and ways to cut it out, how to use the ridged edge as elements, and even show you what my kids came up with! I’ll be sharing our art supply experimentation and recommendations based on our successful results.
We tested this with kids ages toddler (2.5) through 9!
These are great for the classroom, Purim parties, and even make a great Purim carnival booth idea!
Tips and Variations for crafting paper plate masks
Crafts like this are very open-ended and I highly recommend allowing room for creativity. Here are some of our experimentations, as well as ways you can take it to the next level.
Different ways to color it
One of my favorite ways to color paper plate masks is using paint. However, with limited dry time, I wanted to give paint sticks a go. They are my go-to paint solution for any time a project needs paint, so why should this be different, right?
However, I ran into one major issue? they were too wide and clumsy for the textured paper plate!
So while they worked, control was challenging.
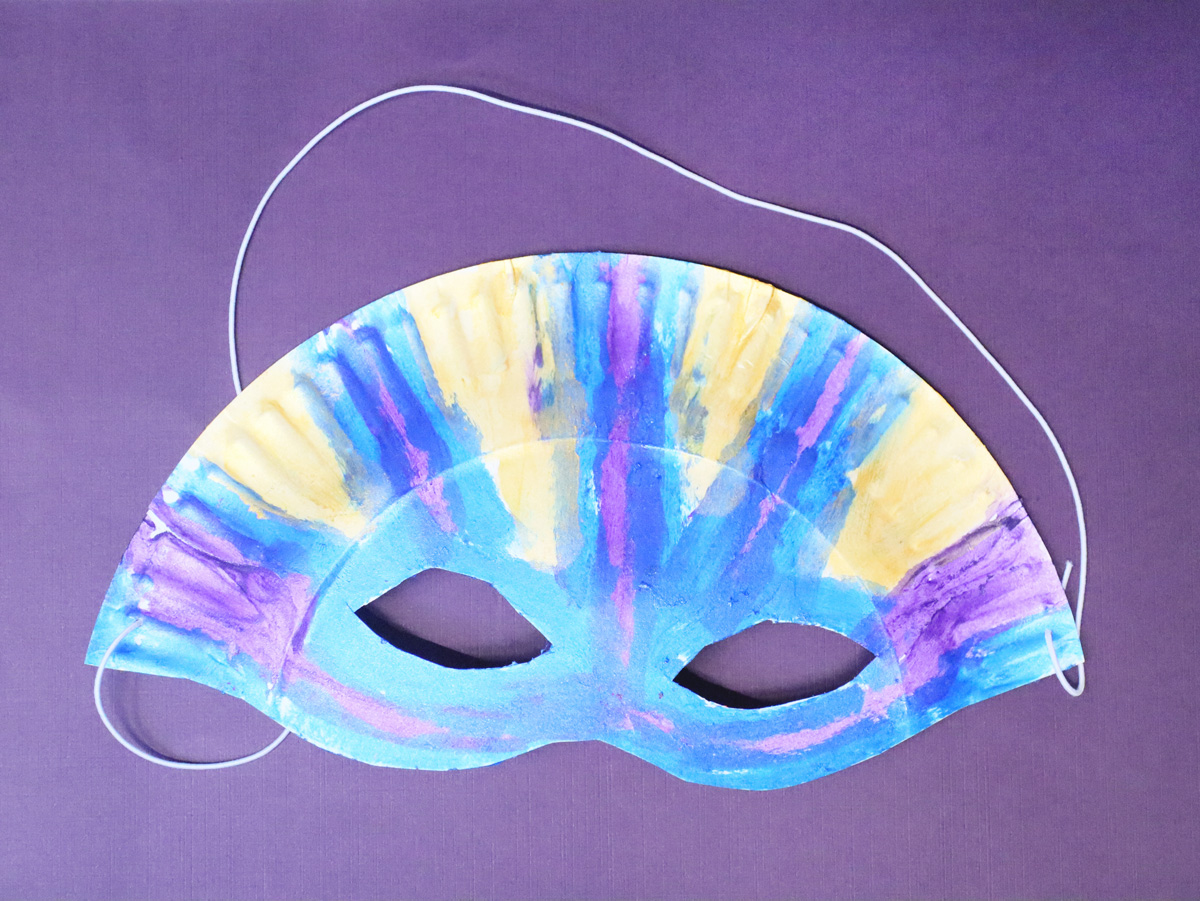
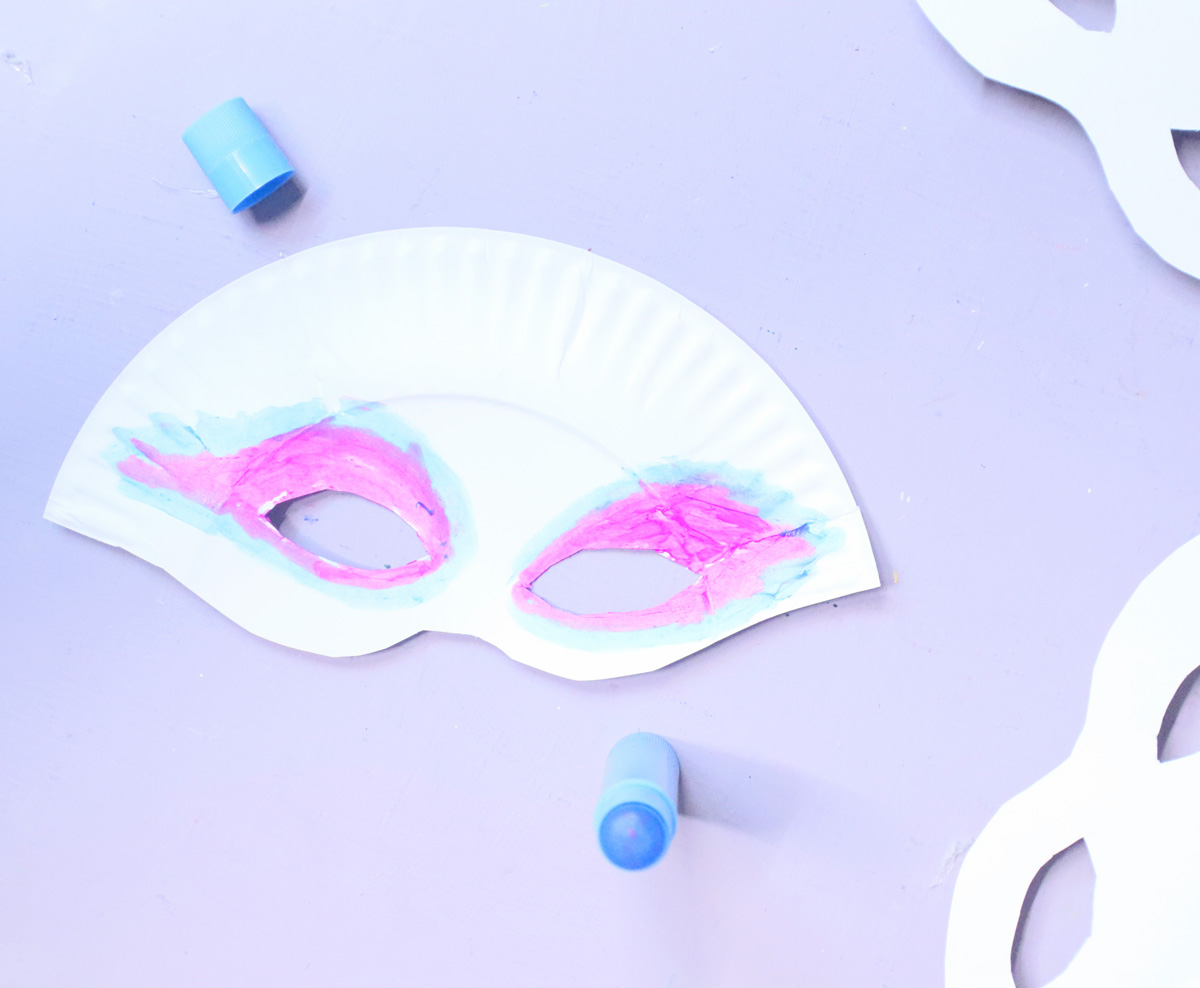
On round two, I pulled out two more mediums to try: watercolor paints and gel watercolor crayons. They both worked fabulously! The watercolor crayons are similar in texture to paint sticks, fast drying (although you’ll need more time if you’re watercoloring over them) and have finer tips that allow for much more detail.
Watercolors are just EASY – especially for younger kids. They can do a simple wash or paint in additional details.
They can also use markers to add details afterwards.
We also used paint markers (I recommend instant ink ones when crafting with kids). Those are fabulous, especially for older kids who will want to add real detail.
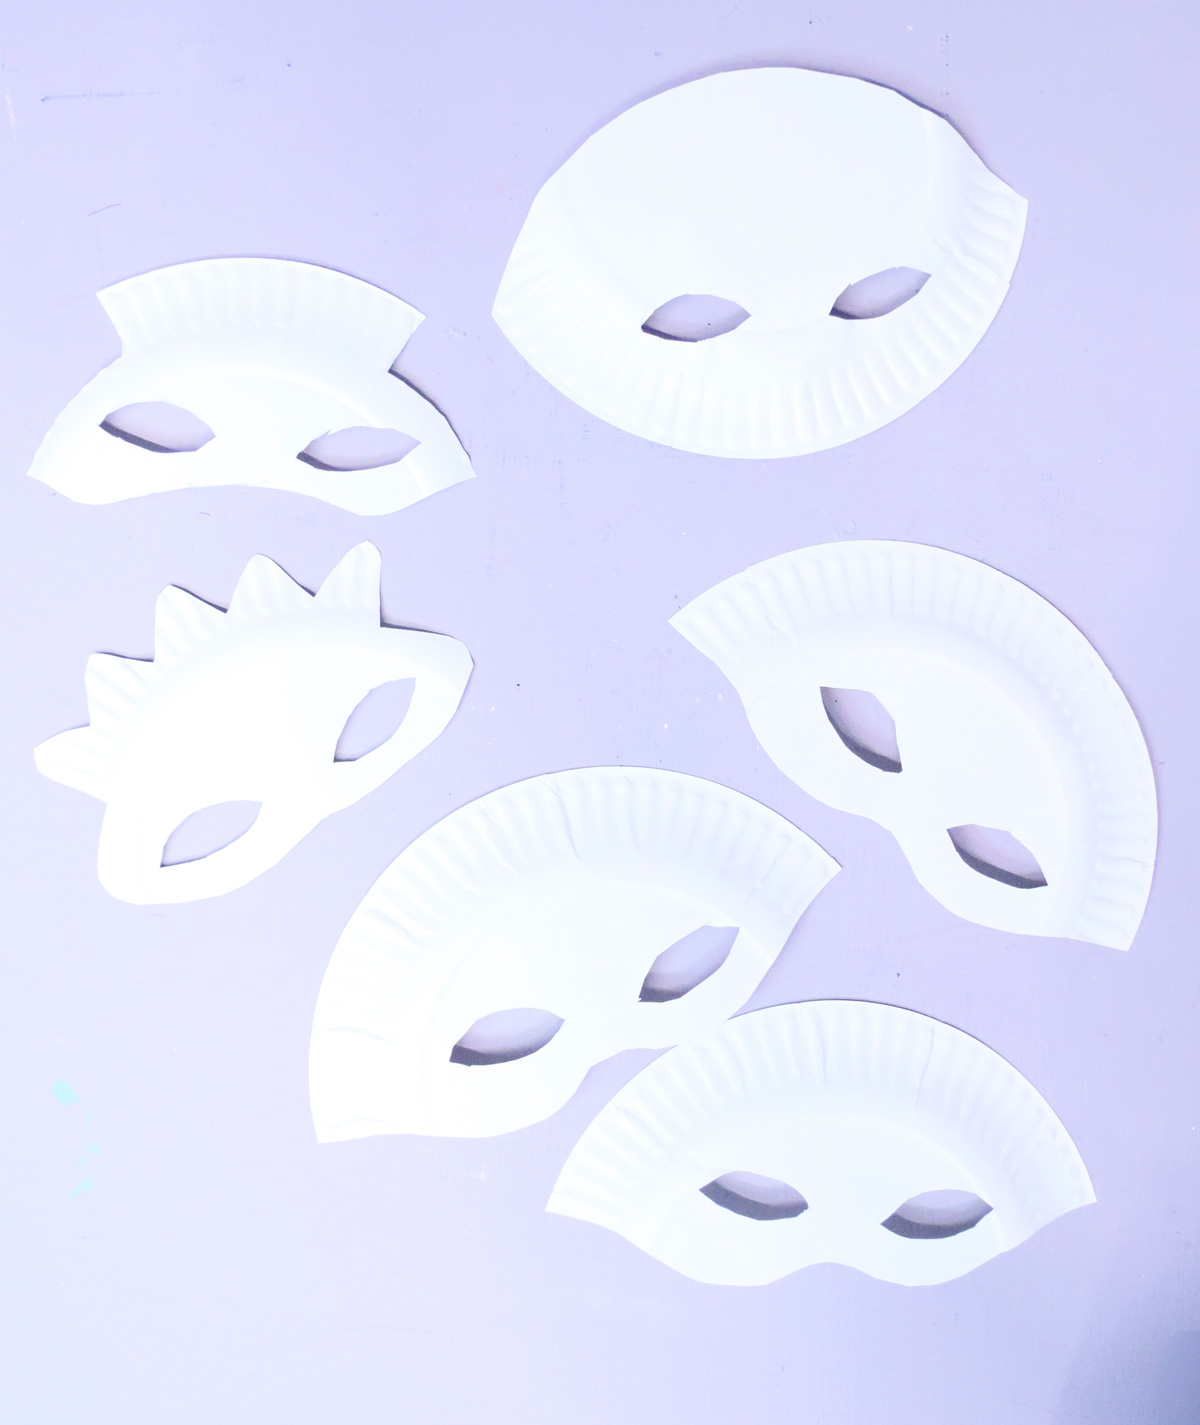
Playing with Shape
The shape of the paper plates really lend themselves to adding pretty designs – especially if you’re making the paper plate masks for Purim!
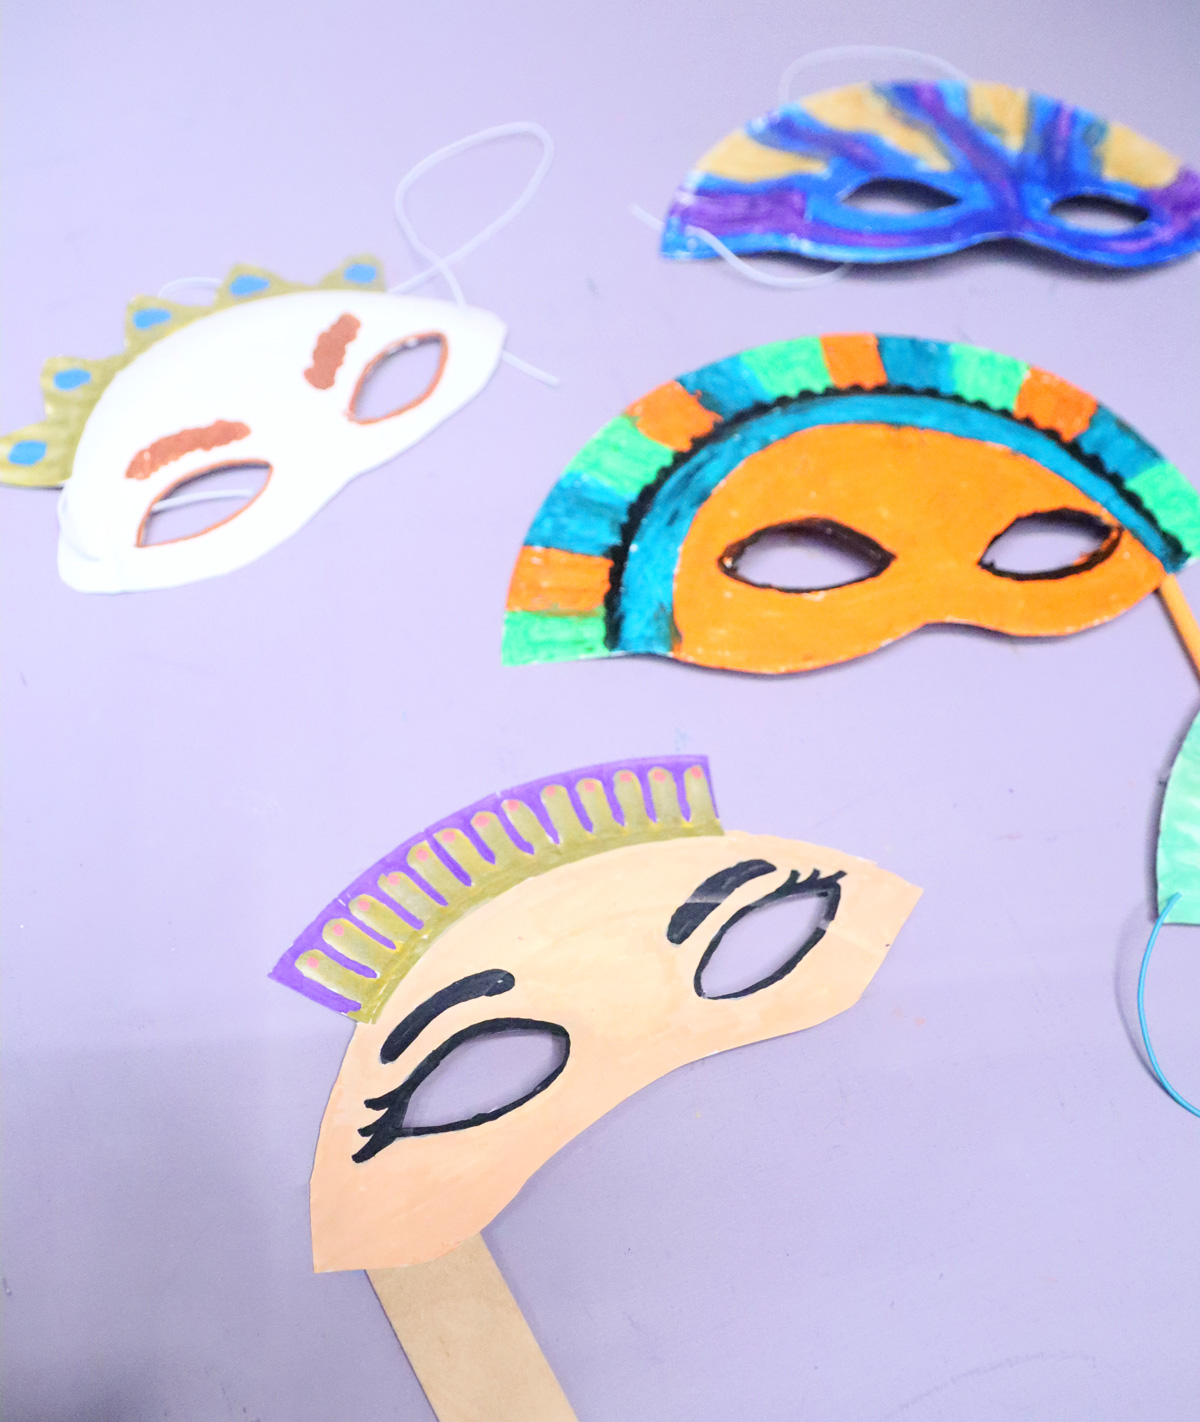
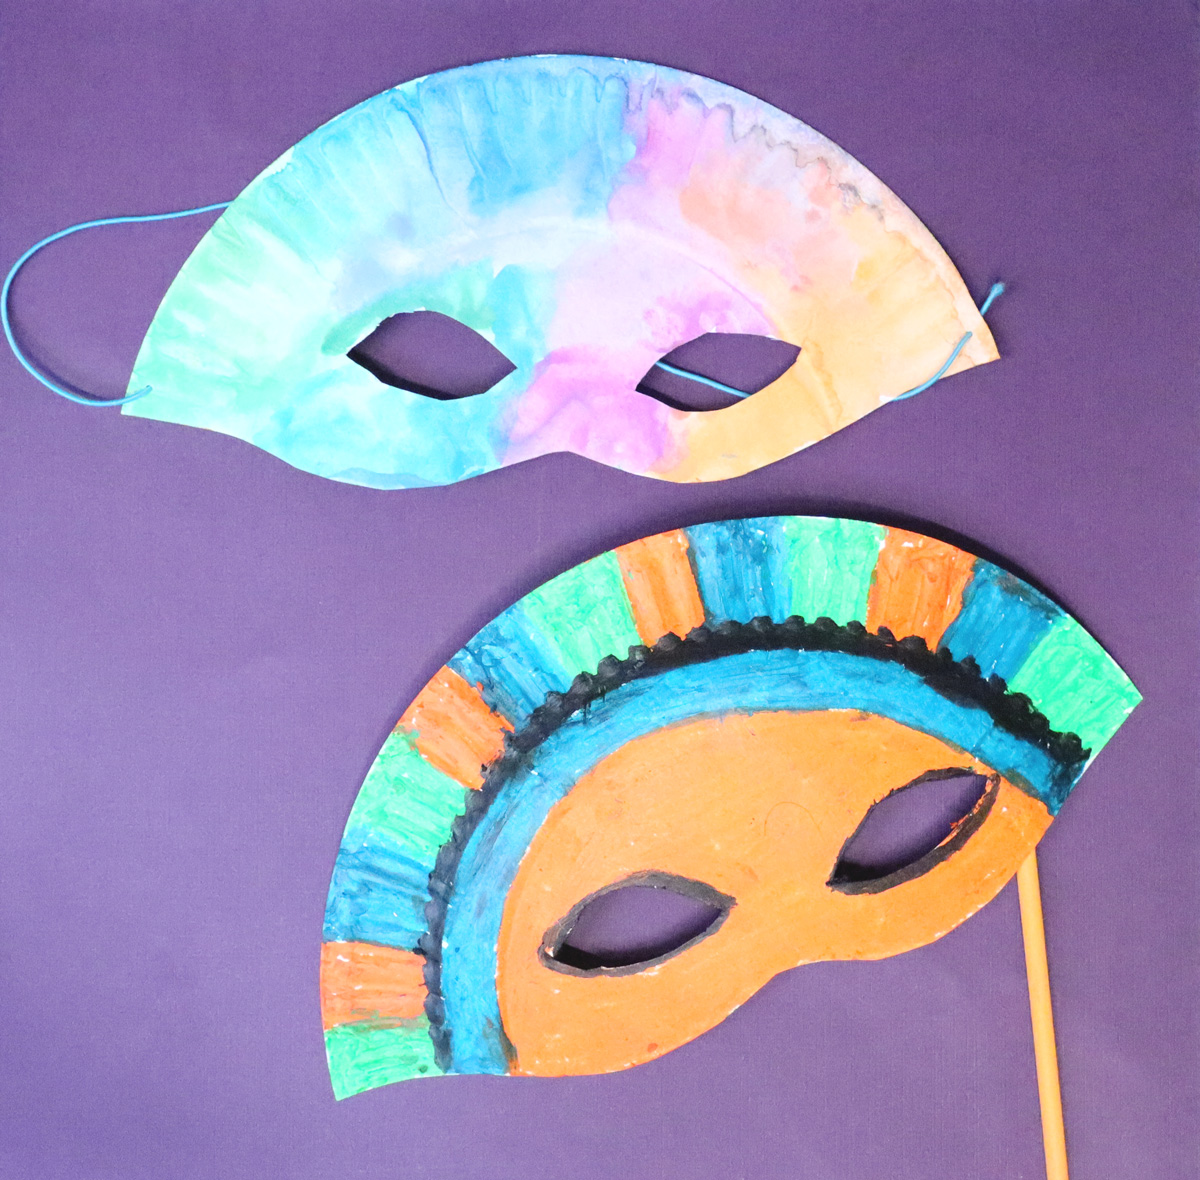
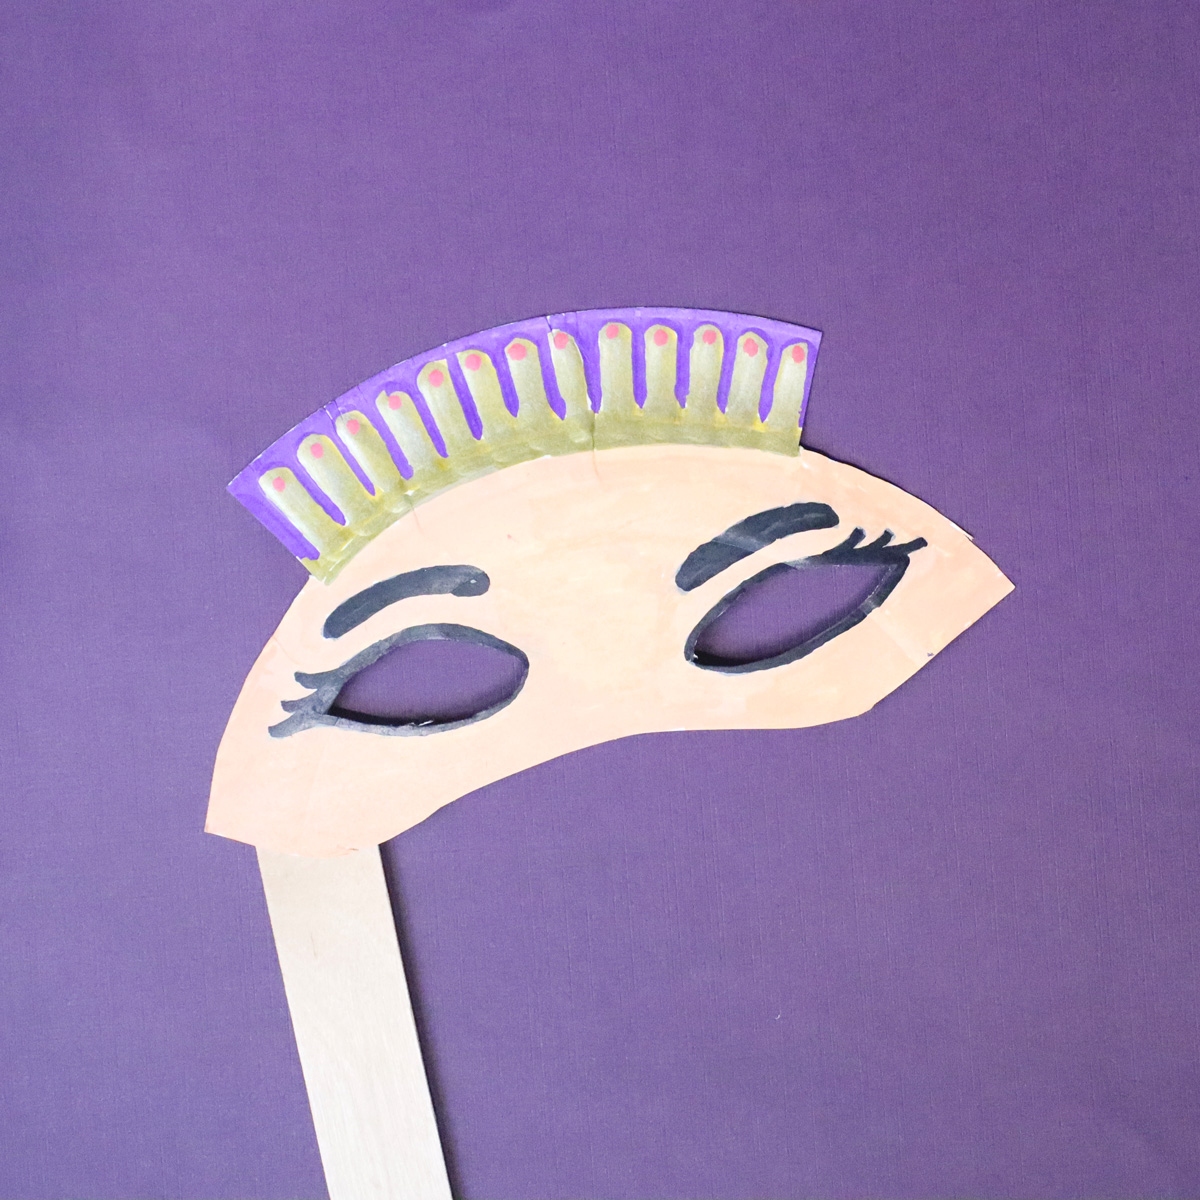
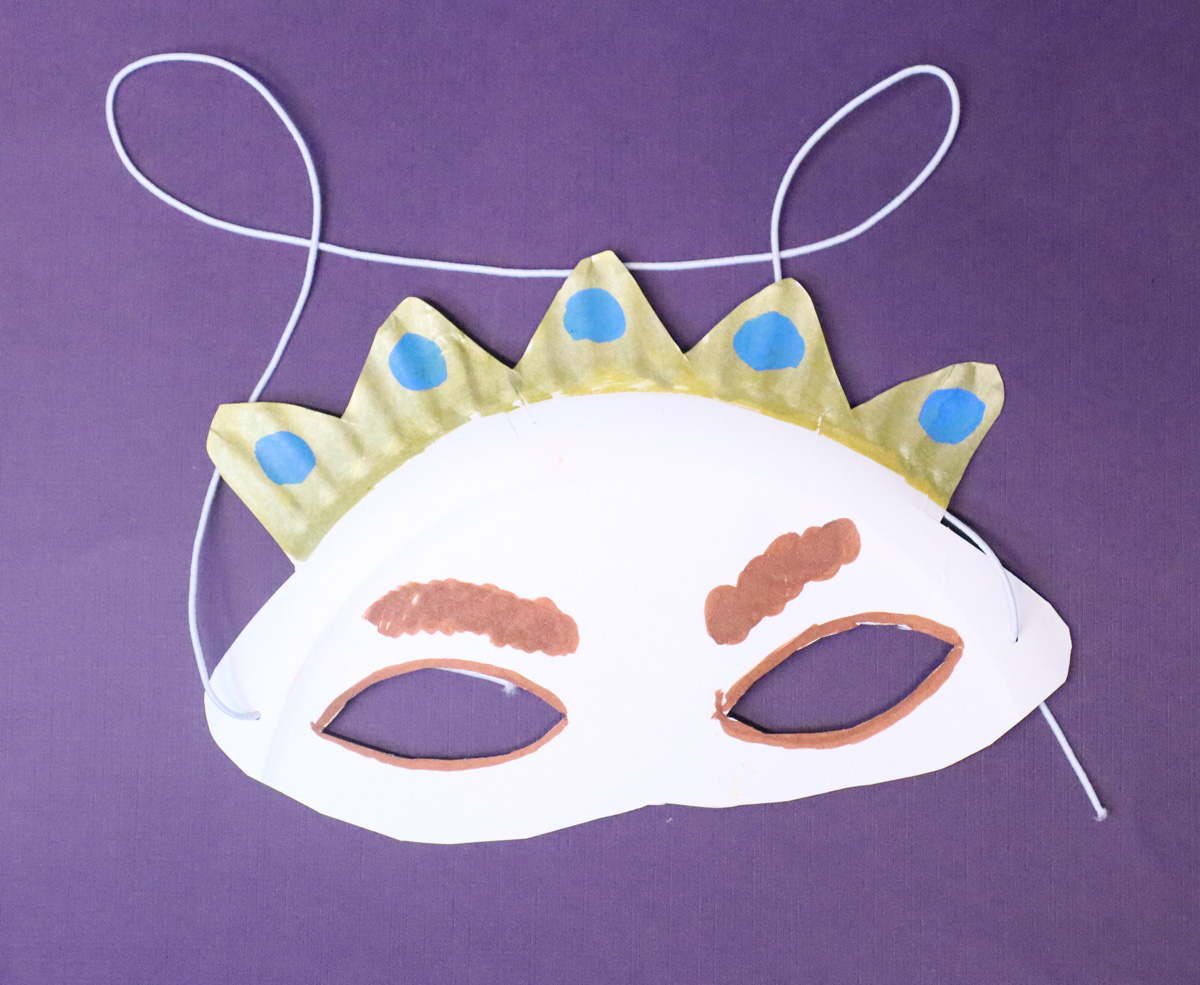
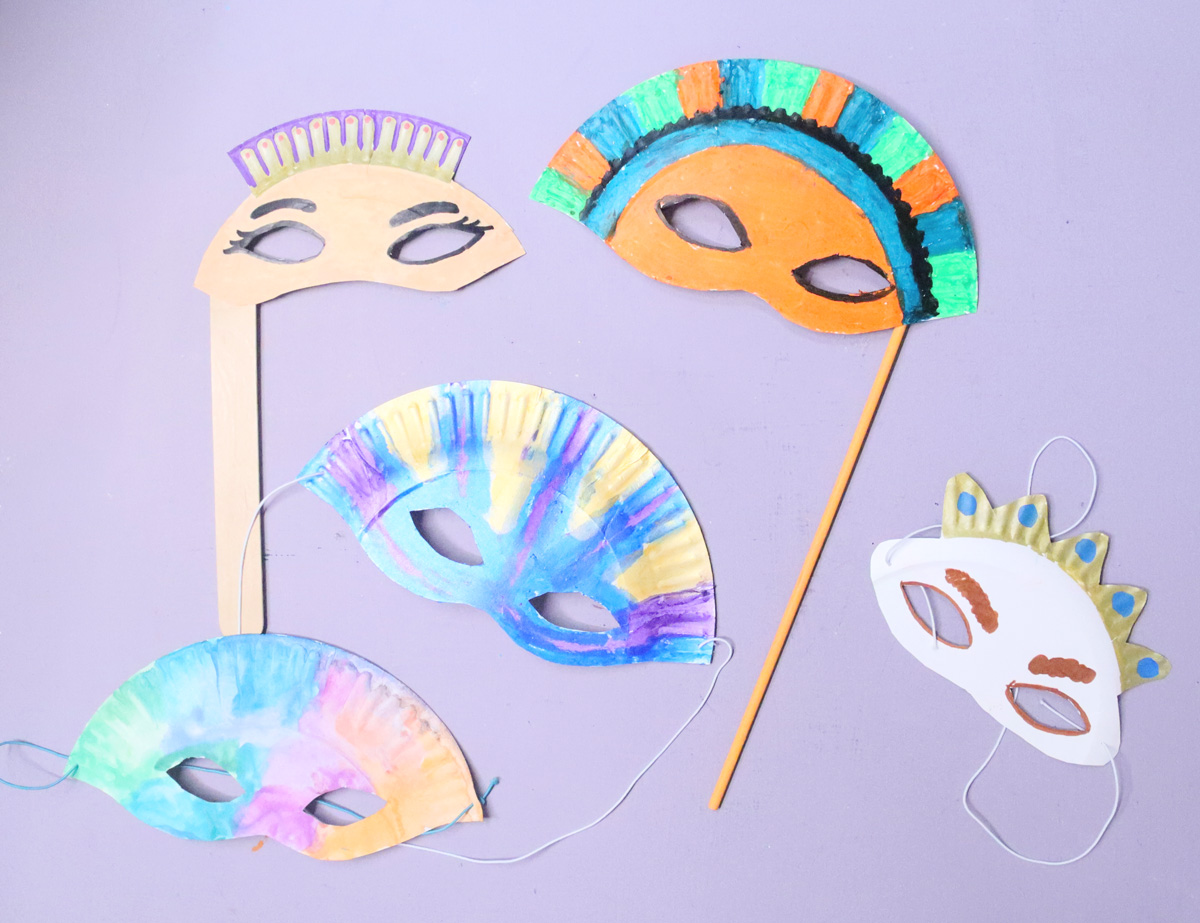
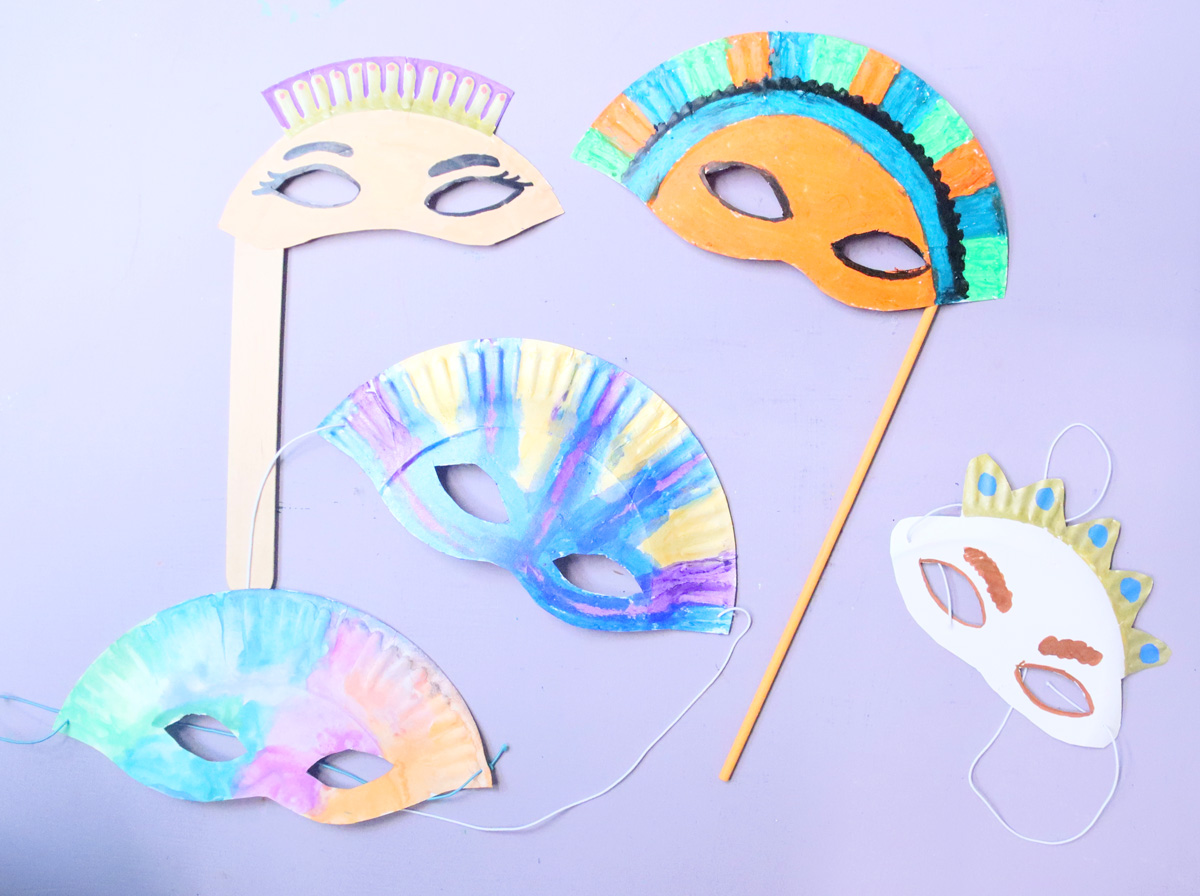
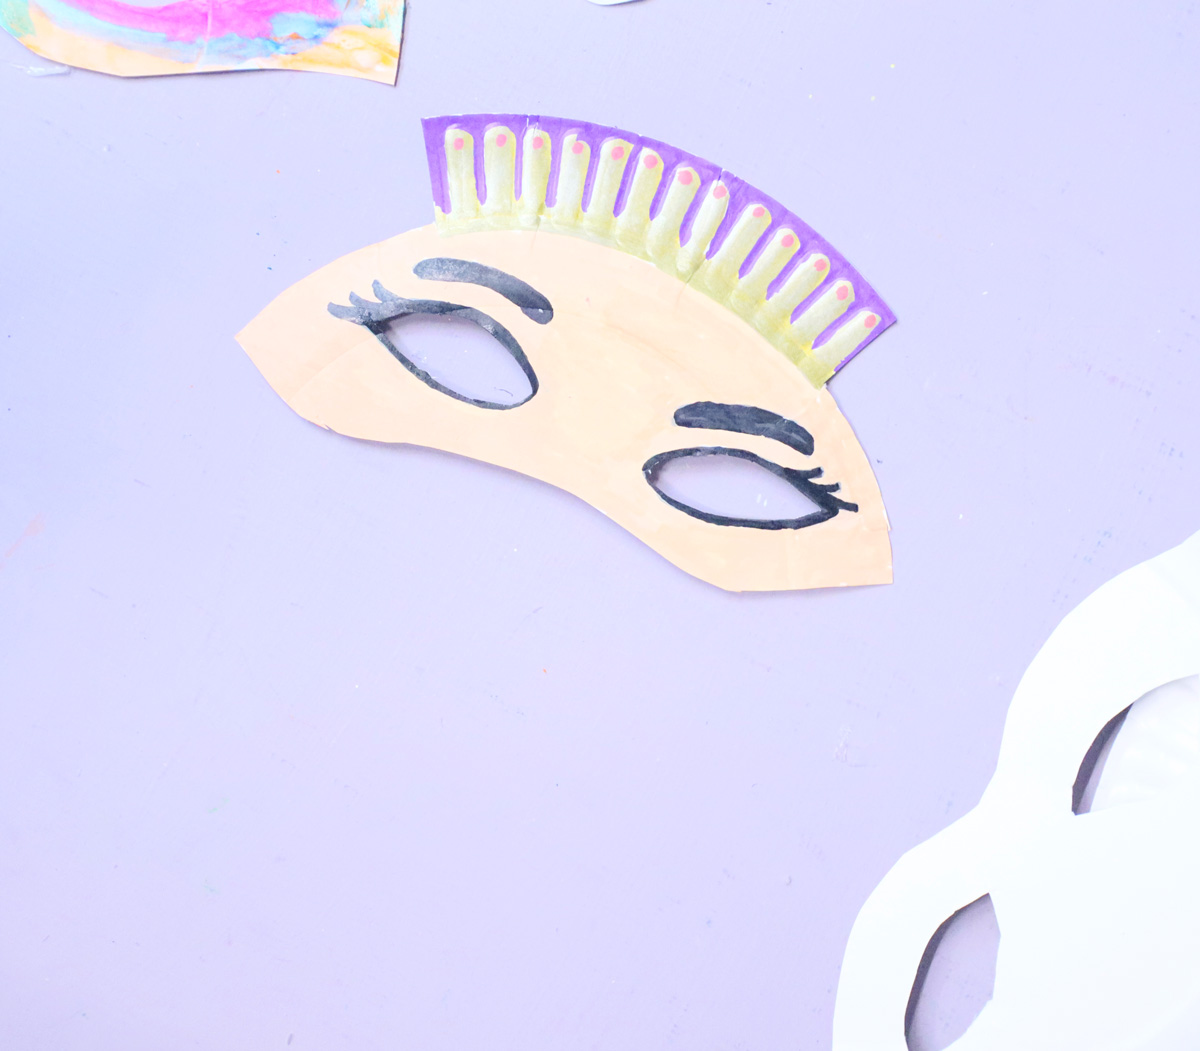
We cut some with a crown edge to make different characters.
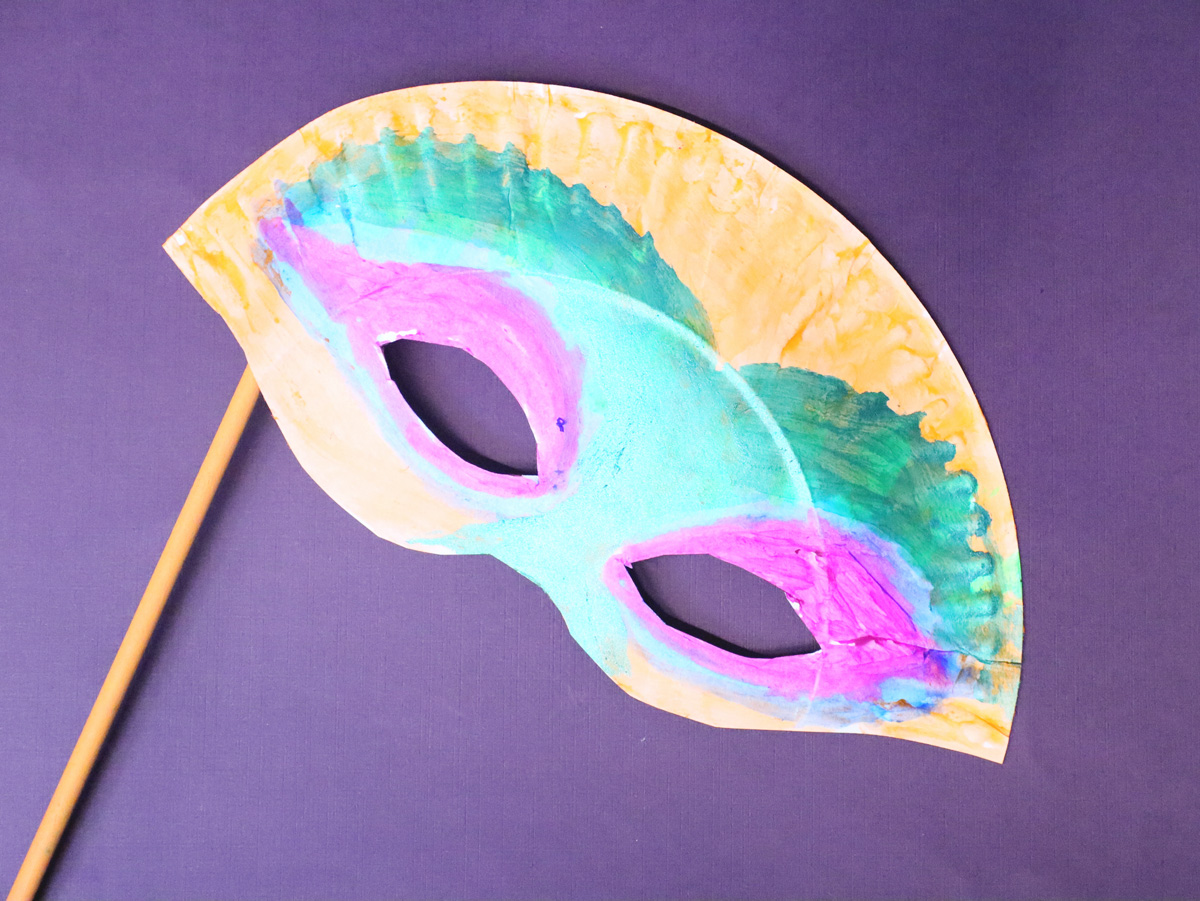
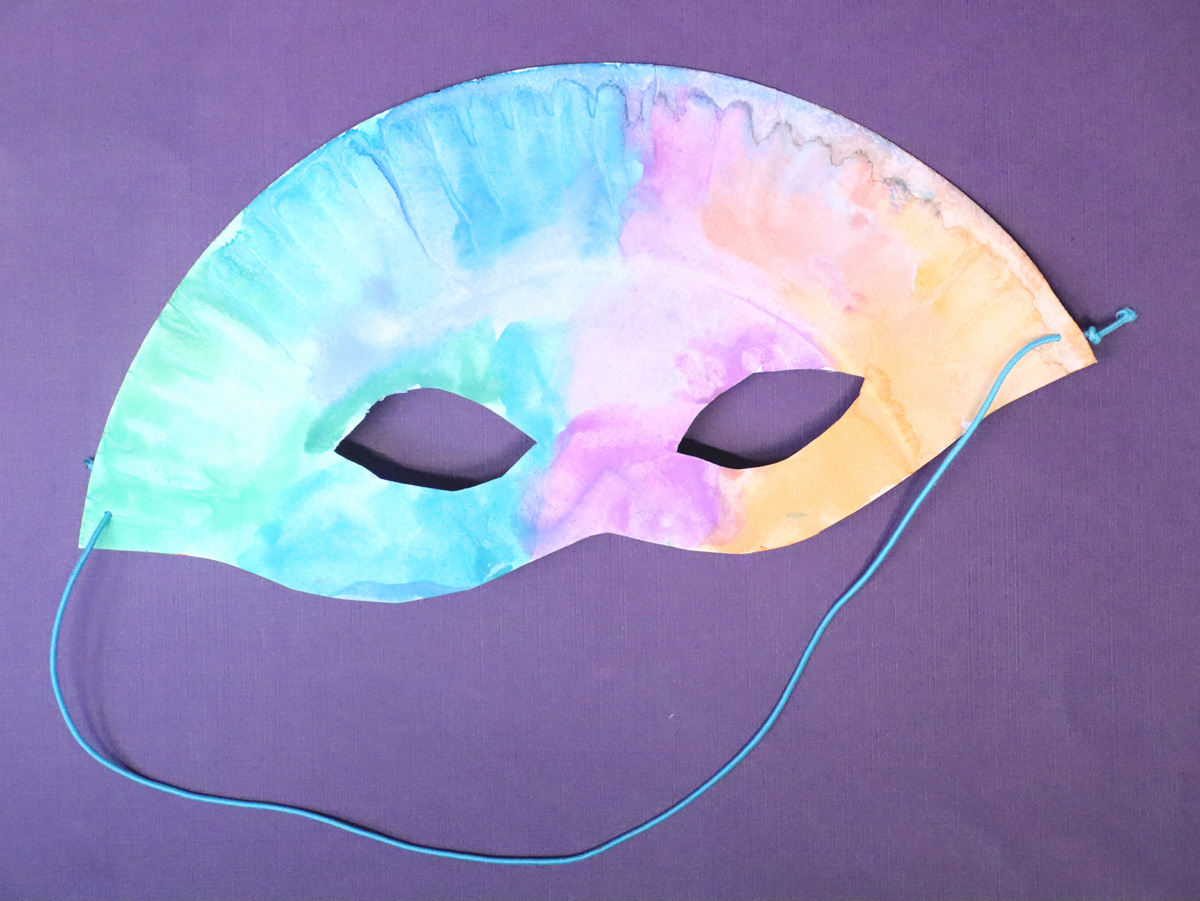
You can also simply play up the shape of the plate to make half masks. I like outlining the eyes in a winged shape.
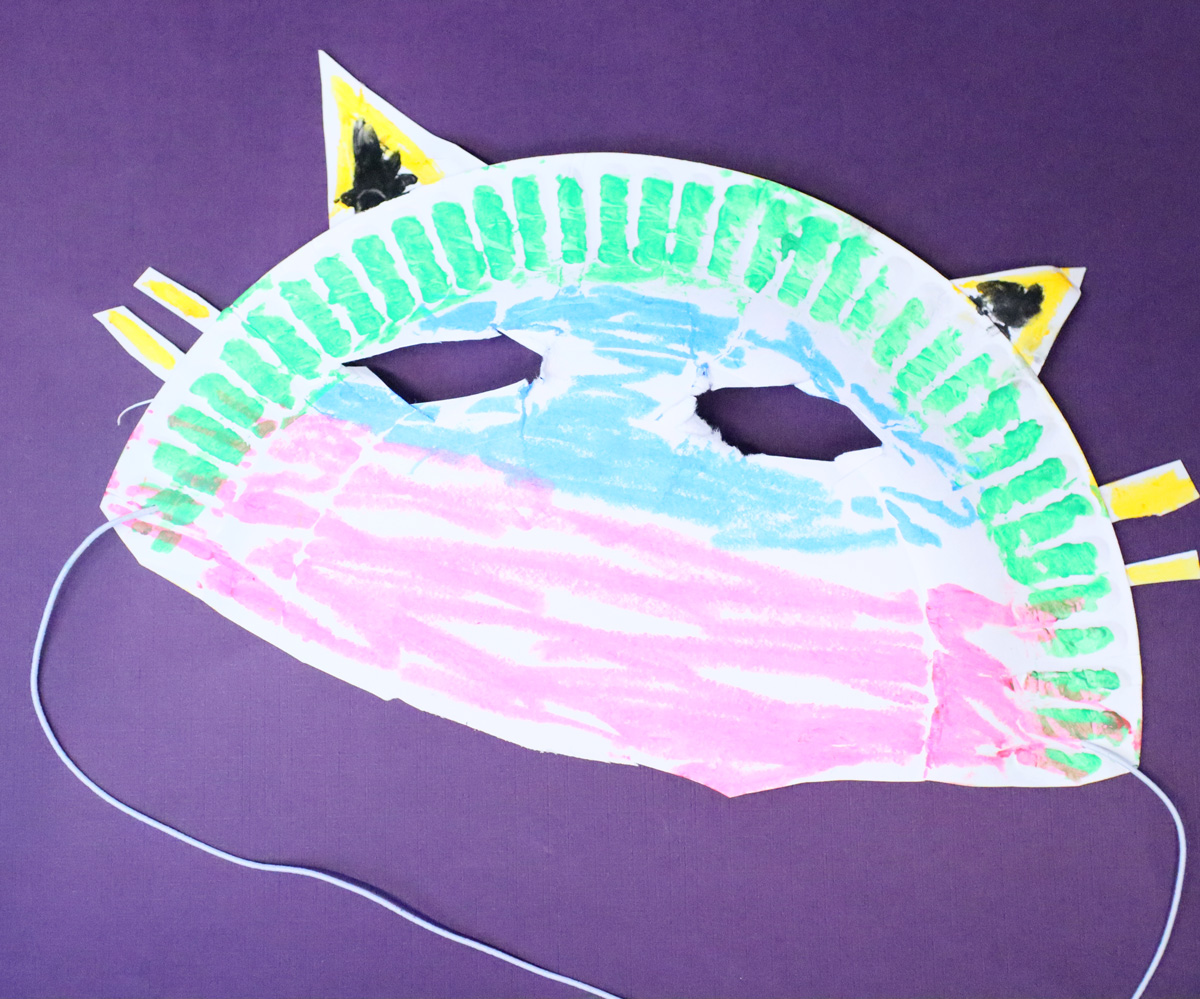
And my 9 year old got really creative! He traced one of my masks on his own to make a template and cut it out entirely on his own. He added cat eyes and whiskers – and it was all his ideas.
More Decorating Ideas
There are more ways you can craft this and here are some tips and pointers. I’ll also offer different styles of setting up this paper plate masks craft based on group size and age later in this post.
- Use colorful plates with permanent/paint markers for a bright, colorful effect with less coloring needed.
- Add feathers to the center of the forehead.
- Add stick-on gems around the eyes and to the crowns.
- Bring on the foam shapes!
How to turn it into a mask
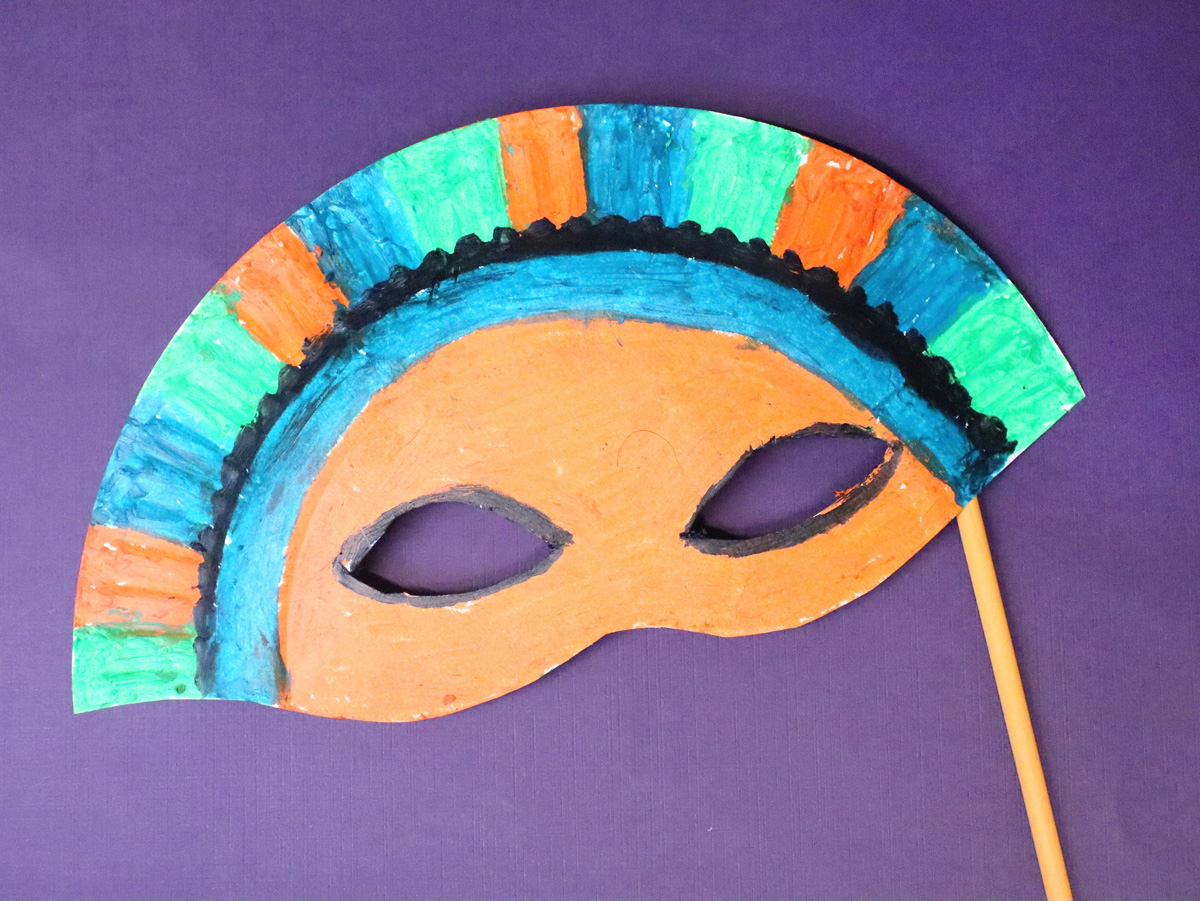
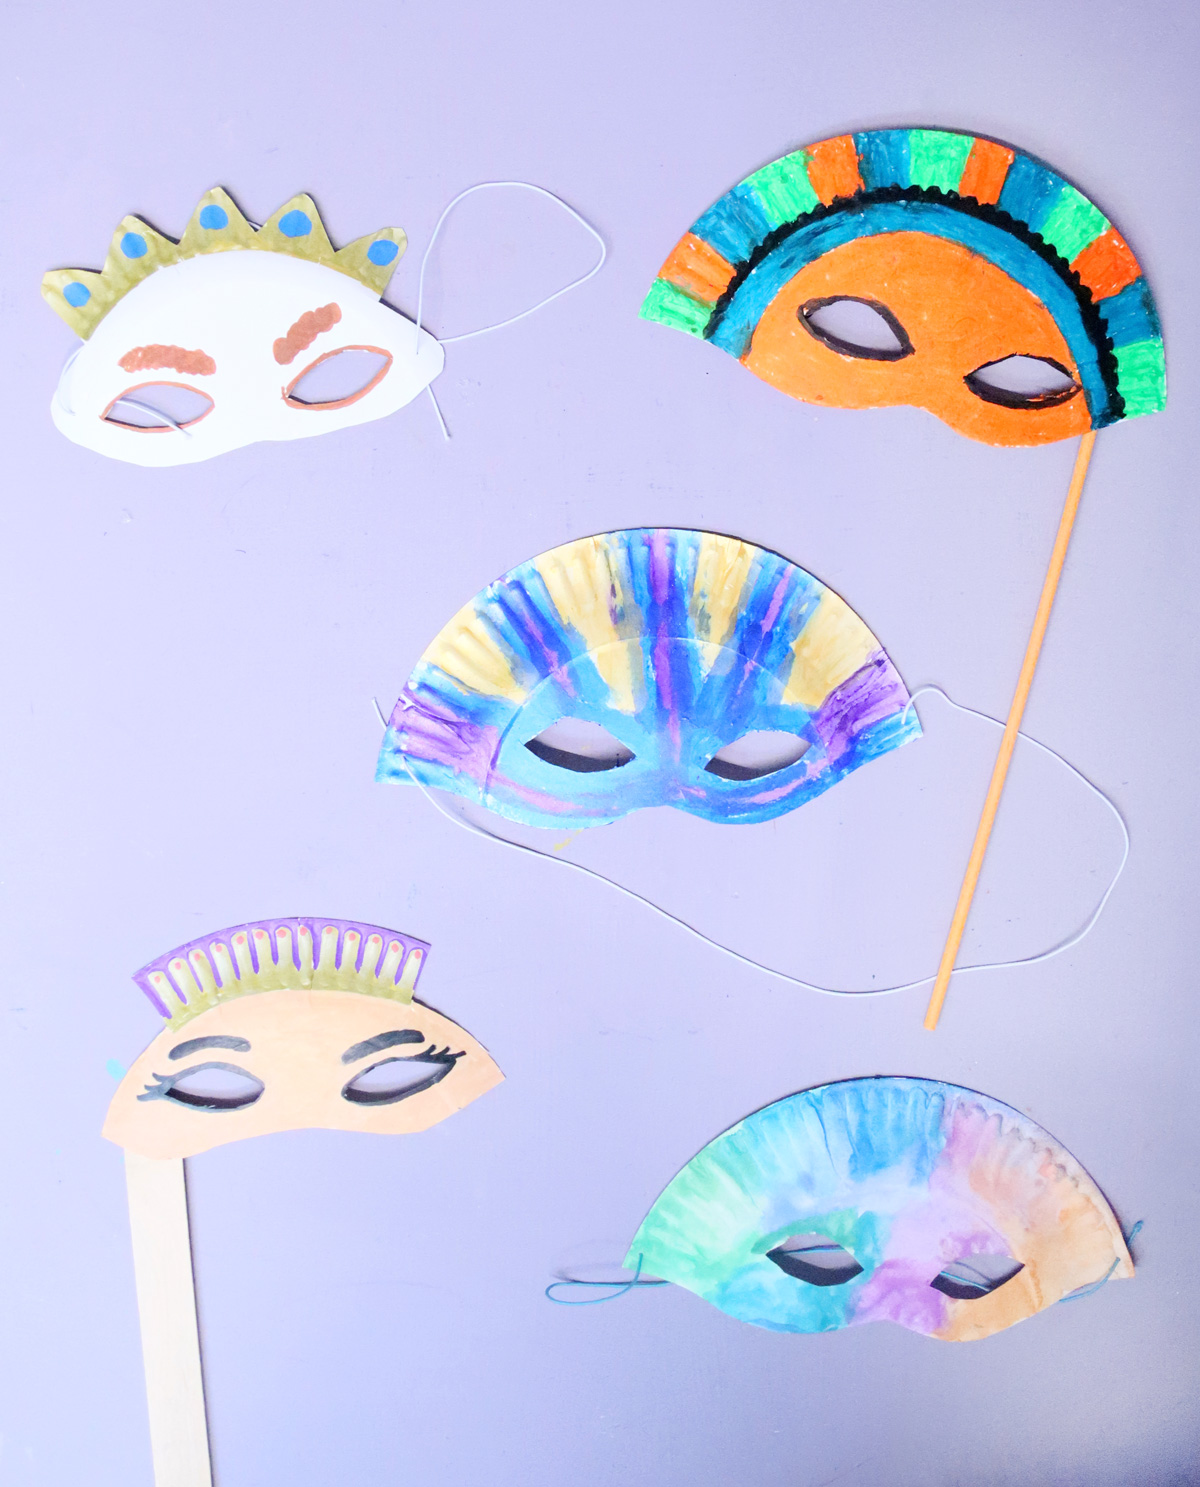
There are a few ways to turn anything into a mask. One of my favorites is to stick a dowel on the side. A paper straw or craft stick does the job too. These handheld masks are more fun for kids to use as a toy – it’s less uncomfortable to wear.
Of course, you can also go the traditional route and use elastic! Opt for 4mm round braided elastic. You can get it in white or in fun colors, or get pre-made mask elastics with metal stoppers at the ends.
Making Paper Plate Masks with Kids
When you’re crafting this, so much of what you might want to do/how you do it depends on the size and age of the group! Here are some pointers for making paper plate masks for Purim with different group types.
Tips for younger kids vs. older kids
Since we crafted this with a nice range of age groups, I can share some pointers based on personal experience.
- Toddlers – Precut the masks and keep the shapes basic. Use watercolor gel crayons if possible, stickers are great too. Use washable paint if you’re brave. You can use regular crayons but the color will be very faint.
- Preschool – Precut the masks. You can incorporate simple shapes like crowns, cat ears (one-piece). Some kids will use it, some won’t. Stick-on embellishments like foam shapes and gems are great here too. They can watercolor or use gel crayons, paint sticks, paint, etc.
- Grade school – Older kids can cut their own masks. Younger ones will need pre-cut. You can offer a mix of options. They can use paint markers (as long as they’re wearing junk clothes) for more detailed drawings. Or allow them to play with watercolors, gel crayons, etc.
- Tween and up – Just hand them the supplies (the more sophisticated the better) and let them explore!
Tips for small groups vs. large groups
When crafting this with a smaller group, you can go more detailed with the instruction, and higher end with the materials. You can also wait and see if they need help with cutting out the masks.
For larger groups, you will really want to have everything set up and self-serve. Precut masks. Offer more bulk of more basic supplies. Go for paint markers if you can as it’s easier to spread out for a group (but get cheap ones and plan for them to be “used up” in this craft session.)
I also recommend instantly drying materials only for larger groups since it’s harder to track which project belongs to which kid. And stick-on embellishments are a win for large groups.
How to make fun paper plate masks
You’ll Need
- Paper plates
- If possible, grab a mask you have handy to trace
- Scissors
- Coloring supplies. My top 3 are: watercolor paints, watercolor gel crayons (fine tip but instant dry if not actually watercoloring), and paint markers
- Optional: embellishments like stick-on gems, feathers, and foam shapes
- Hole punch: if you can swing a 1/16th inch one that’s ideal, otherwise use a standard one
- Elastic or pre-made mask elastics
- OR use a hot glue gun (adults only) or tape to stick on a dowel, jumbo craft stick, or paper straw
Watch the video
Watch the full-length video on YouTube if you prefer to learn that way! Or scroll down for written instructions with photos.
Step by Step Instructions
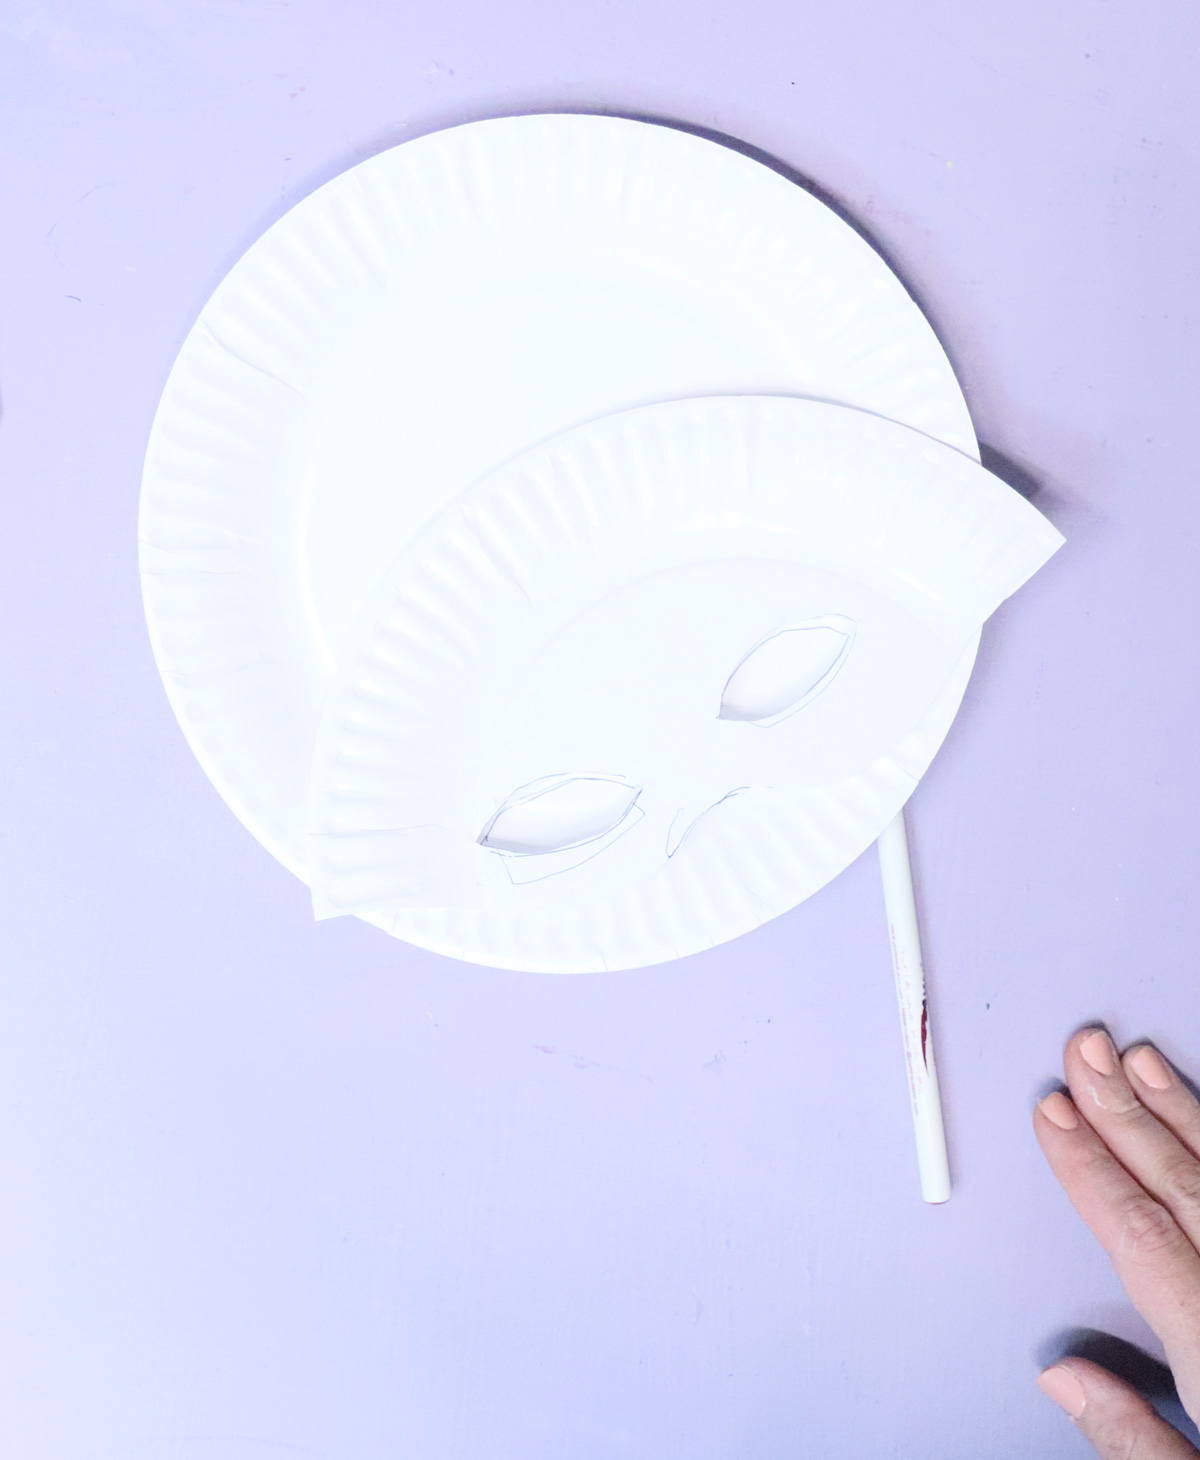
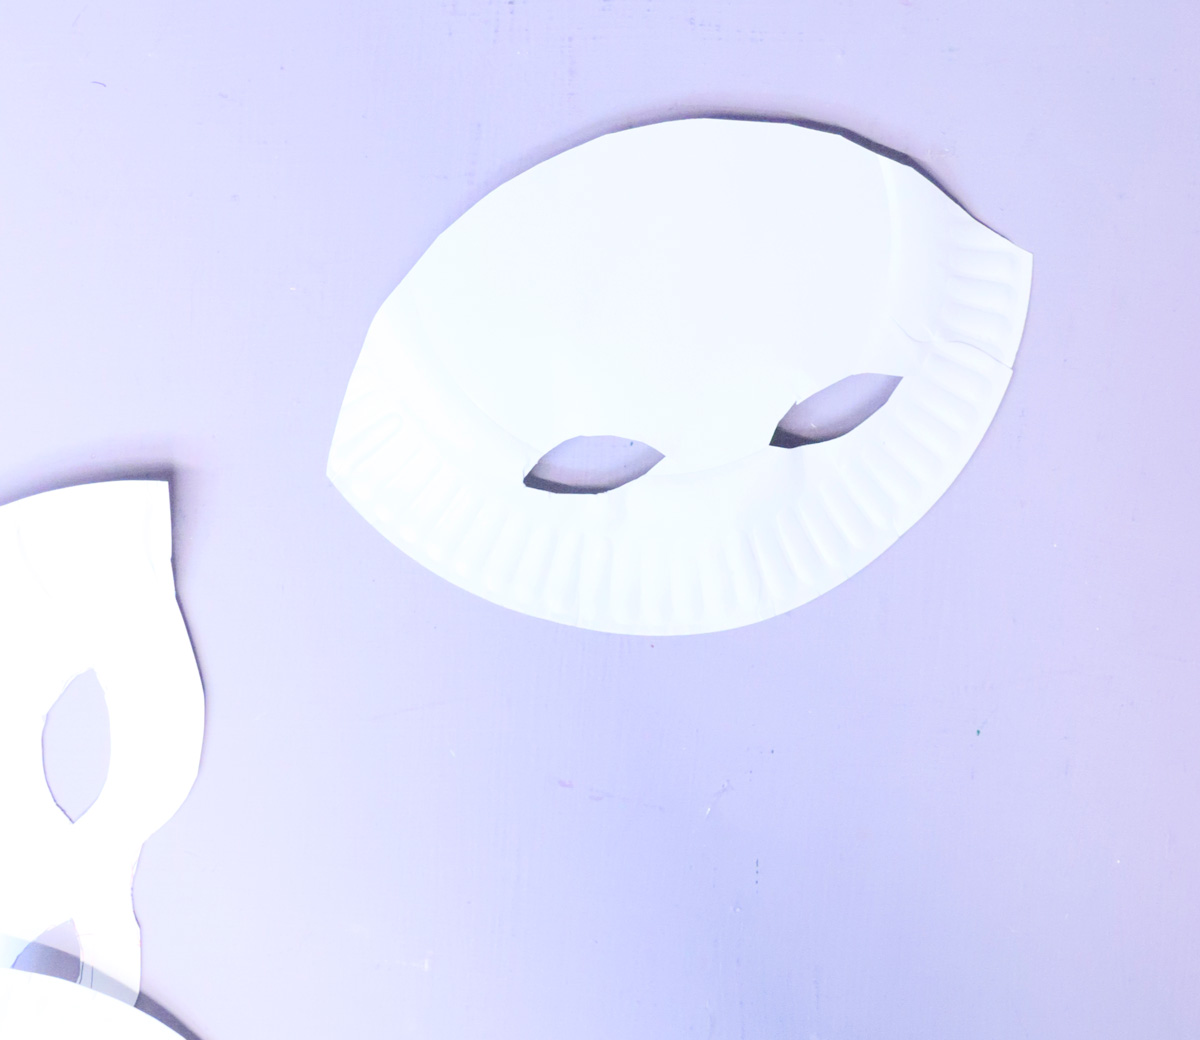
1. Cut your mask from the plate: Use a mask (or a nearby child) to figure out eye placement. Sketch out and cut your mask. Keep your first mask as a template to trace more masks.
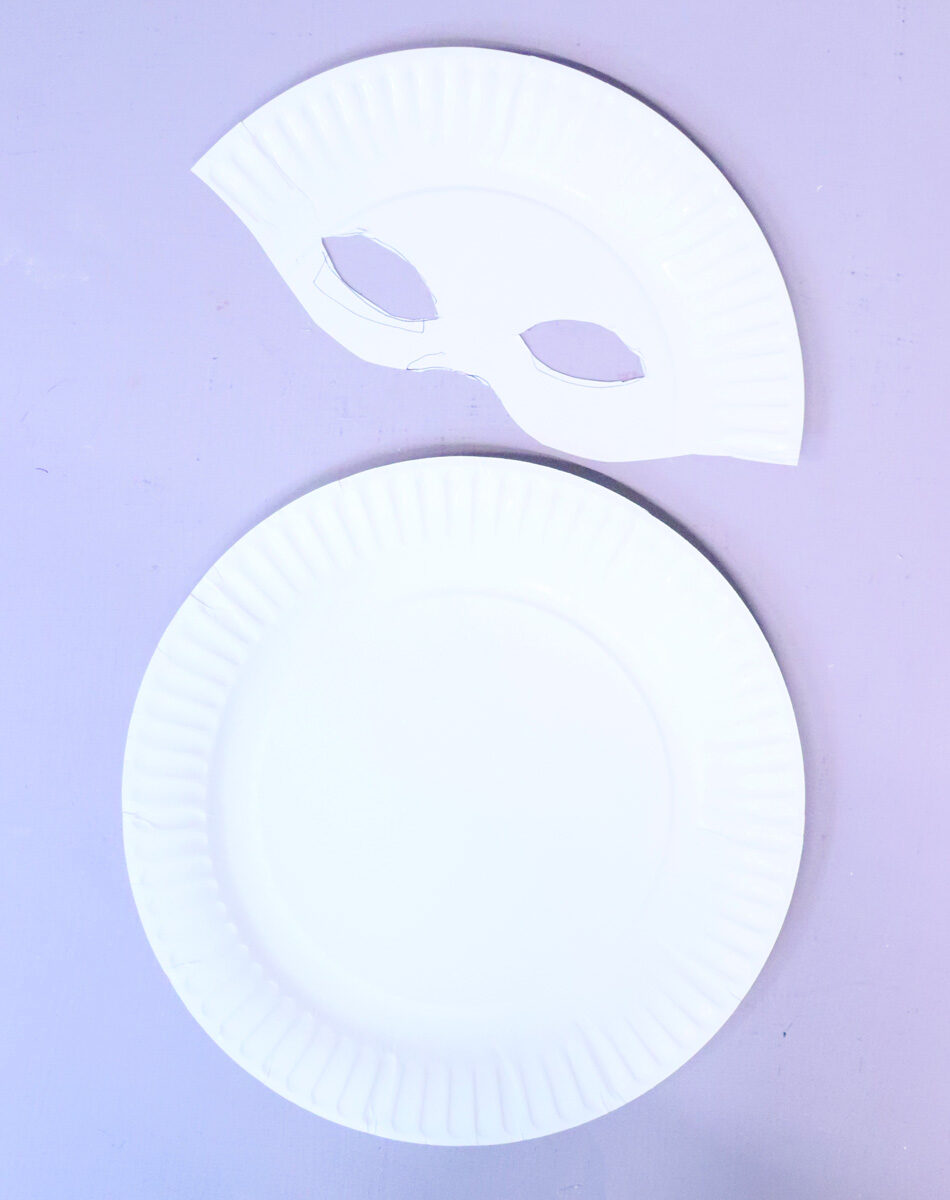
On average, you can fit two masks to a plate.
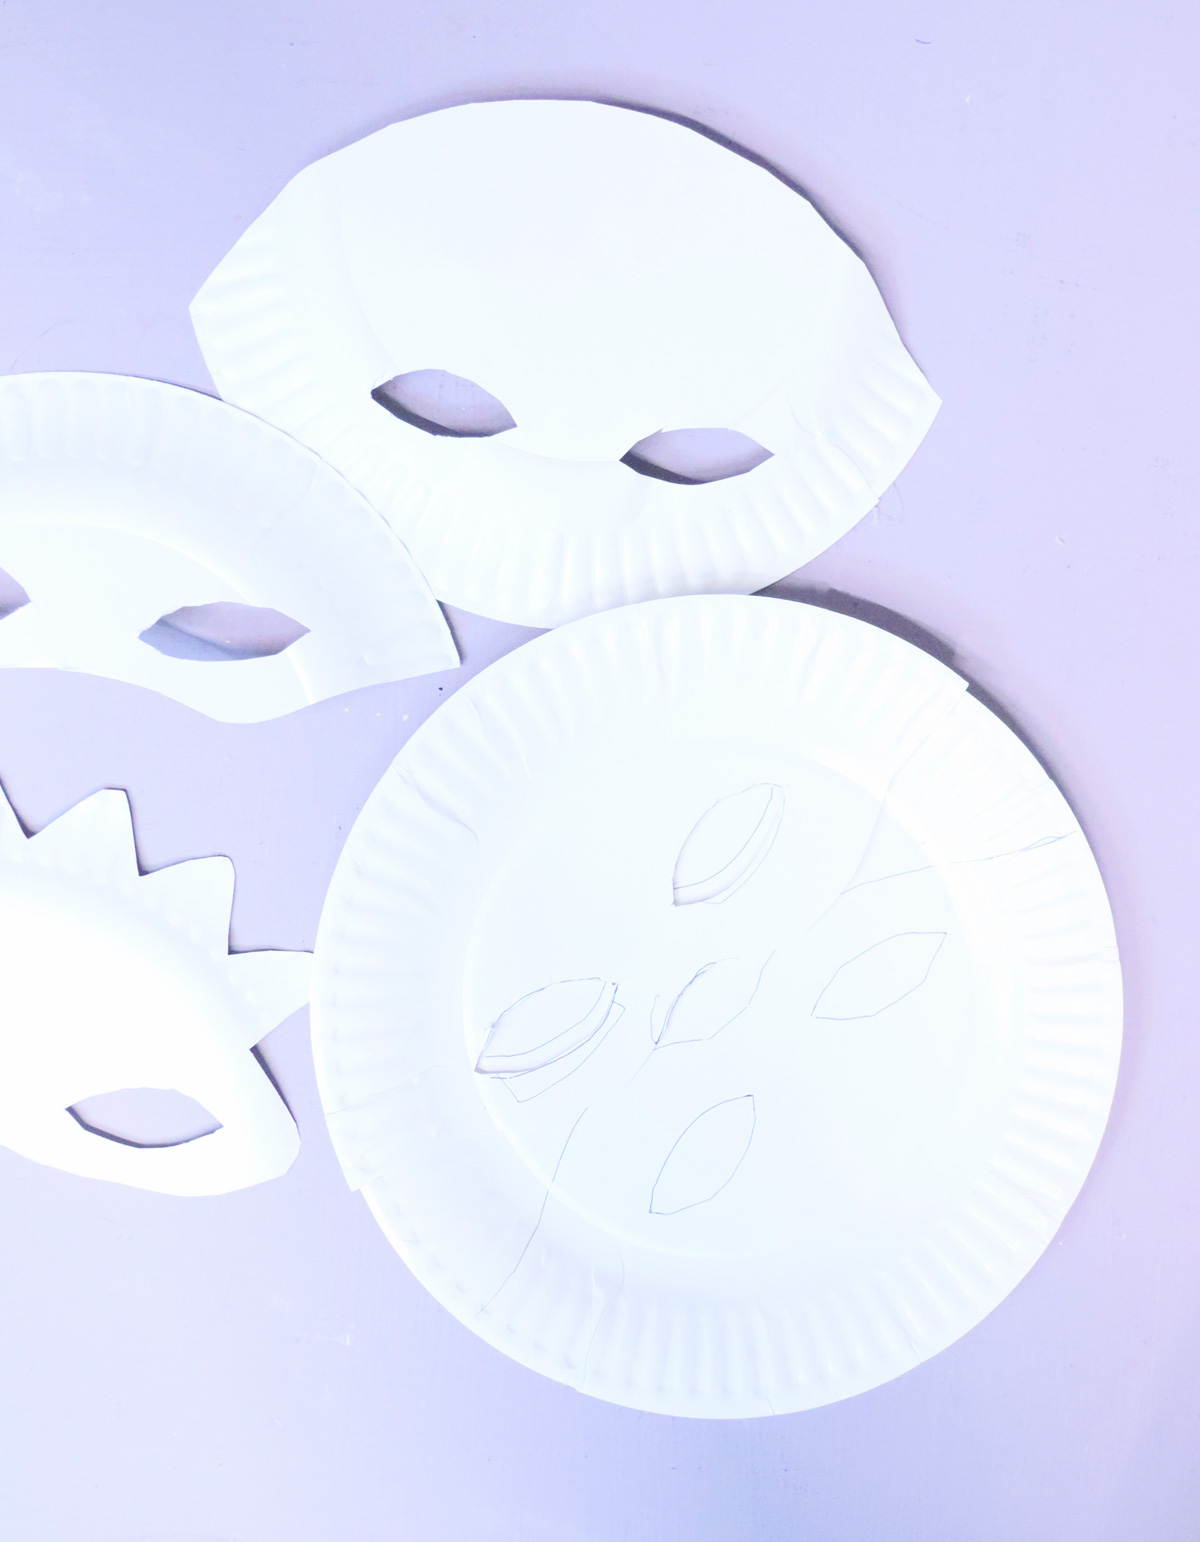
Try using the plate in different directions and ways for a bit of variety.
2. Color your masks. Try outlining the eyes and adding detail based on the winged eye shape.
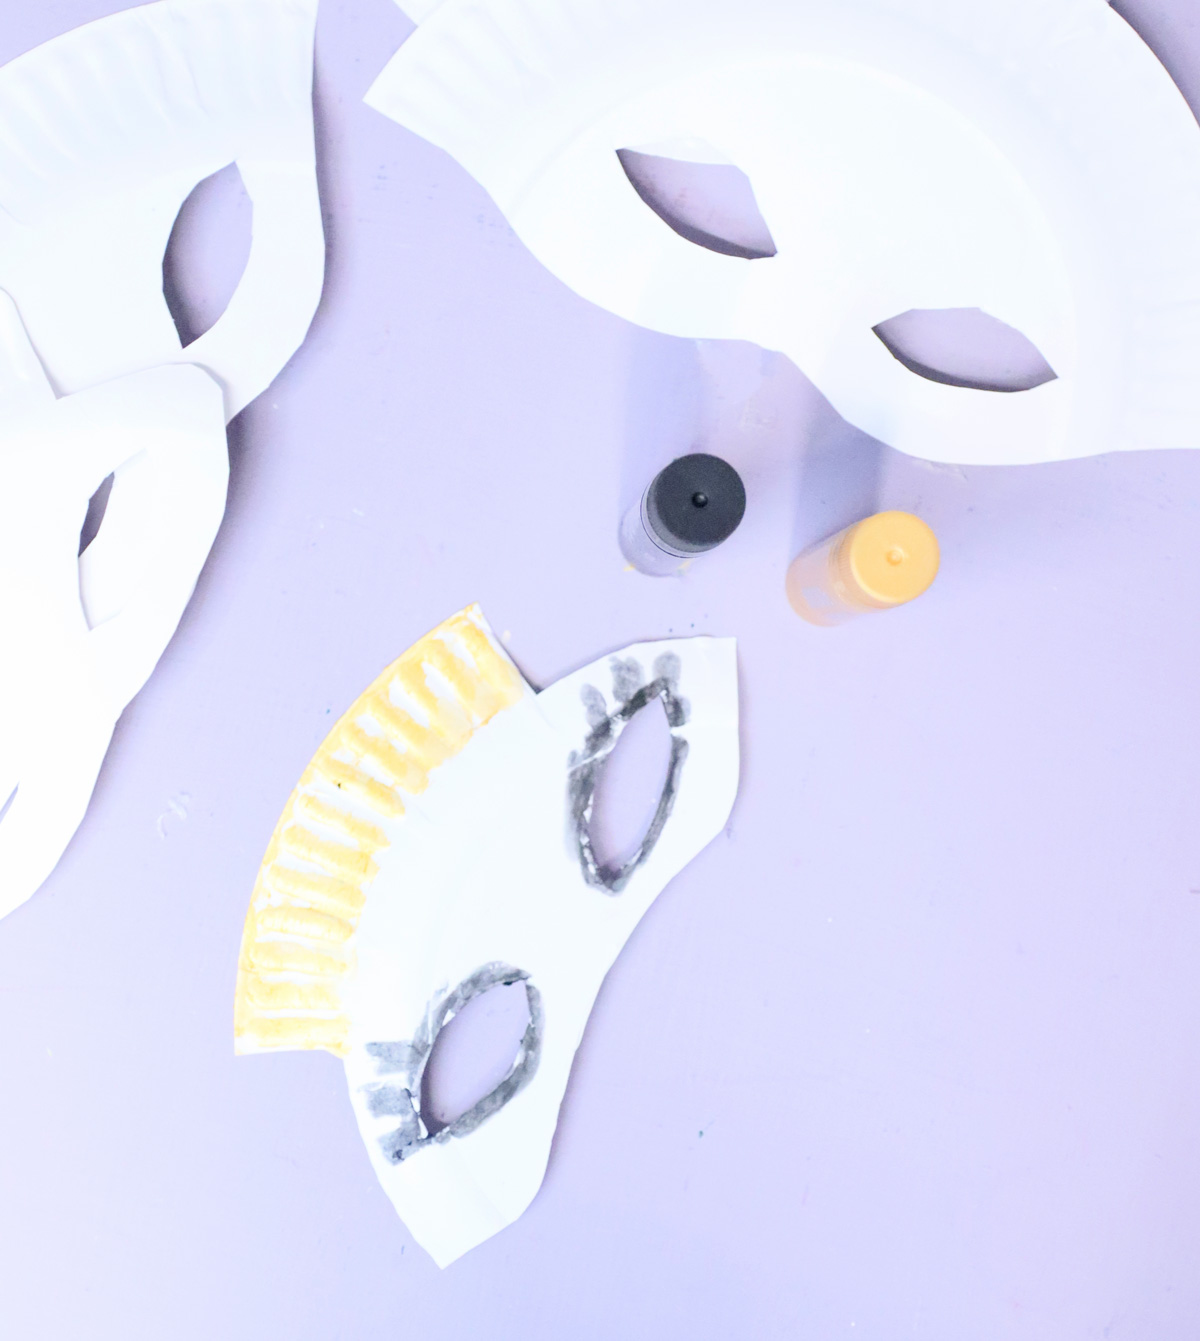
Use paint markers to get around the ridges, and use the ridges as a crown shape.
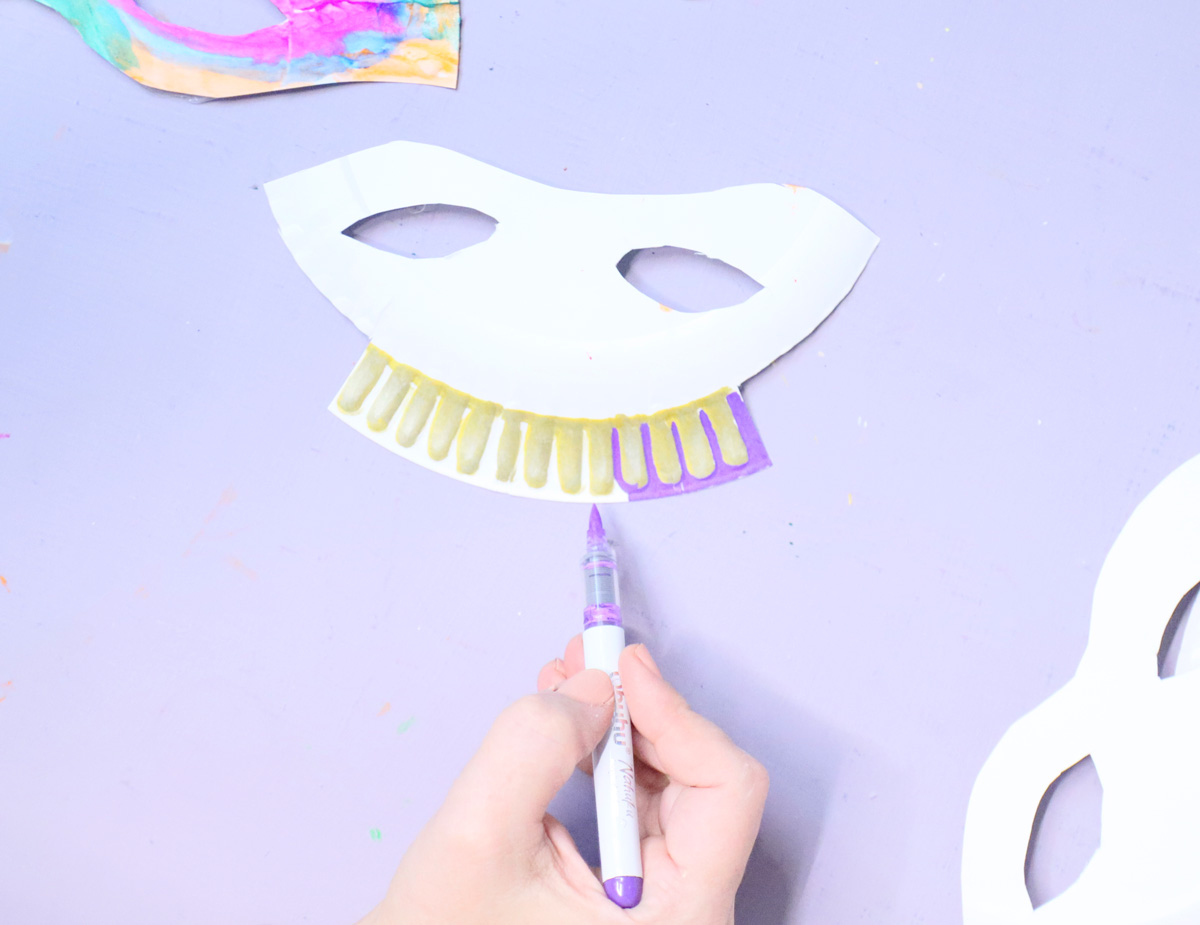
Add facial details like eyebrows and lashes if you want.
3. Turn it into a mask. Punch holes on each side and add an elastic. Or tape or glue on a dowel.
Your paper plate masks for Purim – or anytime – are complete! Which styles will you be crafting next? Comment below and then check out this fun mask decorating activity.