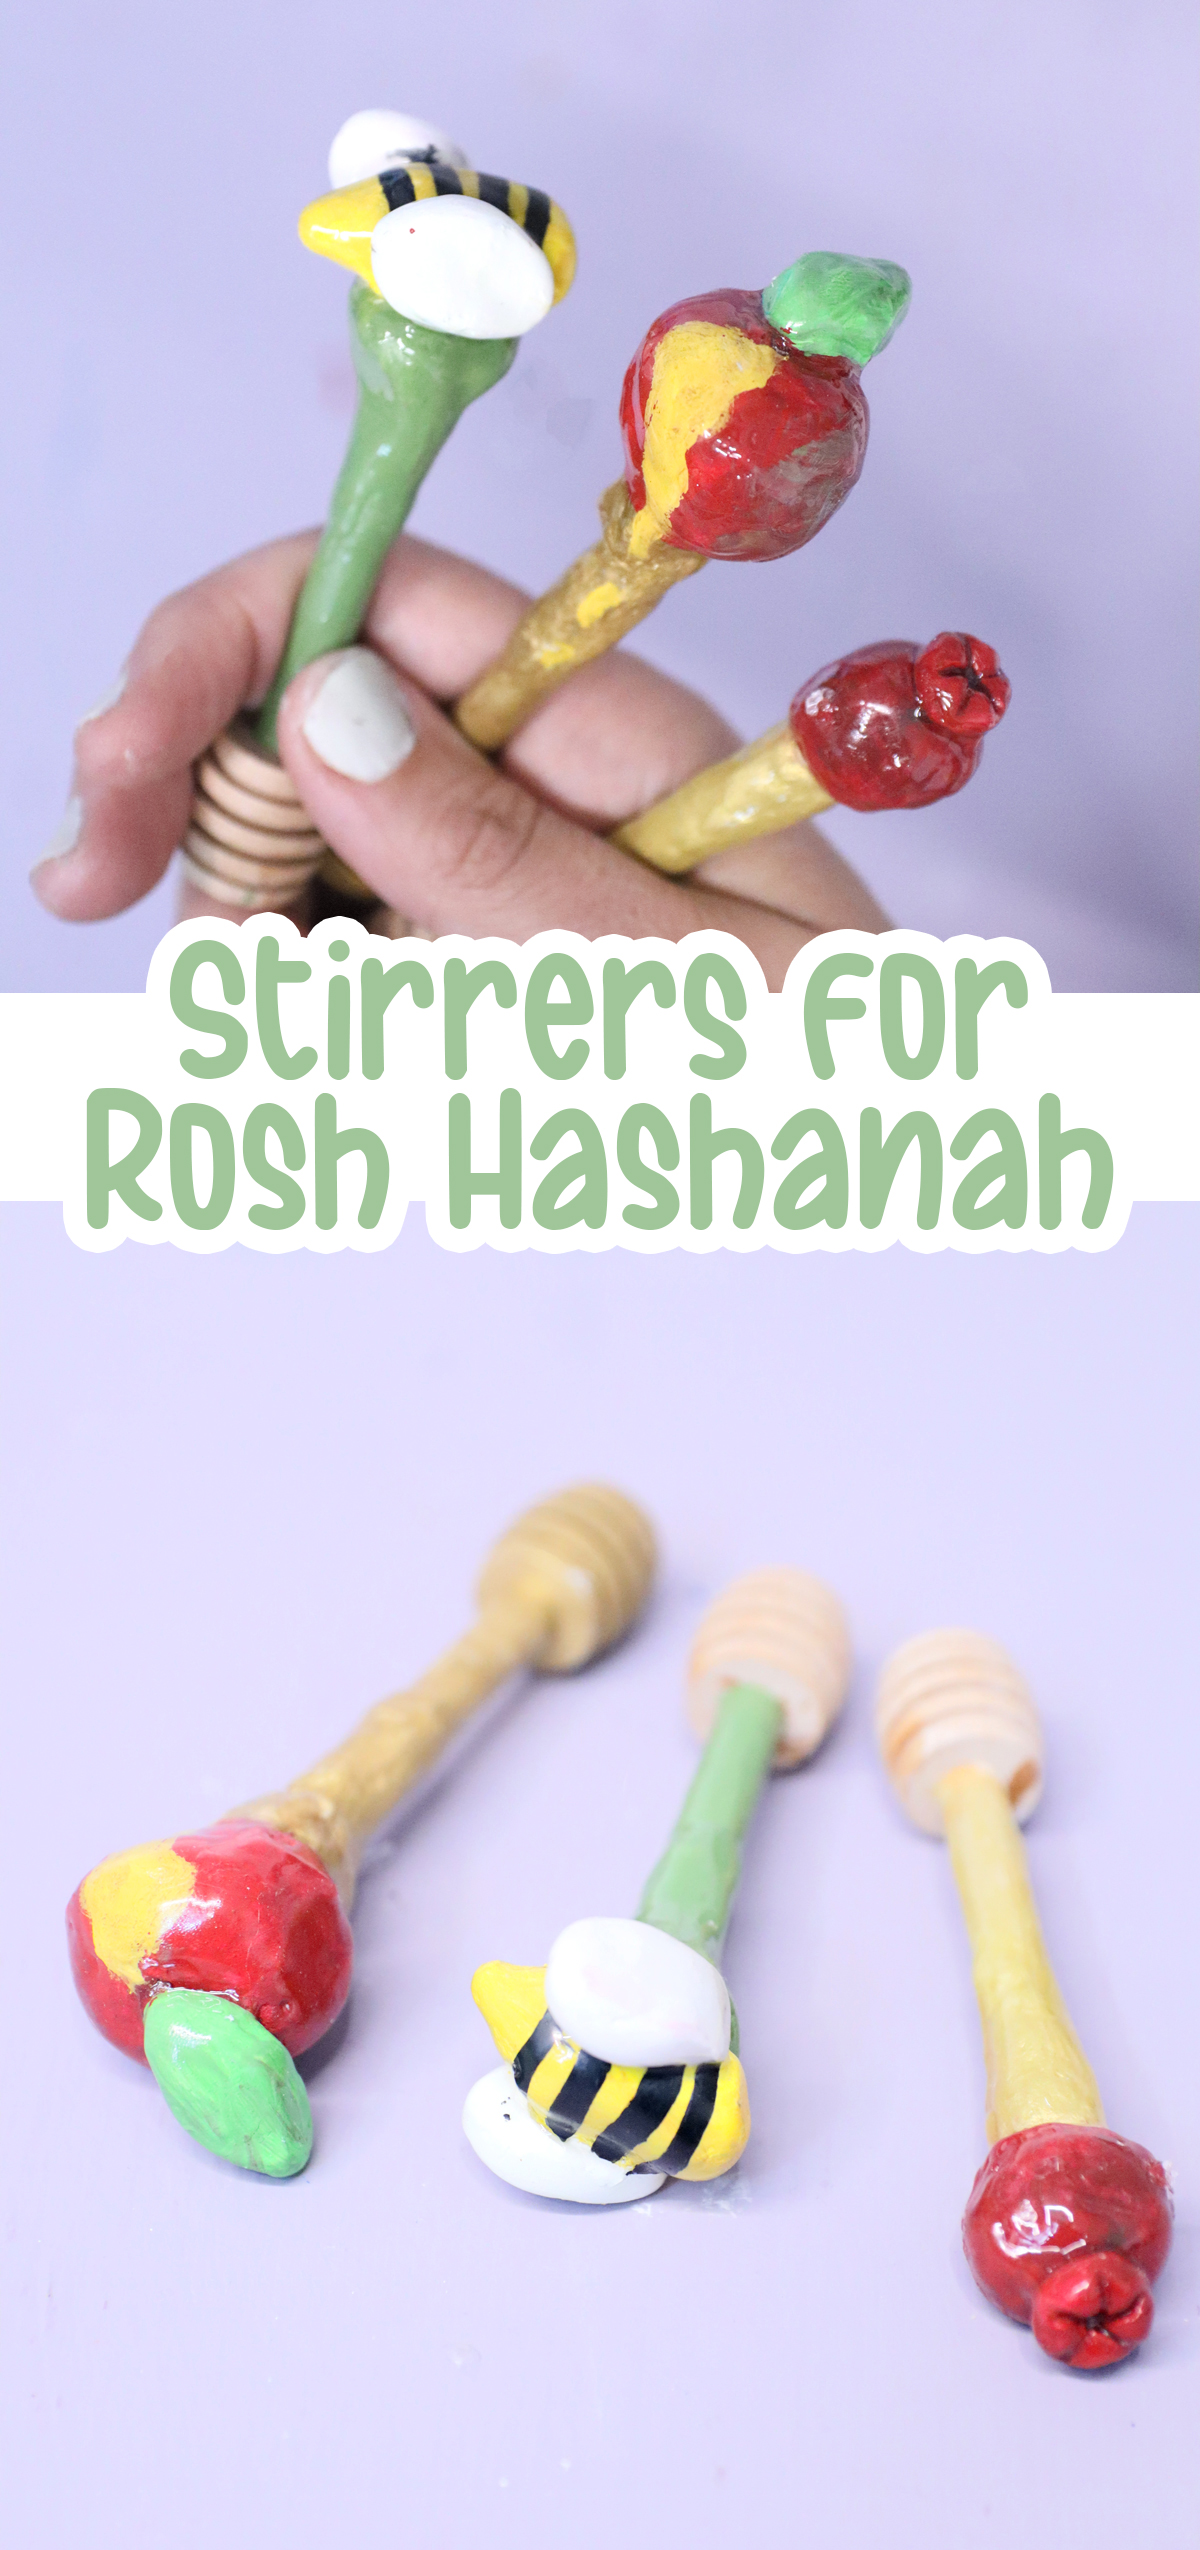
DIY Clay Honey Servers – Dipper Sticks from Air Dry Clay
Craft these adorable DIY clay honey servers using air-dry clay and wood honey wands! If you’re looking for something simpler, try this super cute color-your-own honey wand craft too! This post contains affiliate links.
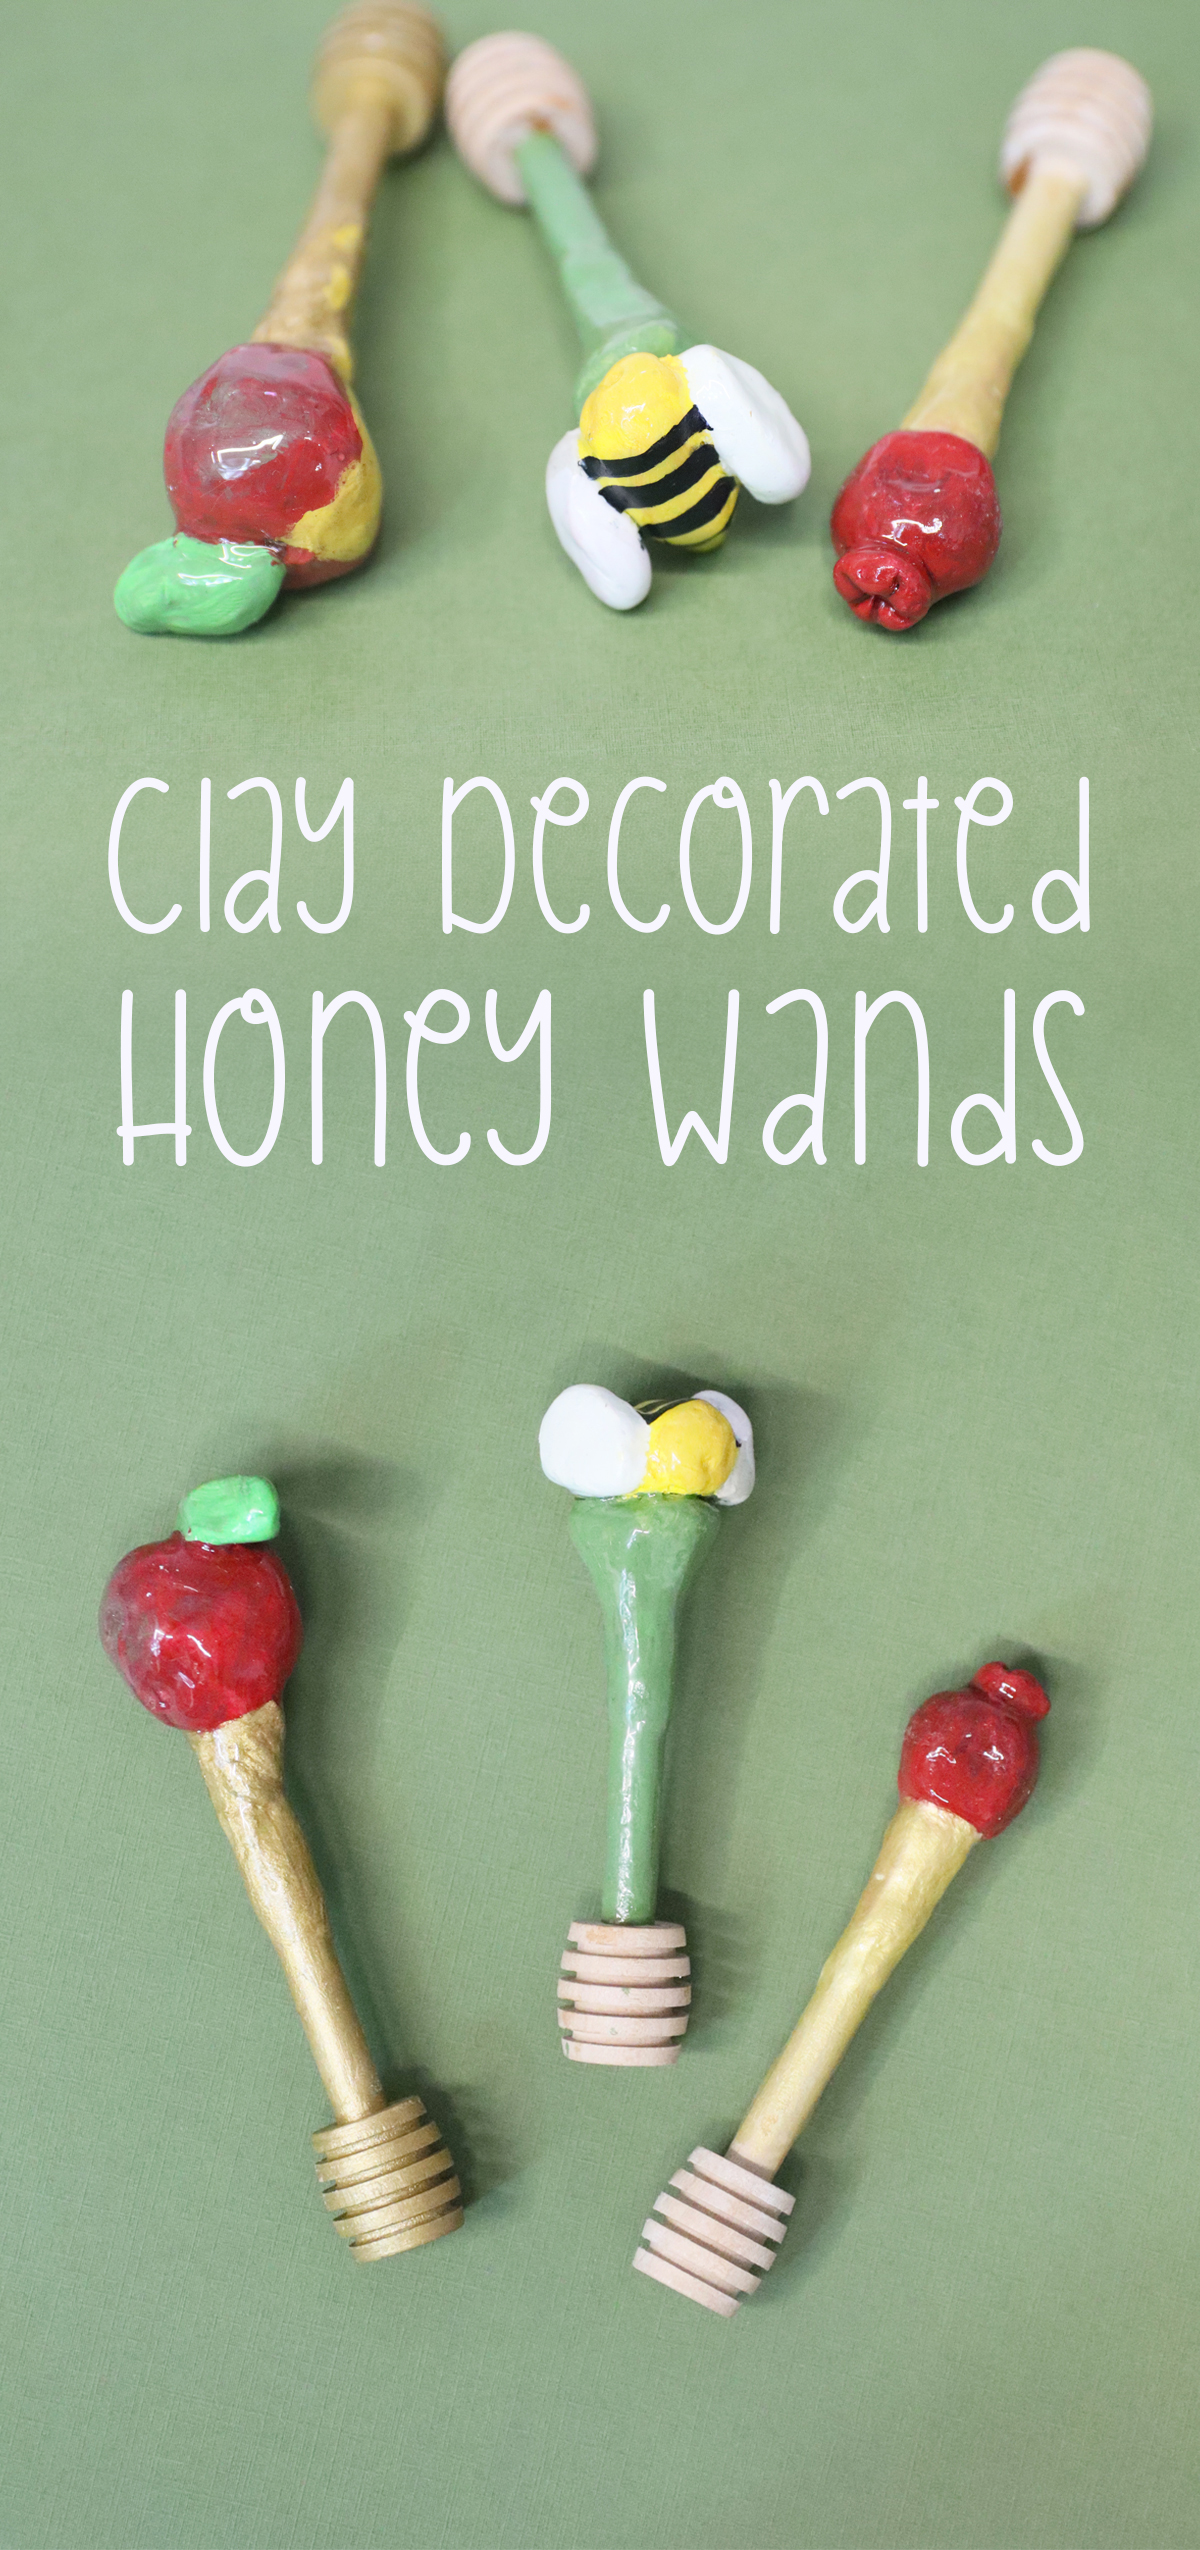
This year, I wanted to share some really cute and functional Rosh Hashanah crafts, and one that I really picked up on was honey wands!
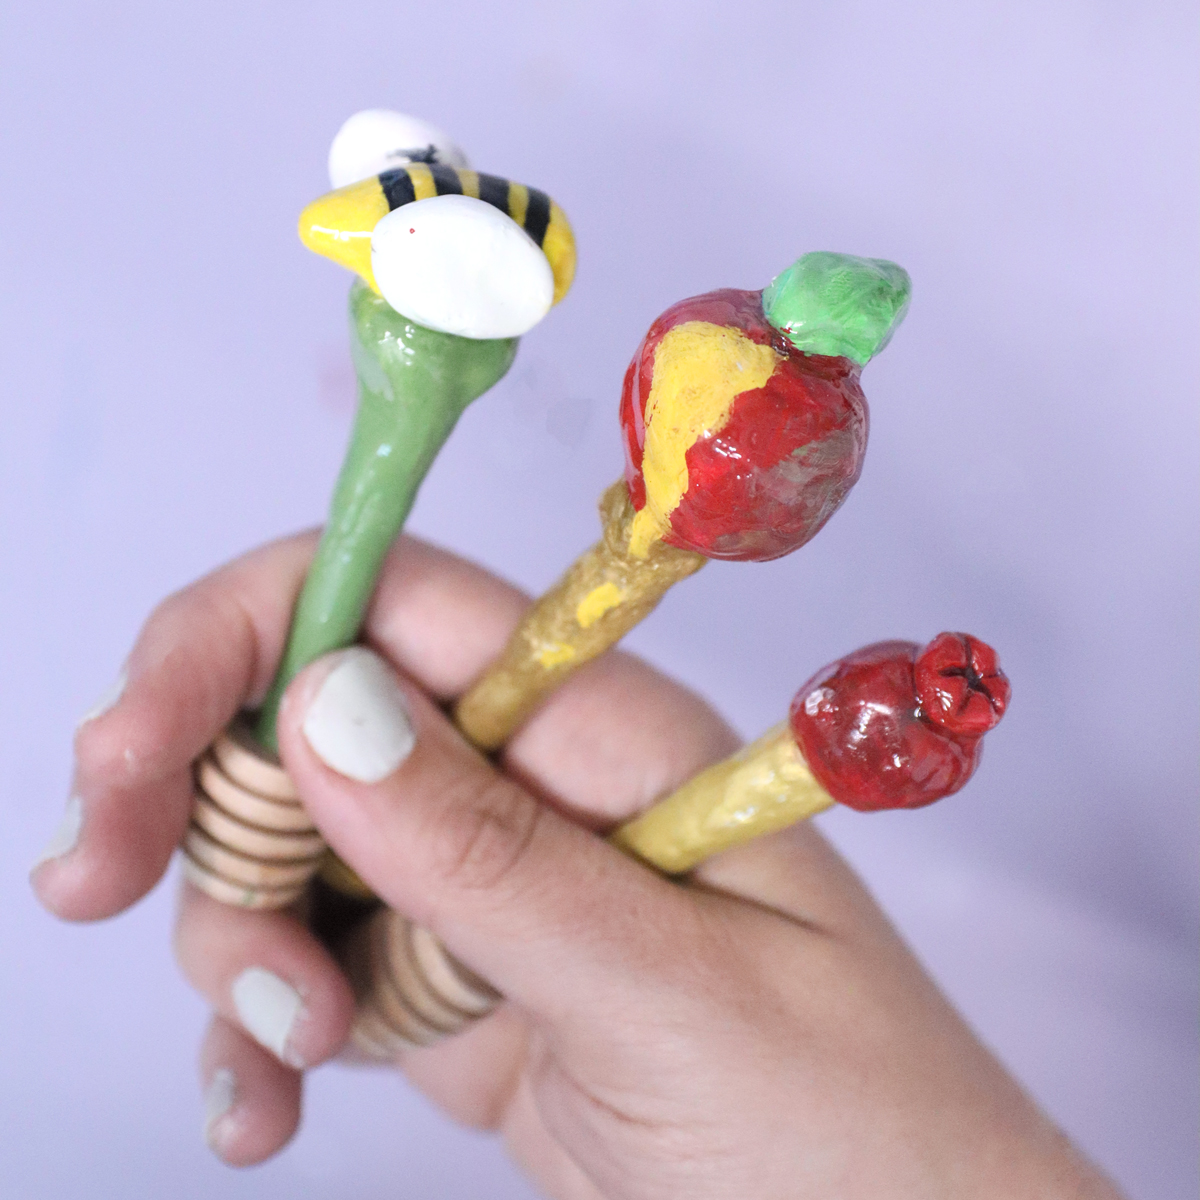
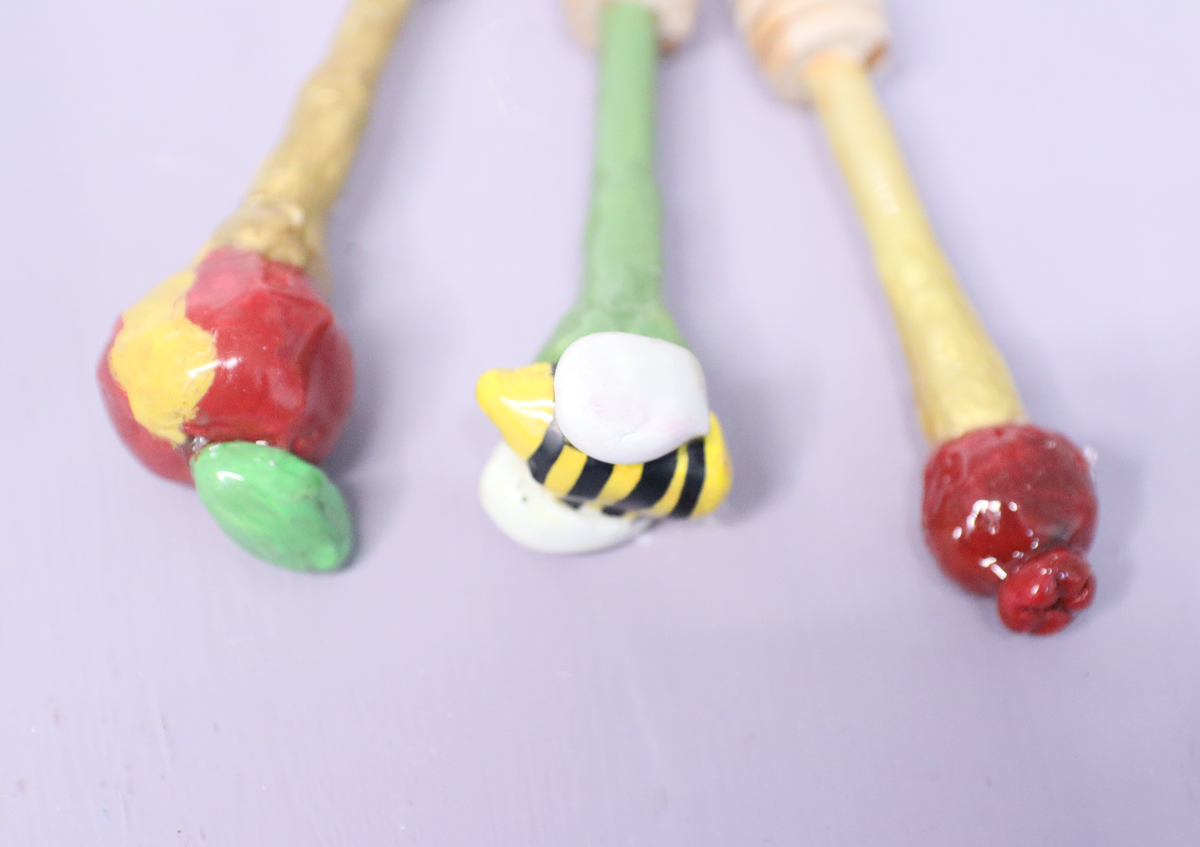
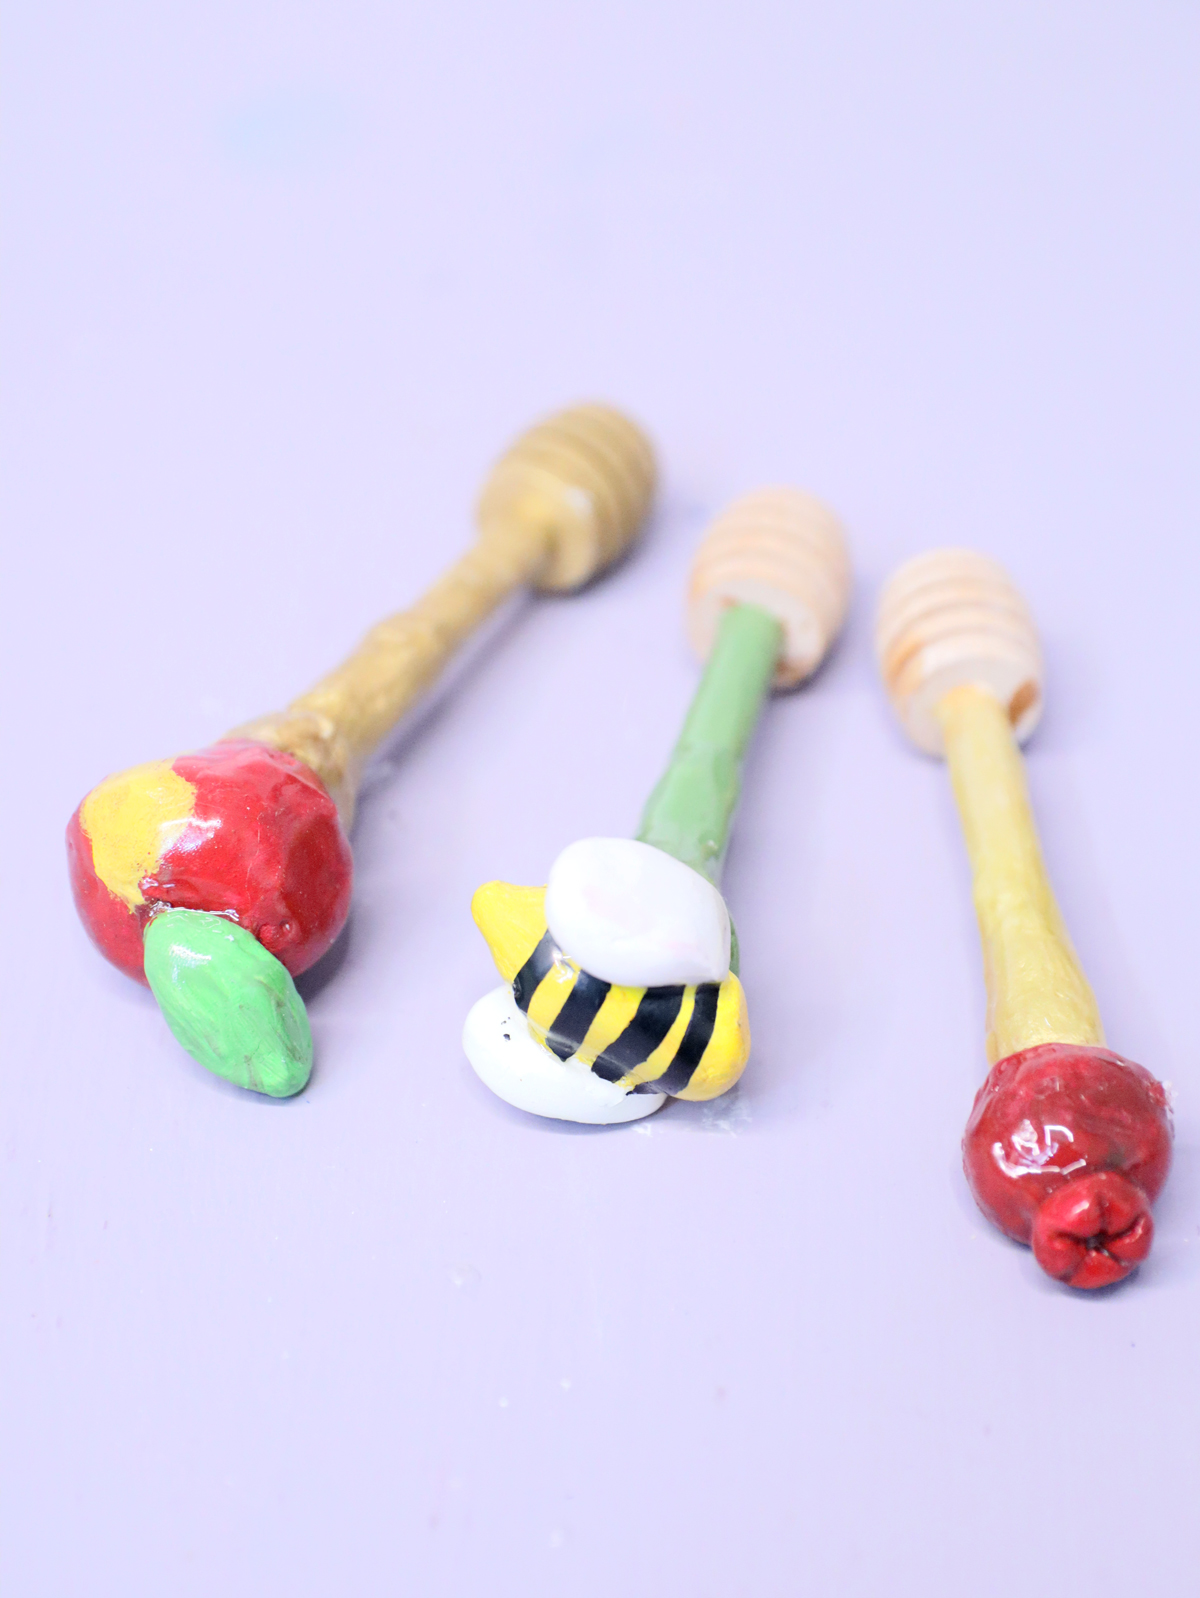
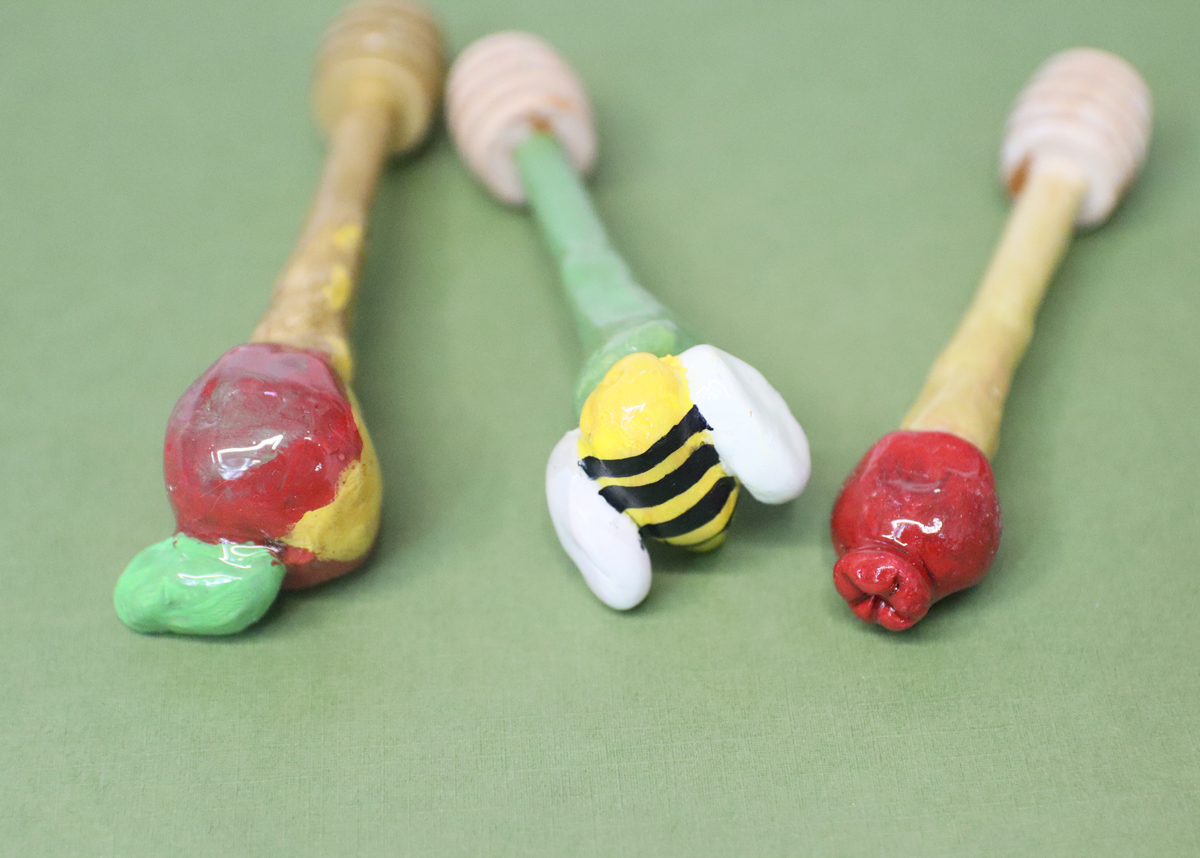
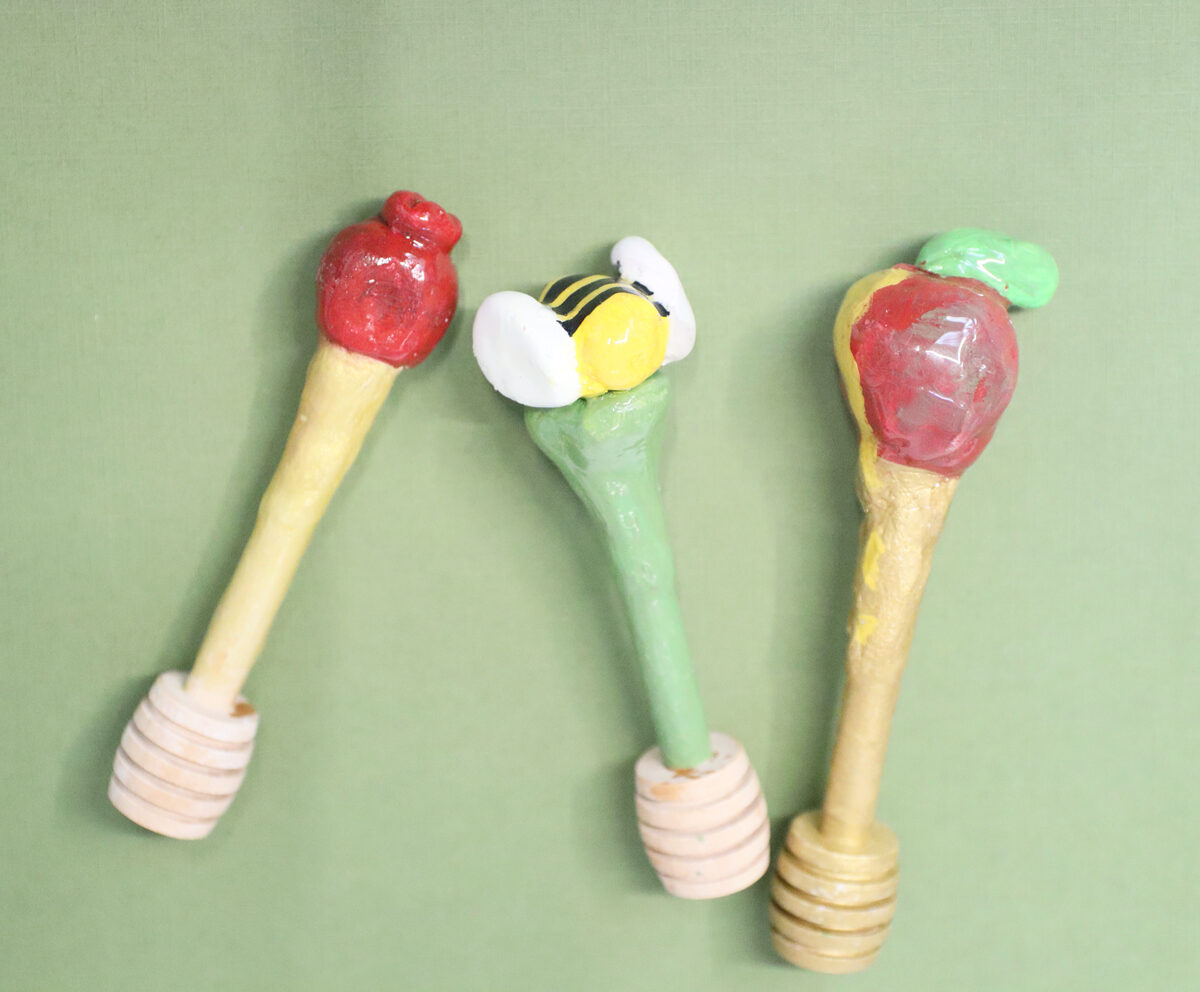
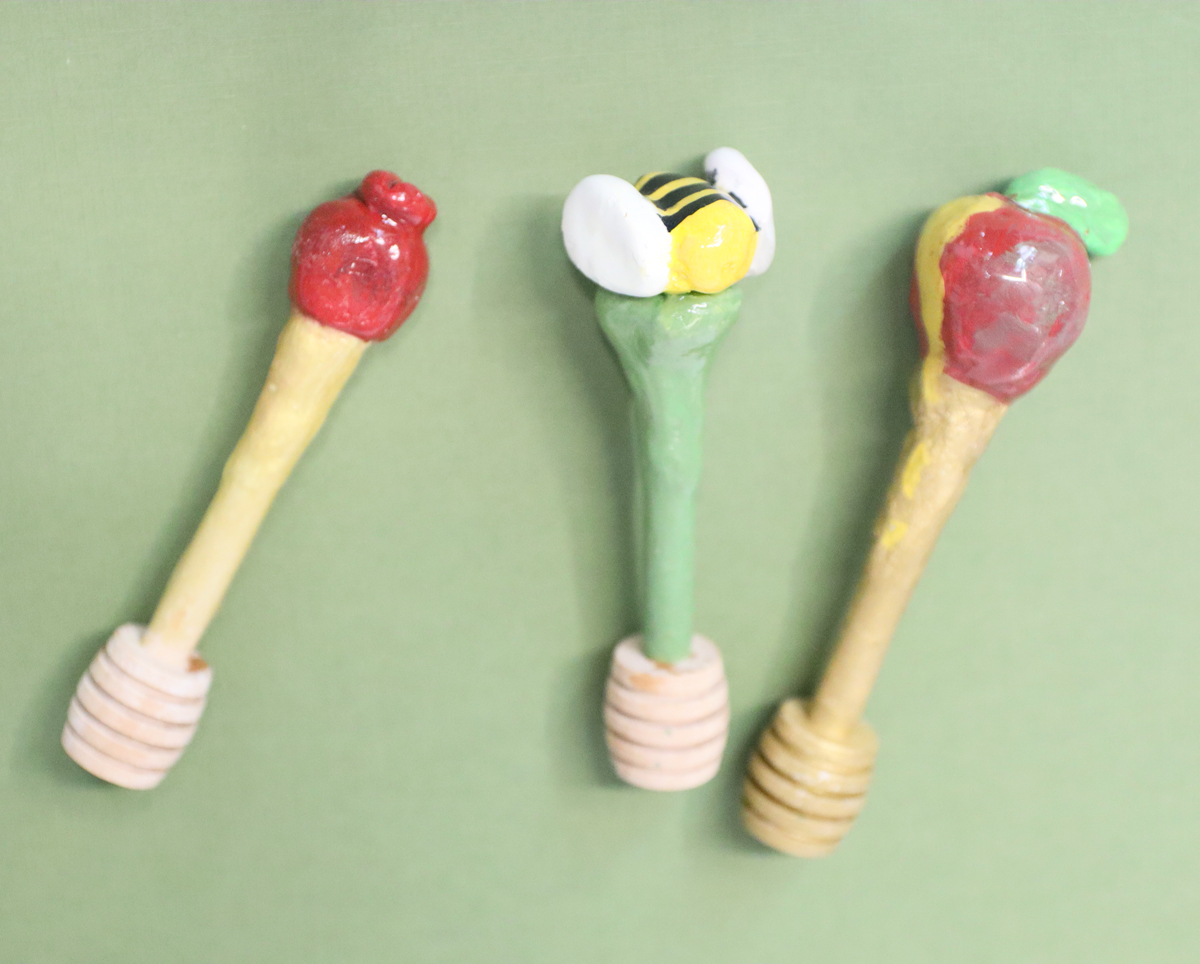
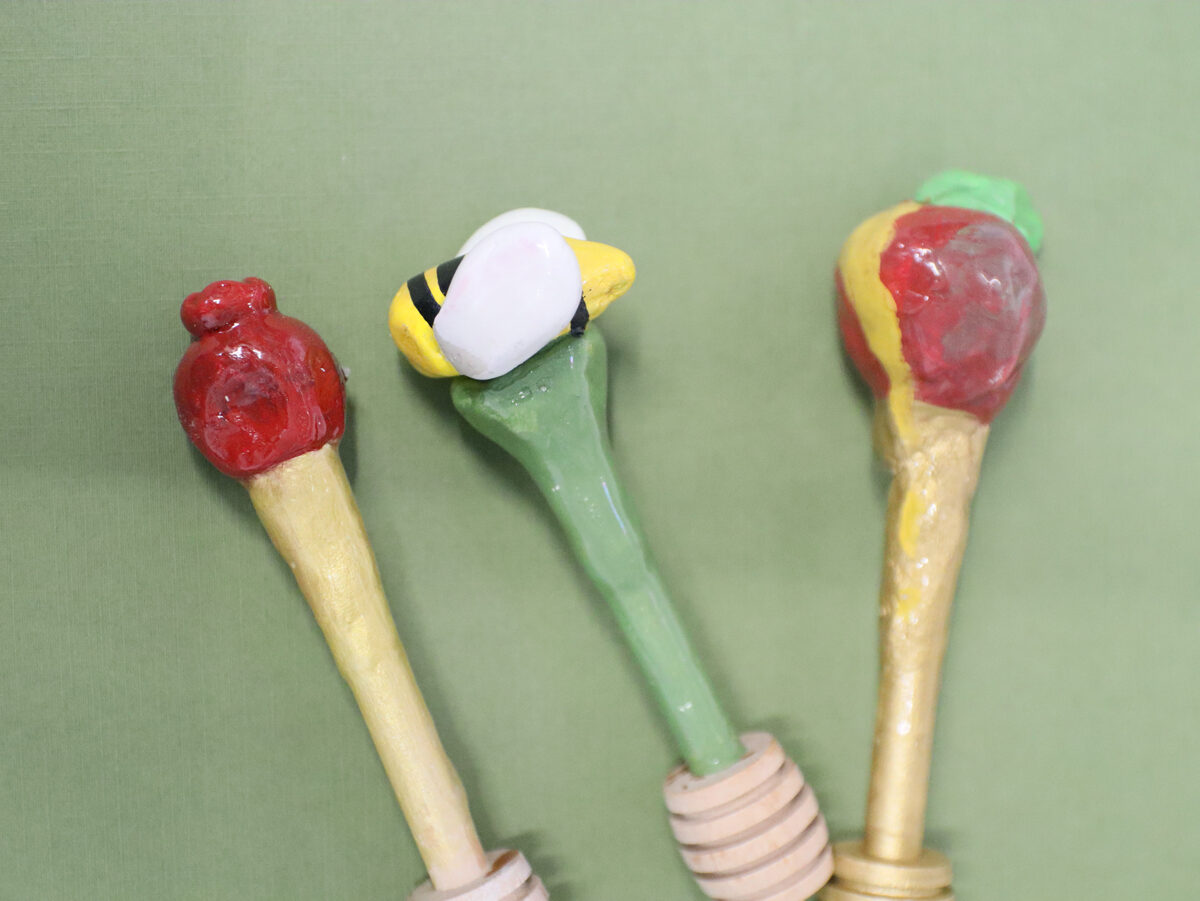
I decided to design my own cute little honey wands by adding clay toppers in Rosh Hashanah themes to basic wood ones. I painted them and sealed them for durability.
I used mini honey wands, but in hindsight, I’d definitely use larger ones! Read on as I go through the process and my tips for making these DIY clay honey servers.

Tips for making DIY clay honey servers
Food safety of your supplies
One of the first challenges with making anything food-adjacent is food safety.
Since it comes in contact with food, you’ll probably want your materials that you use to be food safe.
Disclaimer: I am NOT an expert on food safety and encourage you to do your own research. I am only providing good-faith information based on what I’ve been able to find out.
Generally air air-dry clay remains porous and can harbor bacteria, making it not food-safe. The brand that I used is DAS, which is non-toxic. However, it’s not food grade.
You’ll need to decide if this matters for small contact with honey.
You’ll also need to seal your creation, and you may want to know that the paints and sealants are food safe. Personally, the most important issue here is the sealant (though I do look for non-toxic supplies for the layers underneath, too).
The best option to make a fully food-safe clay honey server would be:
- To seal it with a food-safe resin, such as Alumilite Clear Cast Epoxy resin. The biggest challenge will be getting the right volume and letting it air dry without dripping.
- To leave the bottom part that’ll touch the honey “naked” and undecorated. I recommend this regardless. It can be a bit challenging with a shorter stirrer.
If you’re very concerned about all of this, you can make it purely decorative.
Blending the clay into the dipper base
The next challenge: you need to blend the clay into the base of your dipper to make it look nice. It needs to hold well, so you can’t just plop it on.
This makes it so that more of the handle is covered in clay and paint. If you want to make sure you have more “naked wood” for food safety, use a longer dipper. You can also make standalone toppers with a hole in the base to fit the topper, and then glue it on when you’re done crafting.
Connecting clay parts
Connecting clay parts isn’t as simple as sticking them together – they’re not self-adhesive. The trick to doing this is to distress both sides and then use “slip” – that is, a paste made of clay and water – to glue it together.
It’s very easy to make slip and you can save it from project to project if you store it in an airtight jar.
Since these DIY clay honey servers are shaped using a few small parts, you may want to practice this technique a bit before trying it on the wand.

Finishing things off
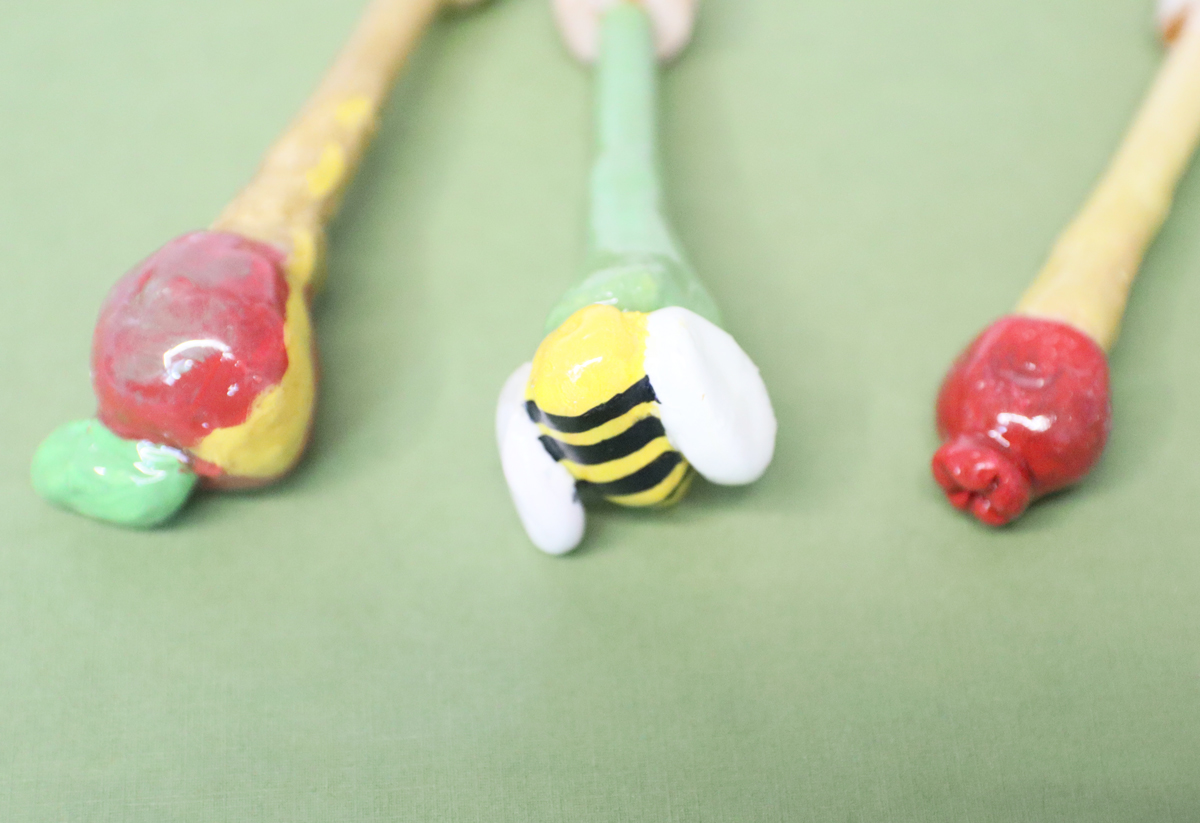
A project like this one is all about the finishing touches. The paint is what brings what might otherwise look like “blobs” of shapes to life. Craft acrylics are a win here, and you can add small details (like I did on the bee) using fine-tipped paint markers.
You can bring in a little sophistication with more muted colors than I used and metallic paints.
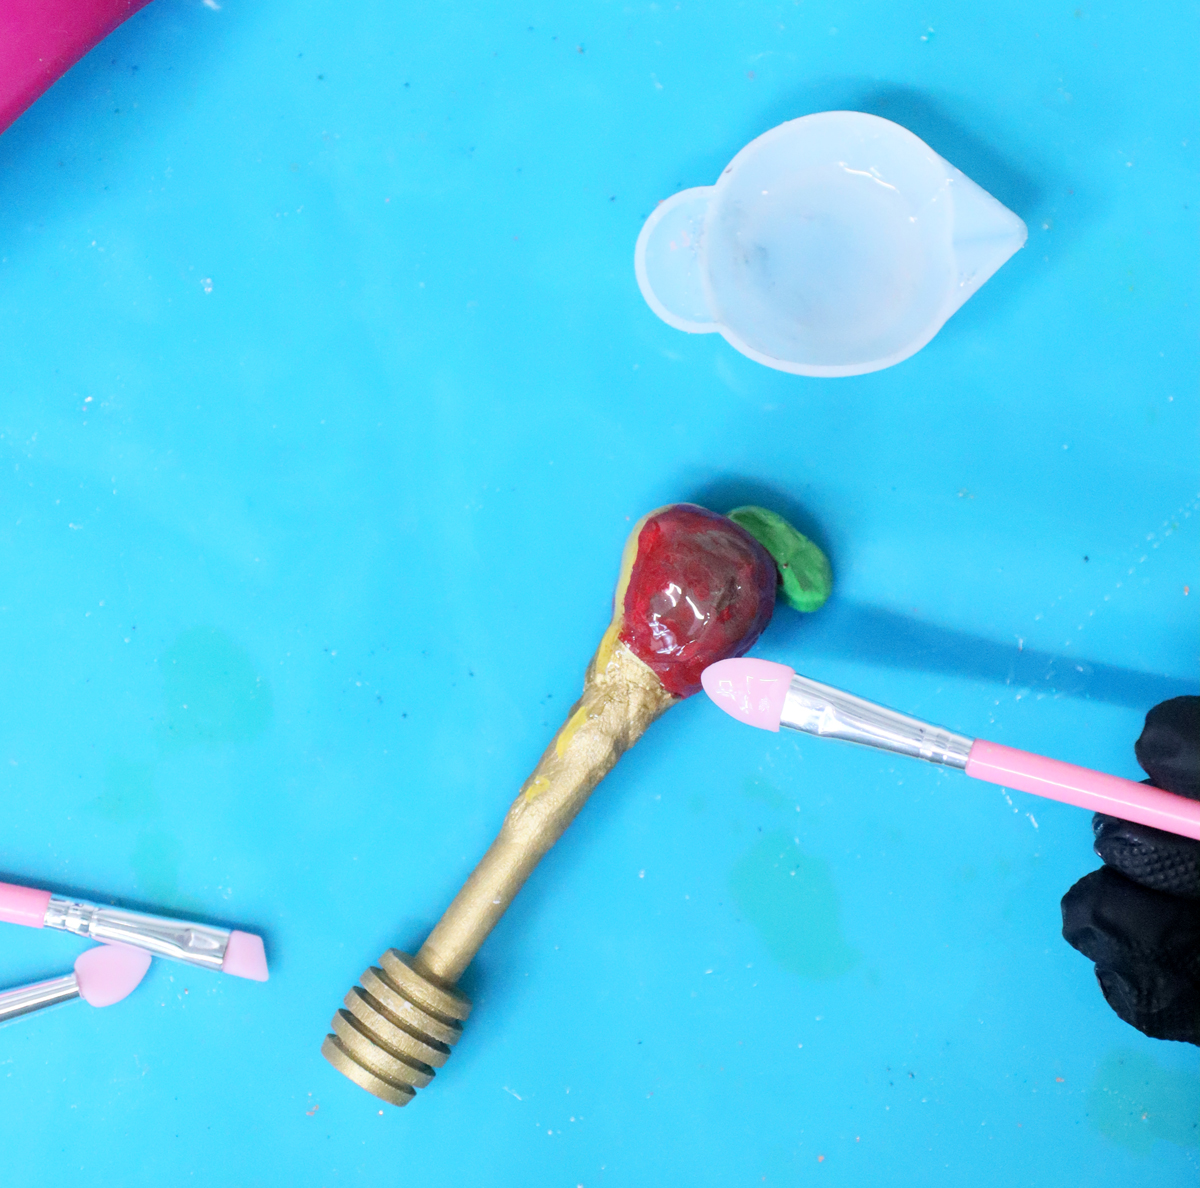
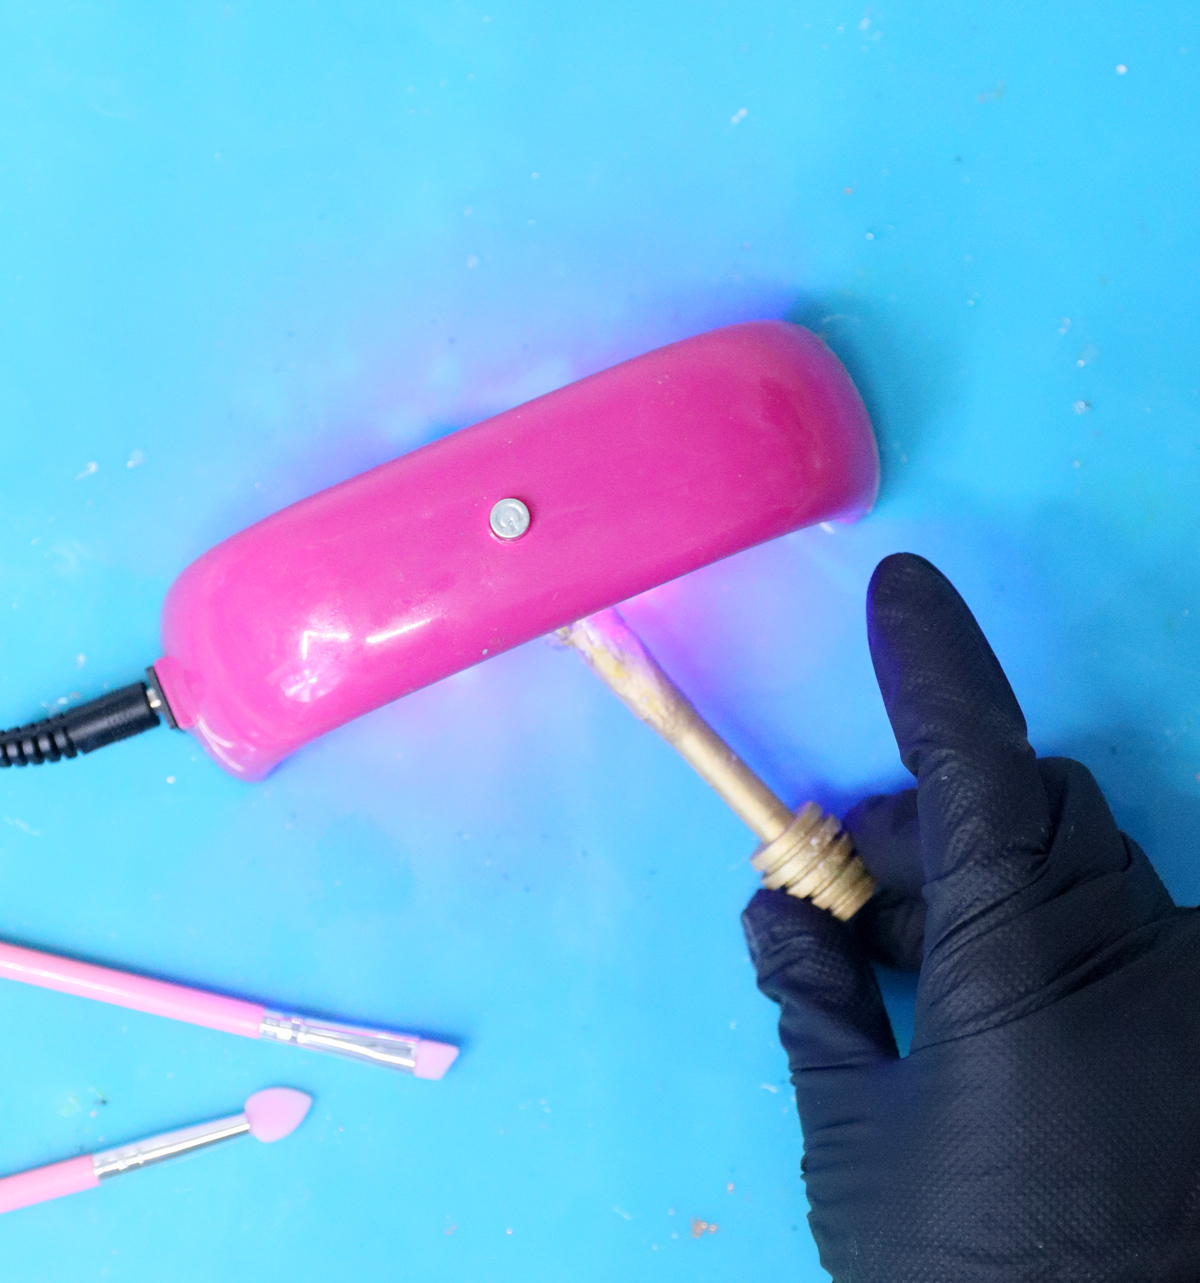
I finished my design off with UV resin for a high-gloss finish. Of course, this is not food safe and should only be used on the top clay portion, not the part that touches the food.
You can also use clay glaze or a hard finishing Mod Podge (such as Outdoor or Dishwasher Safe) – with the same caveat.
How to make DIY Air Dry Clay Honey Servers
Supplies Needed
- Wood honey wands – I used 3-inch wands, but I recommend getting larger 6-8-inch ones
- Air dry clay – I used DAS brand
- Clay tools – great for helping you shape your clay
- If you don’t have a good tool for distressing clay (making scratches in the surface), have a toothpick handy
- Slip: Make this by mixing a little water into your clay until you have a paste.
- A garbage paintbrush to use with the slip.
- Acrylic paints
- Fine paintbrushes and a palette
- Acrylic paint markers to add smaller details
- Optional: masking tape if you want to block off the portion that’ll touch the honey, not to be affected by the craft for food safety reasons.
- Glaze – see notes above. I used UV resin with a silicone brush and UV lamp
YouTube Video
Watch the full-length video on YouTube if you prefer to learn that way! Or scroll down for written instructions with photos.
Step by Step Tutorial with Photos
1. If you’d like, before you start, you can “block off” the portion that’ll actually touch the honey at the base – and part of the stick – using masking tape, to keep it food safe.
Start by taking a small ball of clay and sticking it at the top of your honey wand. Figure like you’re making a pencil topper. Smooth it out on the bottom so that it blends with the stick but doesn’t go too close to the dipper part that’ll touch the honey.
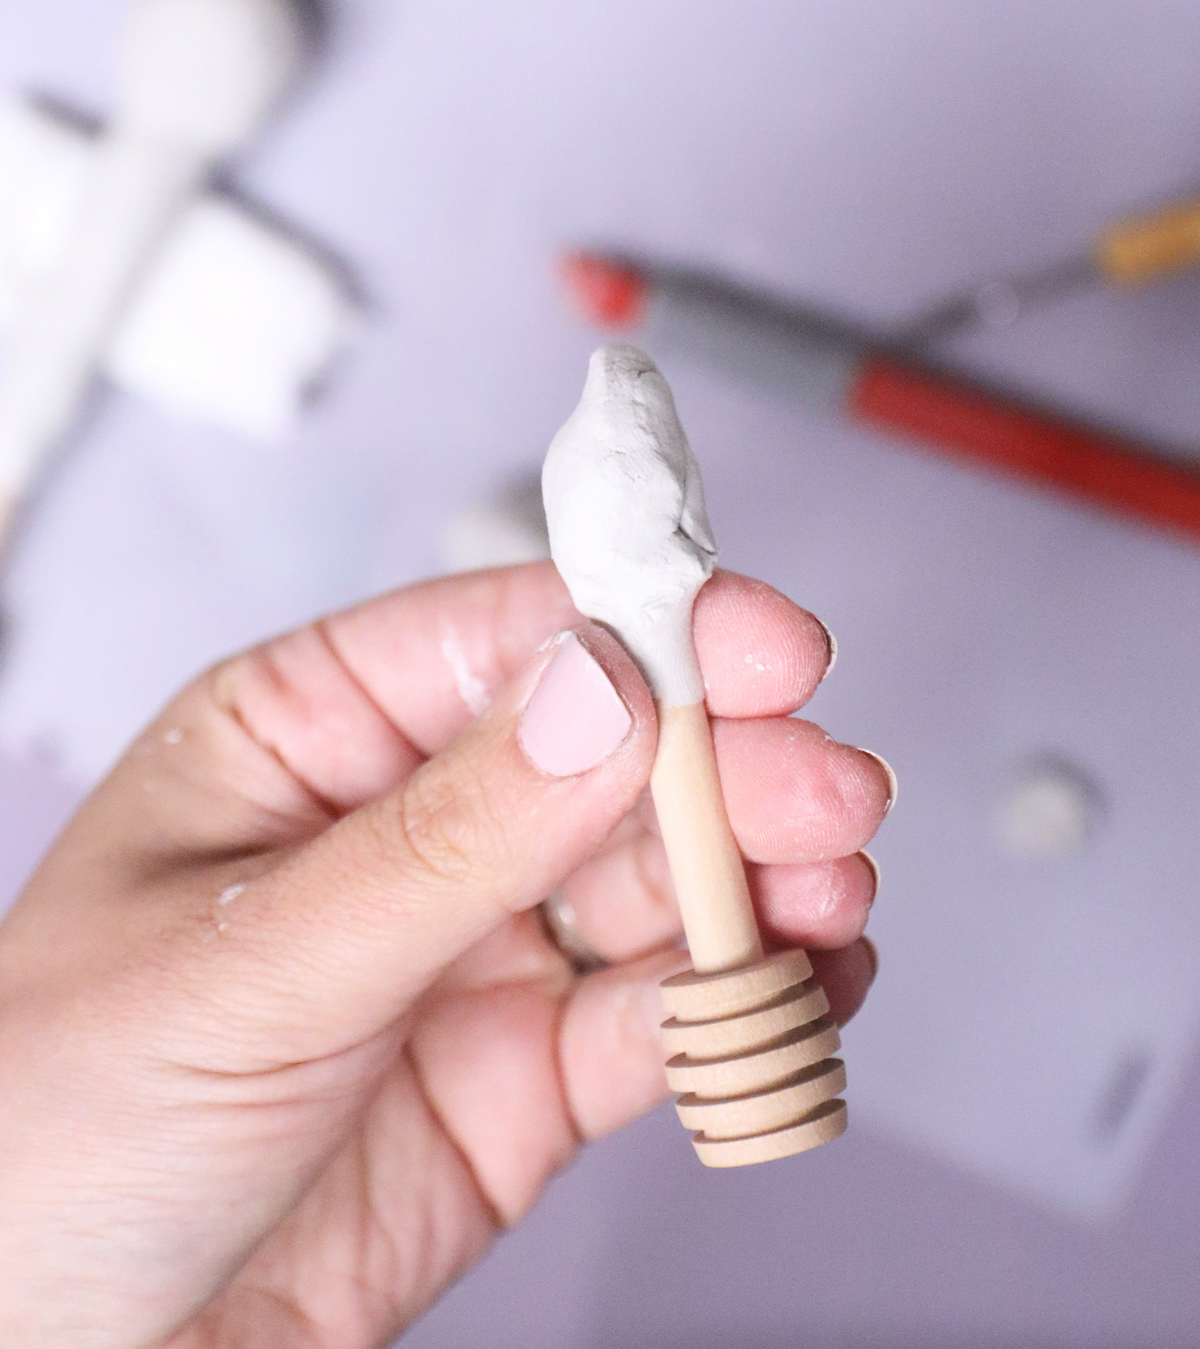
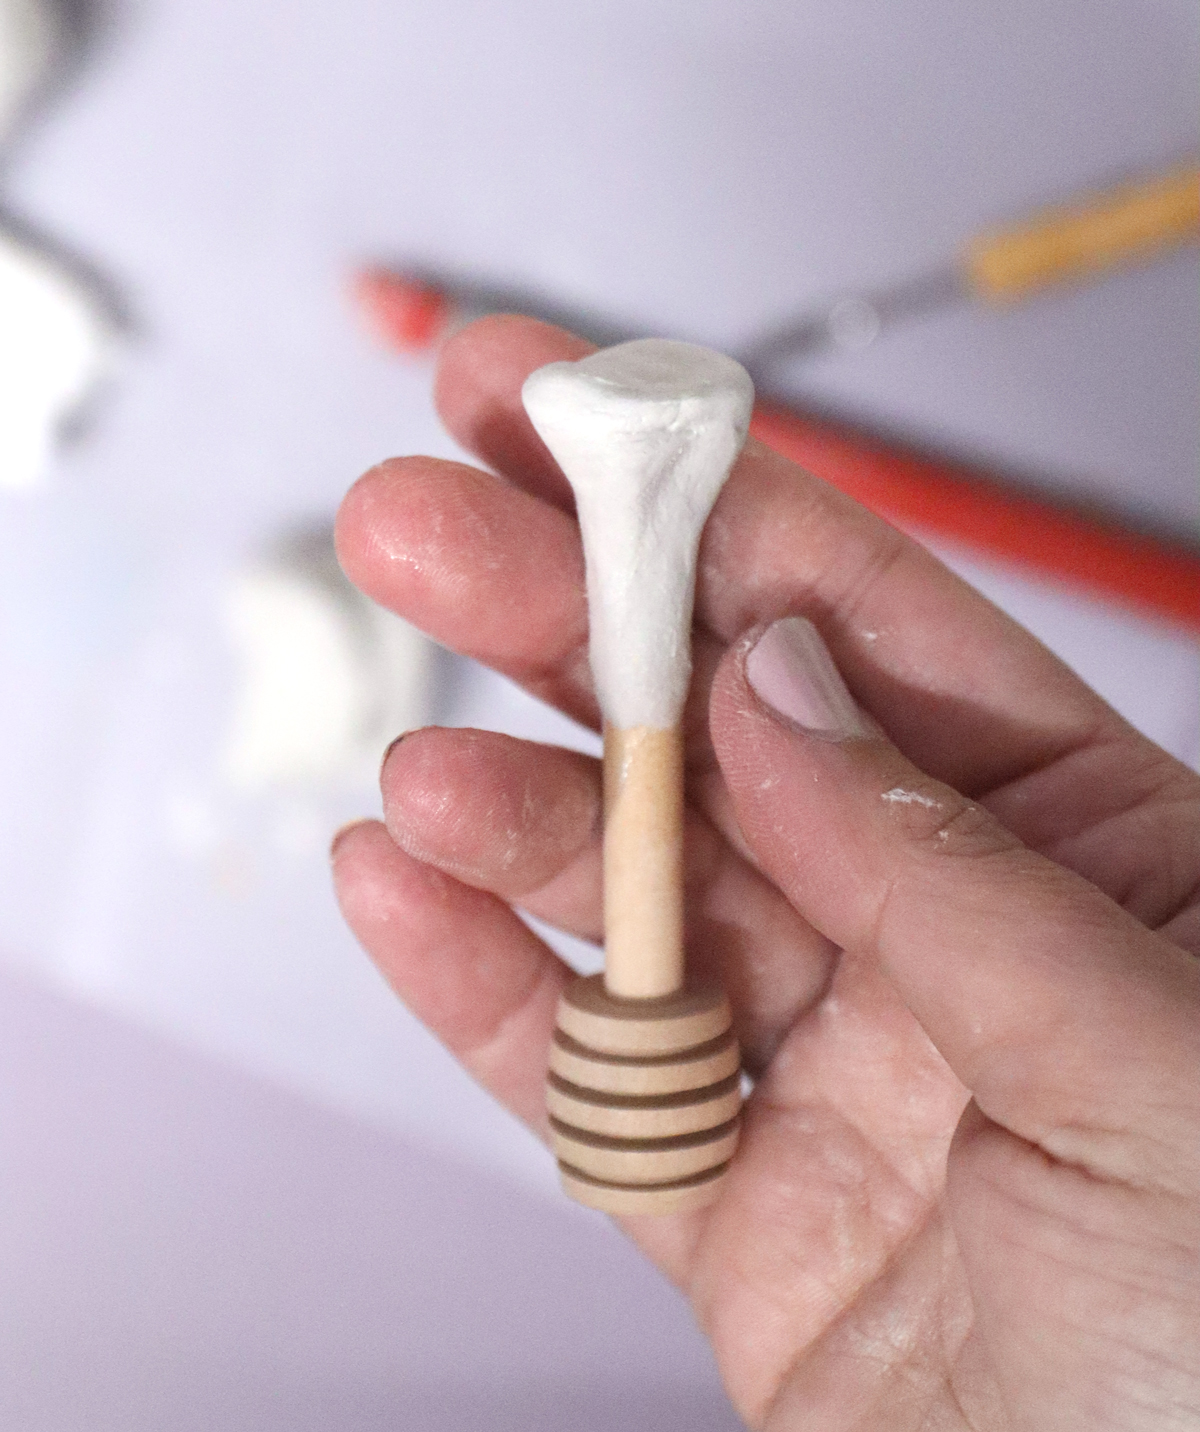
2. Flatten it out at the top, creating a surface to add your decoration. Don’t use too much clay since that’ll make it too heavy, but use enough to cover the top and form a flat base.
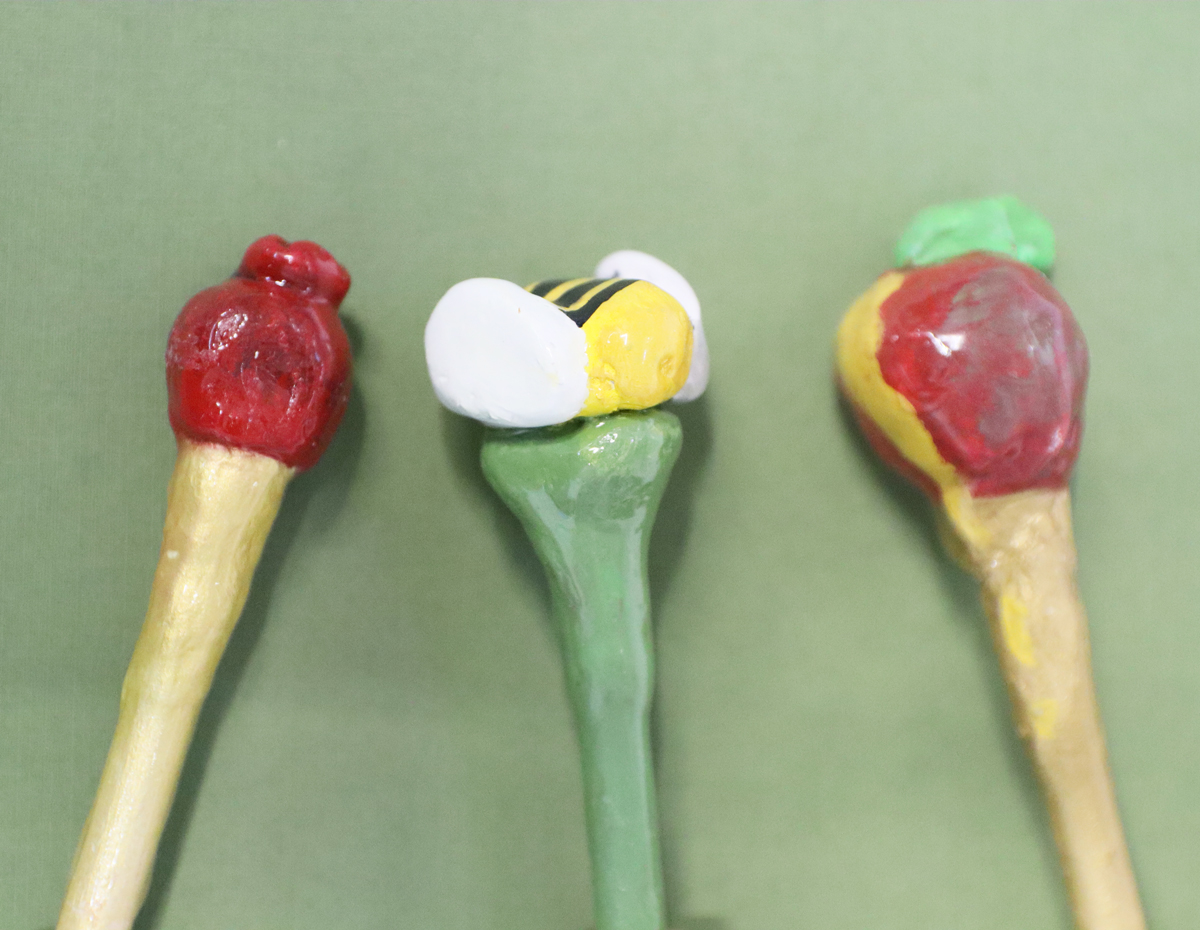
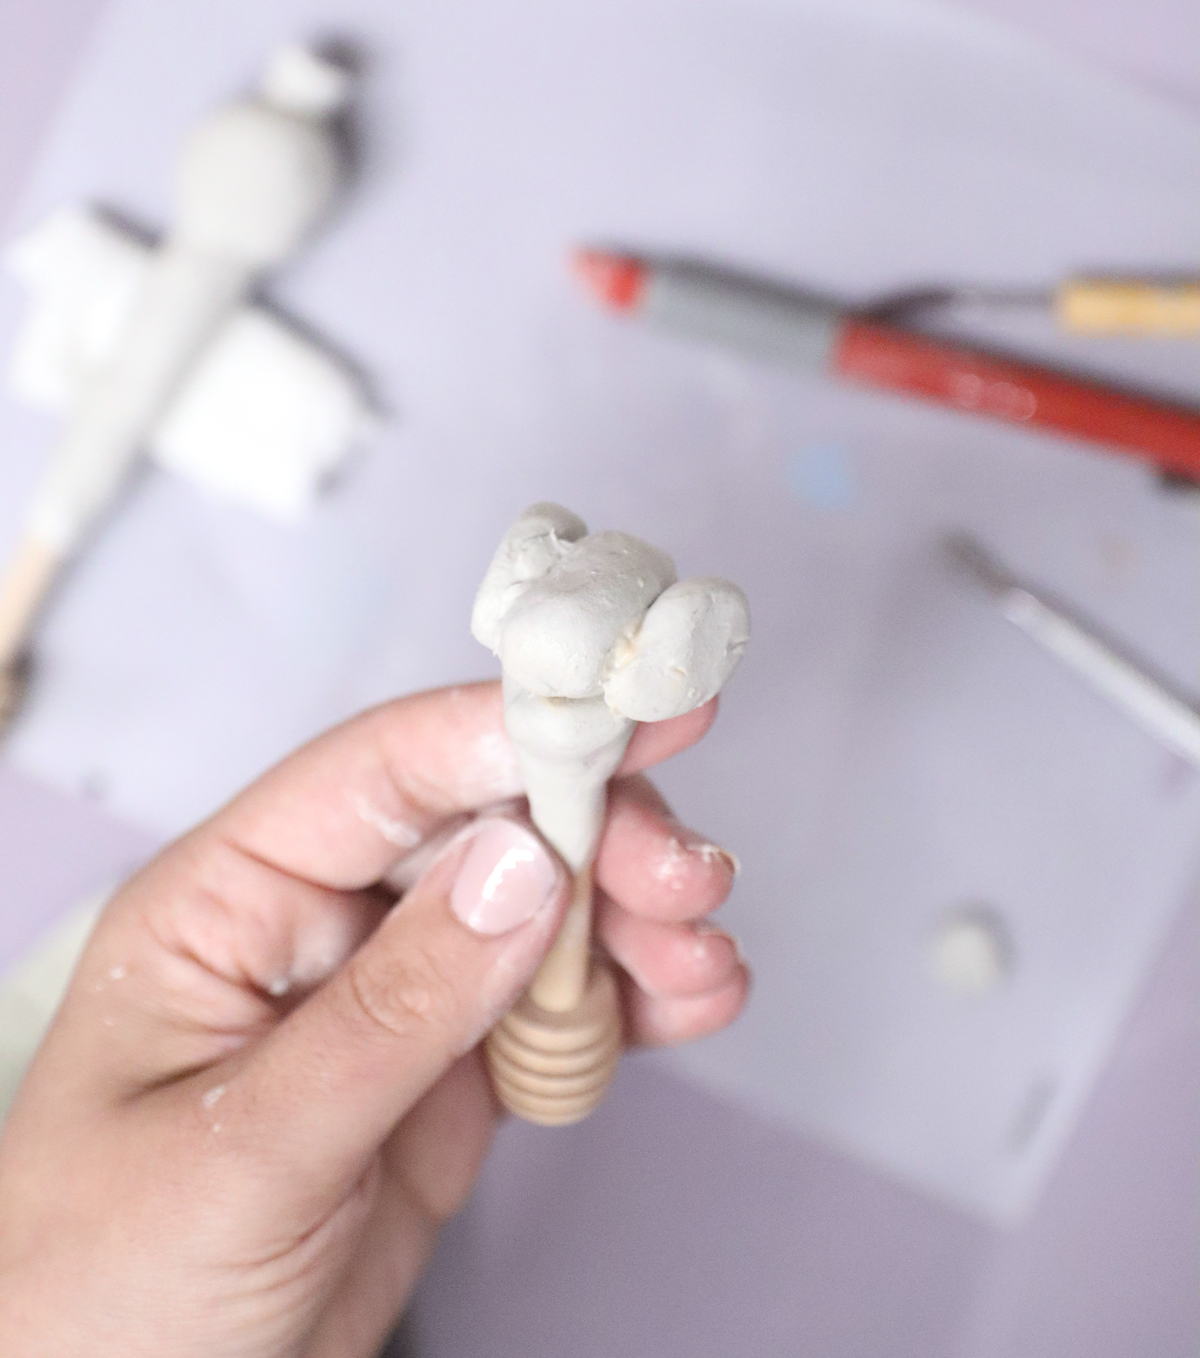
3. Make your design by creating each of the elements and connecting them. I’ll demonstrate it on the bee, but you can follow the same concepts for the apples and honey and pomegranate.
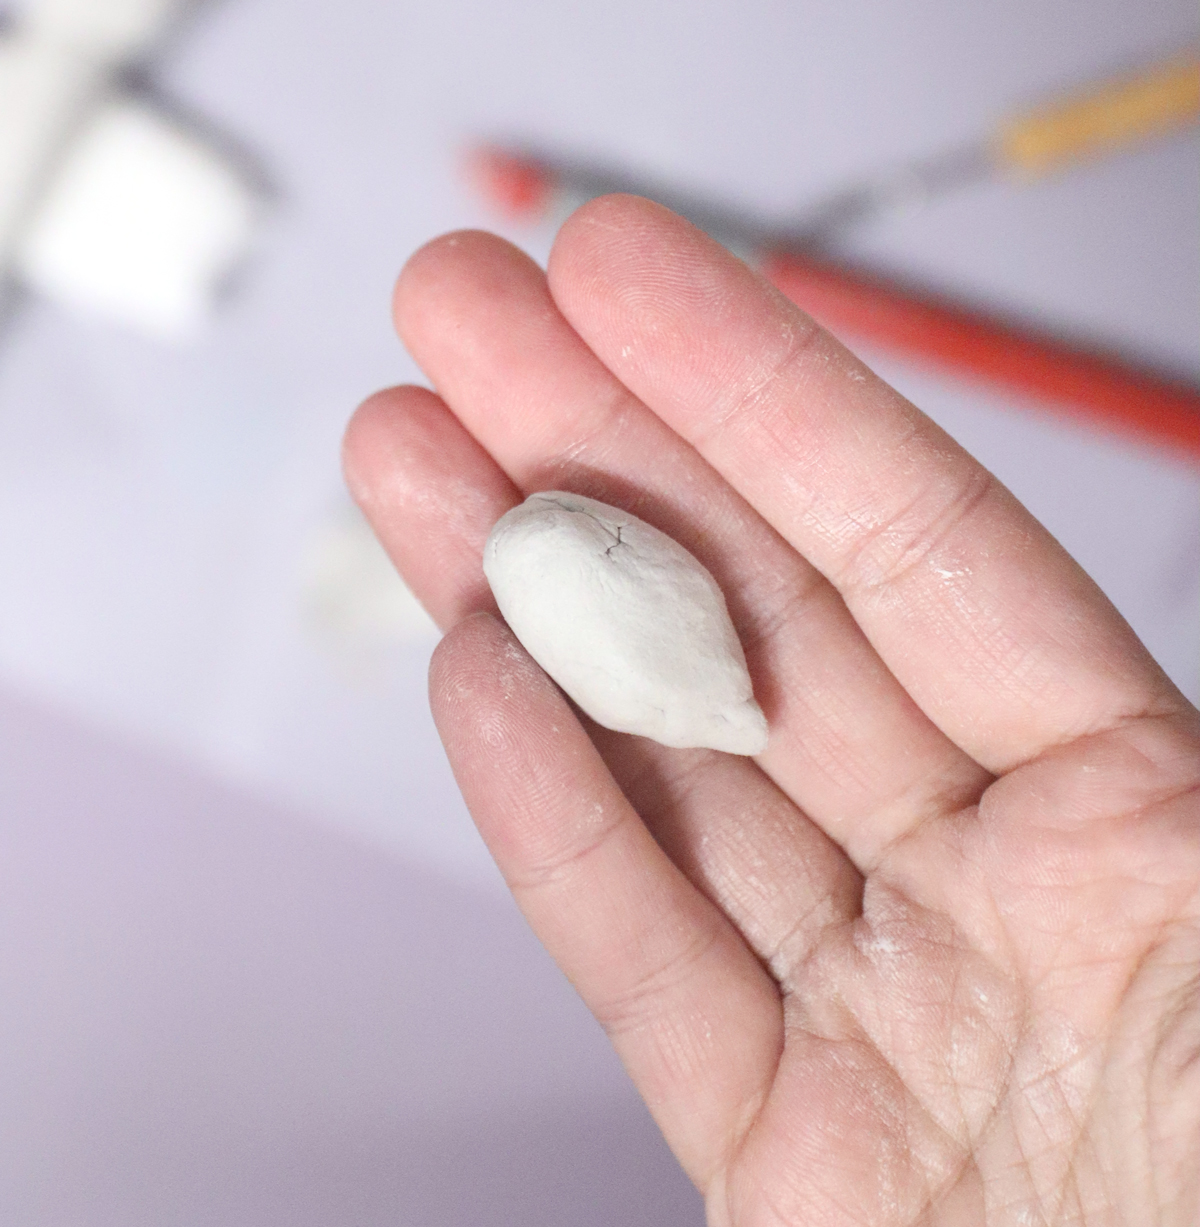
Form the bee’s body: make an egg shape and pull out the end to form a point.
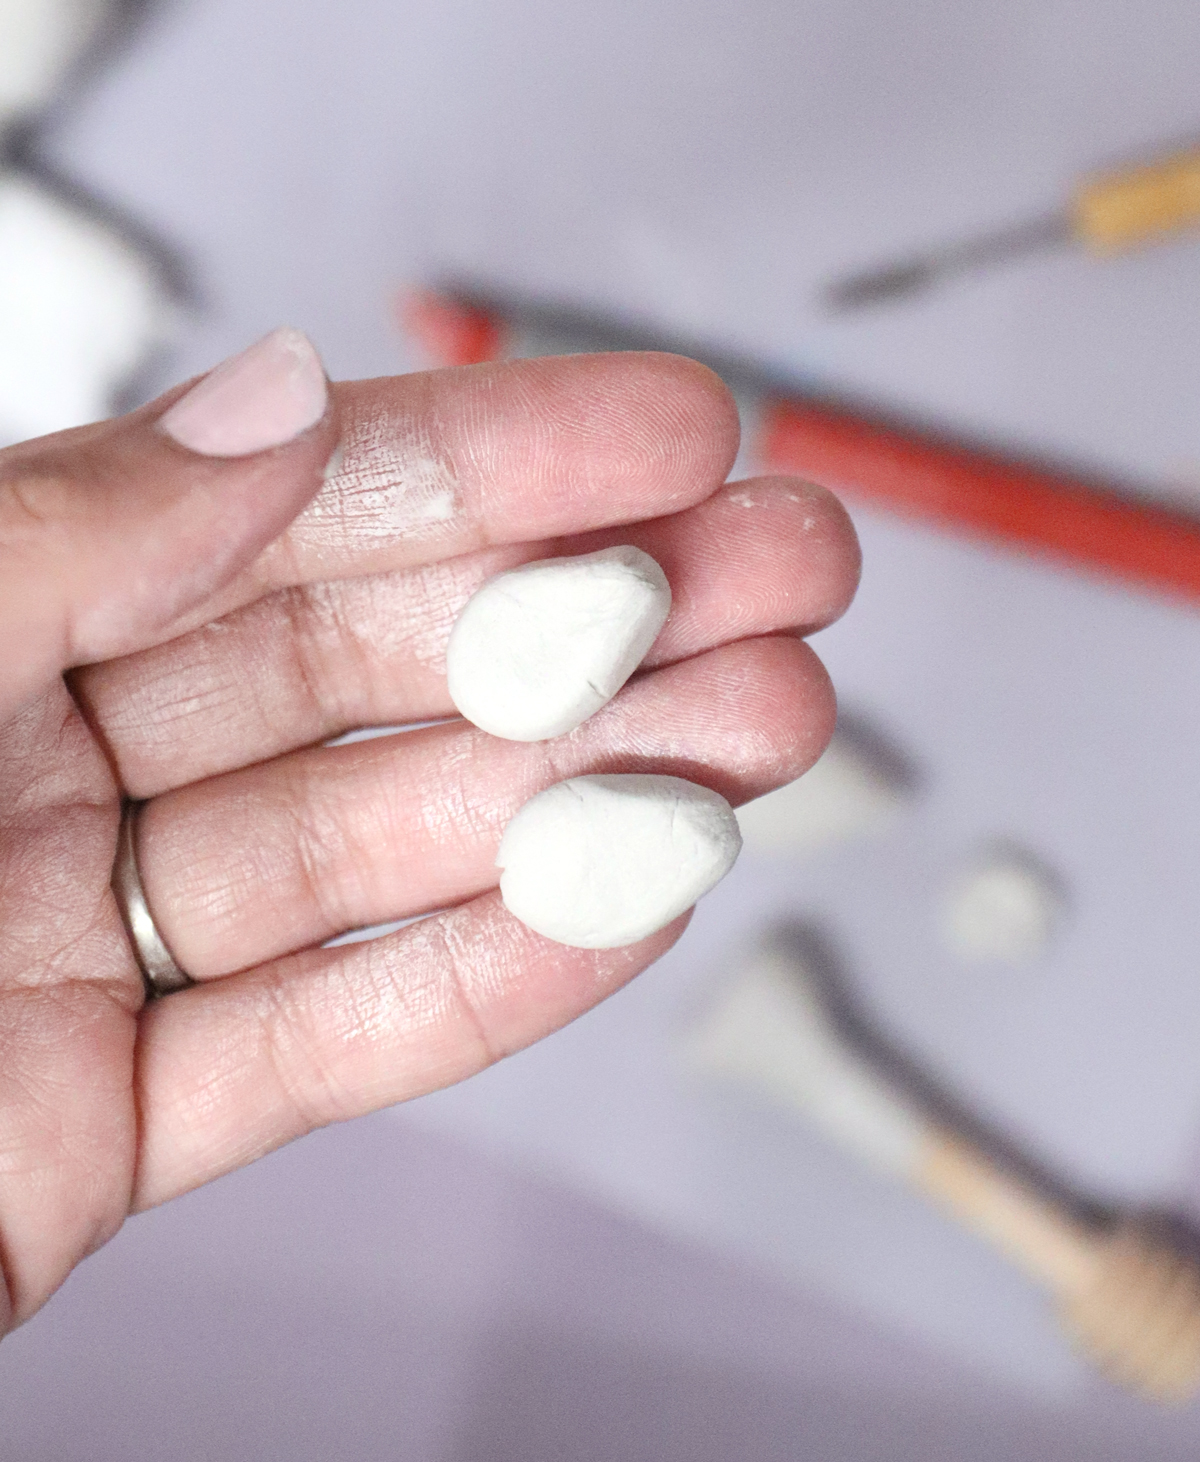
4. Make two leaf shaped wings.
5. Use a pointed or “rake” tool to distress the connection points on the body of the bee and on the wing – where you’ll be attaching them.
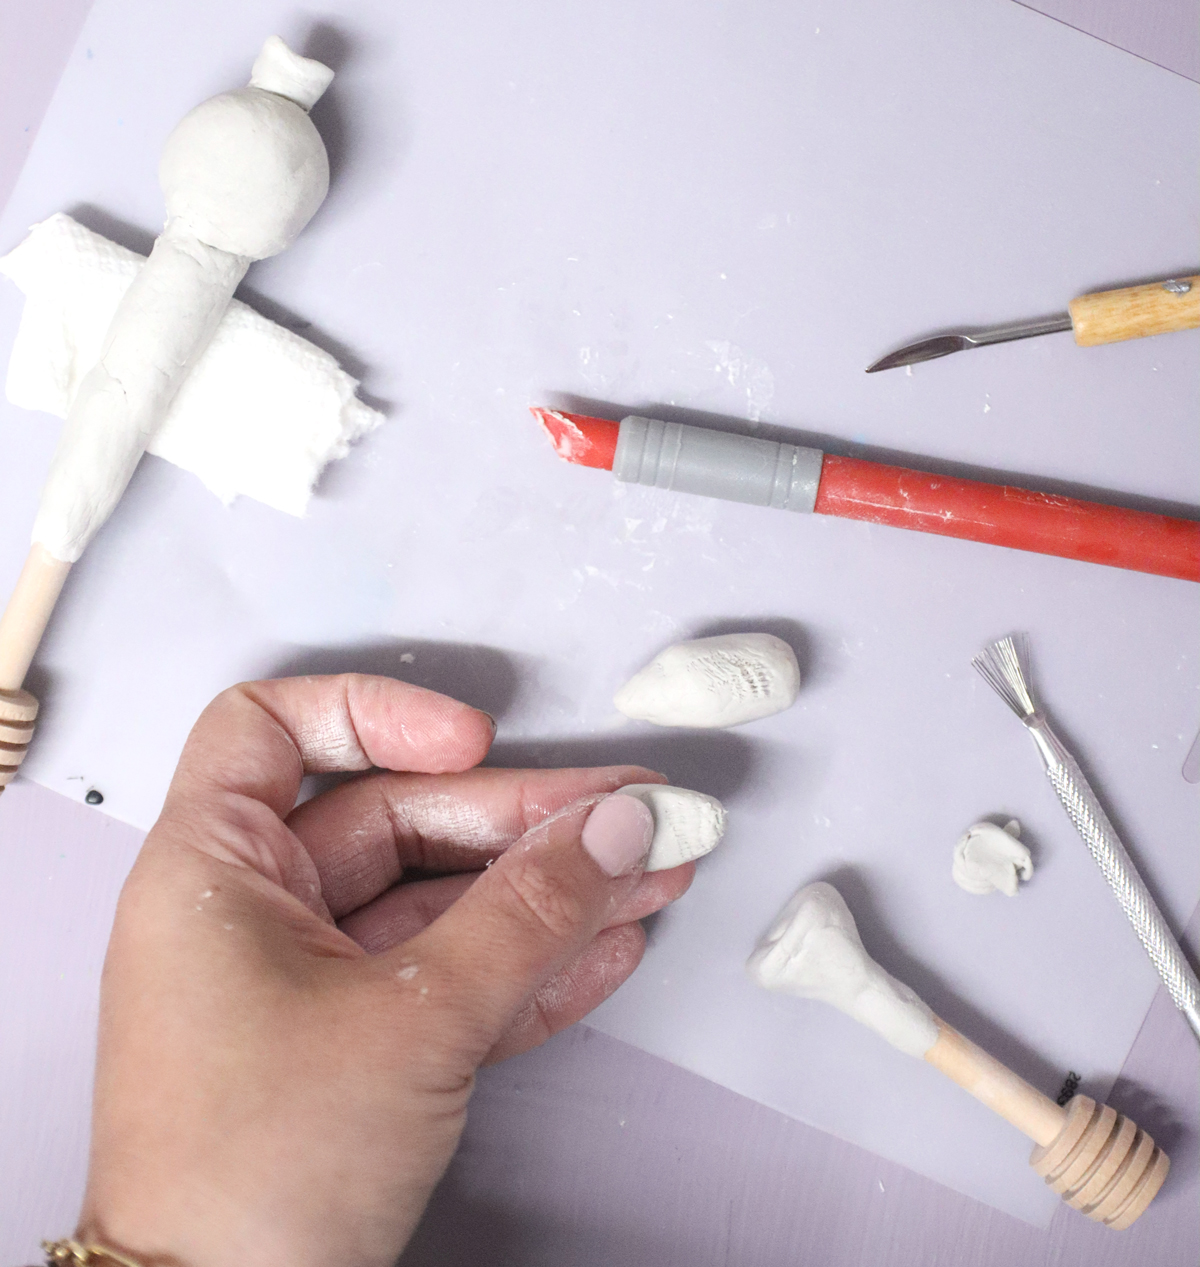
6. Paint a little slip to use as a glue and attach the wings.

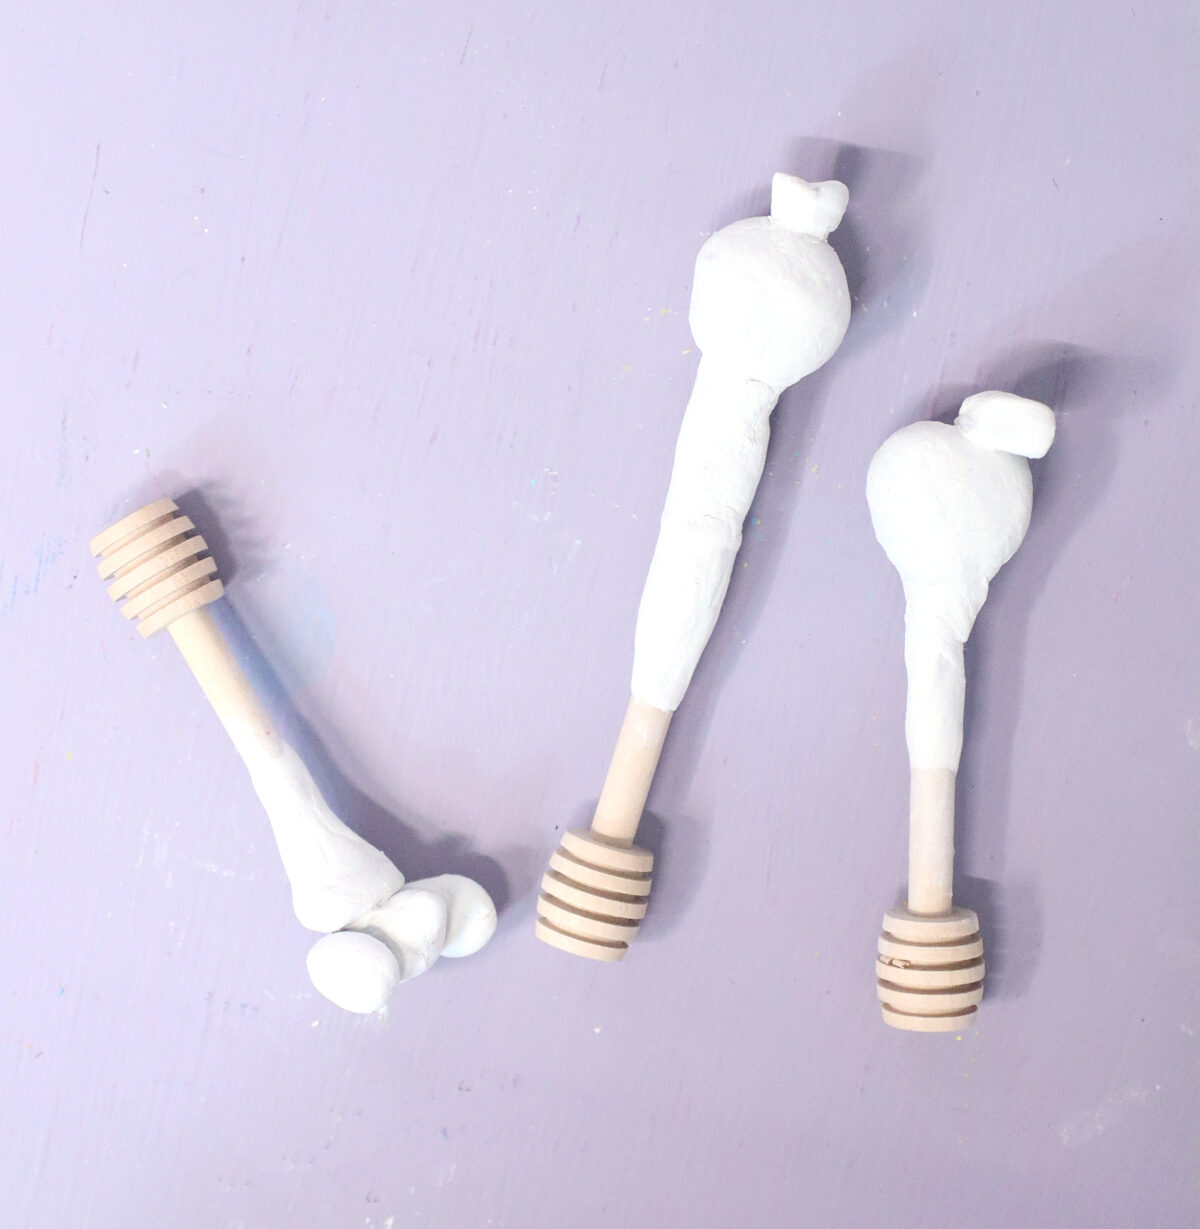
Note: I purposely didn’t crop out the pomegranate from these photos – you can see how I propped it and positioned it to allow it to dry correctly.
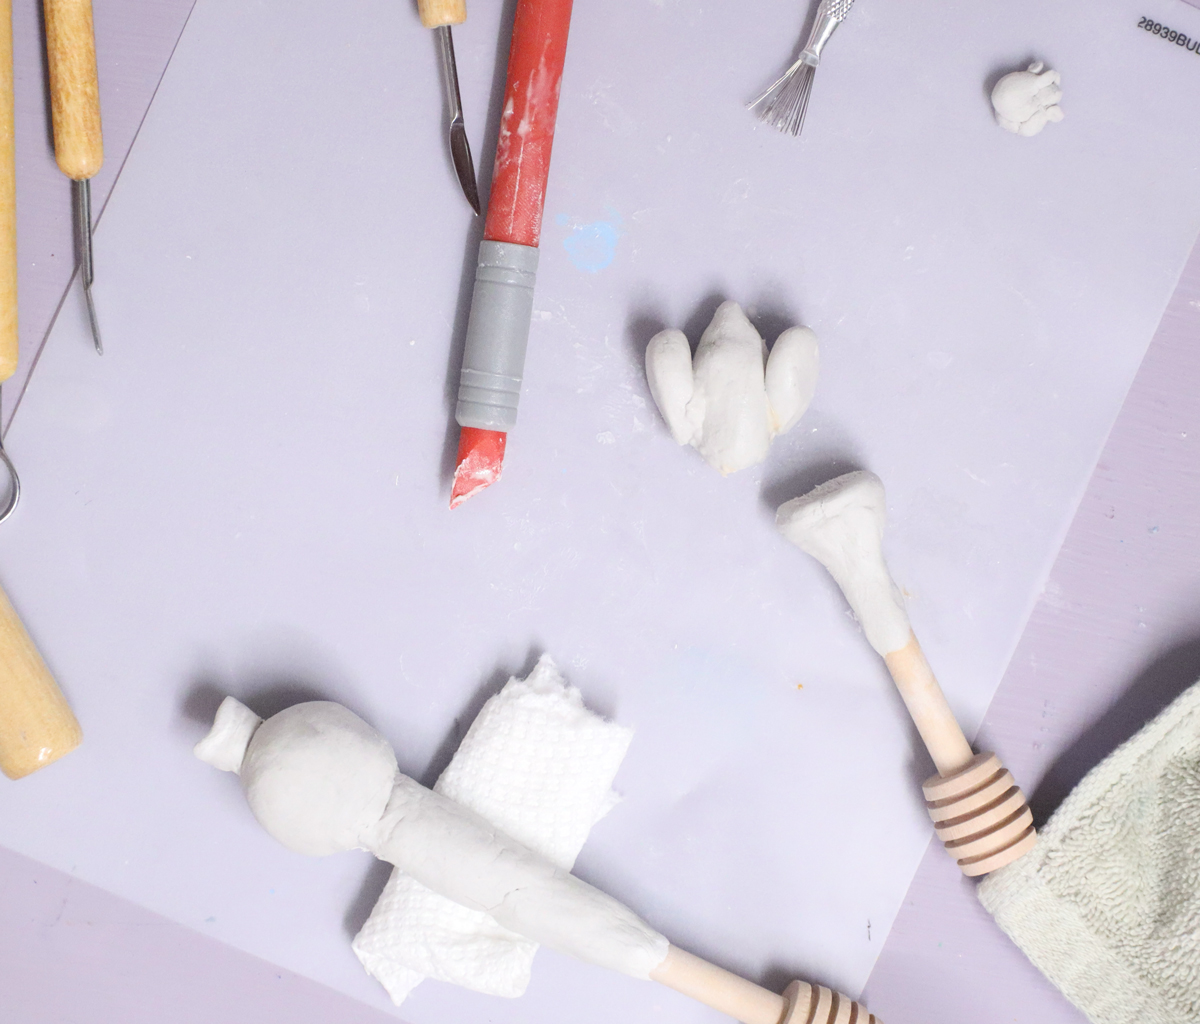
7. Repeat the process of distressing and gluing with slip to attach the bee to the top of the honey wand – on the clay base that you made.
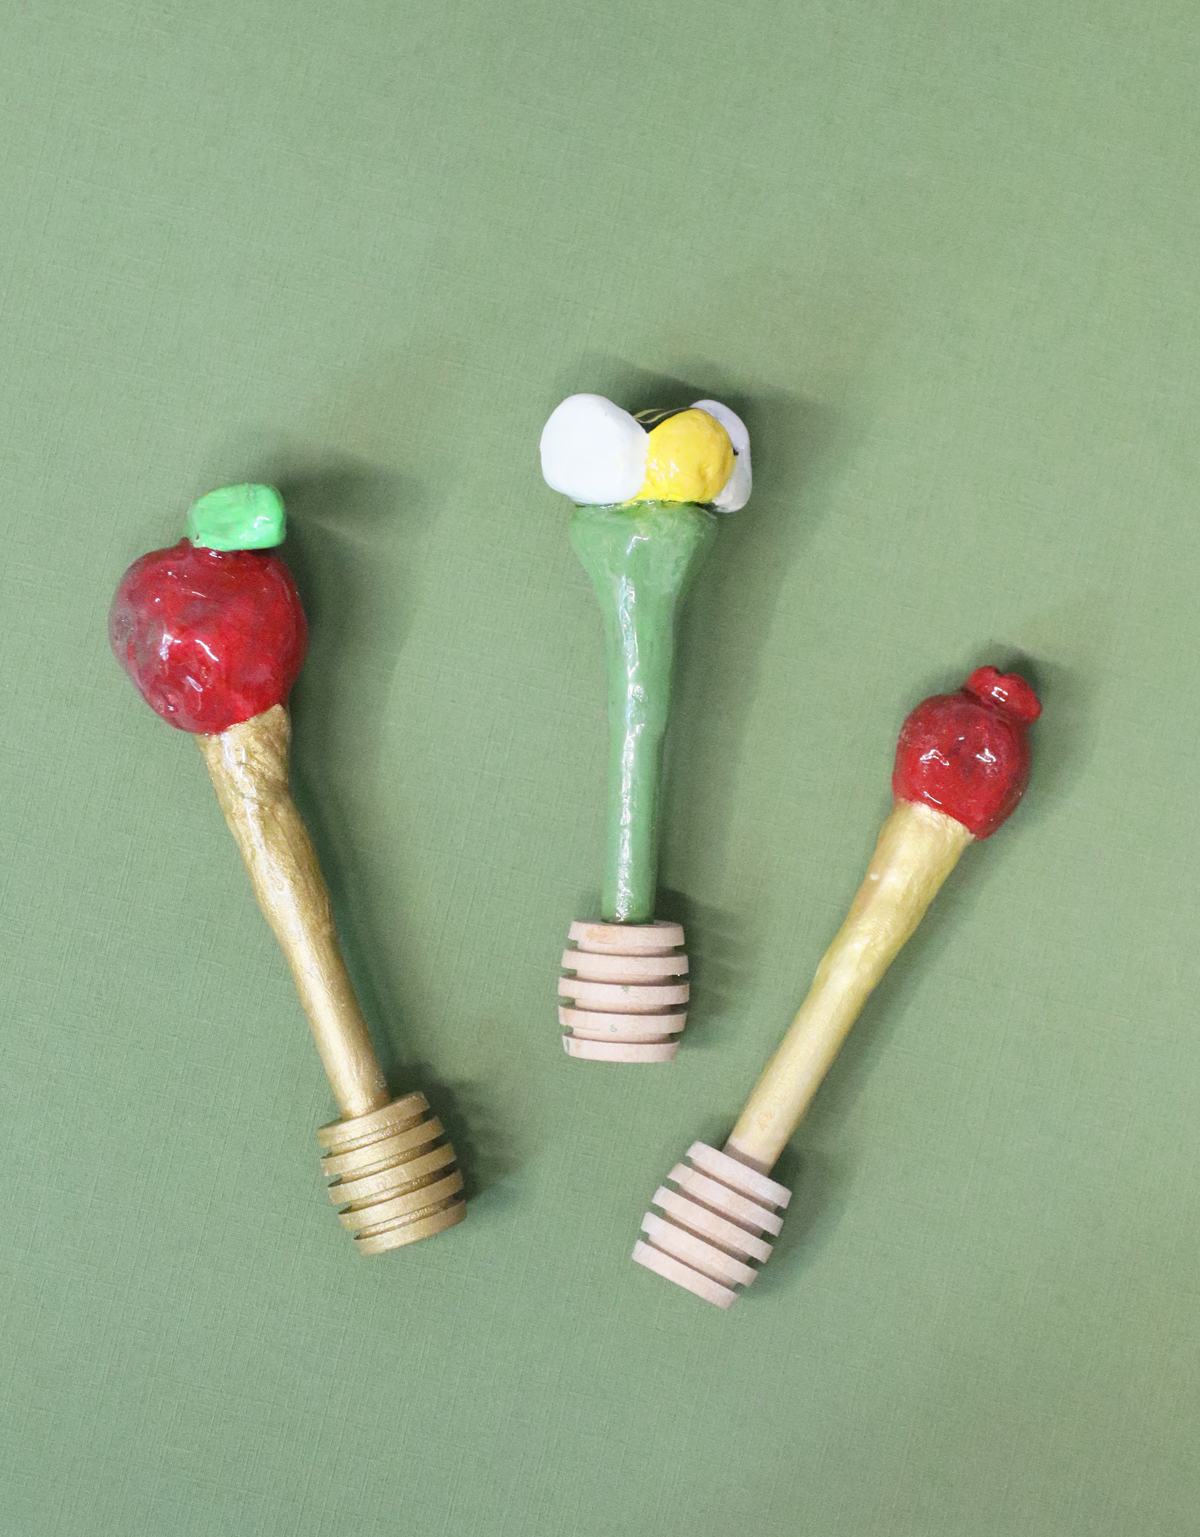
8. Try different Rosh Hashanah themed motifs! I did a pomegranate (a circle with a “crown”) and an apple and honey (made as an apple from clay – with a leaf – and I’ll paint the honey on.)
Let it dry completely – I recommend giving it overnight, flipping it over, and giving it a second overnight. How long you really need will depend heavily on environmental factors.
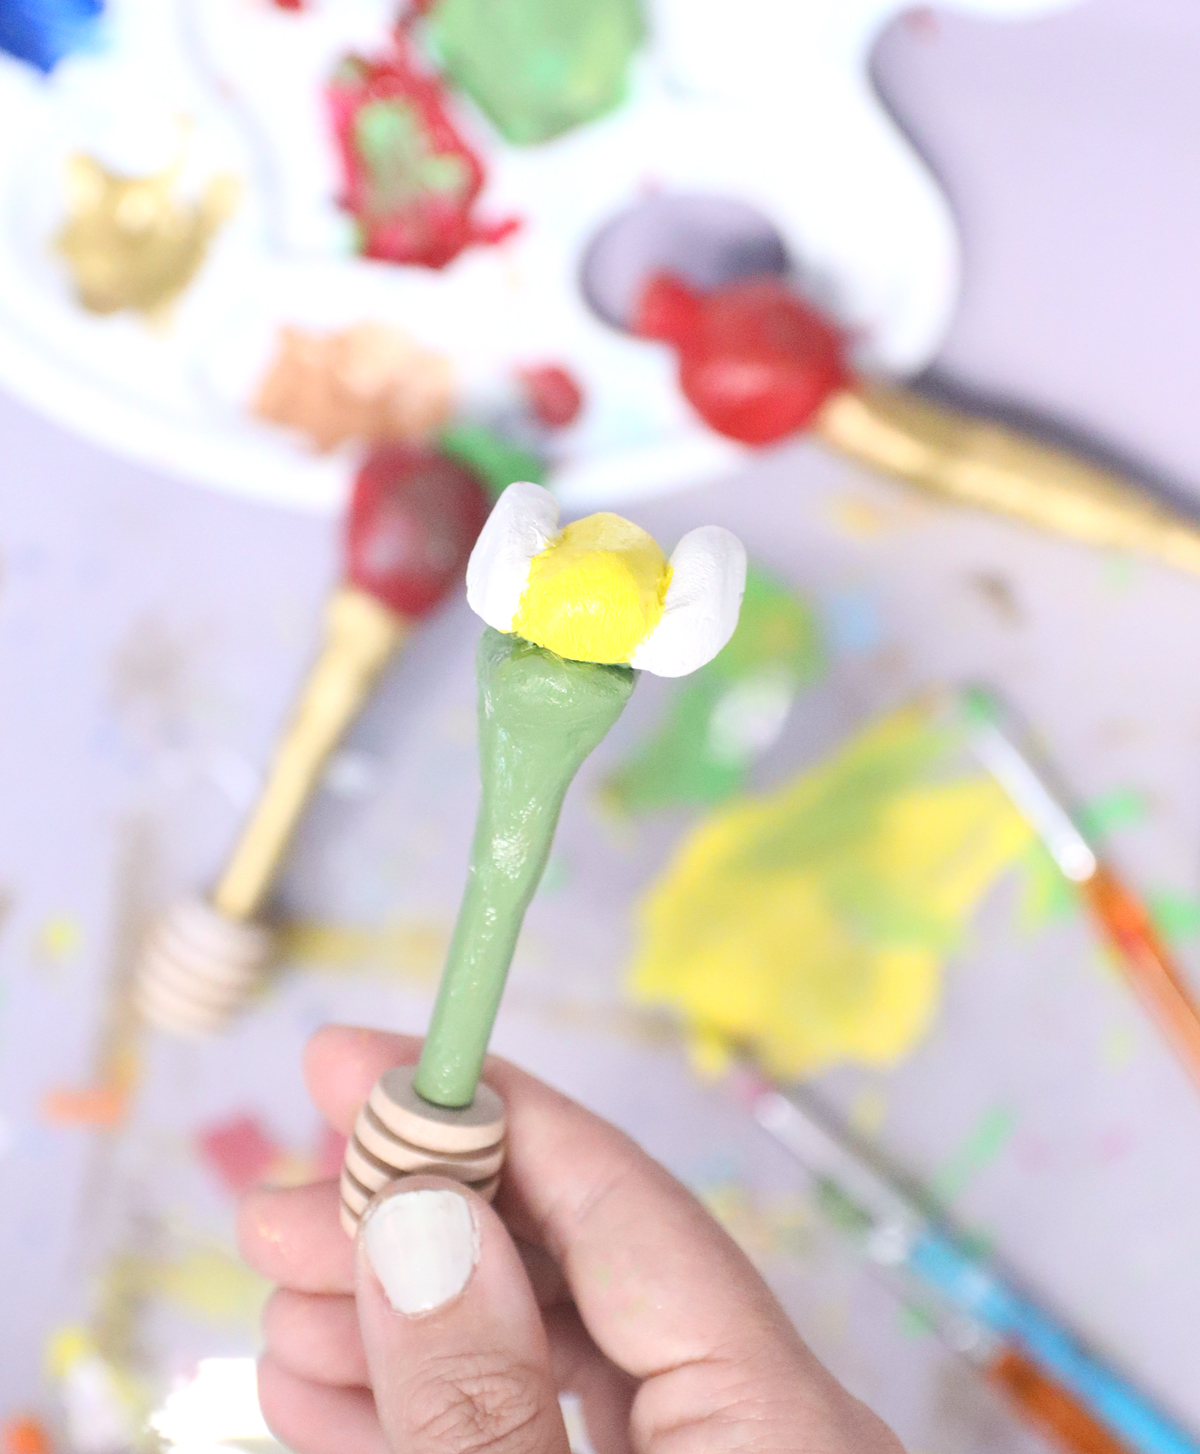
9. Paint your designs! Just a little tip: keeping it a flat color won’t look as nice as if you mix things up a bit on a palette and add a little shading.
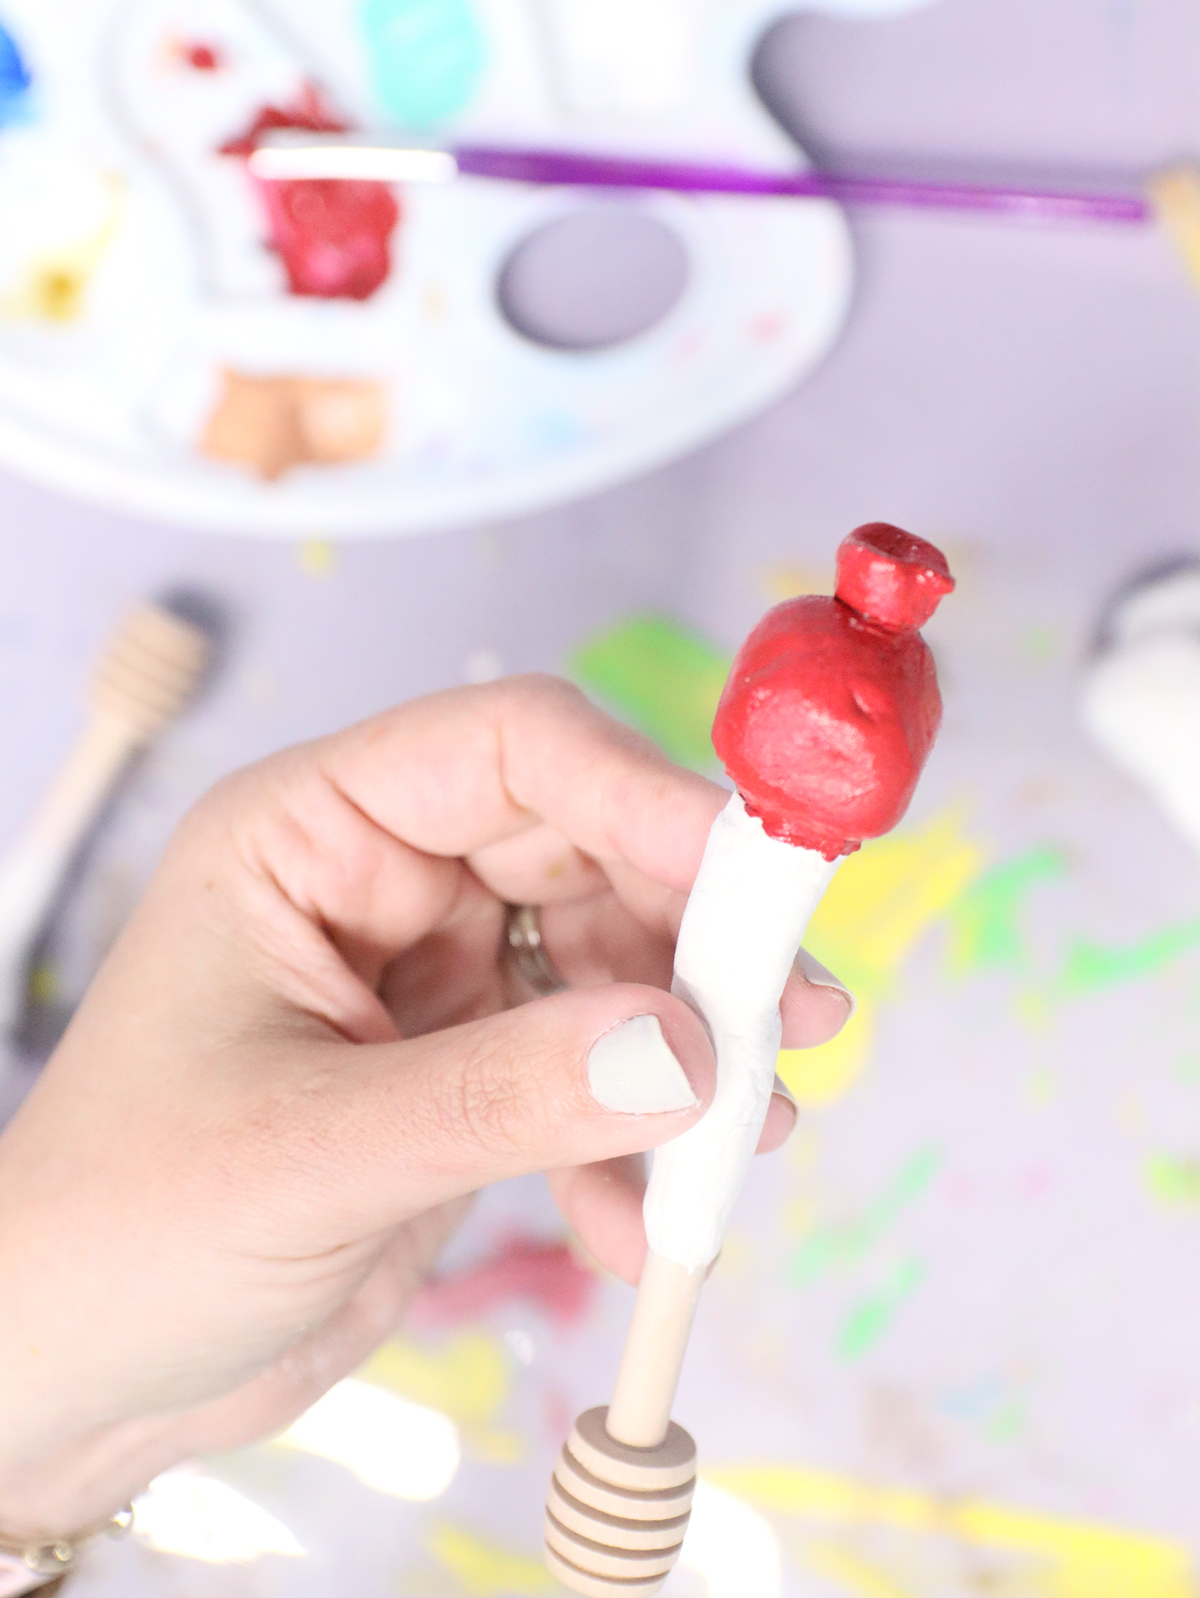
As you paint, you’ll probably want to paint over the portion where you blended the clay with the wood to make it more seamless. However, for food safety reasons, I do recommend that you don’t go so close to the base. On the bee wand, I can only dip the end, and need to be careful not to get the painted portion in the honey.
If you’d like, add more details using paint markers.
10. When it’s dry, seal your design. I used UV resin on one side at a time and cured it as I went along. It is NOT food safe and should only be used on parts that don’t touch the food.
Your DIY clay honey servers are complete! Which designs will you be making? Comment below!