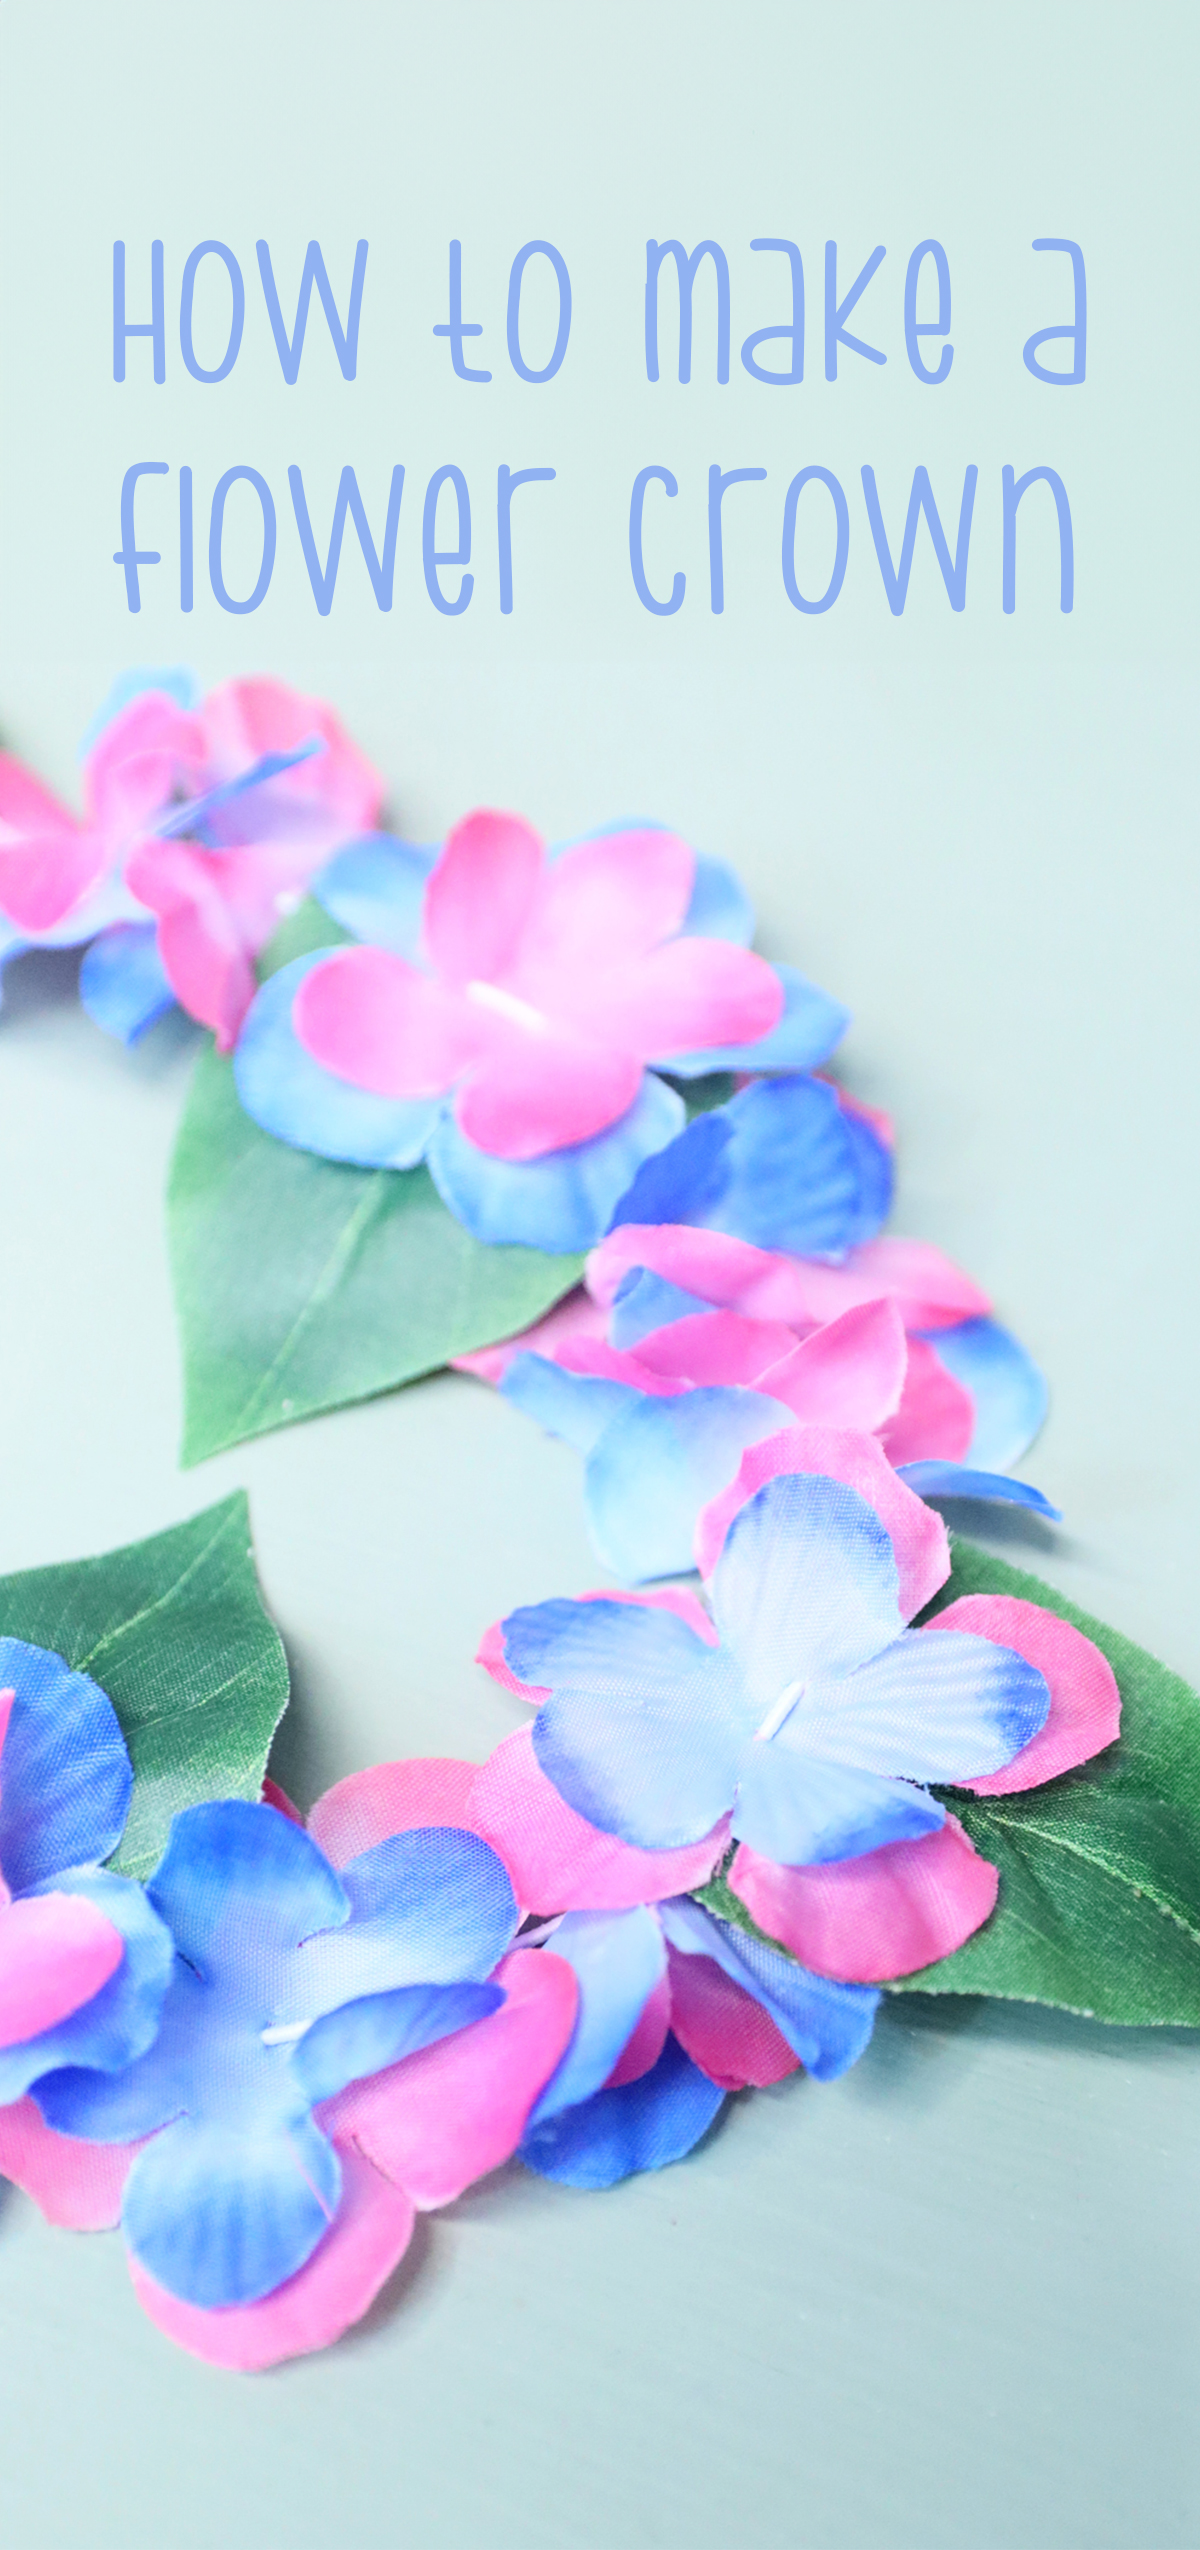
How to Make a Faux Flower Crown
Learn how to make a faux flower crown that is super easy no-glue, and totally wearable! When you’re done, try these beaded DIY flower napkin rings too. This post contains affiliate links.
With Shavuot coming up, I wanted to figure out how to make a faux flower crown that even kids can do with a no-fail tutorial that is easy and wearable.
For those who came just for the basic tutorial: Shavuot is a Jewish late-Spring holiday where the tradition is to adorn the home with flowers and greenery. We sometimes take it a step further and wear our flowers, too…
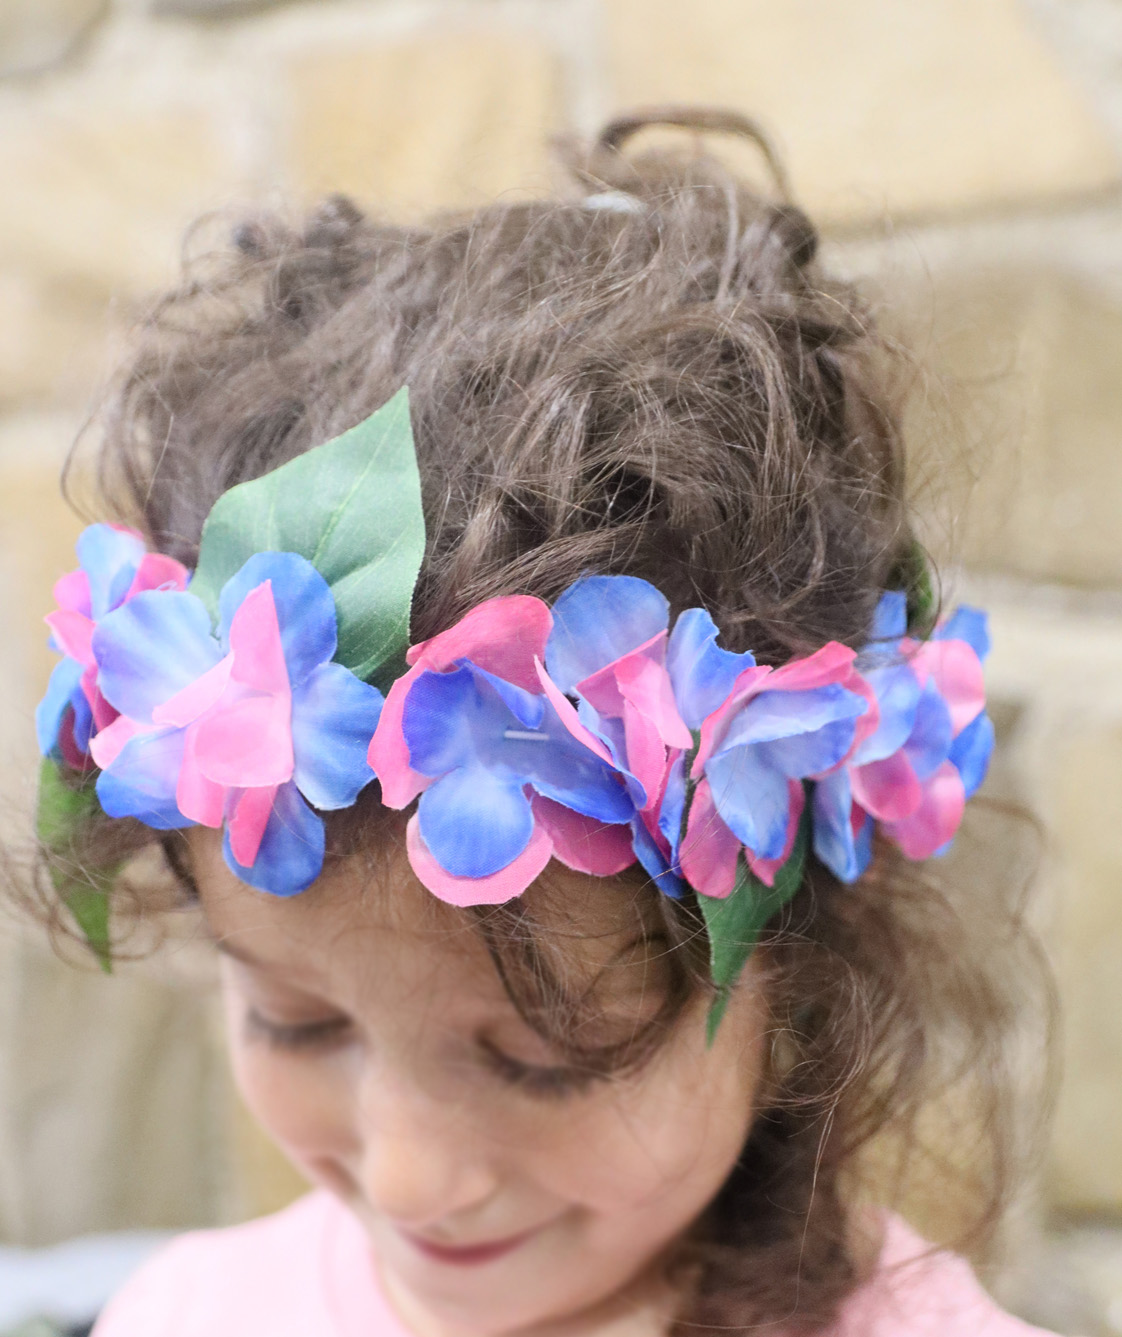

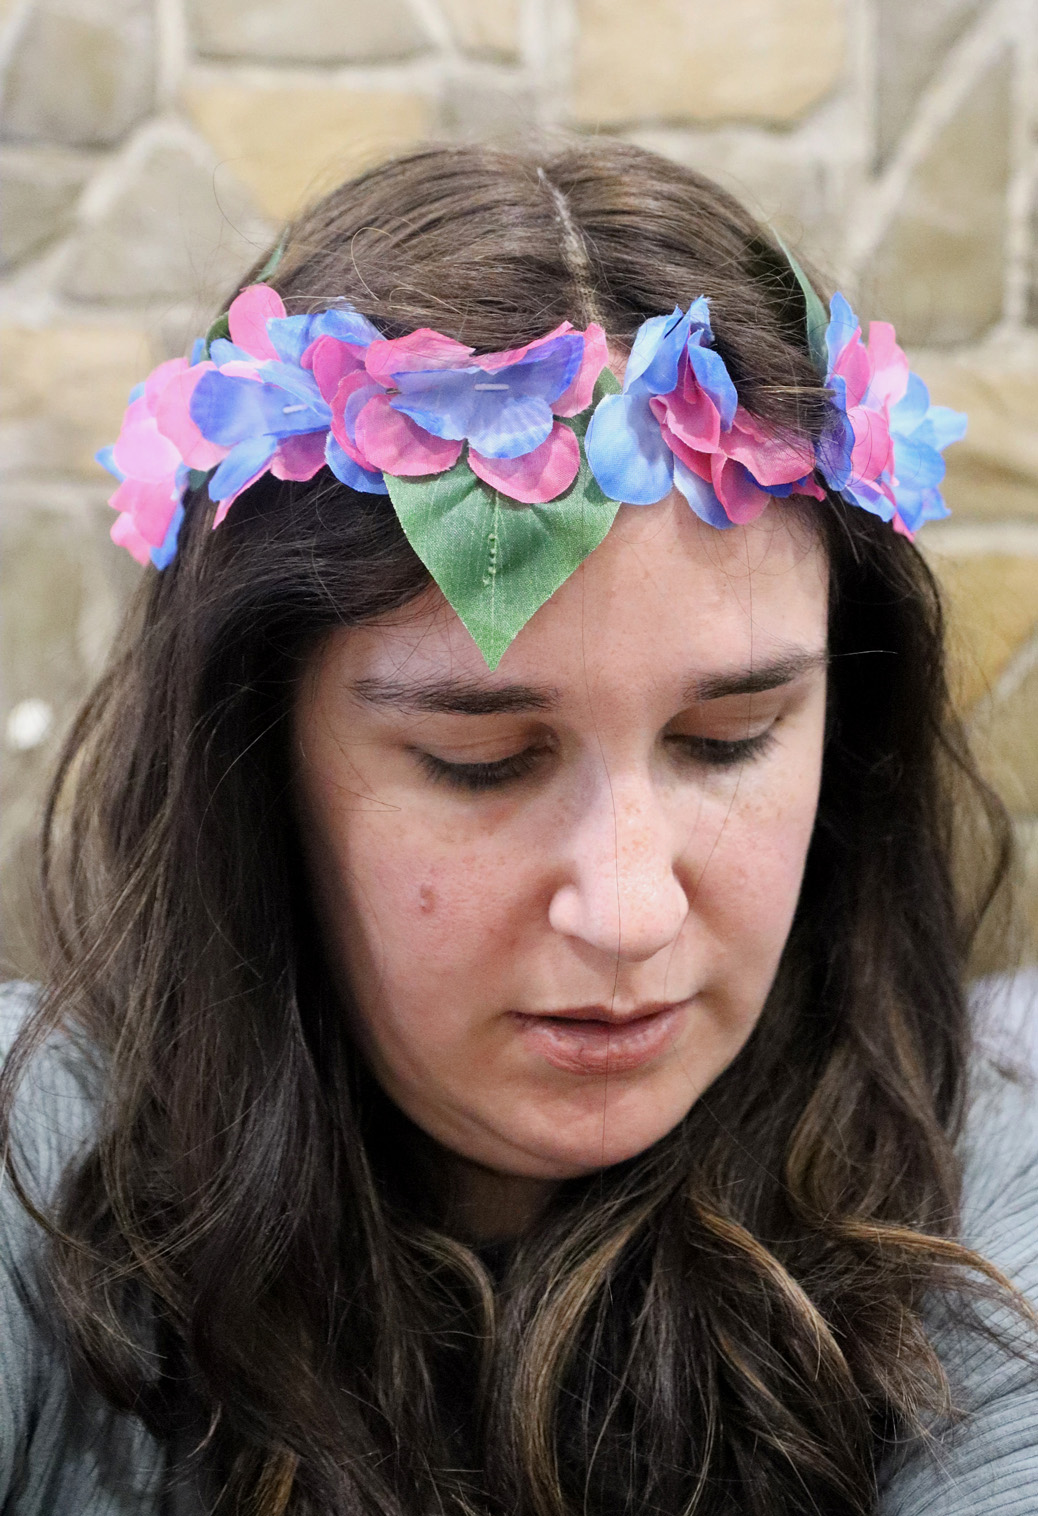
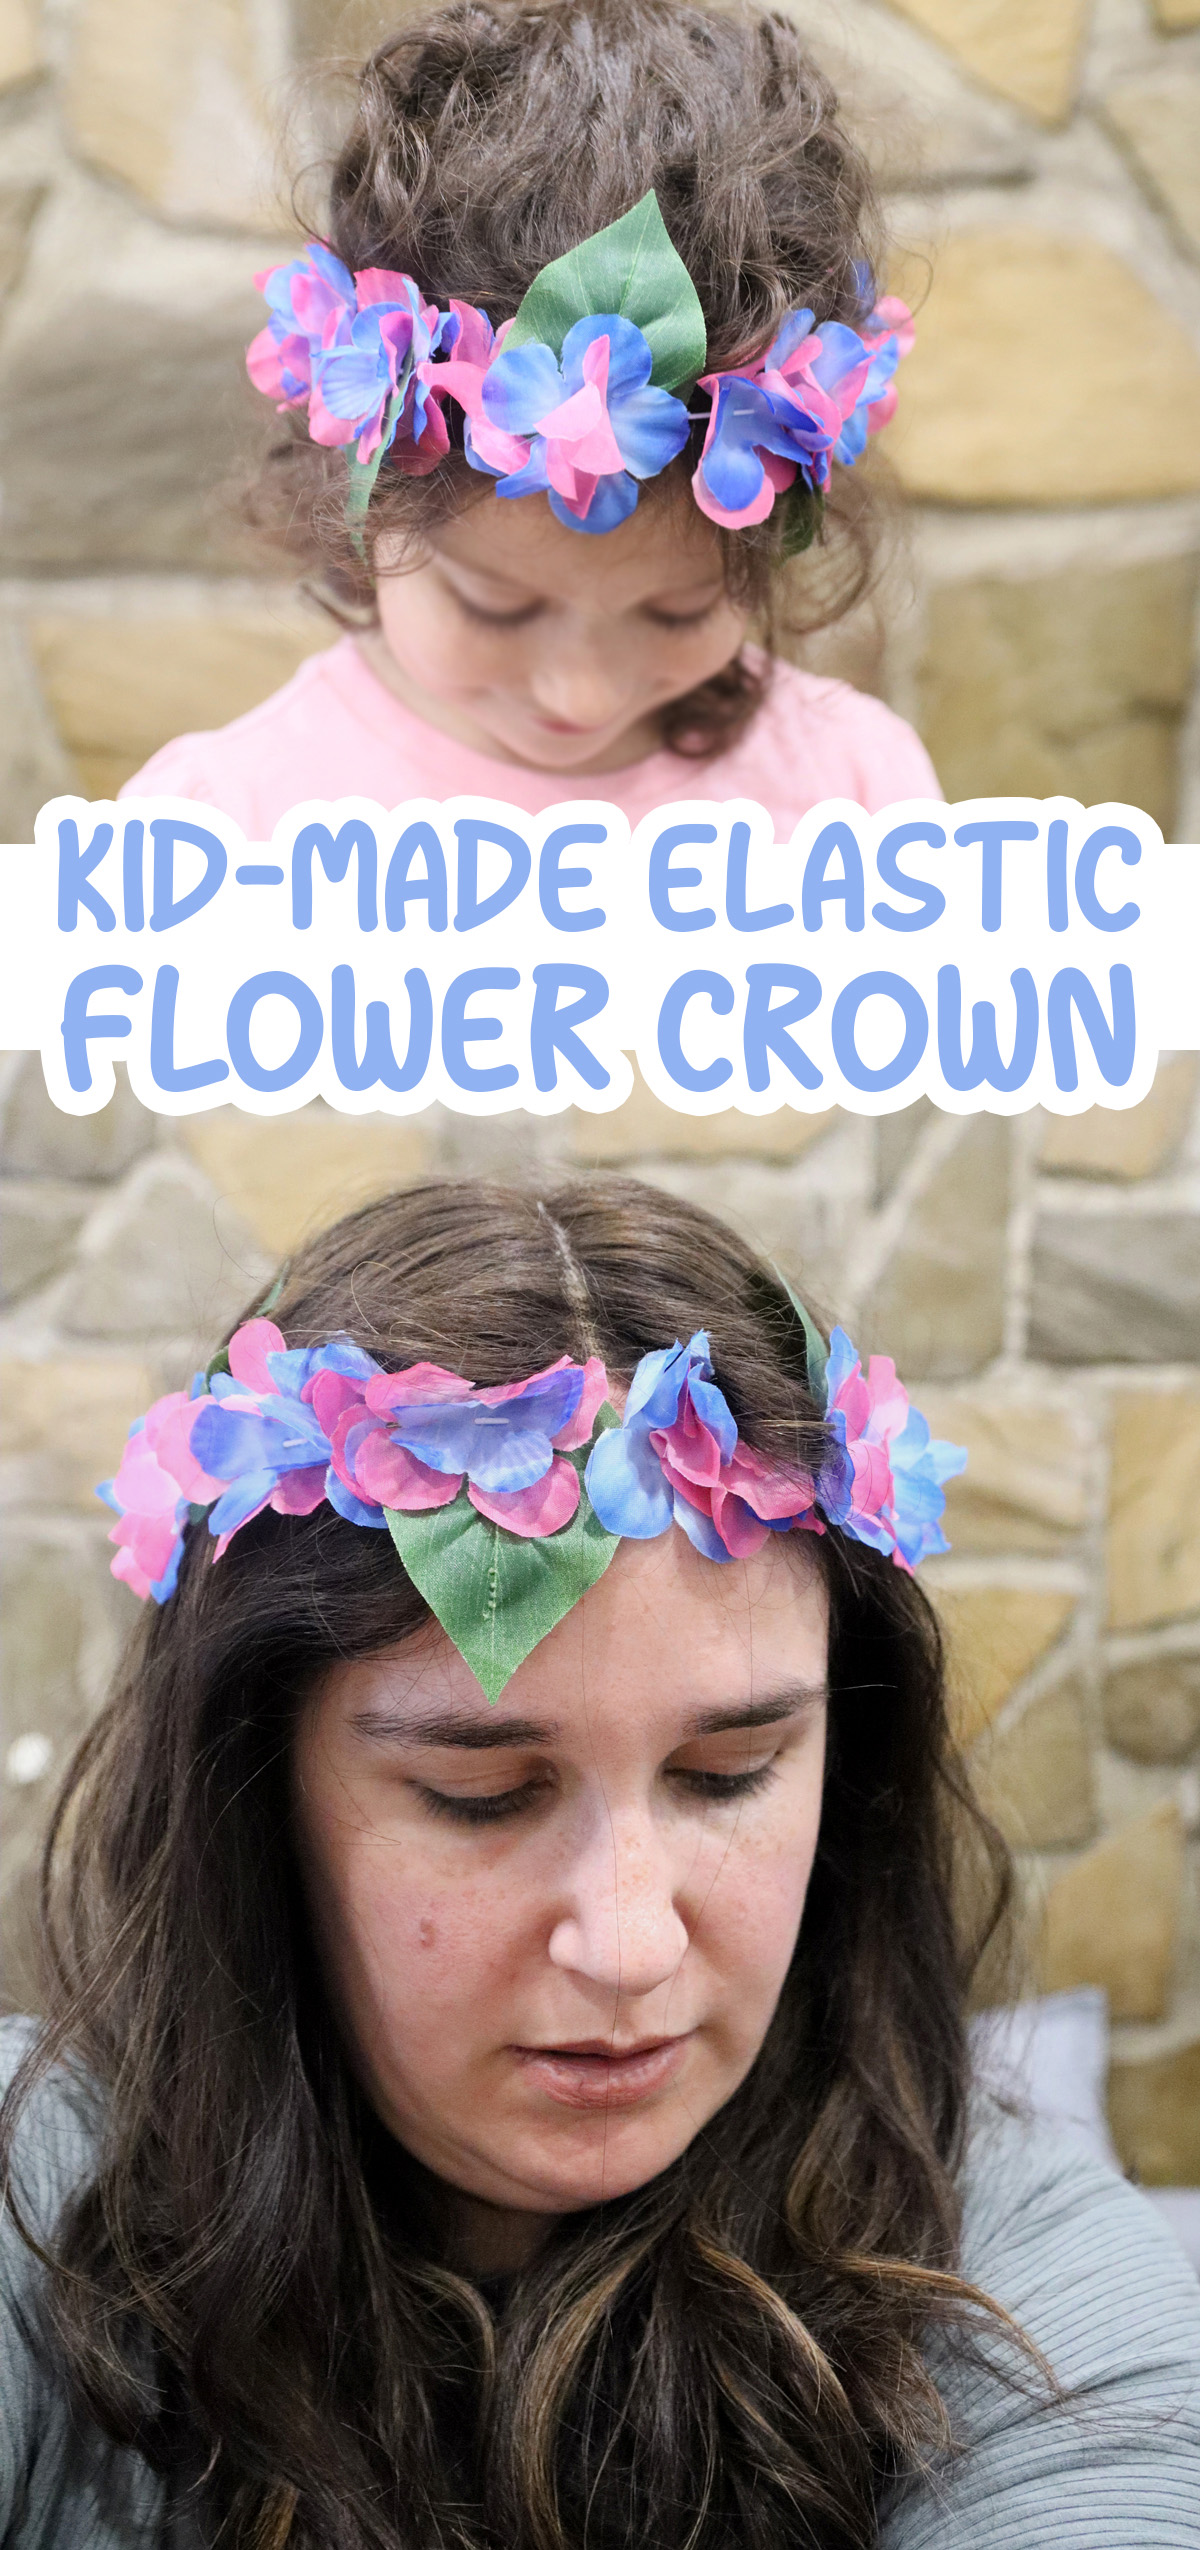
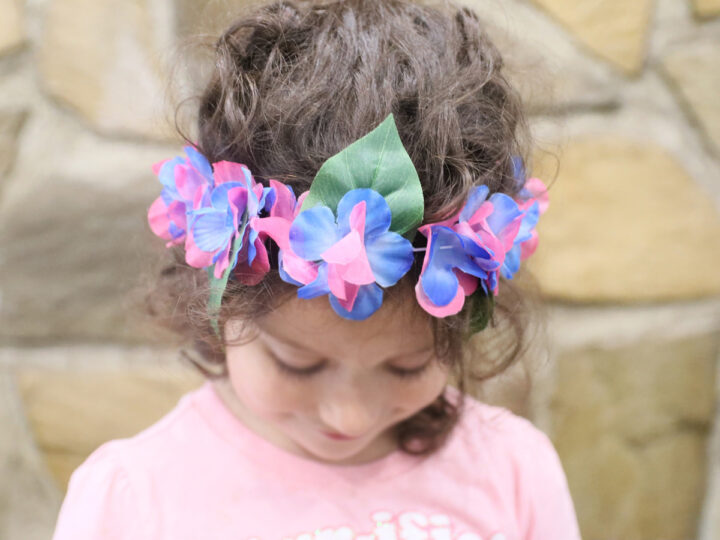
While I made these crowns, I let A wear it and she was in absolute heaven with it. She “tested” it for a few hours and it wore as easily as an elastic headband – which was really the idea.
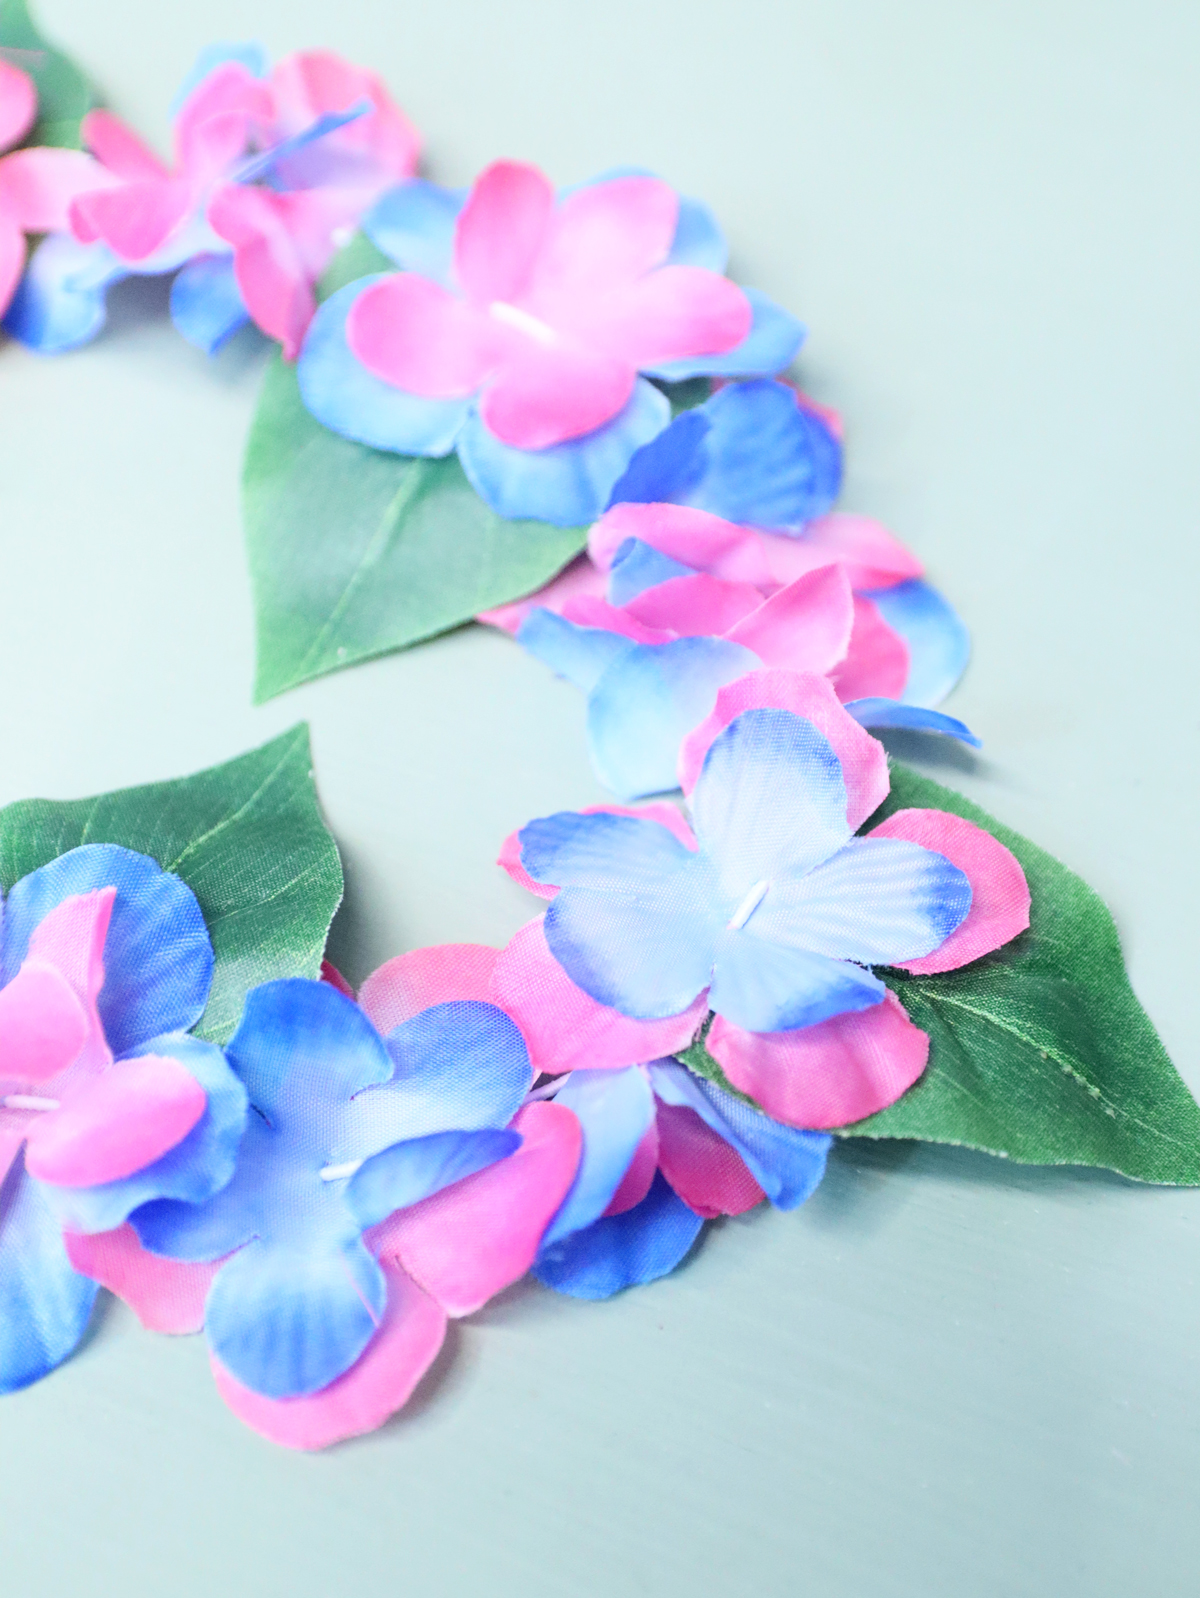
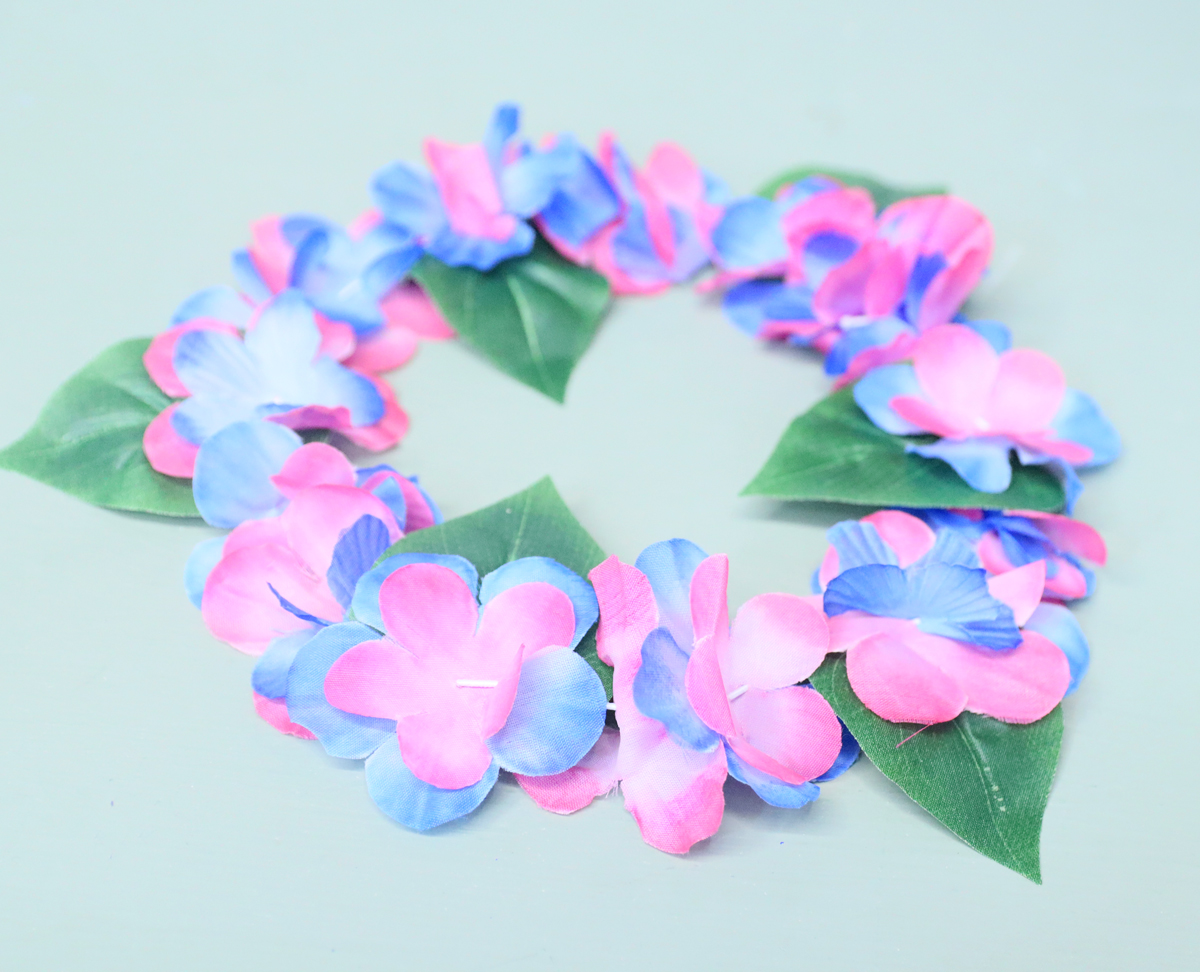
The best way to make a faux flower crown is using leis. Yes, the Hawaiian kind! I take it apart and thread it buttonhole style. They are lightweight, insanely cheap (you can make a good few crowns per lei), and allow you to really customize your look.
I kind of wished I’d have played with adding colorful wood or acrylic beads (lightweight) in the centers – so if you’re making this for yourself and are willing to experiment, try it!
Also, if you are really looking for a more elegant faux flower crown, definitely try this with classier colors of leis – and large crystal acrylic beads! And classier leaves, of course.
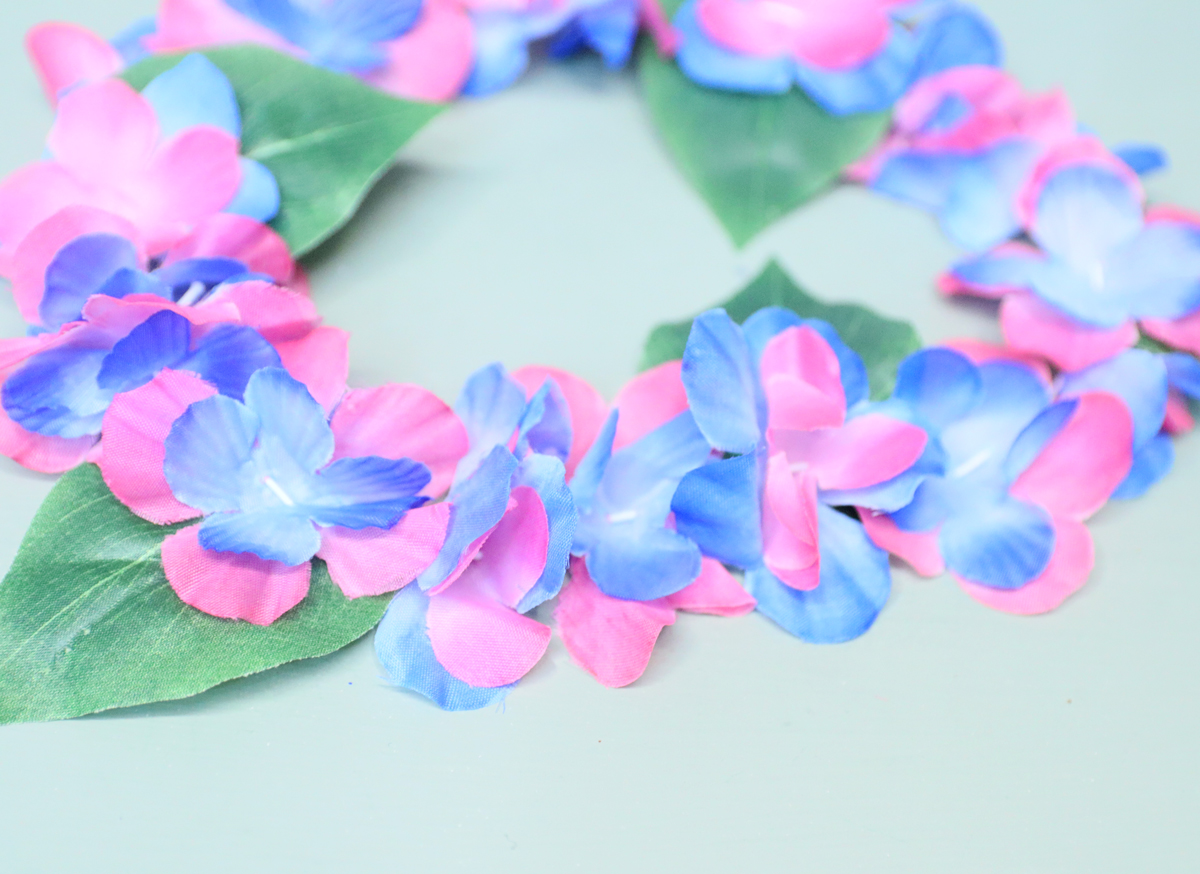
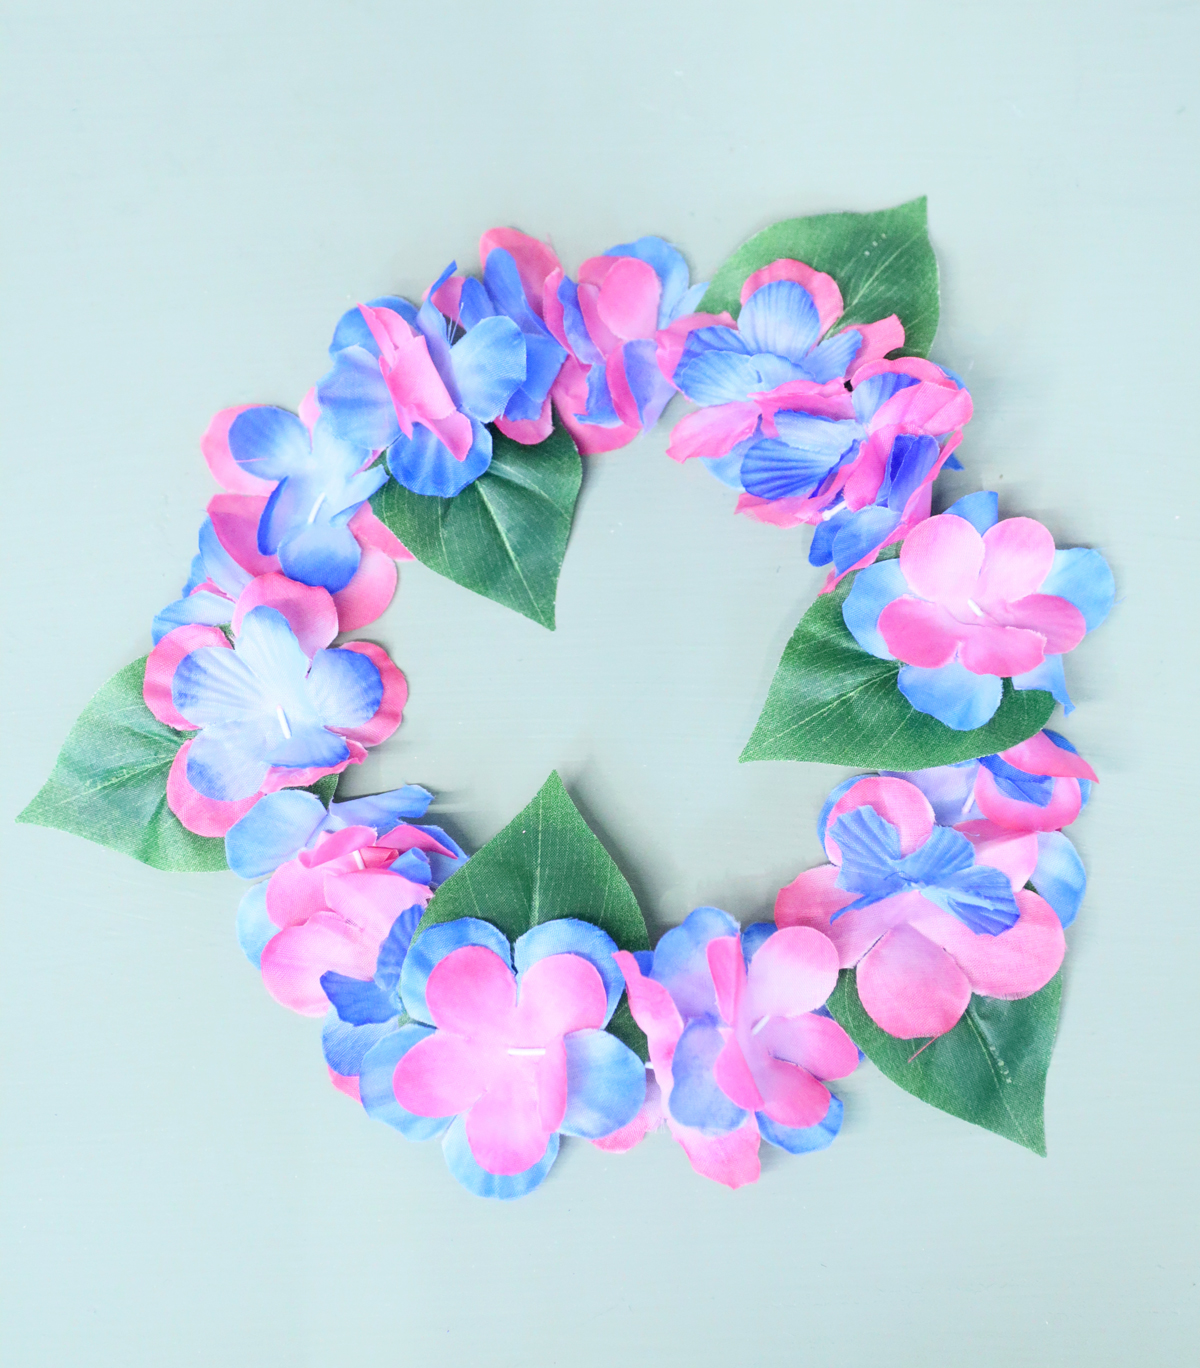
I played with two ways of making these faux flower crowns. On one, I threaded the flowers randomly and used some pretty large ones. On the other, I stuck to smaller flowers and threaded them in a pattern. I prefer the second option.
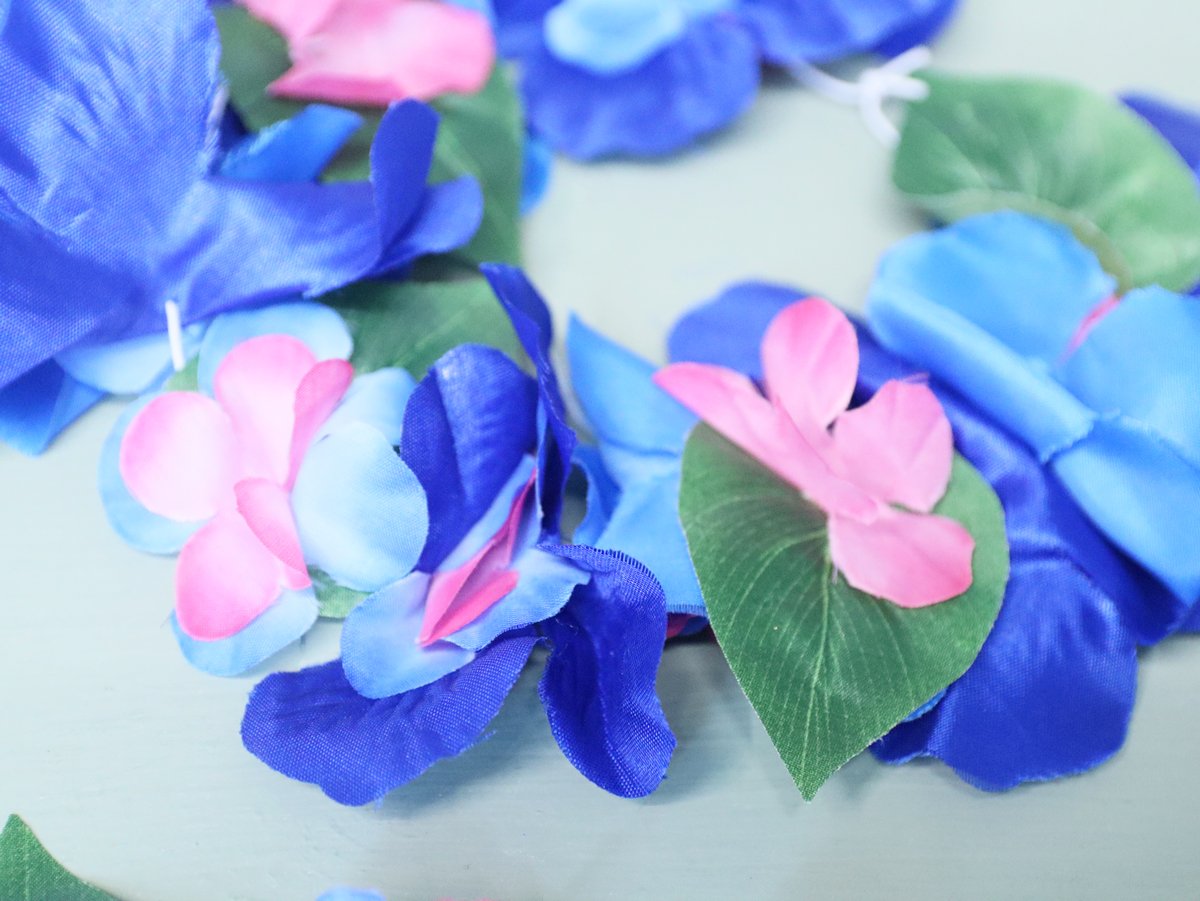
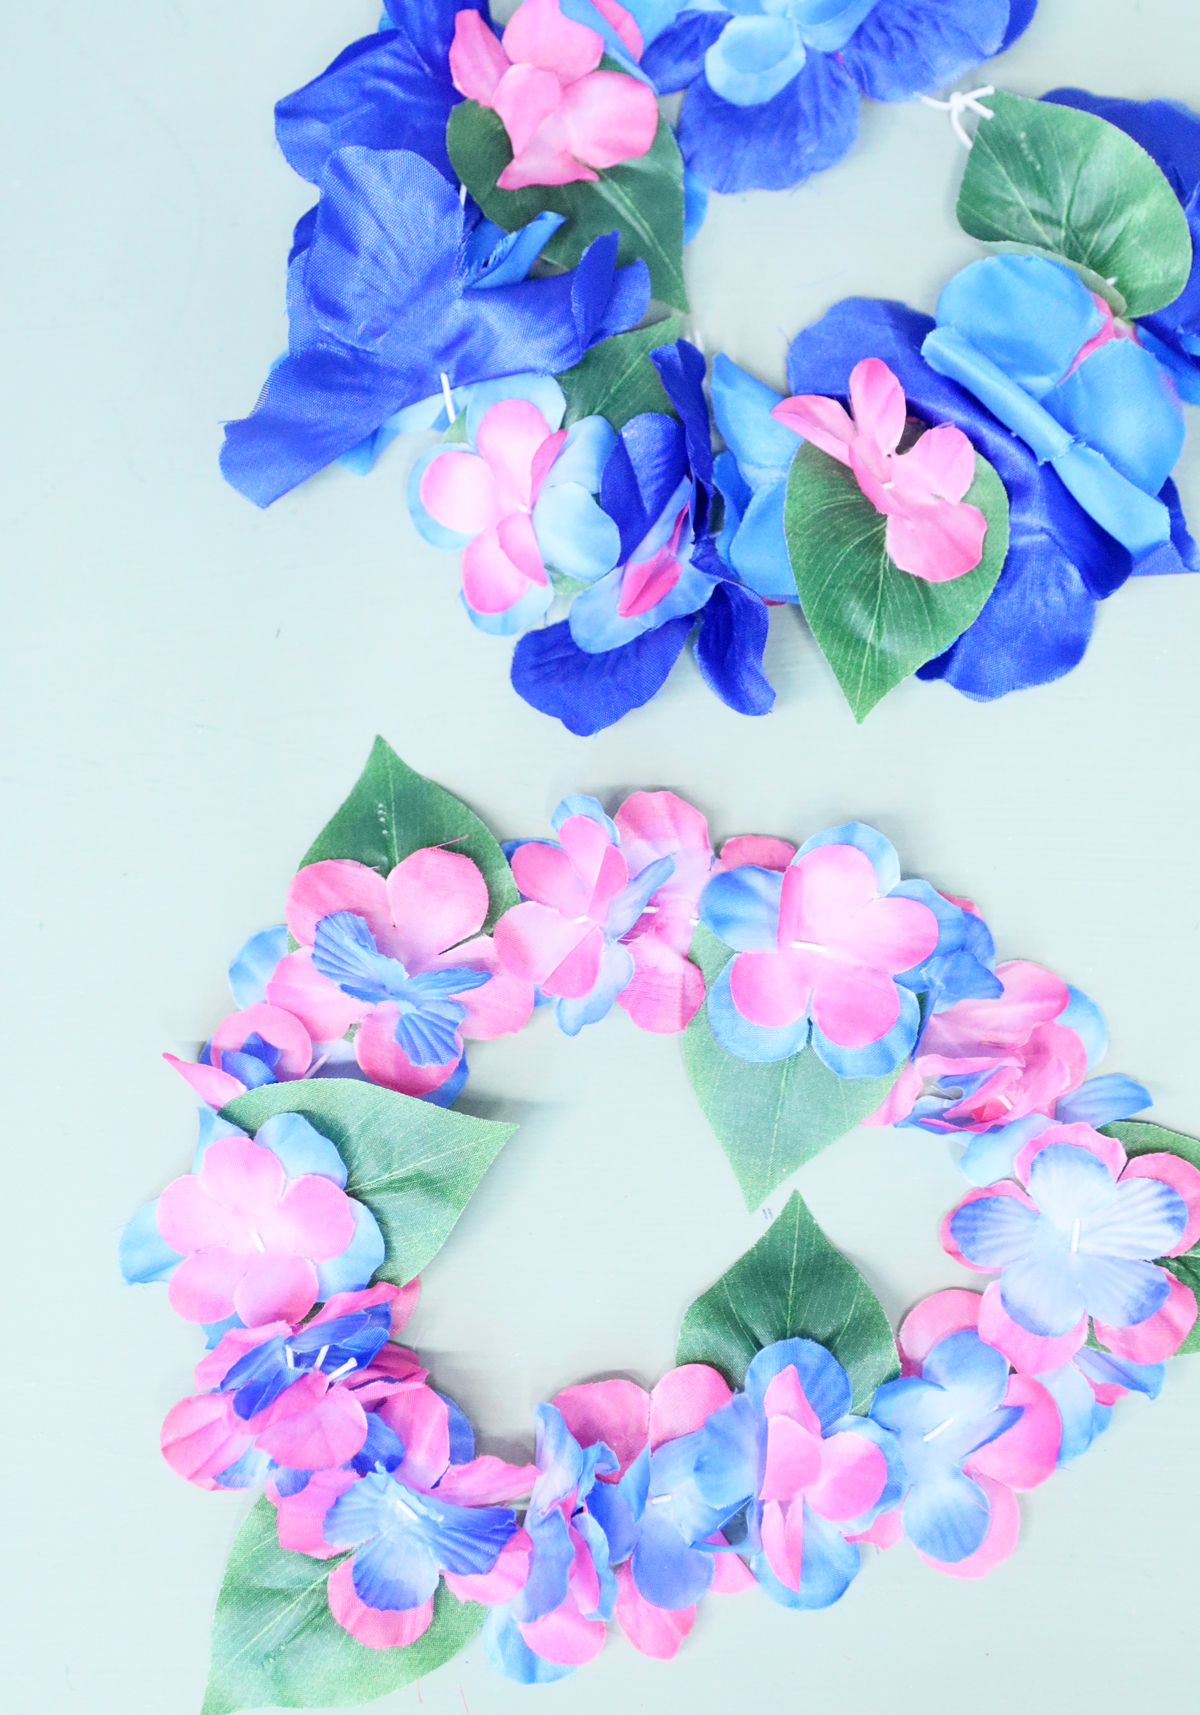
I do love the depth of the larger color selection on the more random one, so especially if you’re crafting this with a group, offer a good selection of flowers!
How to make a faux flower crown with any age group
While I would love for it to be a preschool-and-up craft, I’m not sure it is – you’d need to test it first with that age group if you want to try it. It should be doable for younger elementary and up.
The lei flowers come with one hole. I punched a second one with the needle, but you can use the 1/16th inch Power Punch to poke a second if you need to prep it in advance for them (or poke it with the needle).
You’ll need a very large hole needle, but you can use quite a blunt metal darning needle to make a second hole through the open weave of the leis.
Adding leaves makes a huge impact. It also makes it a bit harder. You can make it easier, again, by pre-punching holes, but it’s a bit harder in the leaves.

Flower crowns are a really fun party activity – whether it’s for a Shavuot event, for a spring picnic… They can be crafted and then worn around the event.
They are really sweet to make in the classroom as an unusual Shavuot craft. They CAN also be worn as headbands (don’t fill the elastic as much – leave the back blank so that the hair can sit comfortably over it) but that takes away a bit from the fun!
And of course, you can also make these in very small, and make a set as napkin rings for your Shavuot table. You know I love napkin rings!
How to make a faux flower crown: step by step
Watch the video
Watch the full-length video on YouTube if you prefer to learn that way! Or scroll down for written instructions with photos.
Supplies needed
- Leis – look for floral colors in a simple color palette (shades of blue, purple, and pink are fabulous) and avoid greens. Go for smaller ones with flowers of about 1 inch. Make sure to get the fabric flower kind and not the plastic scrunched up kind. I got mine from the Dollar Tree.
- Faux leaves or something you can cut faux leaves off of (look for vines if you want something with lots of leaves)
- Elastic cording
- A large-hole blunt metal needle. Make sure the hole fits the thickness of the elastic
- Scissors
Step by step instructions
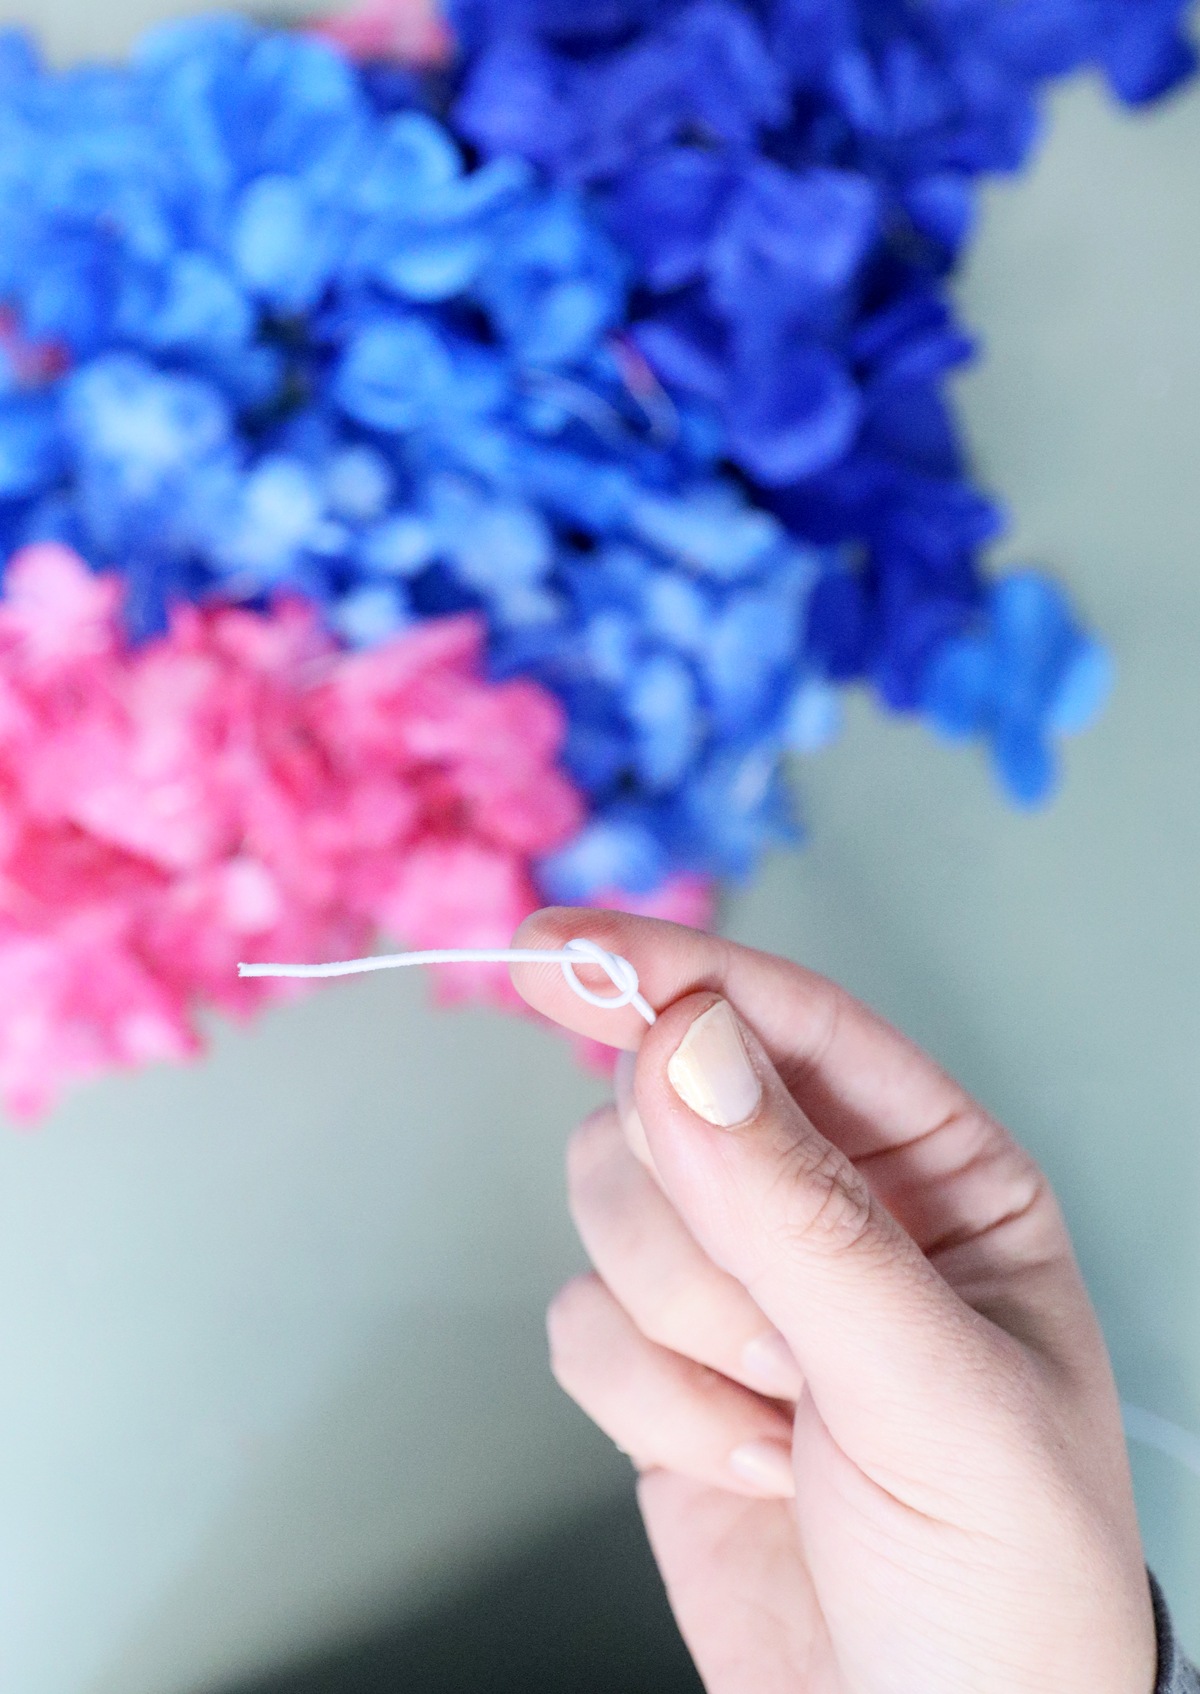
1. Start by cutting an elastic about 36 inches in length. Make a basic overhand knot a few inches from the end. Thread the needle on the other end.
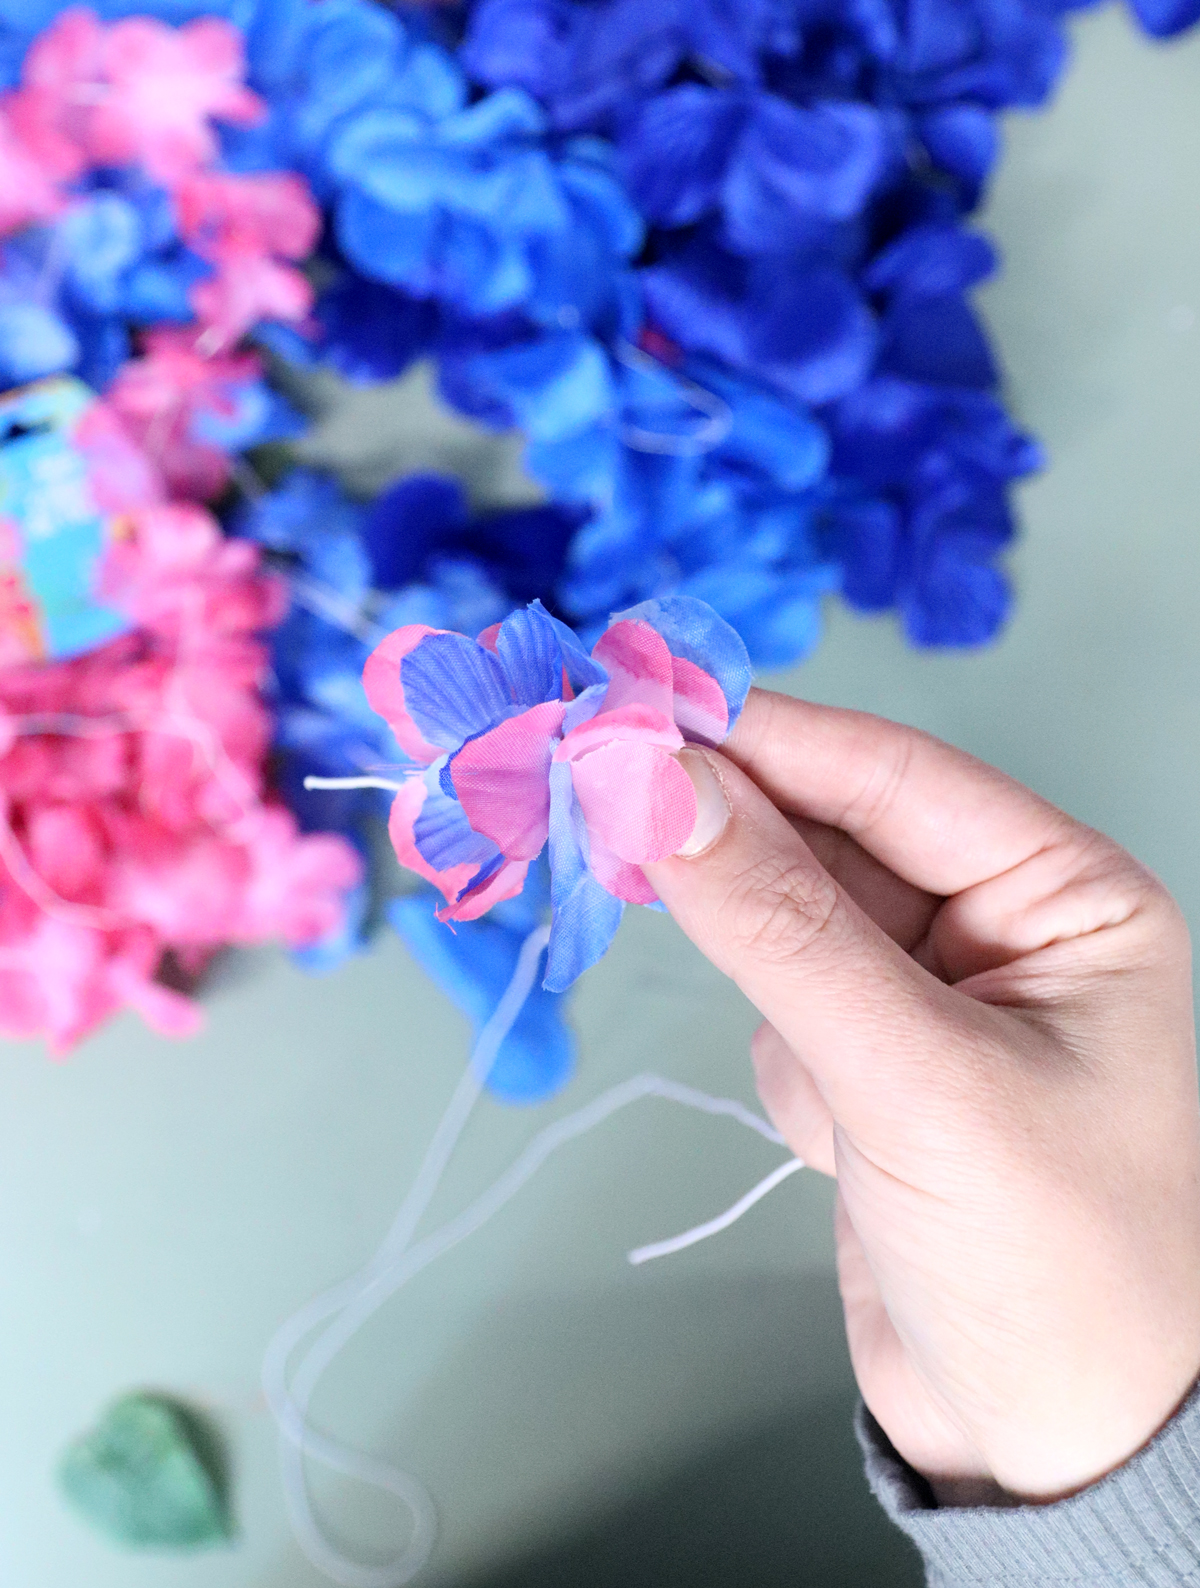
2. Cut open your leis and decide what you want your pattern to look like. Since the leis are usually single-layer flowers, they look nice when you stack them.
Bring your needle from back to front through the existing hole of the first flower/flower stack.
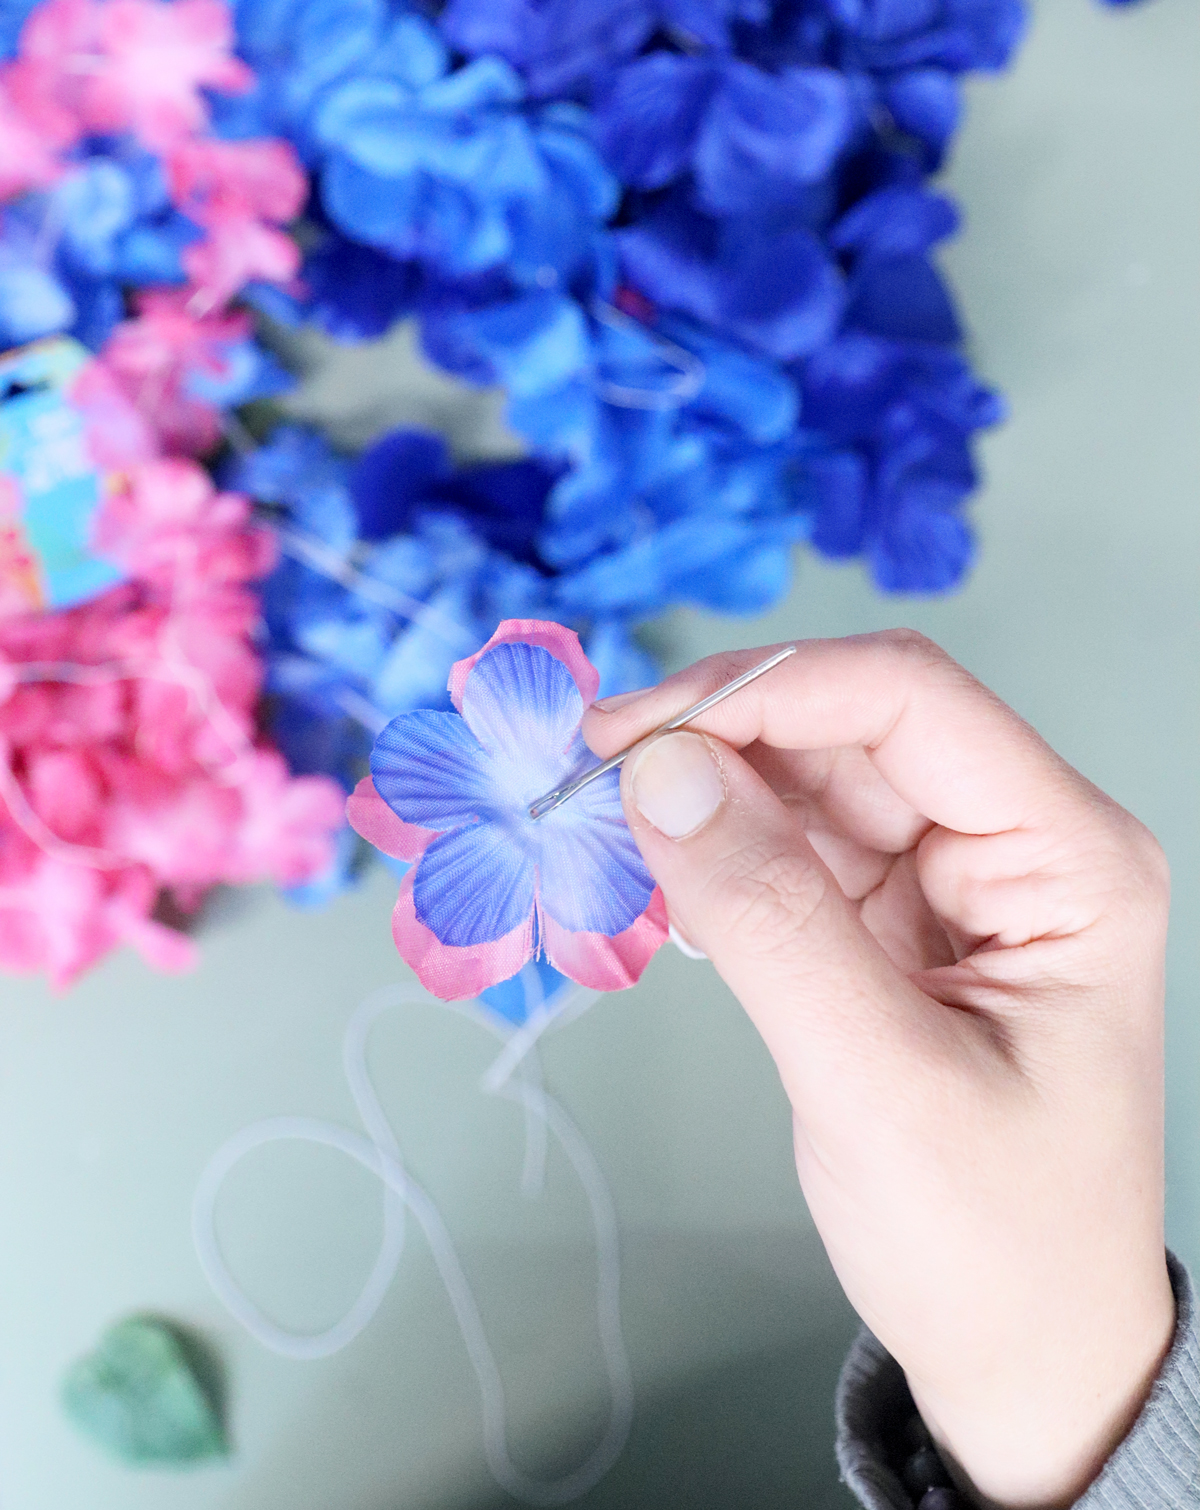
3. Pull it out a little and poke your needle back through from front to back a little (a few mm) away from your first hole. You may need to do each layer individually and wiggle it a little.
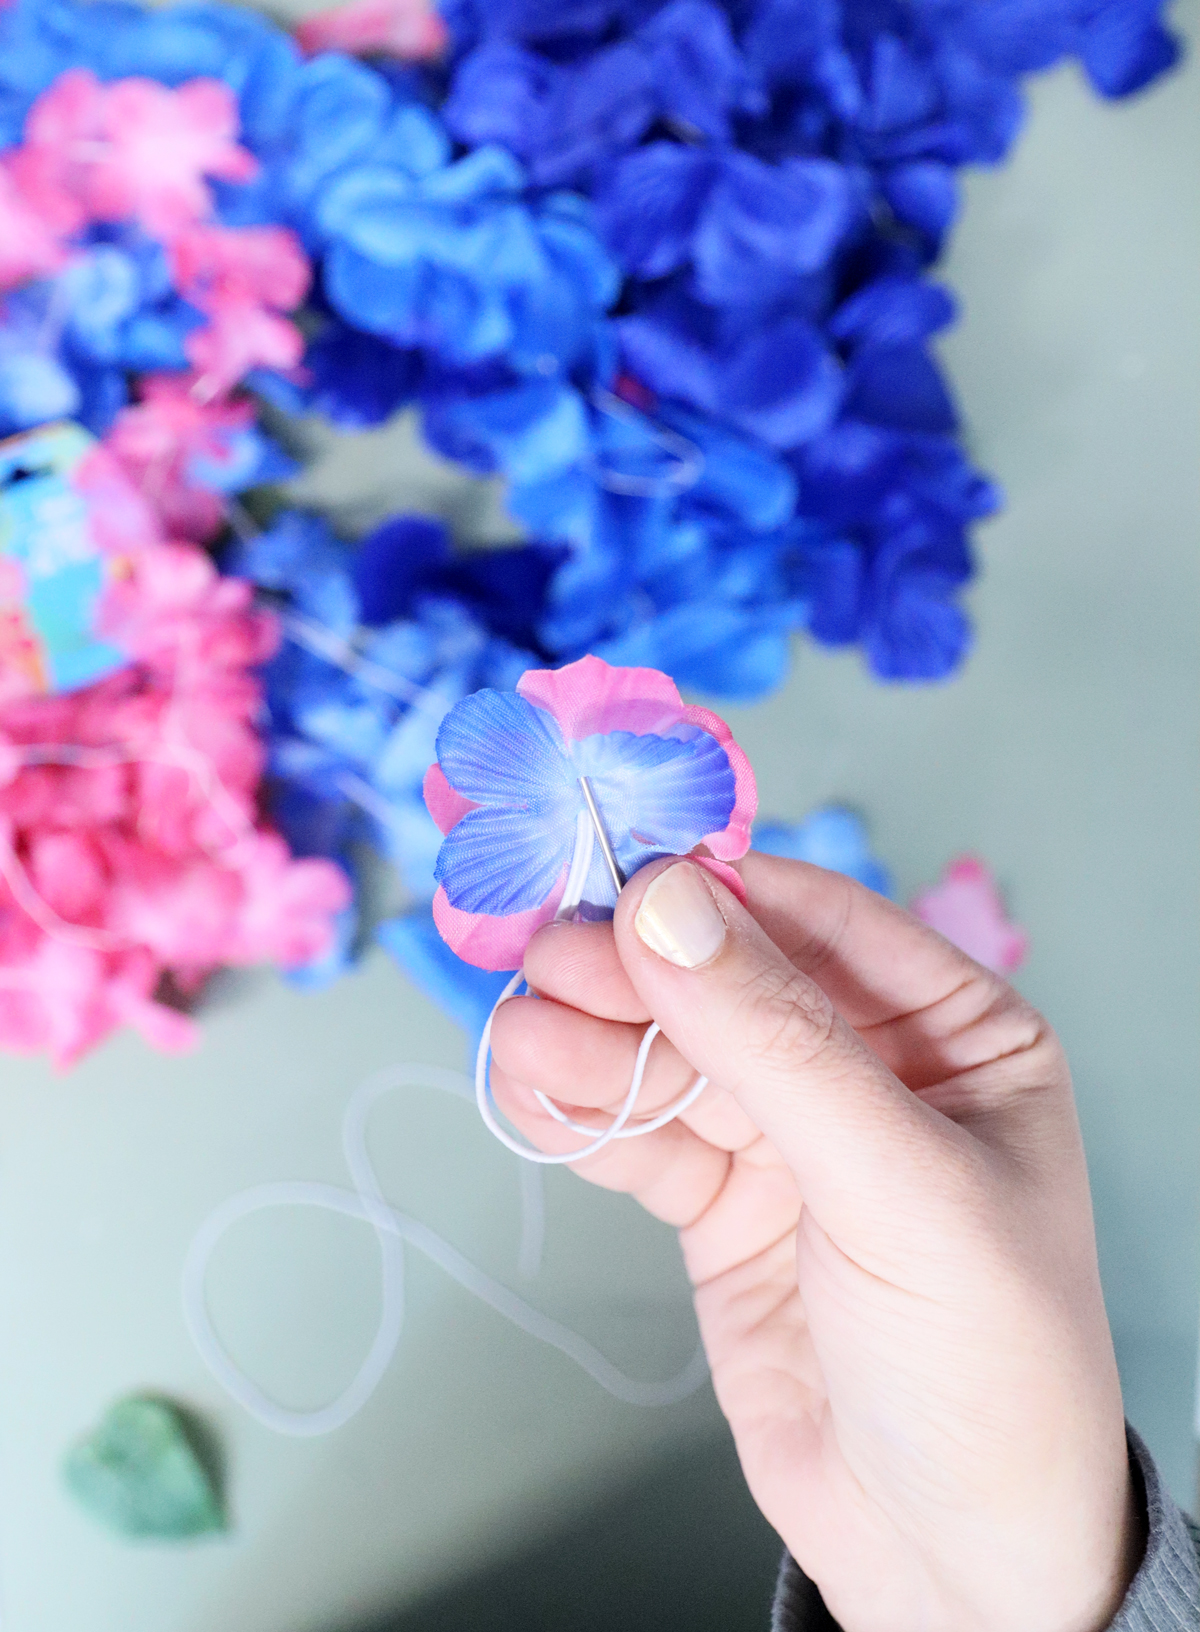
I will take this opportunity to tell you that this is a VERY forgiving craft. Your flowers don’t need to be perfectly centered or spaced. The holes don’t have to exactly align. They can scrunch a little. It is really easy to make look pretty.
4. Slide your flower stack all the way down to the knot you created.

5. Thread your next stack, following the same process and slide it all the way down to the first.
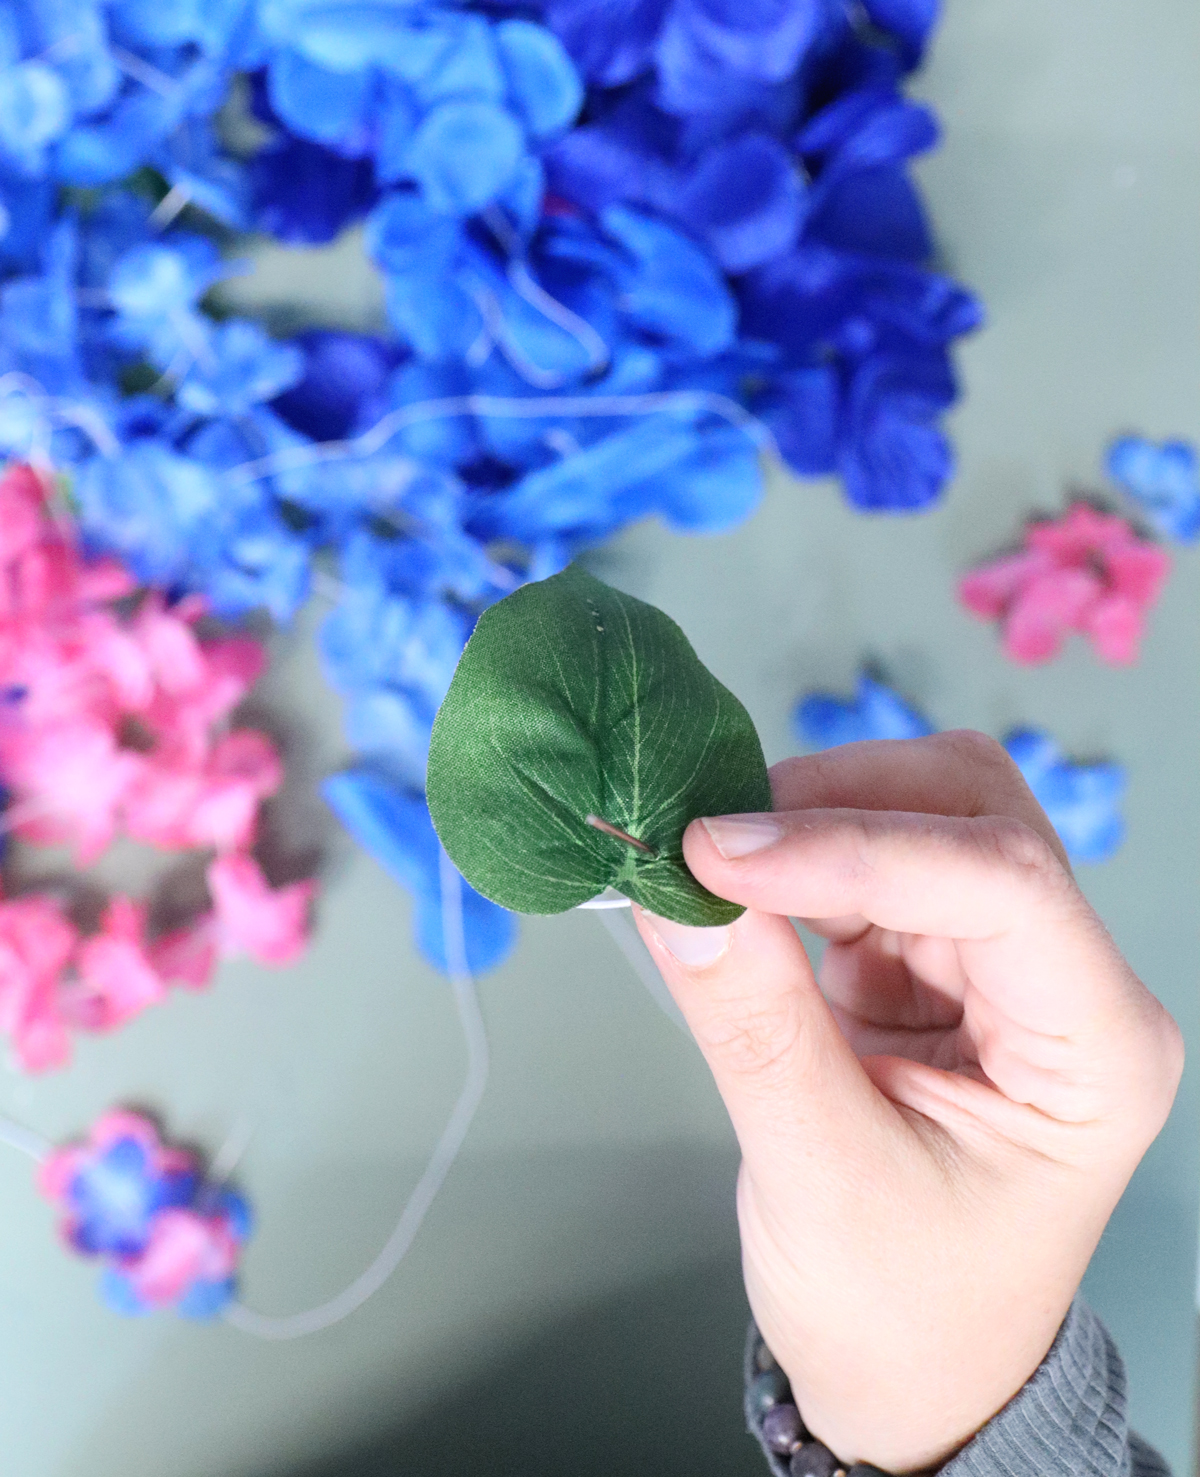
6. Now let’s add a leaf! The ones that I added were a bit harder to poke through, and for kids, I’d definitely pre-punch these. The good news is, you’ll only really use a few per crown. Punch the needle from back to front at the base of the leaf on one side of the vein.
7. Add the next flower stack in your pattern threading it from back to front in front of your leaf.

8. Now poke back through the flowers and the leaf on the other side of the vein.
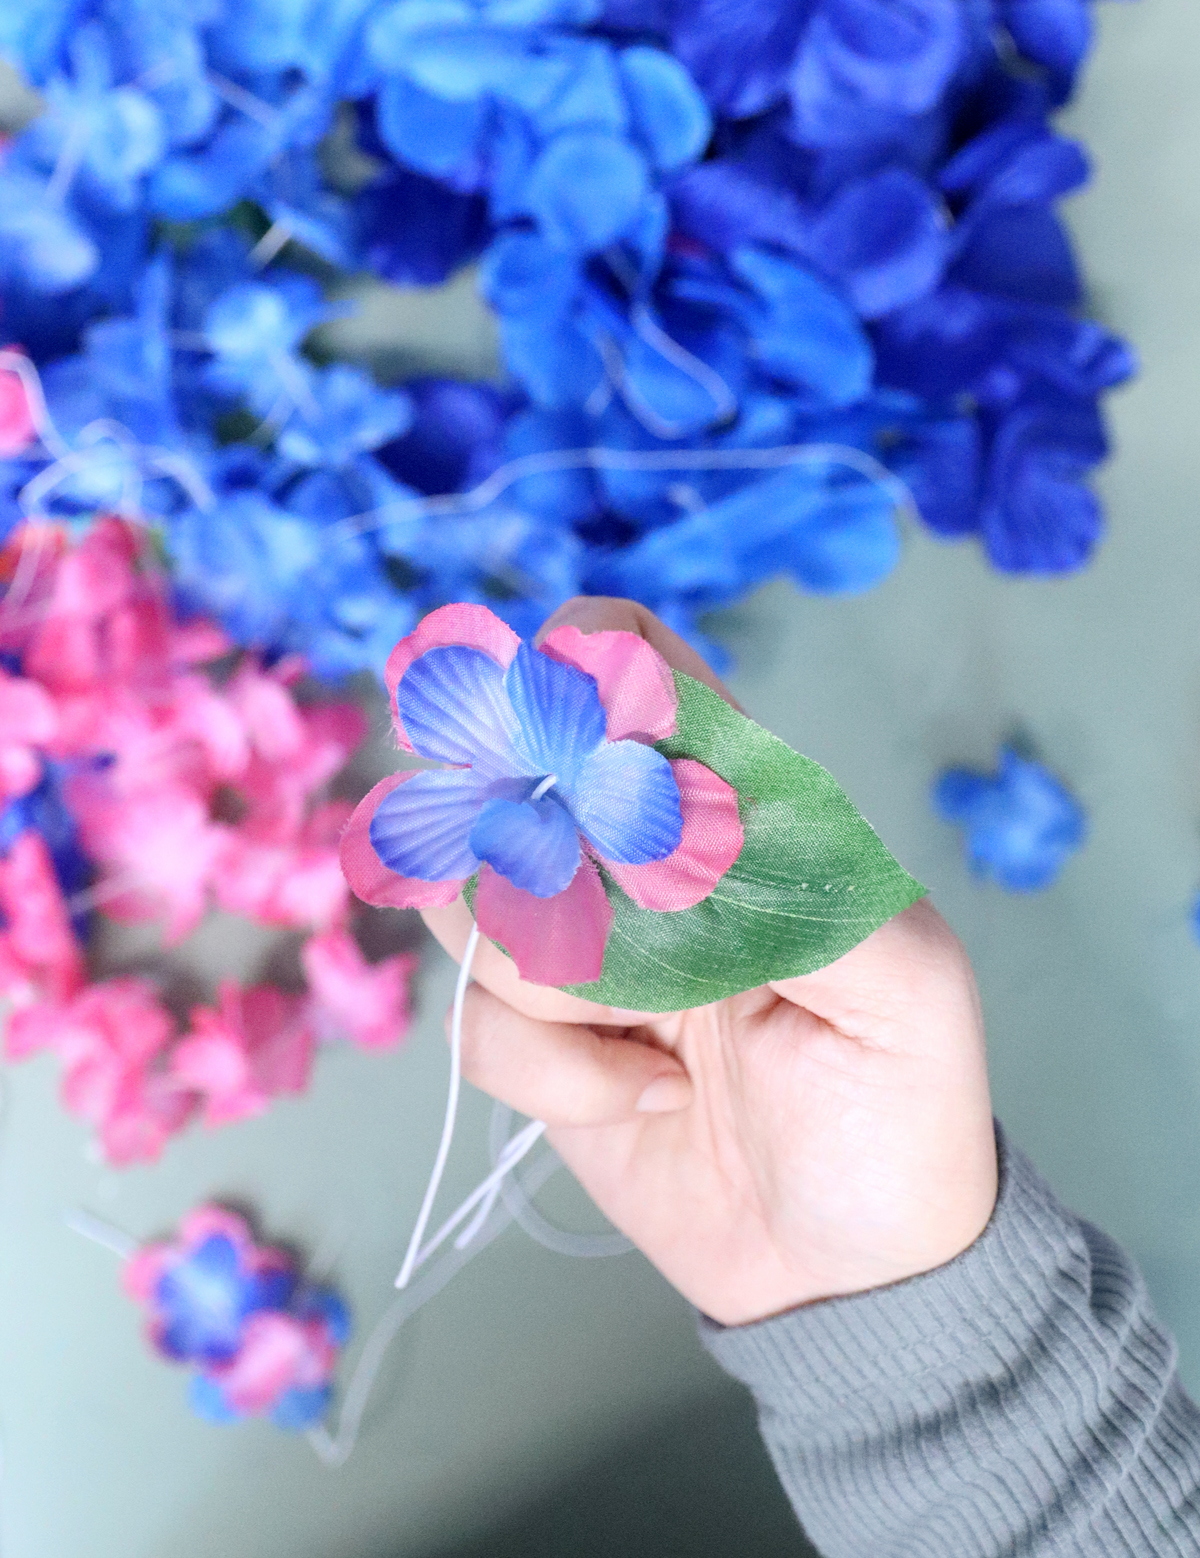
9. Slide the leaf stack all the way to the end.

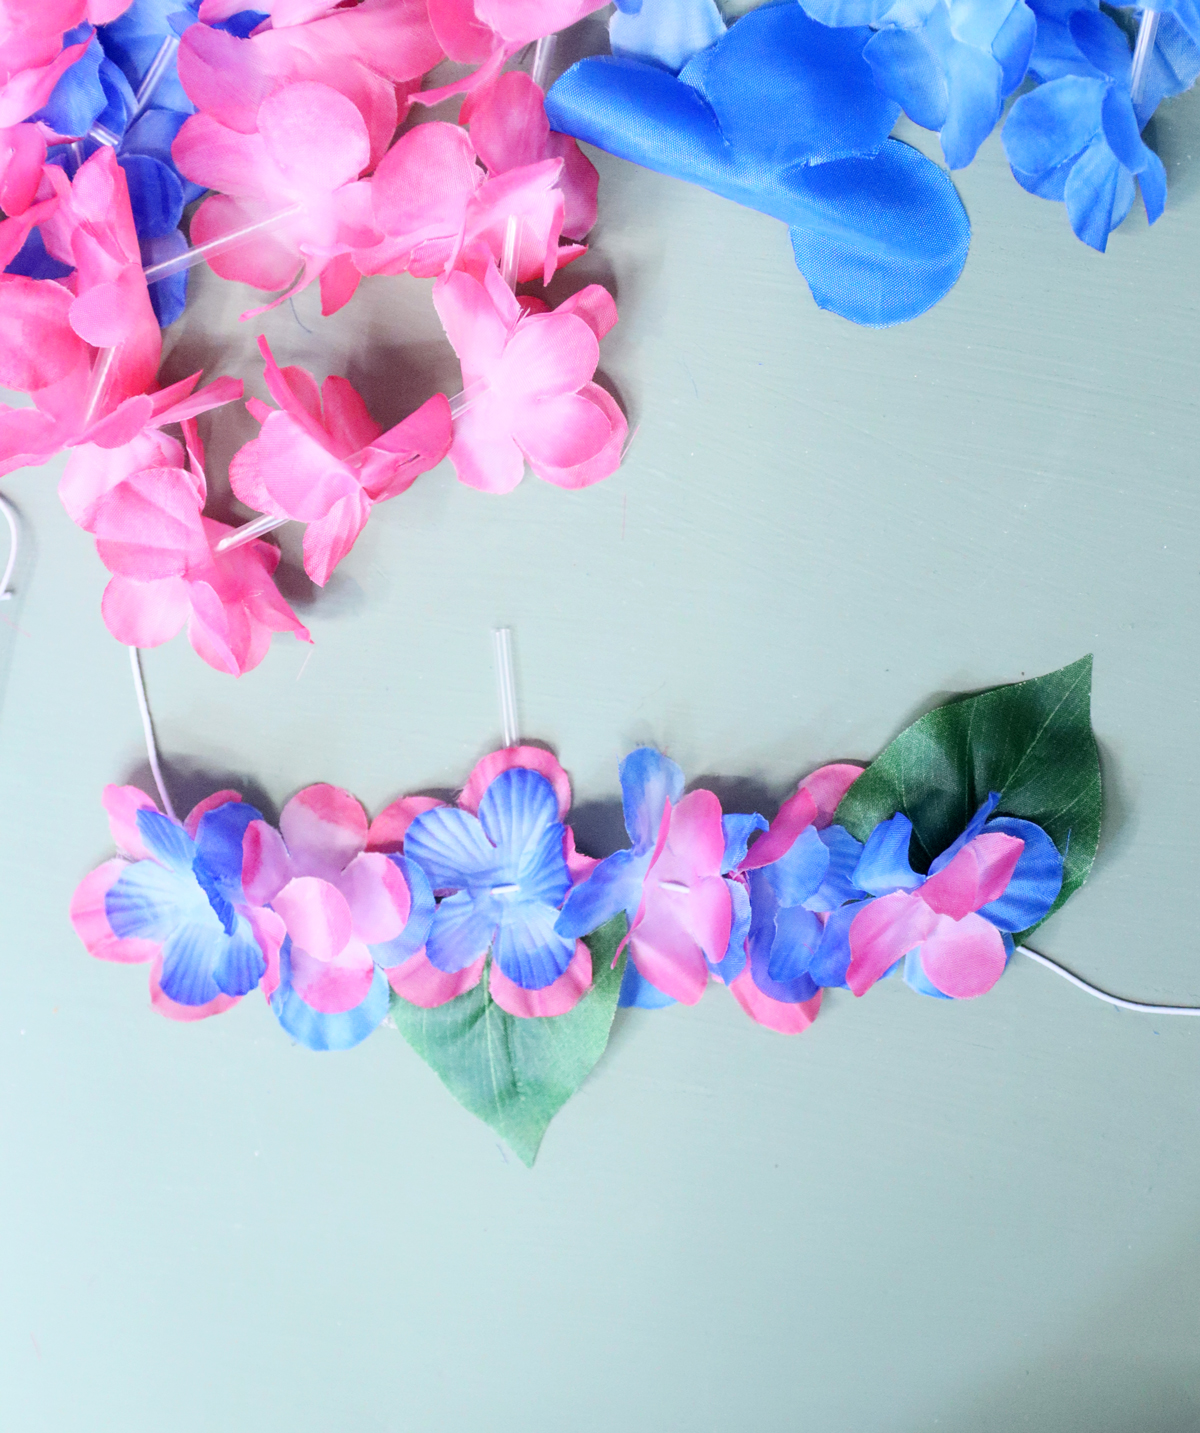
10. My basic pattern was as follows: Large pink with small blue, large blue with small pink, leaf facing down with large pink and small blue, large blue and small pink, leaf facing up with large blue and small pink.
Sounds complicated but it’s really a basic pattern alternating the flowers (large blue/small pink and small blue/large pink) and then adding a leaf every third one. The leaves switch off facing up and down.
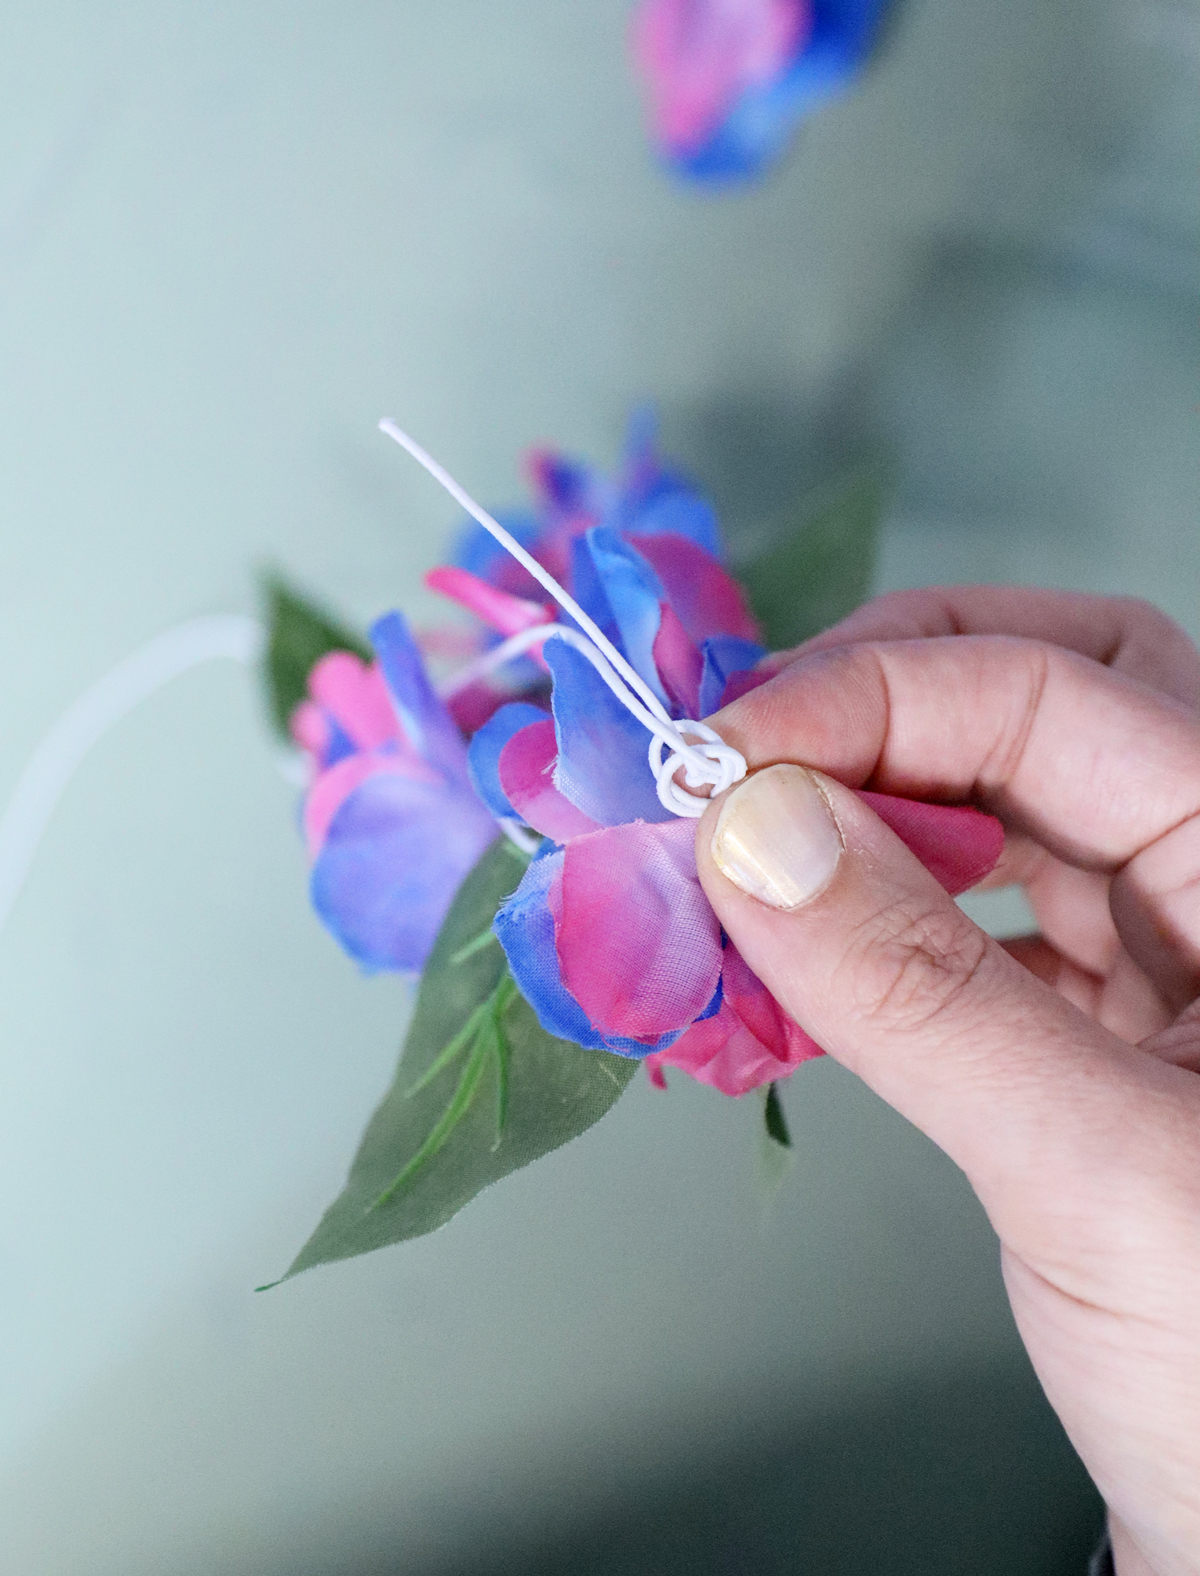
11. When you’ve threaded enough to complete your flower crown, double overhand knot your two sides and pull tight. Trim. Leave about 3/4 inch tail – you can be generous as it’ll mostly disappear in the flowers.
You’ve mastered how to make a faux flower crown! How cute is this? Which occasion will you be making yours for? Comment below!
DIY Faux Flower Crowns
Learn how to make a faux flower crown that is super easy no-glue, and totally wearable!
Materials
- Leis - look for floral colors in a simple color palette (shades of blue, purple, and pink are fabulous) and avoid greens. Go for smaller ones with flowers of about 1 inch. Make sure to get the fabric flower kind and not the plastic scrunched up kind.
- Faux leaves or something you can cut faux leaves off of (look for vines if you want something with lots of leaves)
- Elastic cording
- A large-hole blunt metal needle. Make sure the hole fits the thickness of the elastic
- Scissors
Instructions
1. Start by cutting an elastic about 36 inches in length. Make a basic overhand knot a few inches from the end. Thread the needle on the other end.
2. Cut open your leis and decide what you want your pattern to look like. Since the leis are usually single-layer flowers, they look nice when you stack them.
Bring your needle from back to front through the existing hole of the first flower/flower stack.
3. Pull it out a little and poke your needle back through from front to back a little (a few mm) away from your first hole. You may need to do each layer individually and wiggle it a little.
4. Slide your flower stack all the way down to the knot you created.
5. Thread your next stack, following the same process and slide it all the way down to the first.
6. Now let's add a leaf! The ones that I added were a bit harder to poke through, and for kids, I'd definitely pre-punch these. The good news is, you'll only really use a few per crown. Punch the needle from back to front at the base of the leaf on one side of the vein.
7. Add the next flower stack in your pattern threading it from back to front in front of your leaf.
8. Now poke back through the flowers and the leaf on the other side of the vein.
9. Slide the leaf stack all the way to the end.
10. My basic pattern was as follows: Large pink with small blue, large blue with small pink, leaf facing down with large pink and small blue, large blue and small pink, leaf facing up with large blue and small pink.
11. When you've threaded enough to complete your flower crown, double overhand knot your two sides and pull tight. Trim. Leave about 3/4 inch tail - you can be generous as it'll mostly disappear in the flowers.
Notes
The lei flowers come with one hole. I punched a second one with the needle, but you can use the 1/16th inch Power Punch to poke a second if you need to prep it in advance for them (or poke it with the needle).