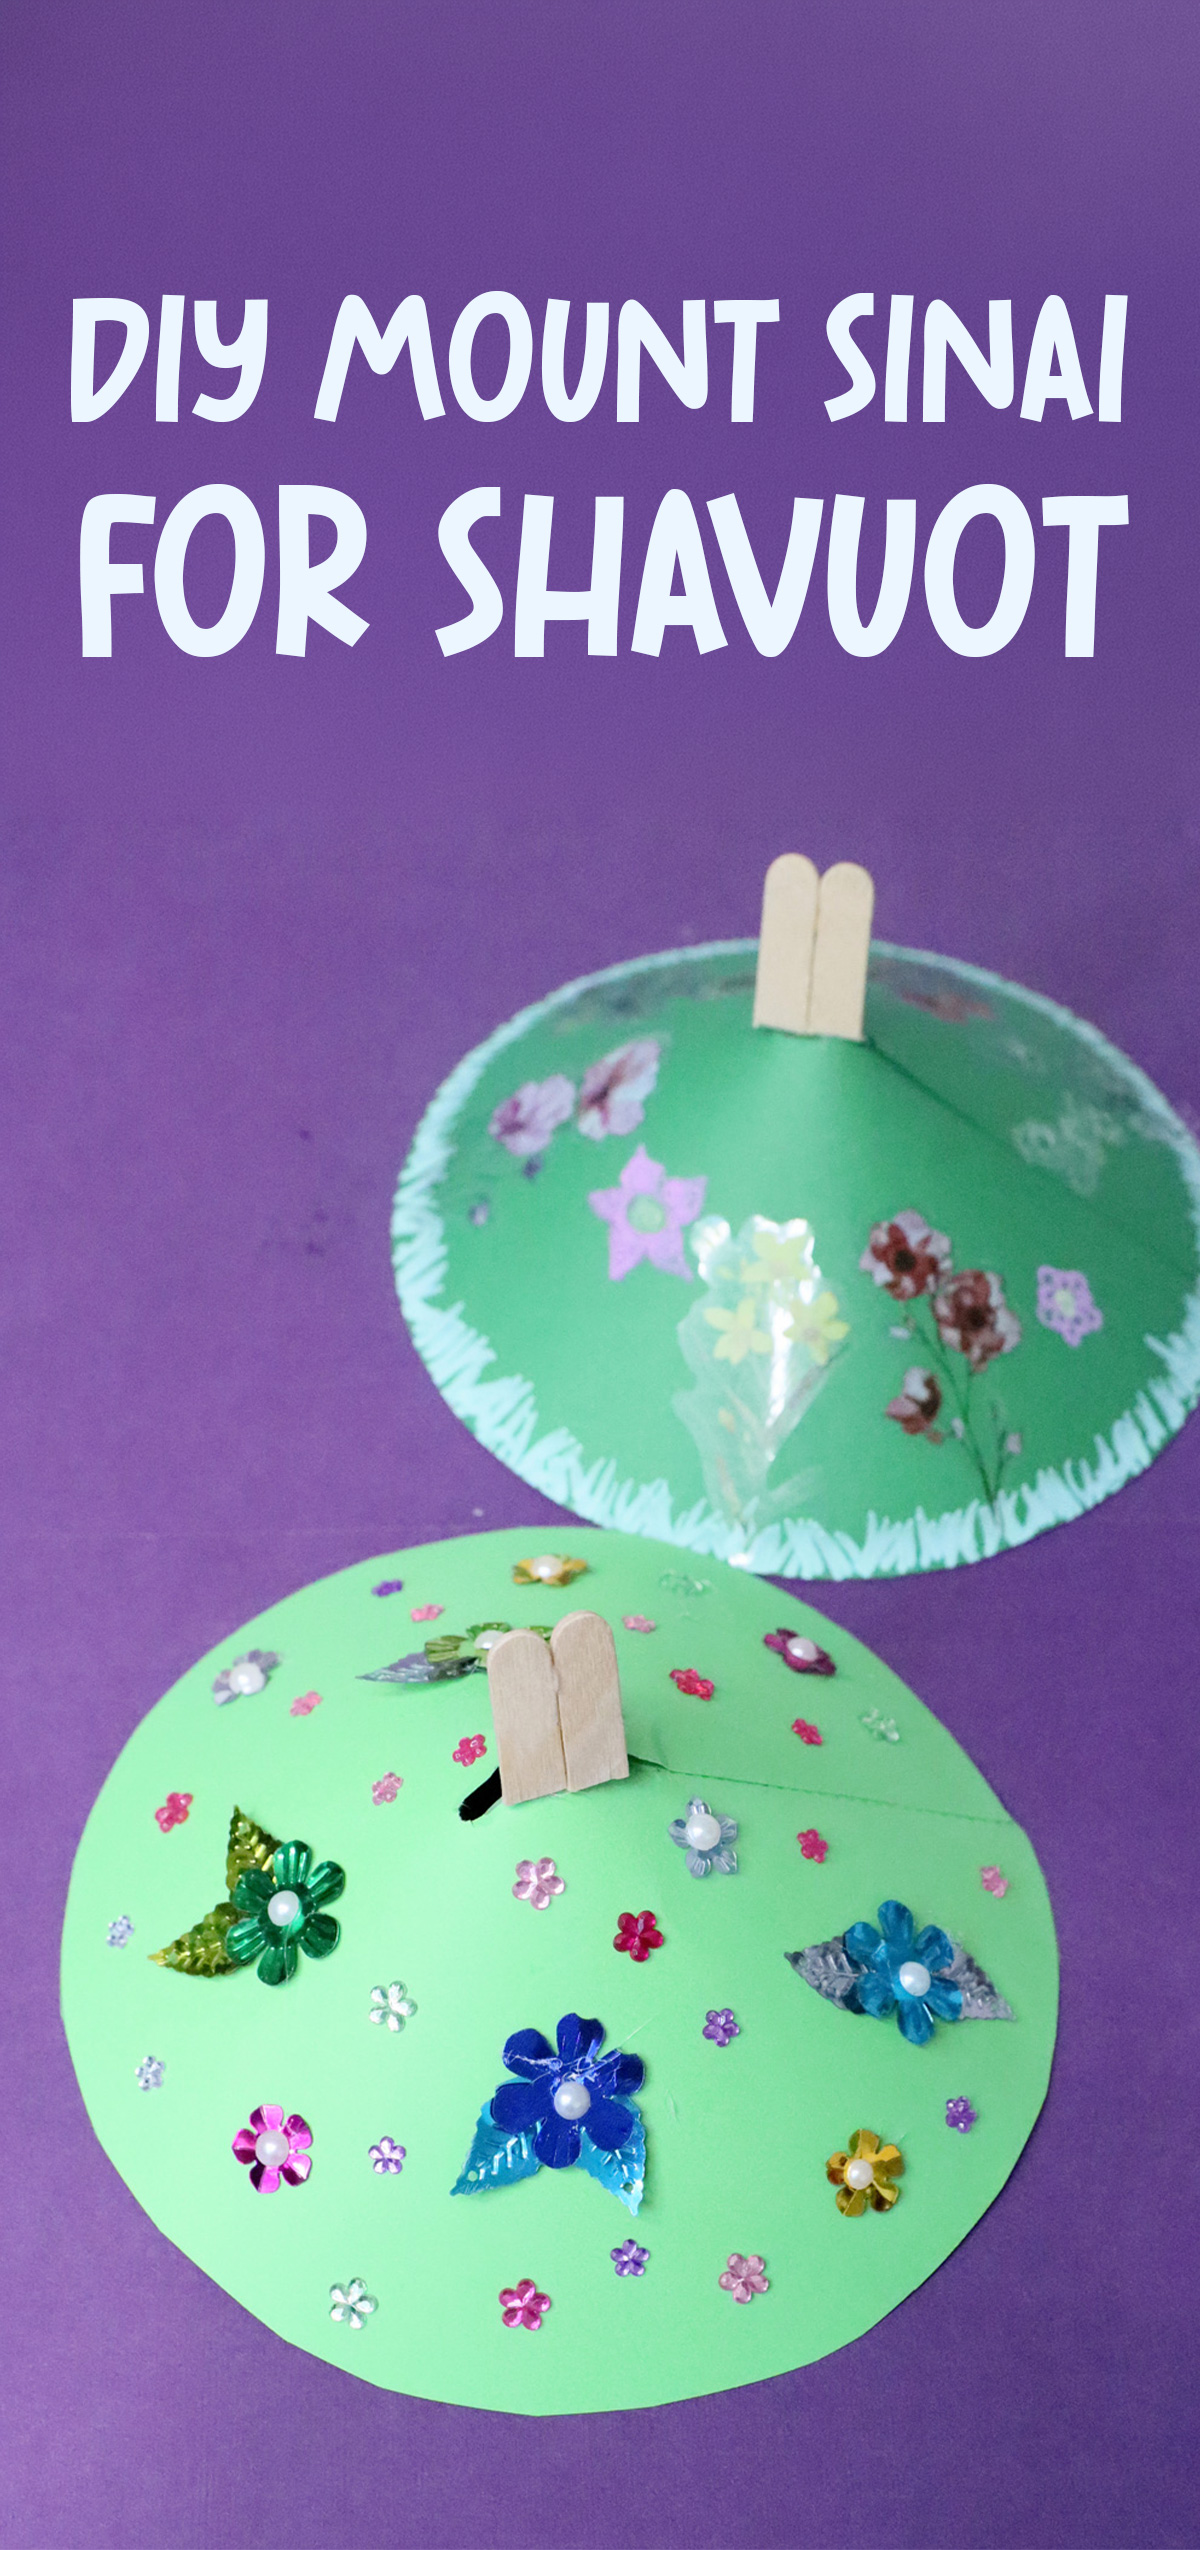
Mount Sinai Shavuot Craft for Preschool
Craft this adorable paper mount sinai craft for Shavuot – a fabulous project for preschool kids! When you’re done, make sure to check out this Torah Aleph Bet Craft for Preschool too. This post contains affiliate links.
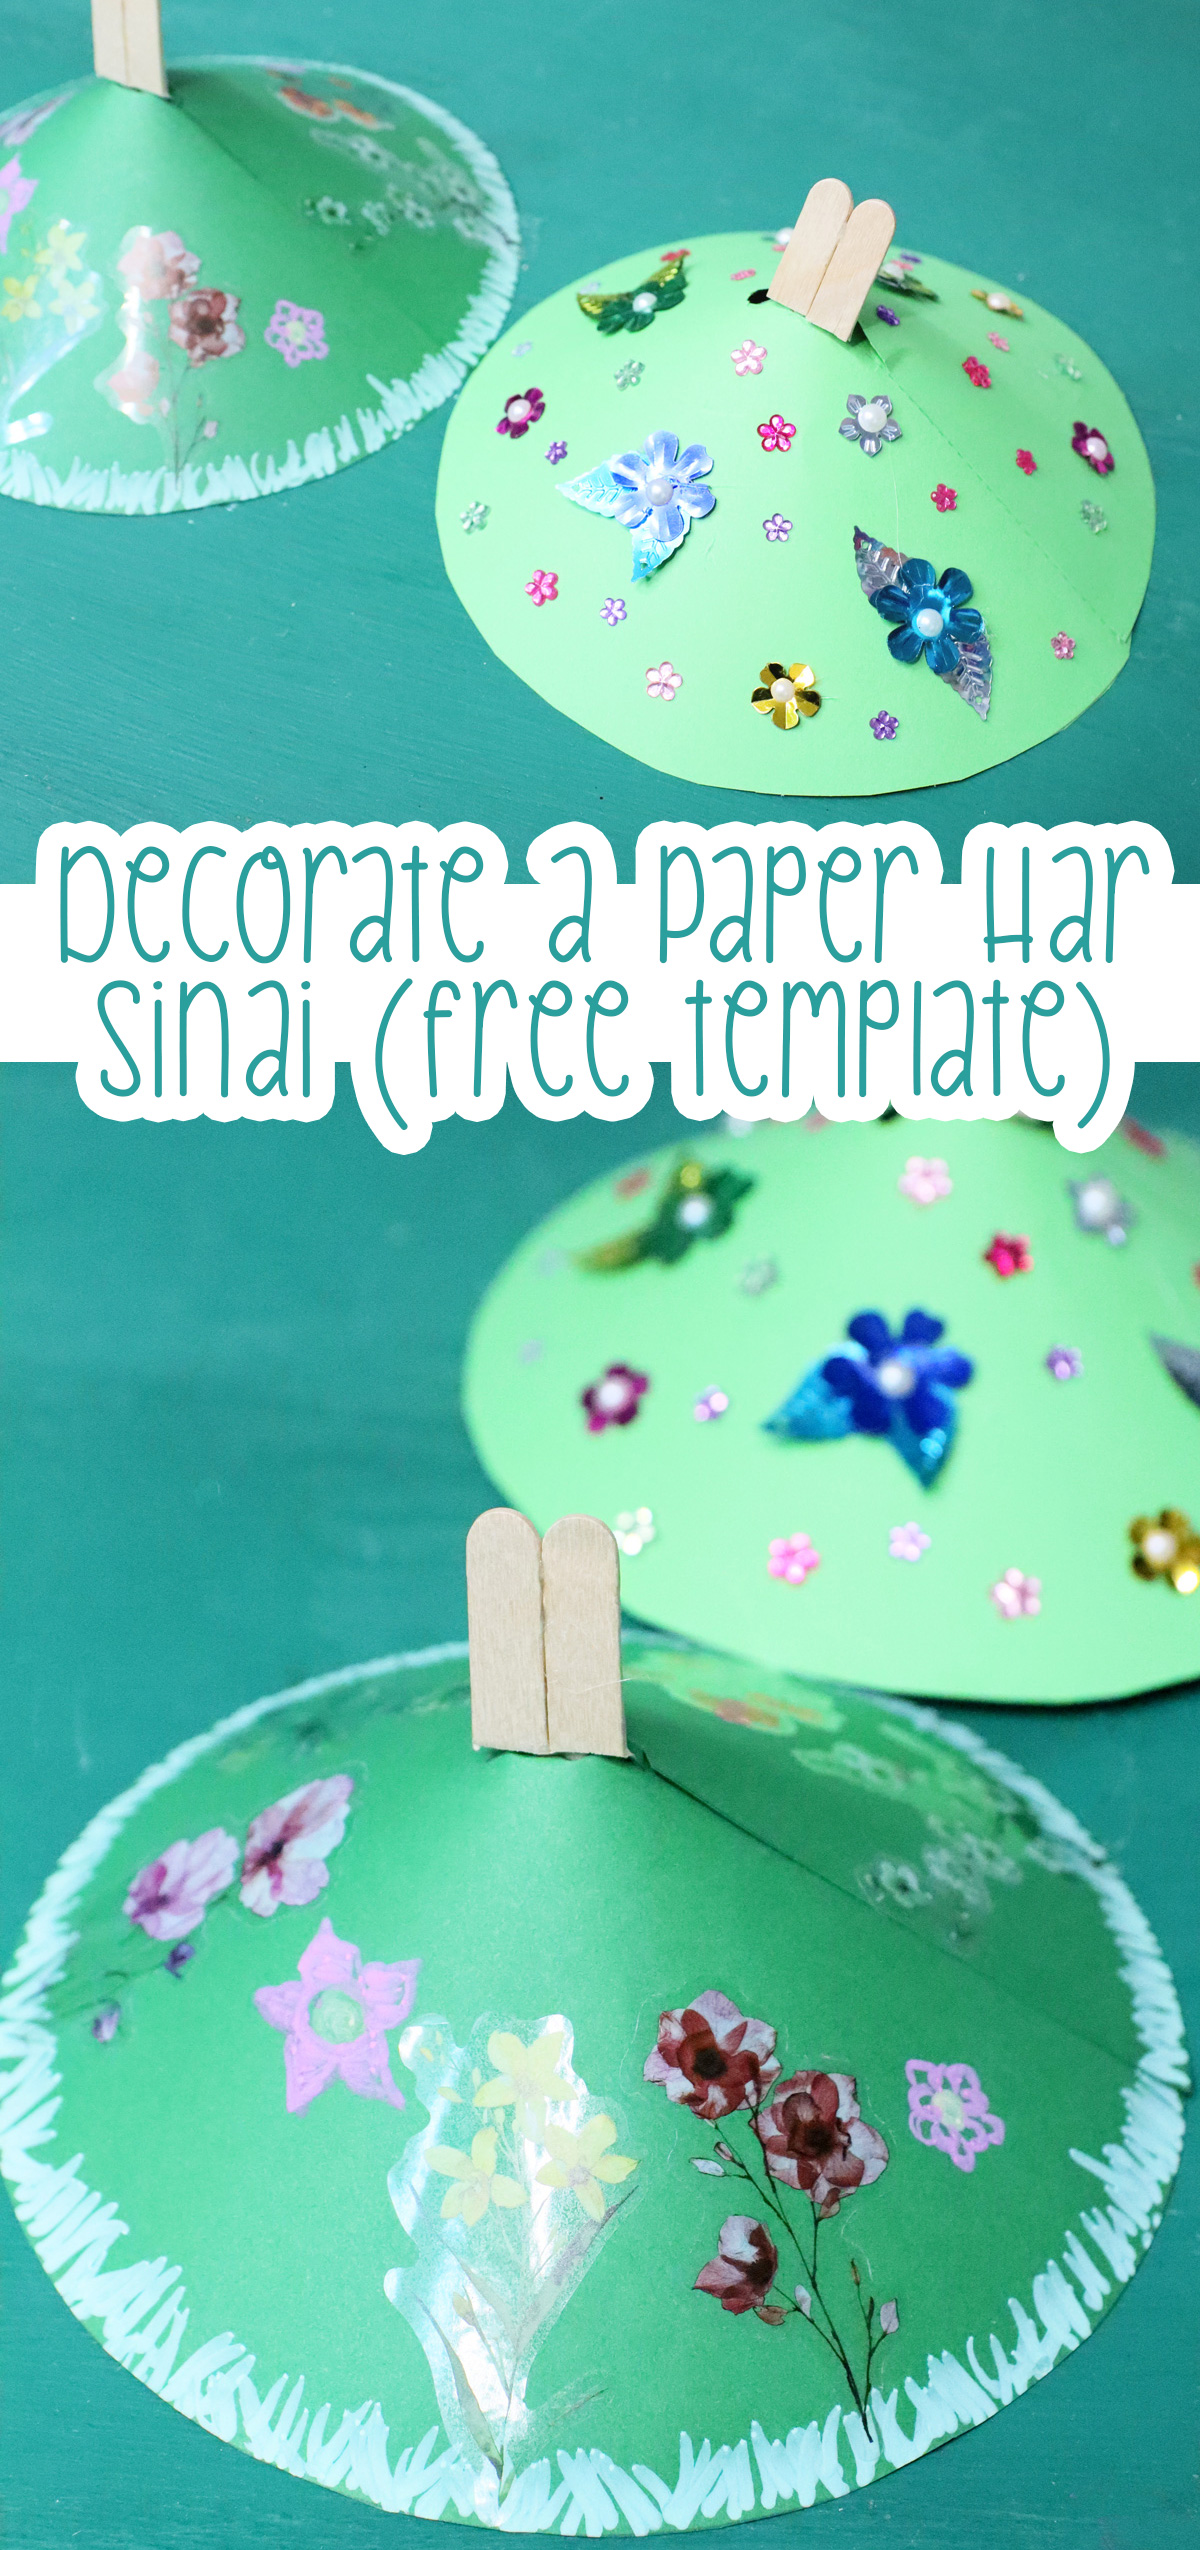
Let’s craft some adorable Har Sinais for the upcoming holiday of Shavuot! This adorable paper craft includes a free mountain template. It is a spinoff of the color & craft version I designed for Parshat Yitro. this one requires more crafting. Choose the one that better suits your needs and have fun crafting!
Tips for crafting your Mount Sinai Shavuot Craft
We got so creative with crafting these, and while I wanted to show you the endless possibilities with making this, I had to limit myself so that I can actually get around to sharing it with you.
Here, I’ll be sharing what I did for each craft, but I’ll also be highlighting how you can switch it up, and share more of my ideas.
The base
For the base of my Mount Sinai craft, I simply printed the template on green copy paper. If you’re having kids cut this out, and yes, preschoolers should be able to do that on their own, paper is the easiest material.
Since you can print it directly on the material, that’ll be your easiest choice.
Here are some more ideas beyond green paper:
- Trace the template onto a paper plate and cut it out from there.
- Try it on green cardstock.
- You can even print it directly onto green construction paper using an inkjet printer. Just trim the construction paper to size if needed.
And it doesn’t even need to be green! Use white versions of any of the above and use a compatible material to decorate it:
- Dot markers
- Paints in yellow and green
- Watercolors
Adding your flowers
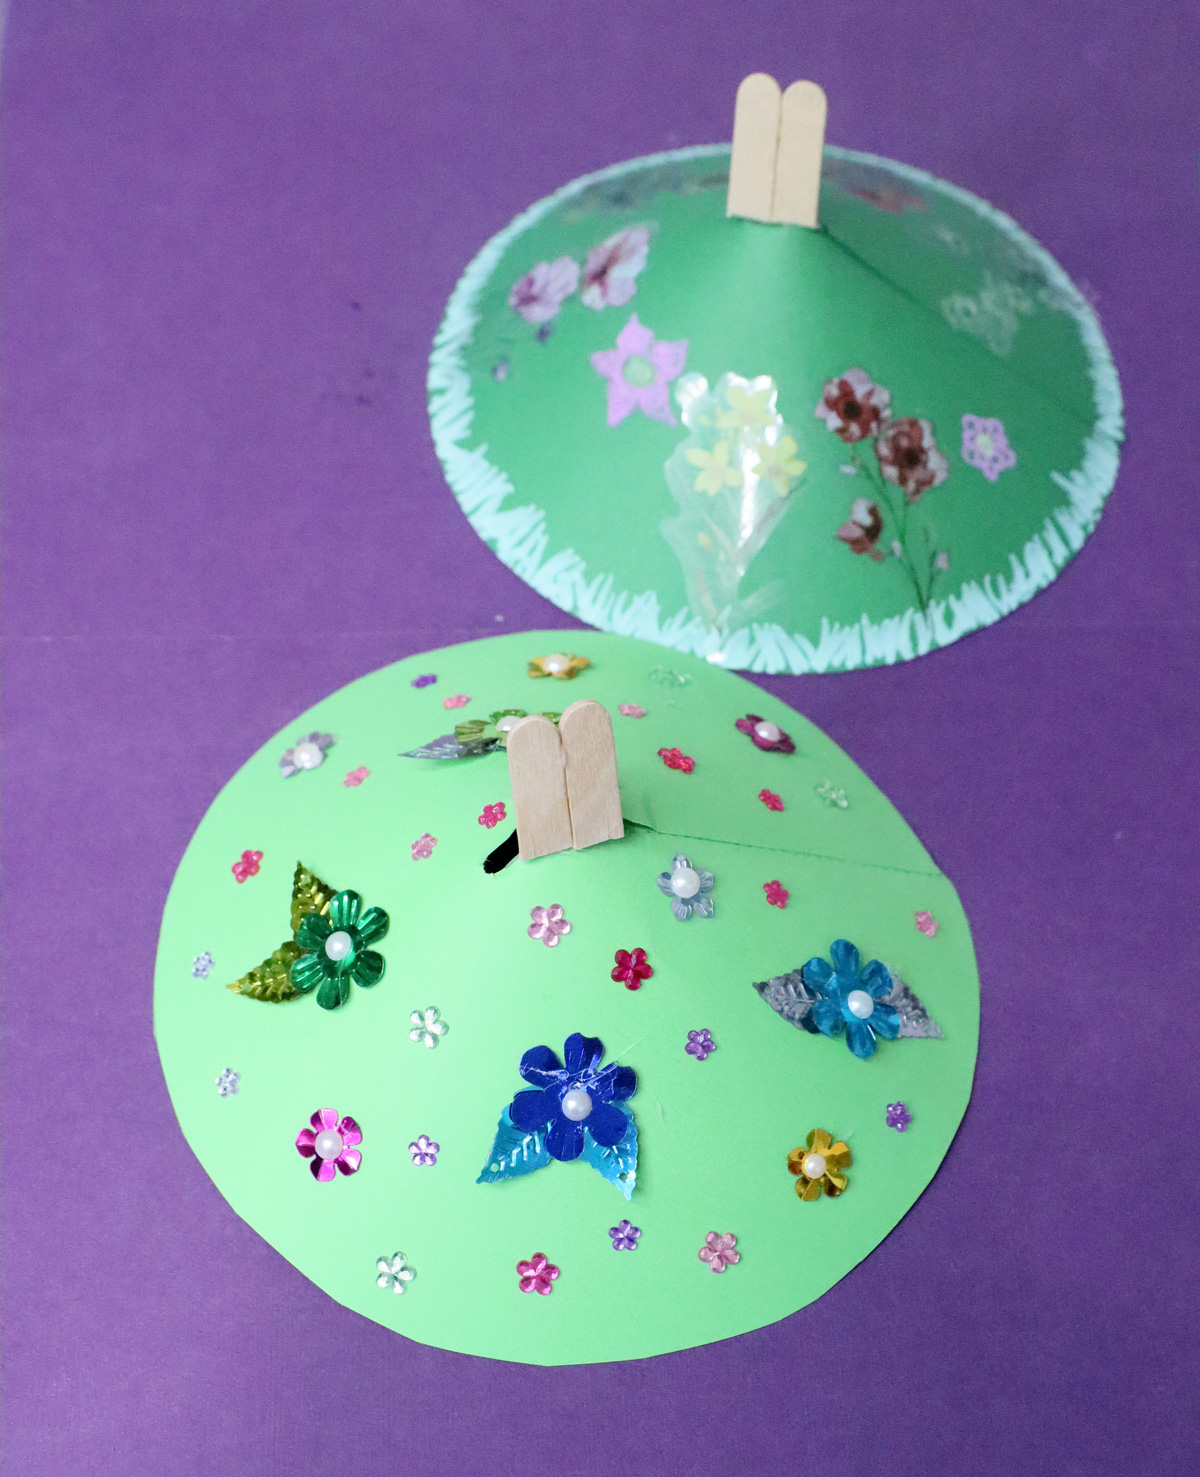
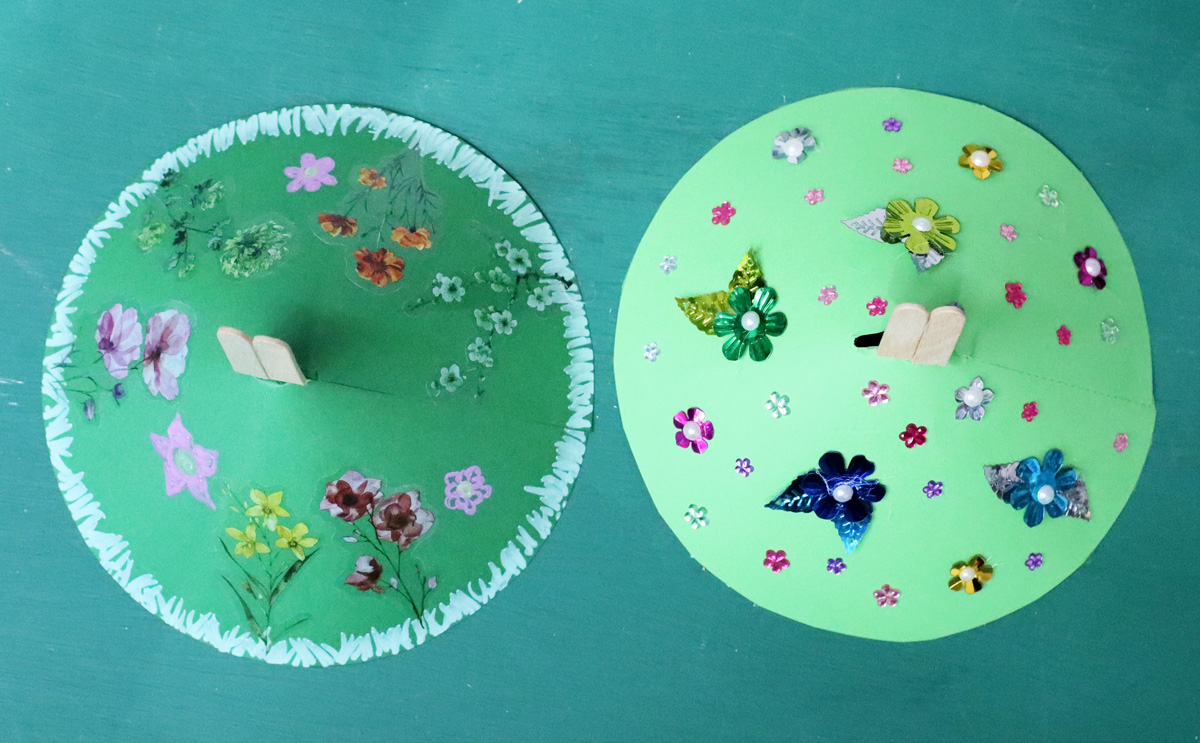
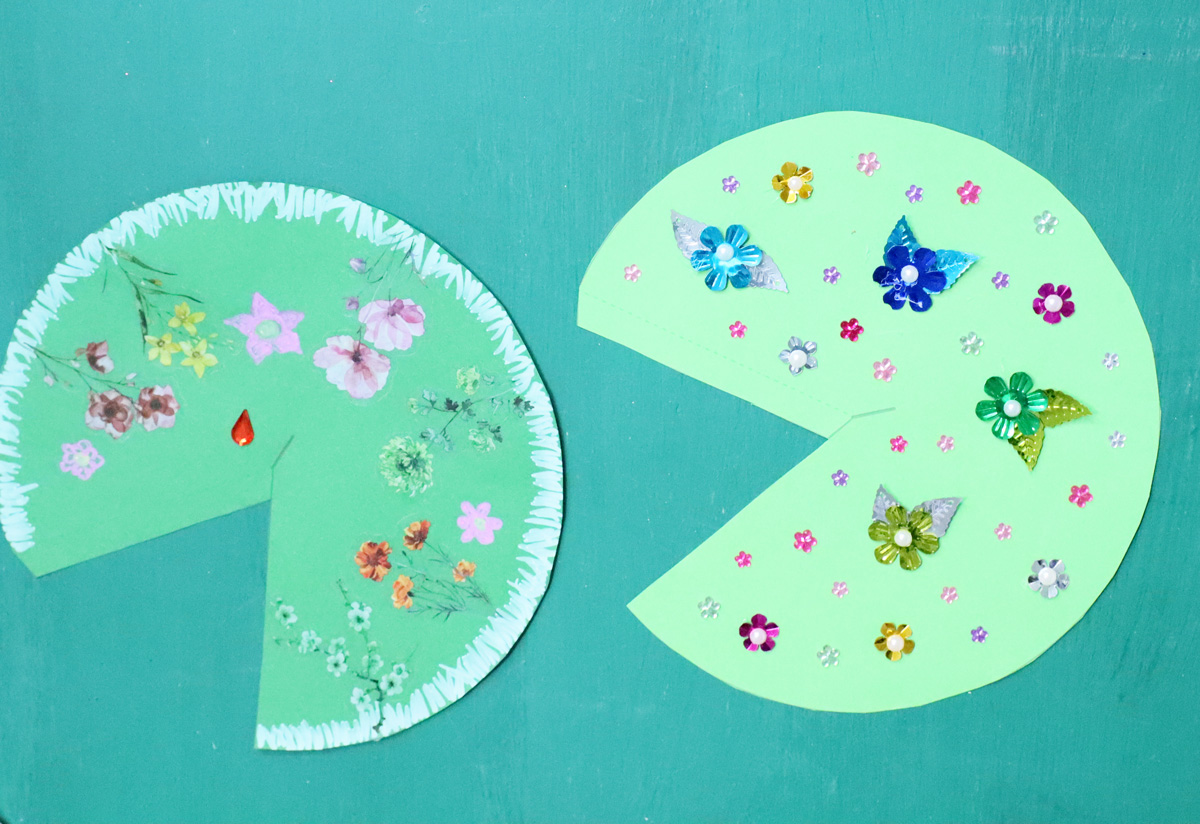
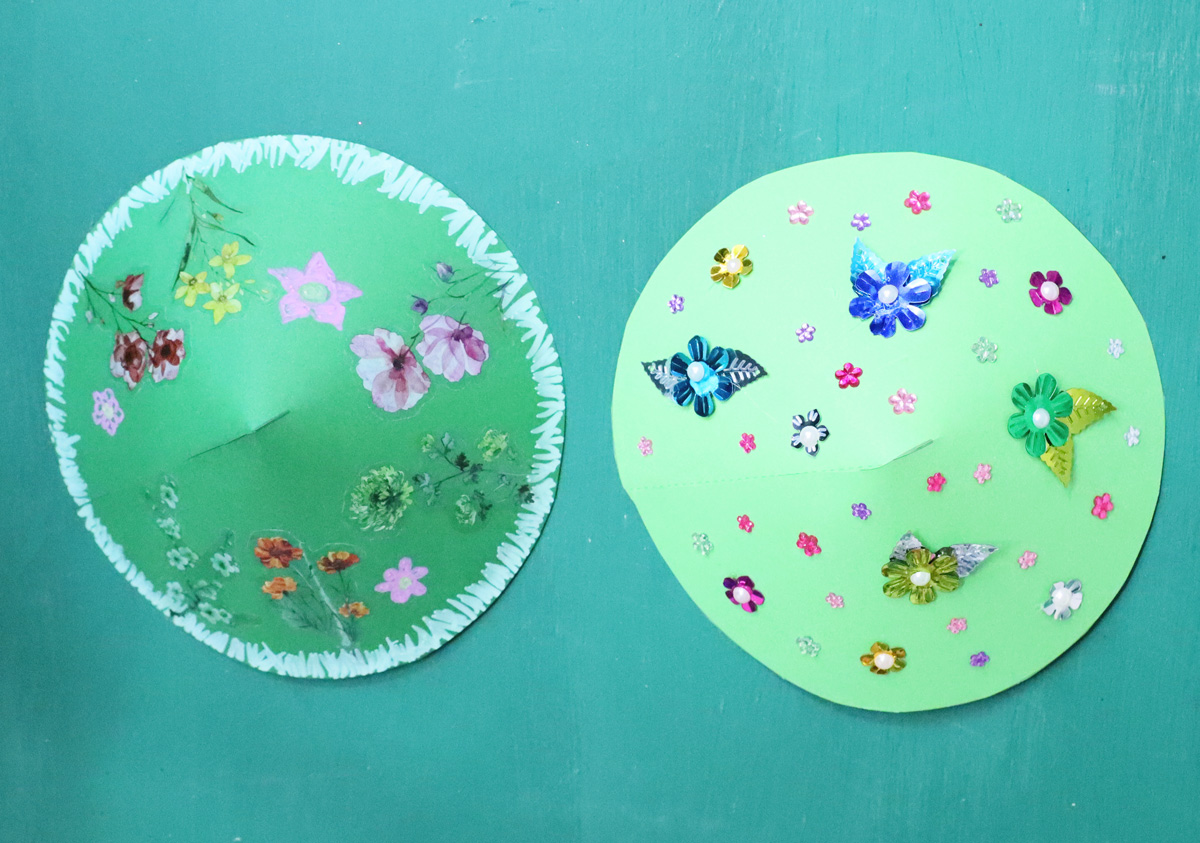
I had so many ideas for flowers, but stuck to a few (mixed and matched) to show you just some of what can be done.
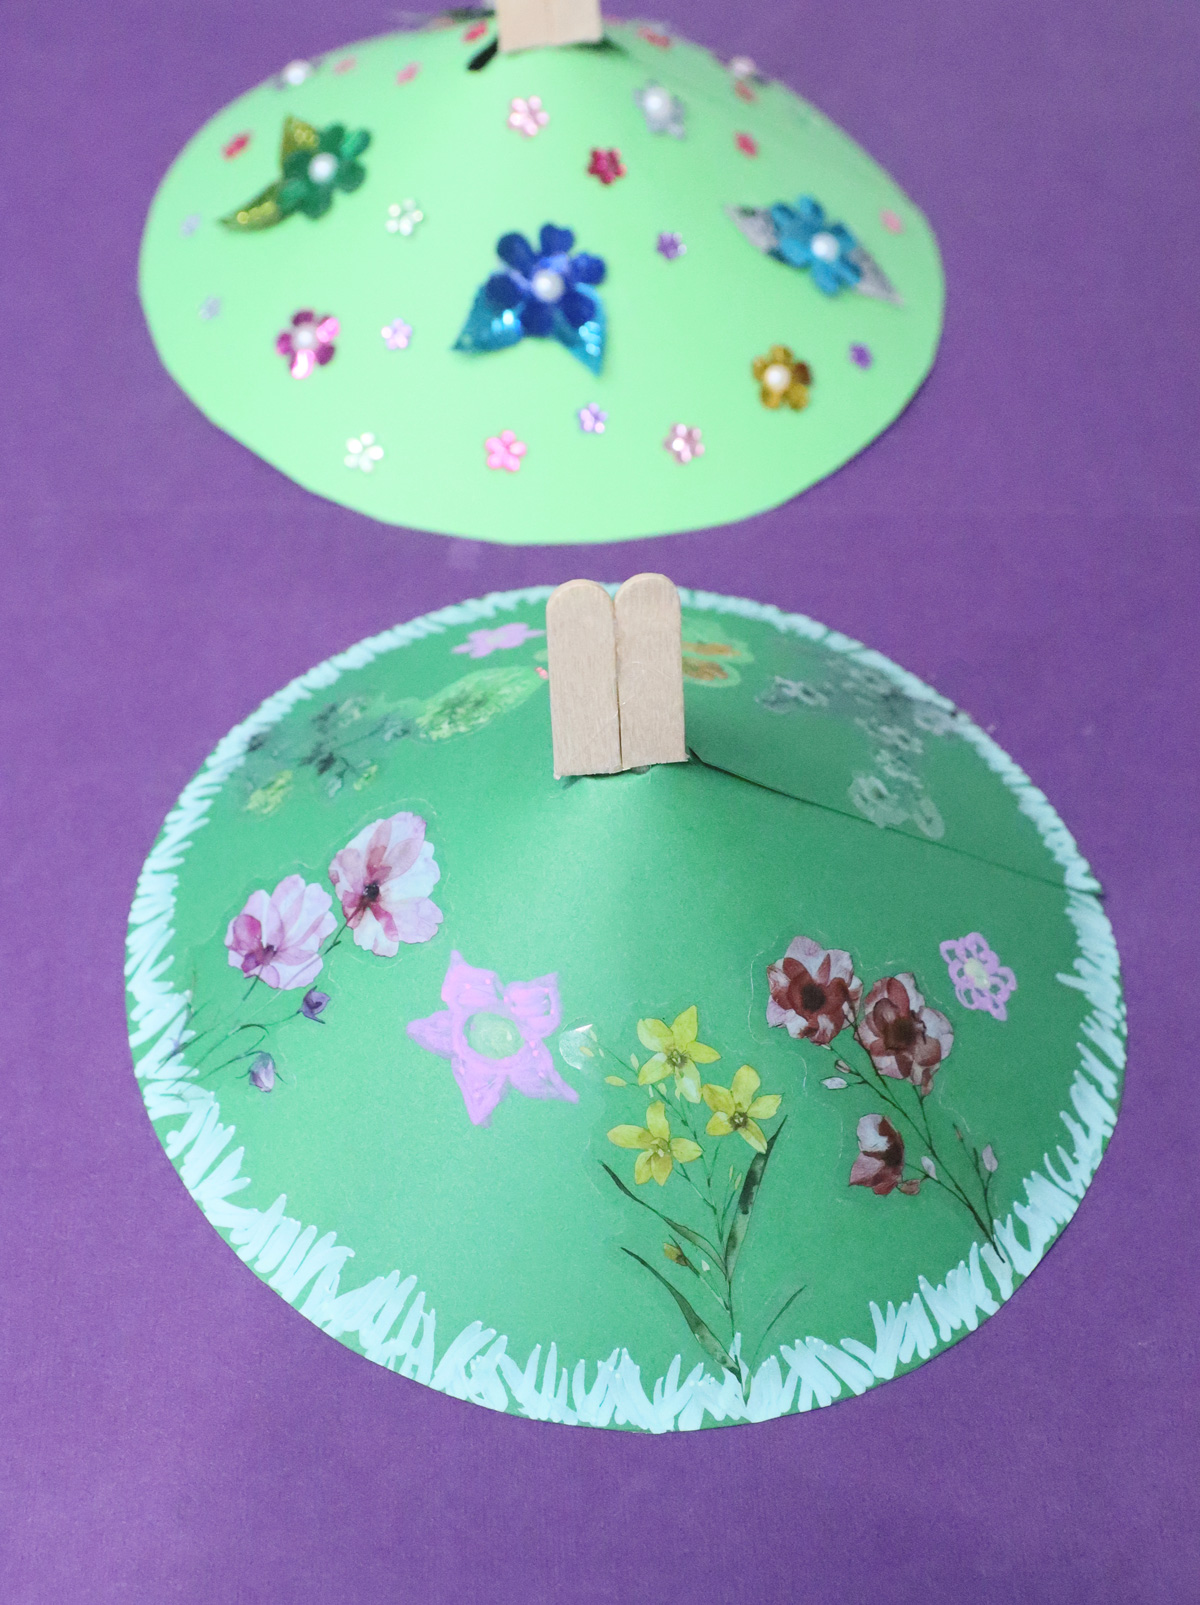
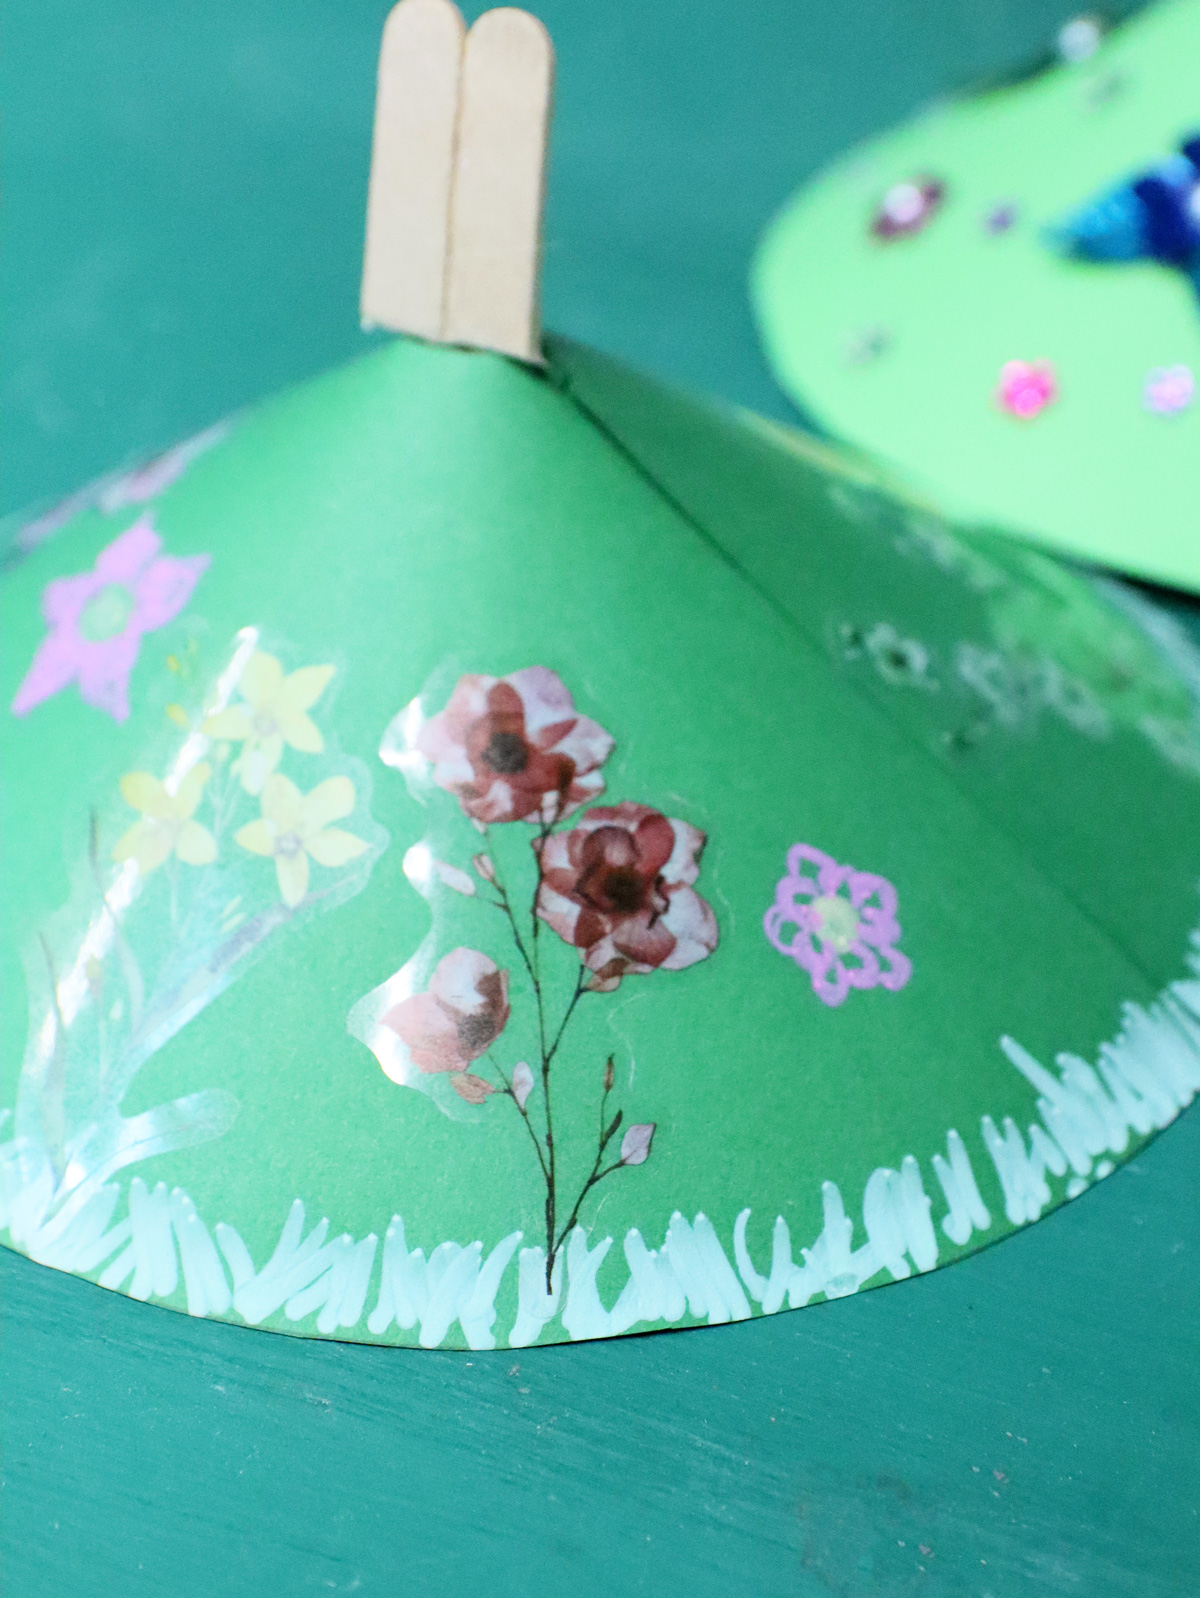
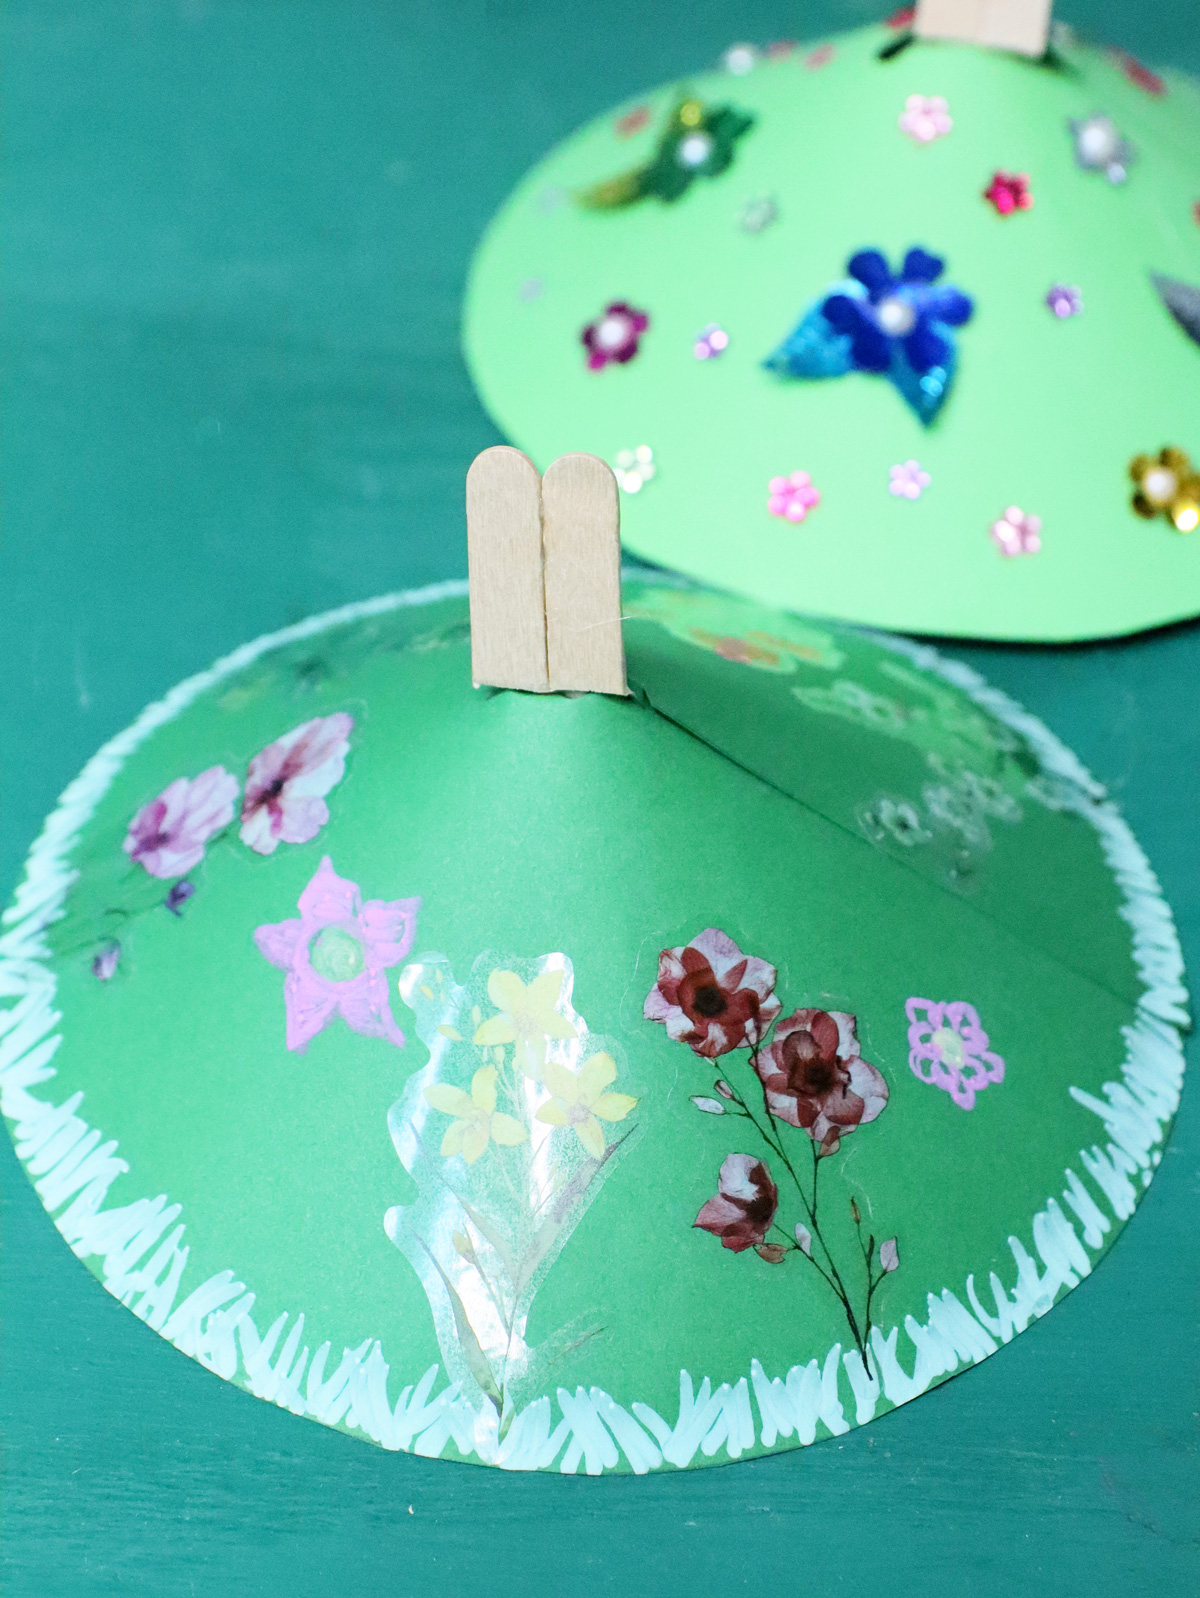
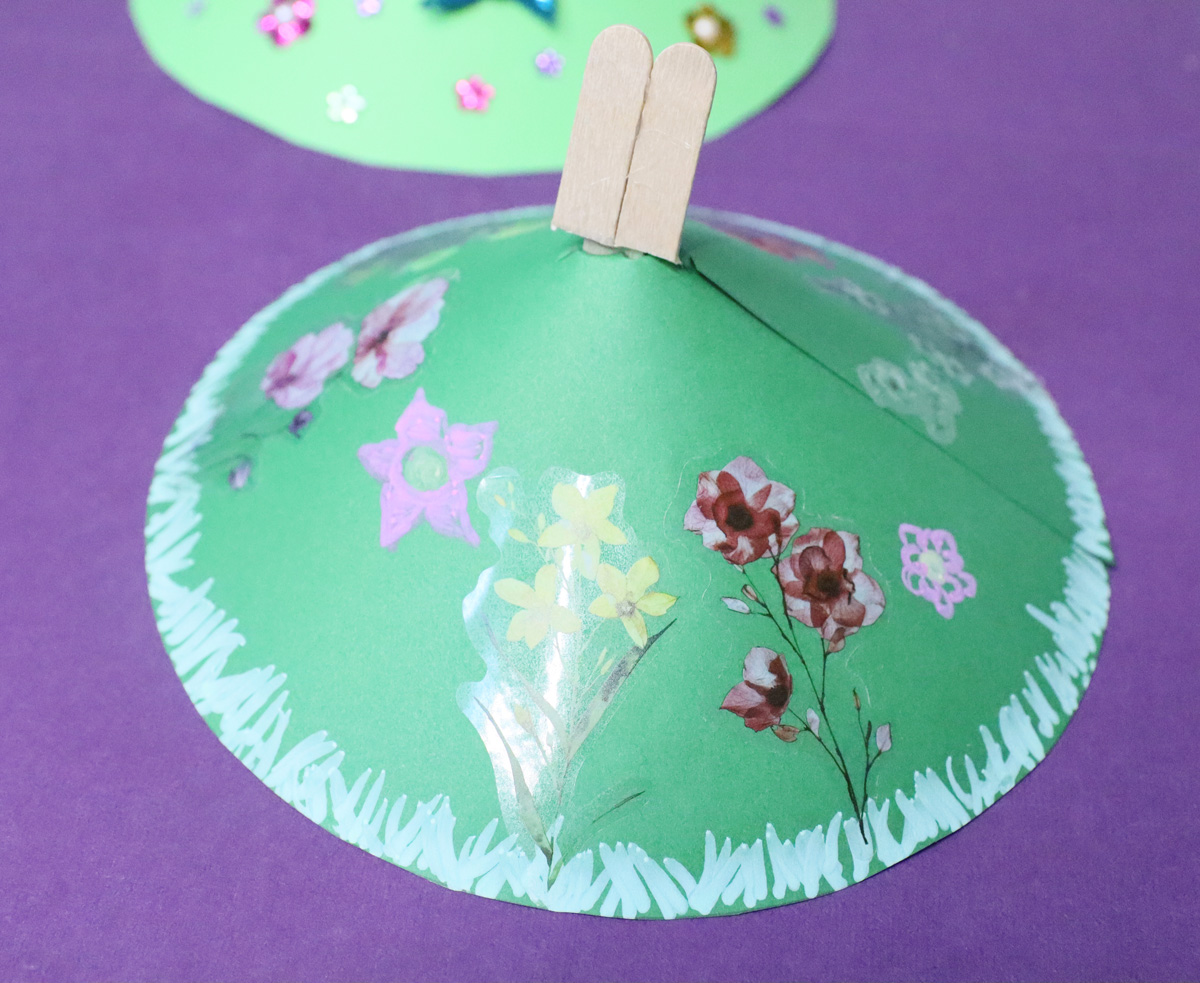
One one, I used transparent flower stickers for a more sophisticated look. I filled in with Cra-Z-Art’s new Milky markers.
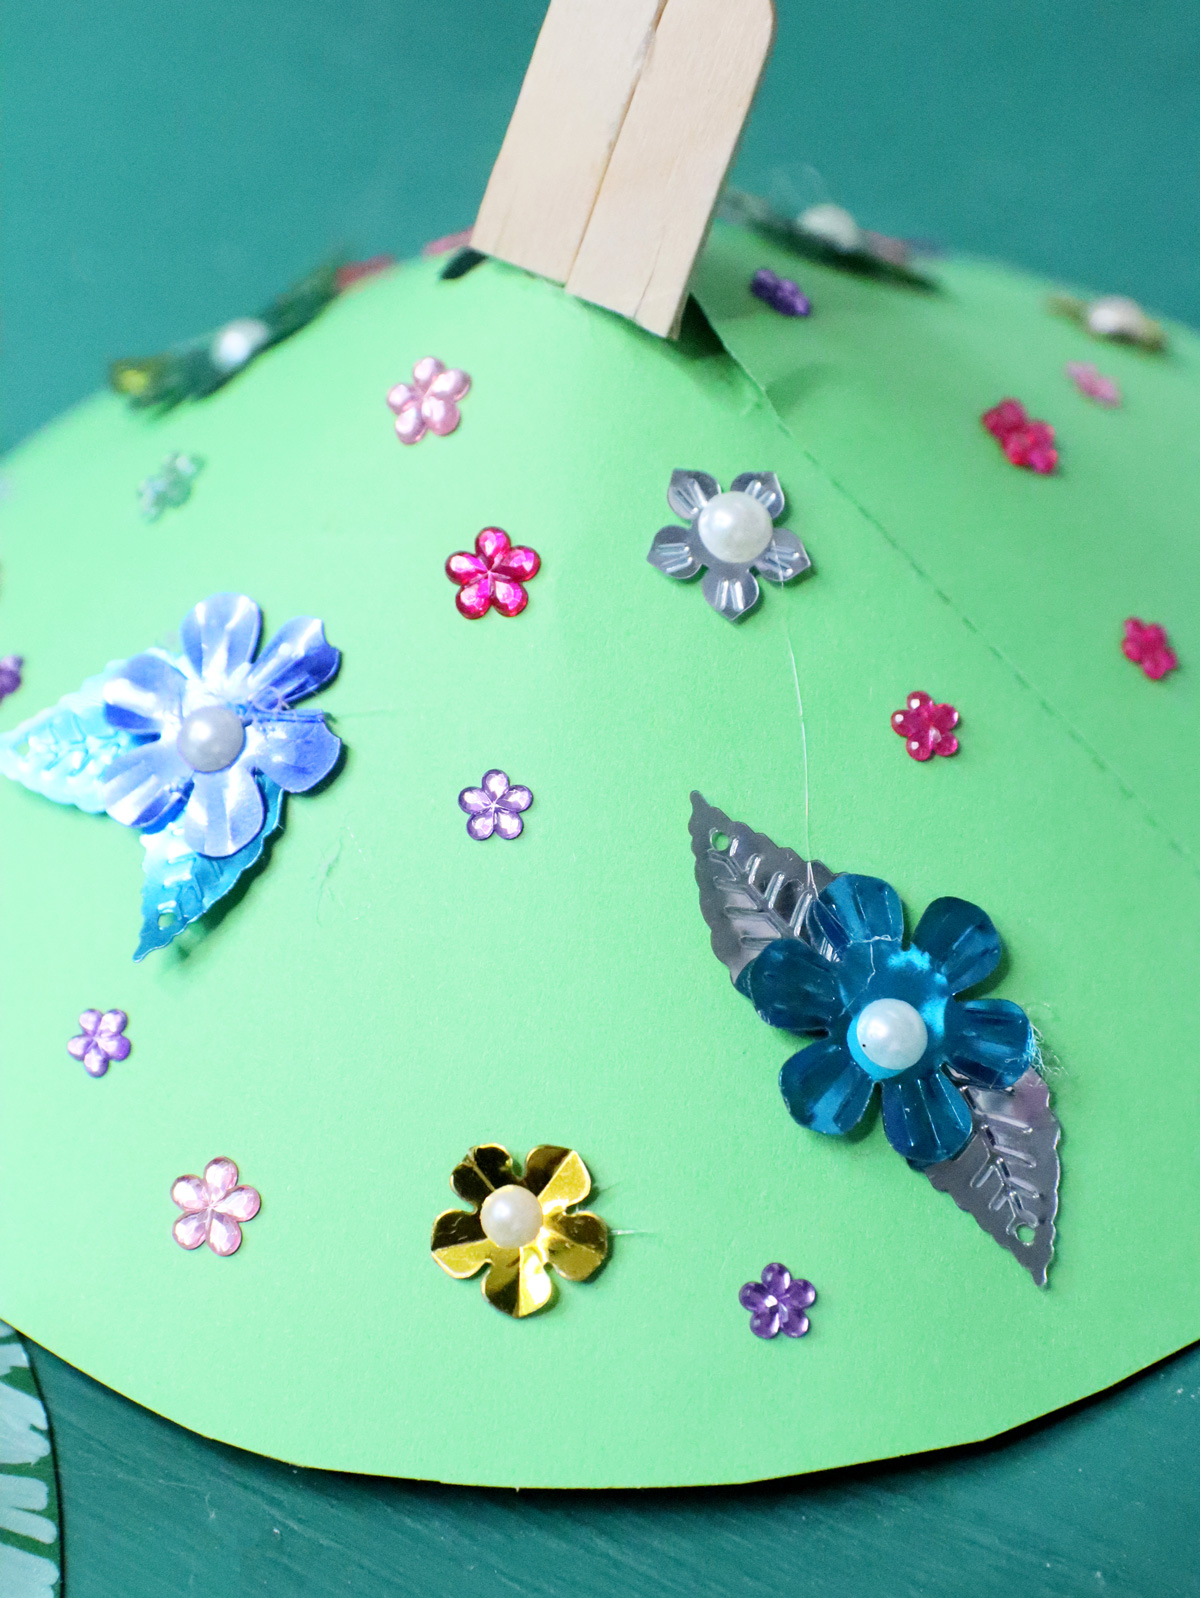
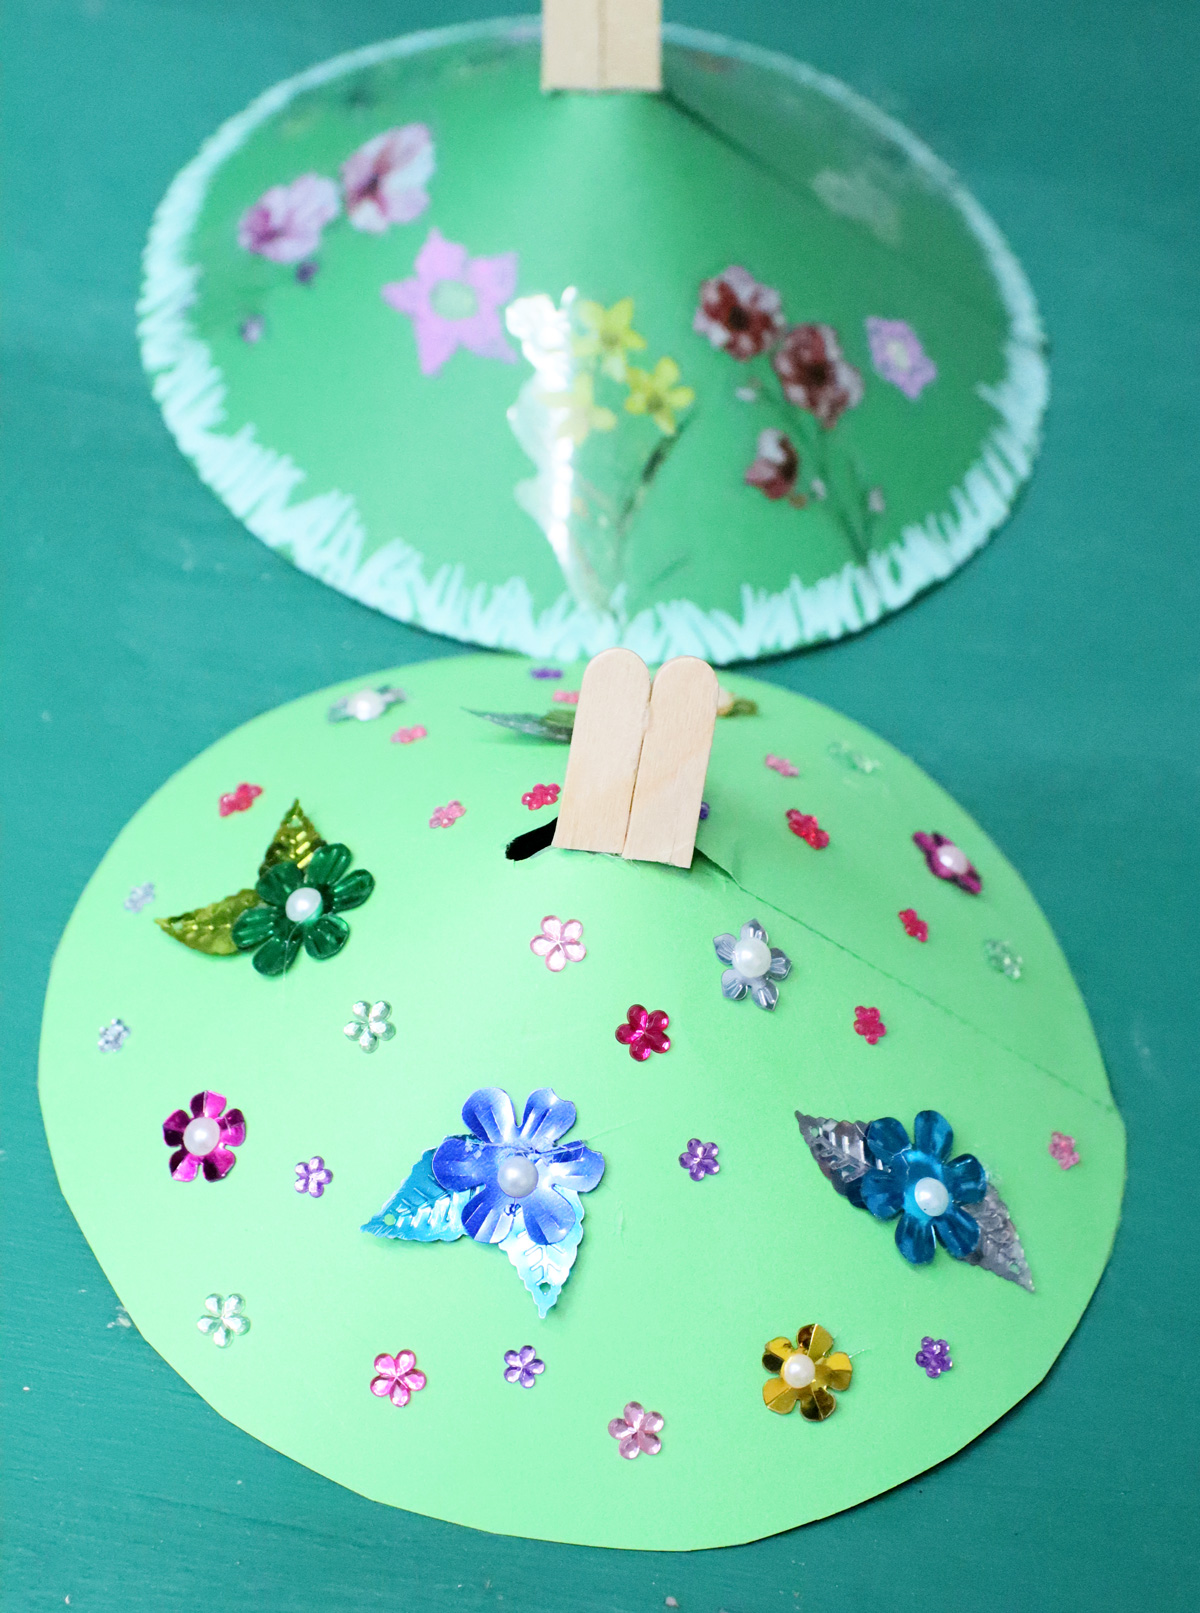
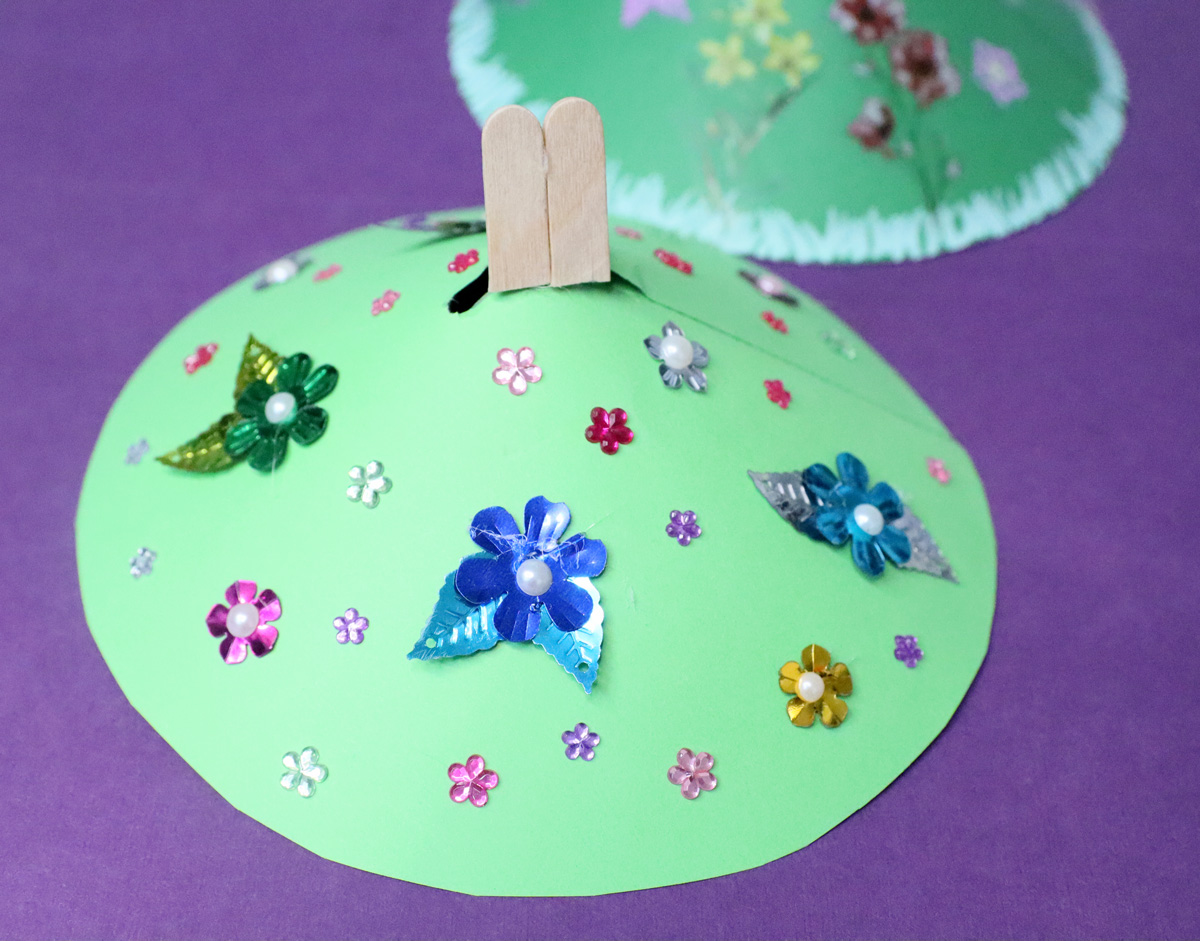
On the other, I mixed up flower and leaf sequins with self-adhesive gems. I specifically used gems that were in flower shapes, or those that can be the centers of flowers.
I had a whole stash of supplies I wanted to try, and while I couldn’t do it all, here are some of those ideas:
- Classic kiddie flower stickers
- Felt flowers
- Foam stickers
- Scrunched up tissue paper squares – a classic
- Flower punch-outs from construction paper.
- Gel pens for drawing flowers and leaves
- Mini fake fabric flowers
- Small dried flowers
You can really take this in any direction and make it your own. You can choose whether to add grass around the base or not. I drew grass on one, but you can also cut fringe on green paper strips or use sushi grass.
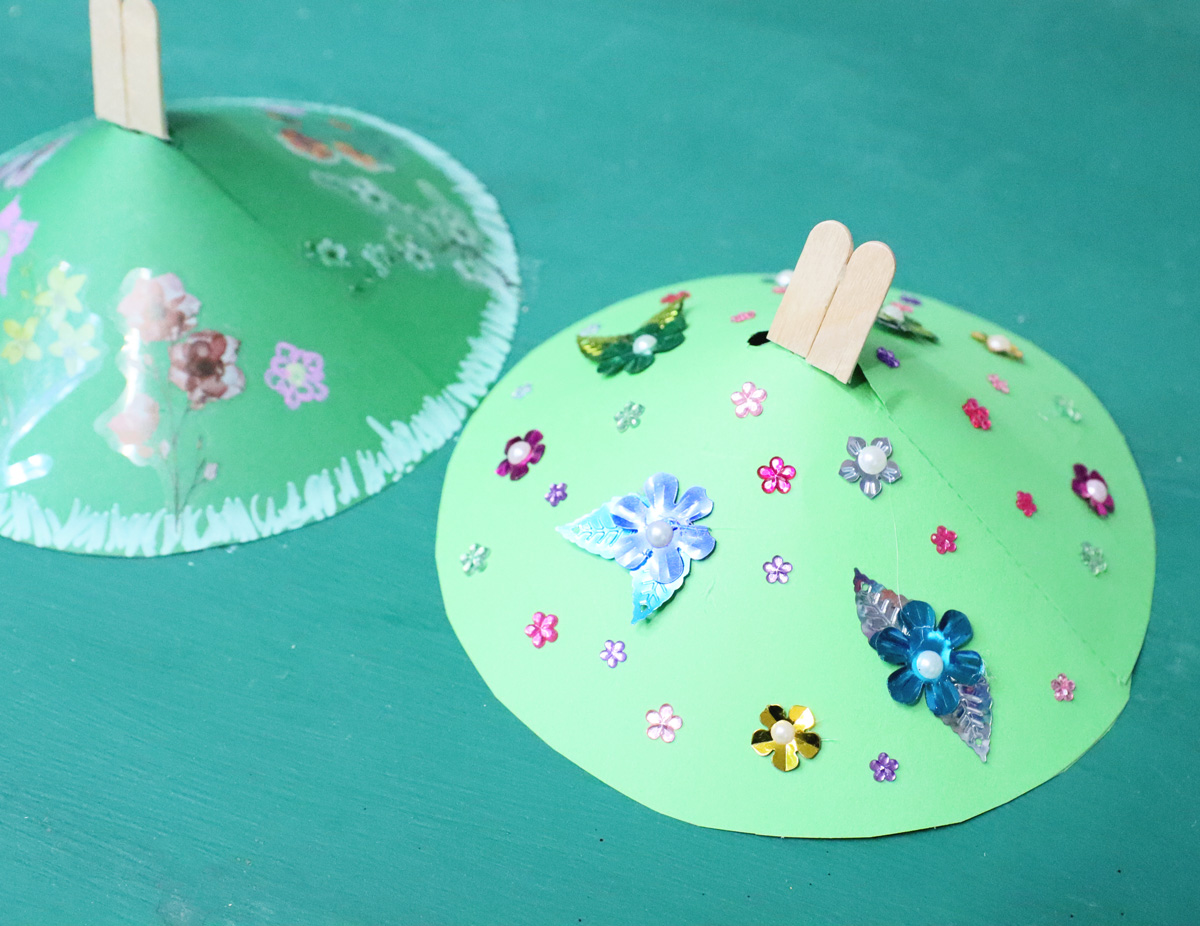
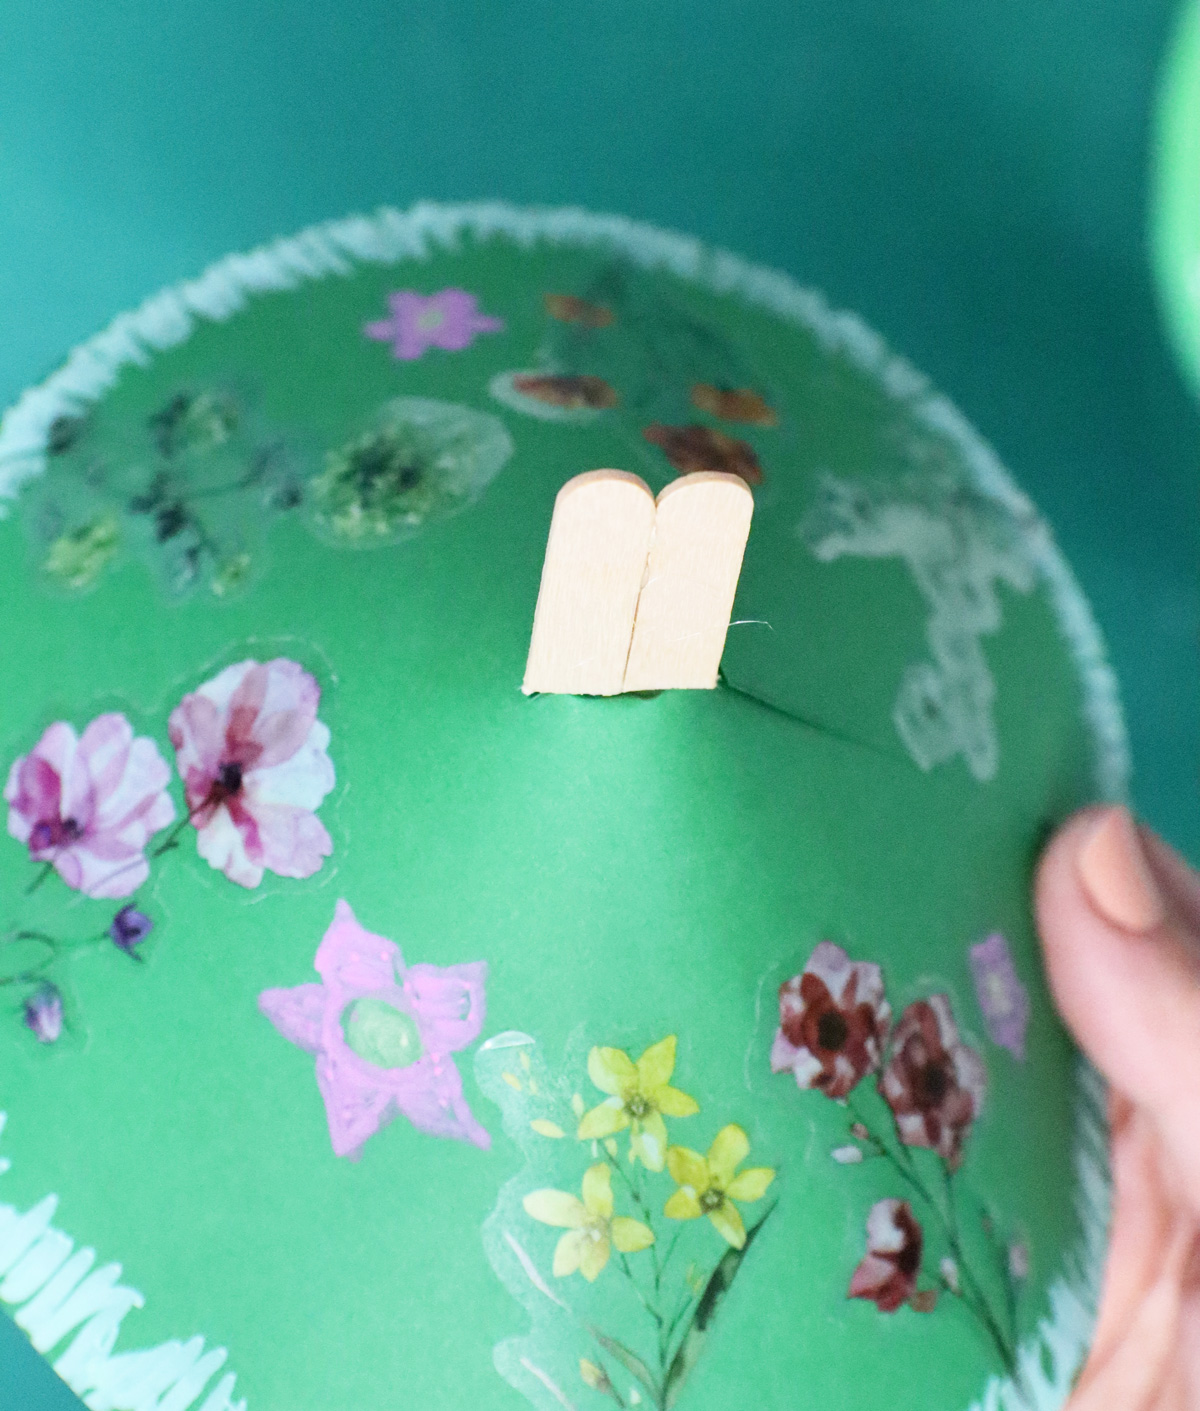
The Luchot or tablets
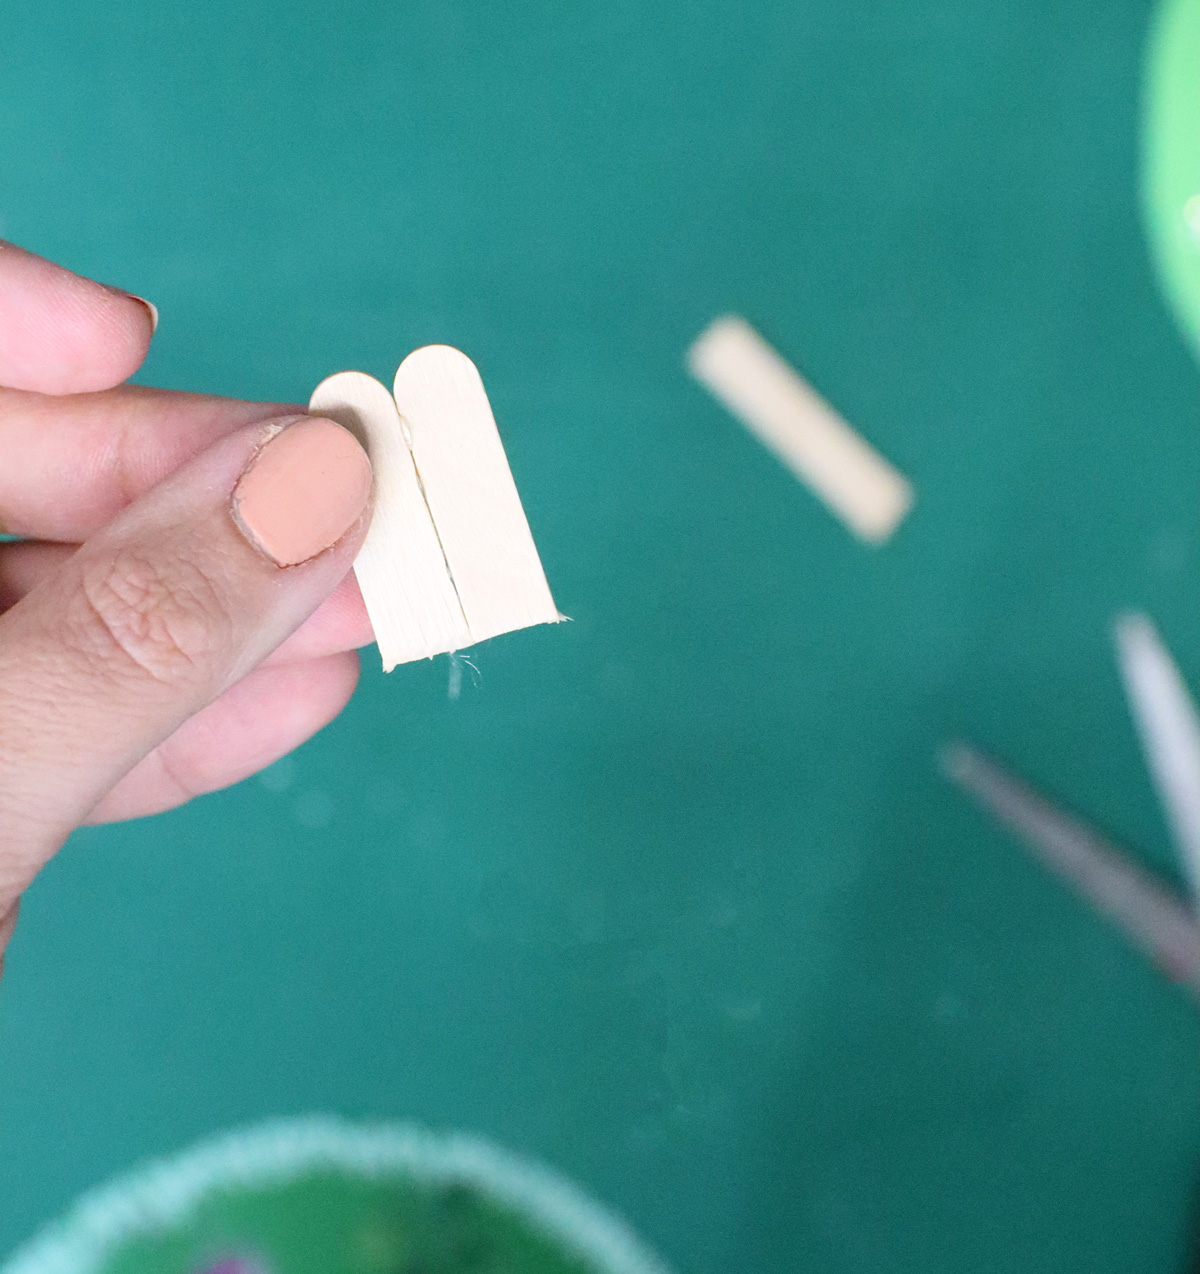
I made Luchot by cutting the tops of craft sticks and gluing them together. Mine are rounded mainly because they looked cute that way.
However, if you have the tradition that the Luchot were rectangular, go ahead and snip the top end off too.
The luchot are poked into a slit I added into the top of my Mount Sinai craft. You can also make Luchot by cutting them from cardboard or cardstock, construction paper, craft foam or anything really and then gluing them onto a craft stick.
Add letters to the Luchot if you want.
Making the Mount Sinai Shavuot craft with kids
The exact approach to crafting a Mount Sinai Shavuot craft will depend on the setting. Classrooms allow for different crafting sessions than one-time workshops, for example.
Here, I’ll offer adaptations and ideas that are too much to share in the actual process.
In the classroom + adapting it by age
When making this craft in the classroom, I recommend choosing in advance how they’ll be crafting it and sticking with one thing.
For example, if you’re crafting with toddlers, you should probably get them basic flower stickers. Allow them to paint the base before assembling the mountain for them, so that they made more of it.
Preschoolers can cut out the base. They’ll do well with glue-on elements, or more advanced stick-ons like gems. They can also do some drawing. But again, choose one.
And slightly older kids would do well with more sophisticated stickers and drawing supplies. They can also do more assembly, handle adhesives like glue dots or tacky glue, and cut out smaller shapes.
Even older kids/adults can do it! Once you have people responsible enough to use hot glue, decorations like sequins become easier to use.
At open-ended workshops
This Mount Sinai craft is actually open ended enough to make a fabulous craft workshop. You don’t need any dry time for it, especially if you prep the Luchot in advance.
When doing workshops, offering multiple supplies makes more sense. Let crafters choose from an assortment of stickers, sequins, gems, fabric flowers, and more. Add in gel pens, paint markers, and any other nice coloring supplies for the artists to choose from.
Create a few samples showing single-item use, or more aesthetically-pleasing strategic combinations.
How to make a paper Mount Sinai for Shavuot
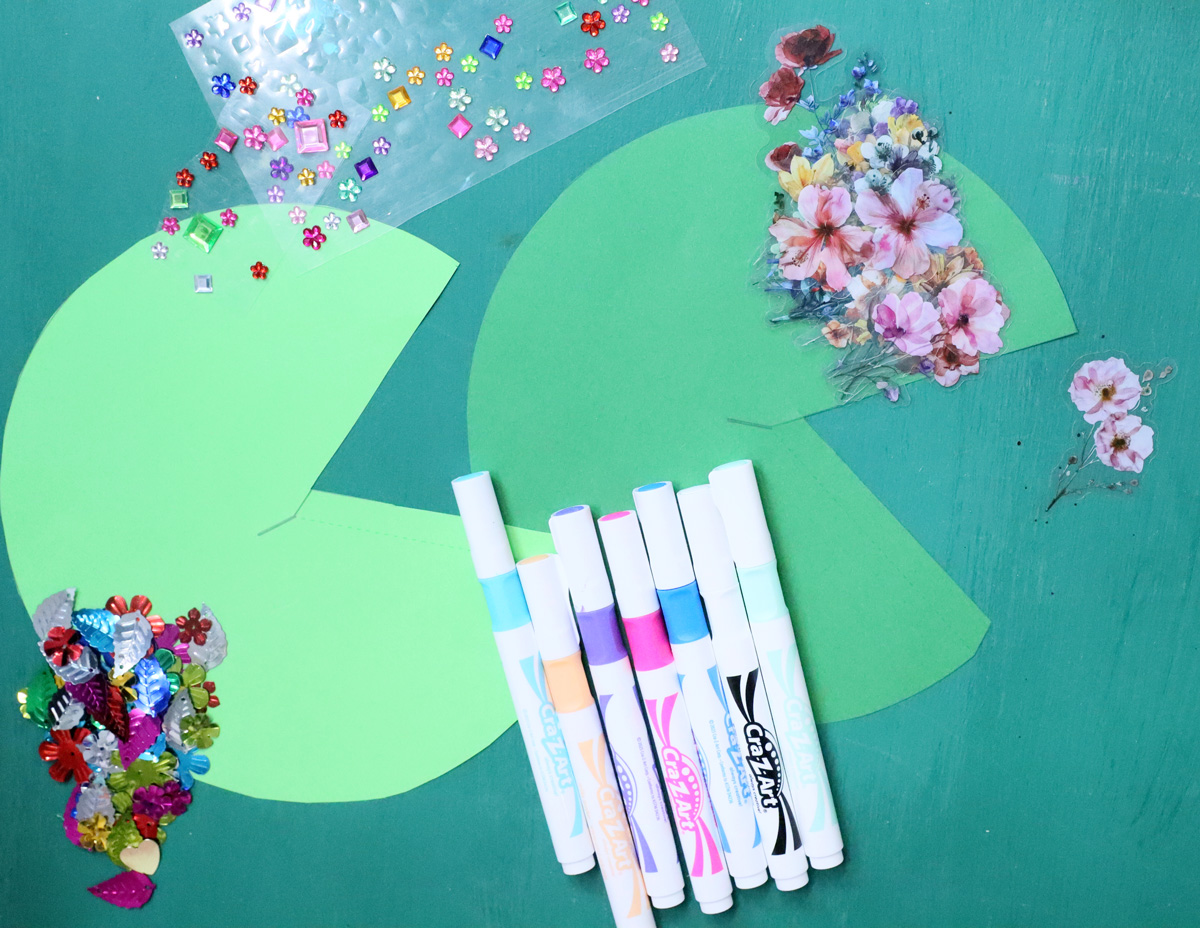
You’ll Need
- The template – download it below
- Paper – I printed it on green copy paper
- Scissors
- Flowers! I used flower stickers, gems, and sequins
- Optional markers and/or gel pens
- Double sided tape or glue
- Glue for any embellishments that aren’t adhesive. Hot glue dries fastest and is secure, but for kids you can use a dollop of tacky glue or white glue
- A craft stick
Download the Mount Sinai craft template
Download your free template! It’ll arrive right in your inbox. By downloading, you’re subscribing to our FREE newsletter with updates on cool printables like this, ideas to simplify Jewish life, and more. Unsubscribe at any time at the bottom my emails. I respect your privacy and the law, and won’t share or sell your email address.
Step by Step
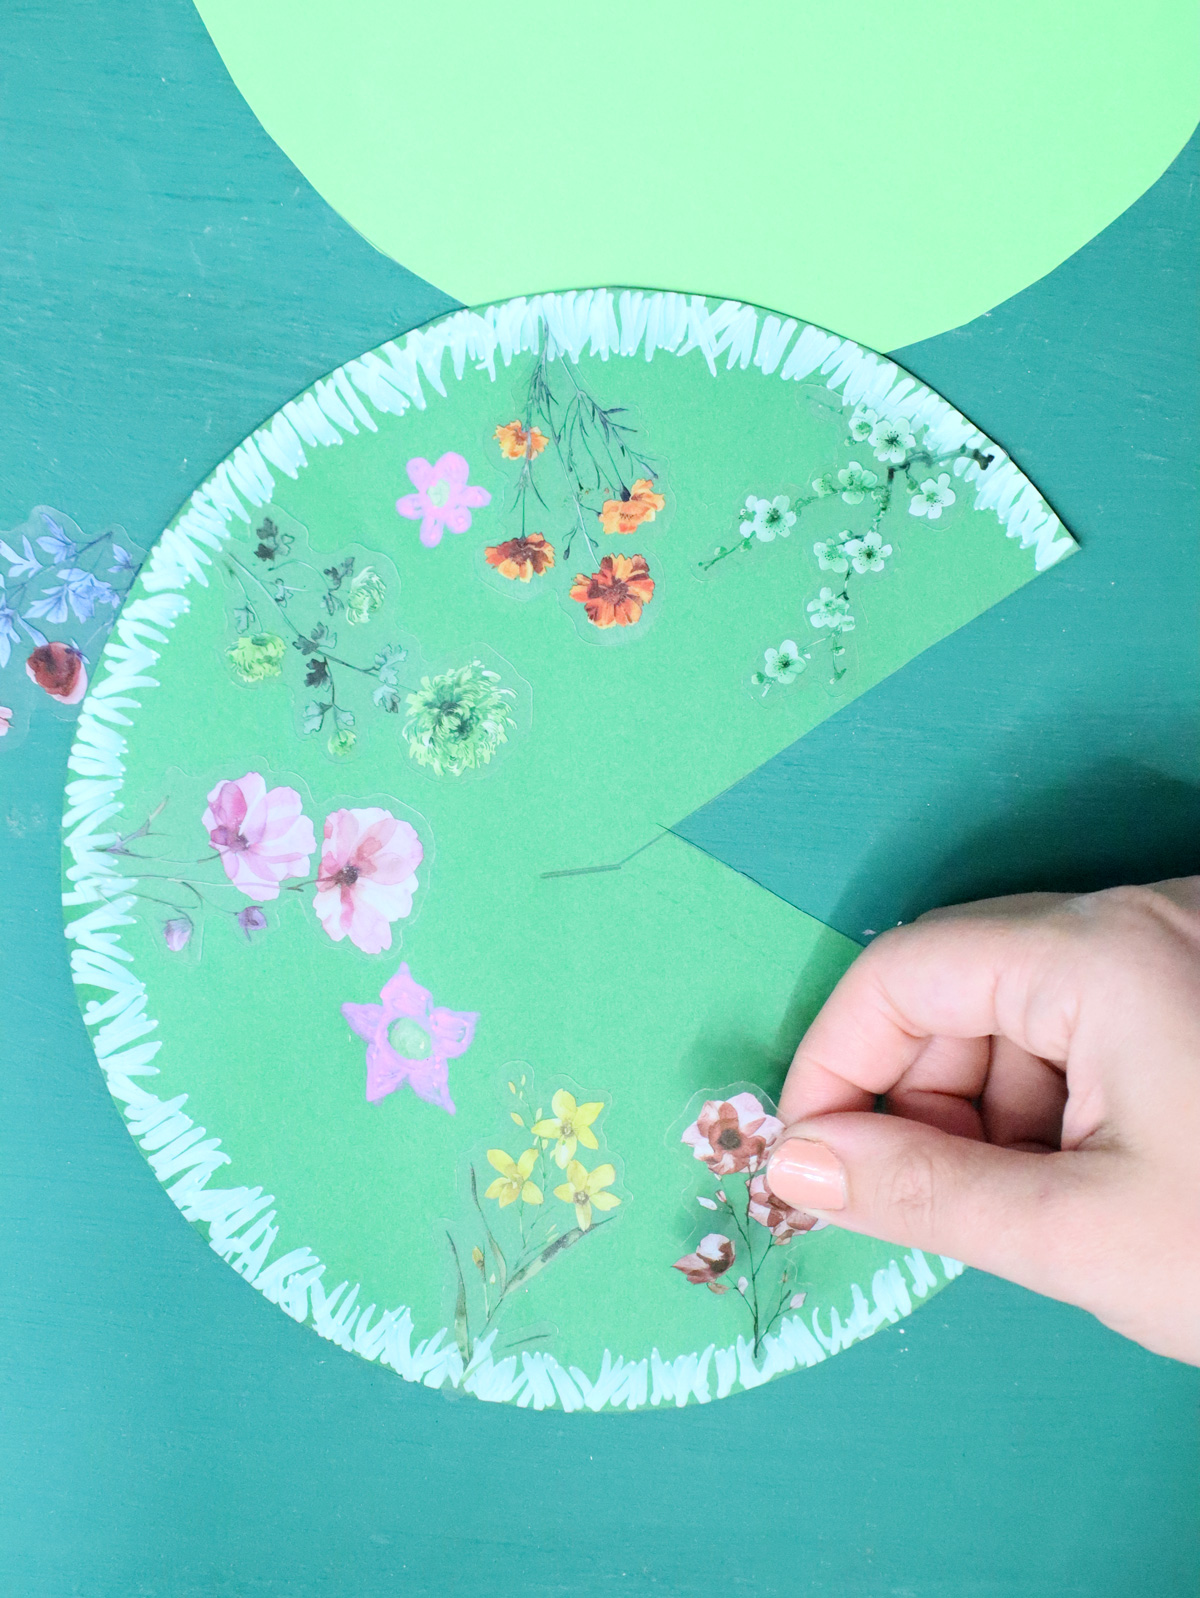
1. Print your template and cut it out. on the solid line.

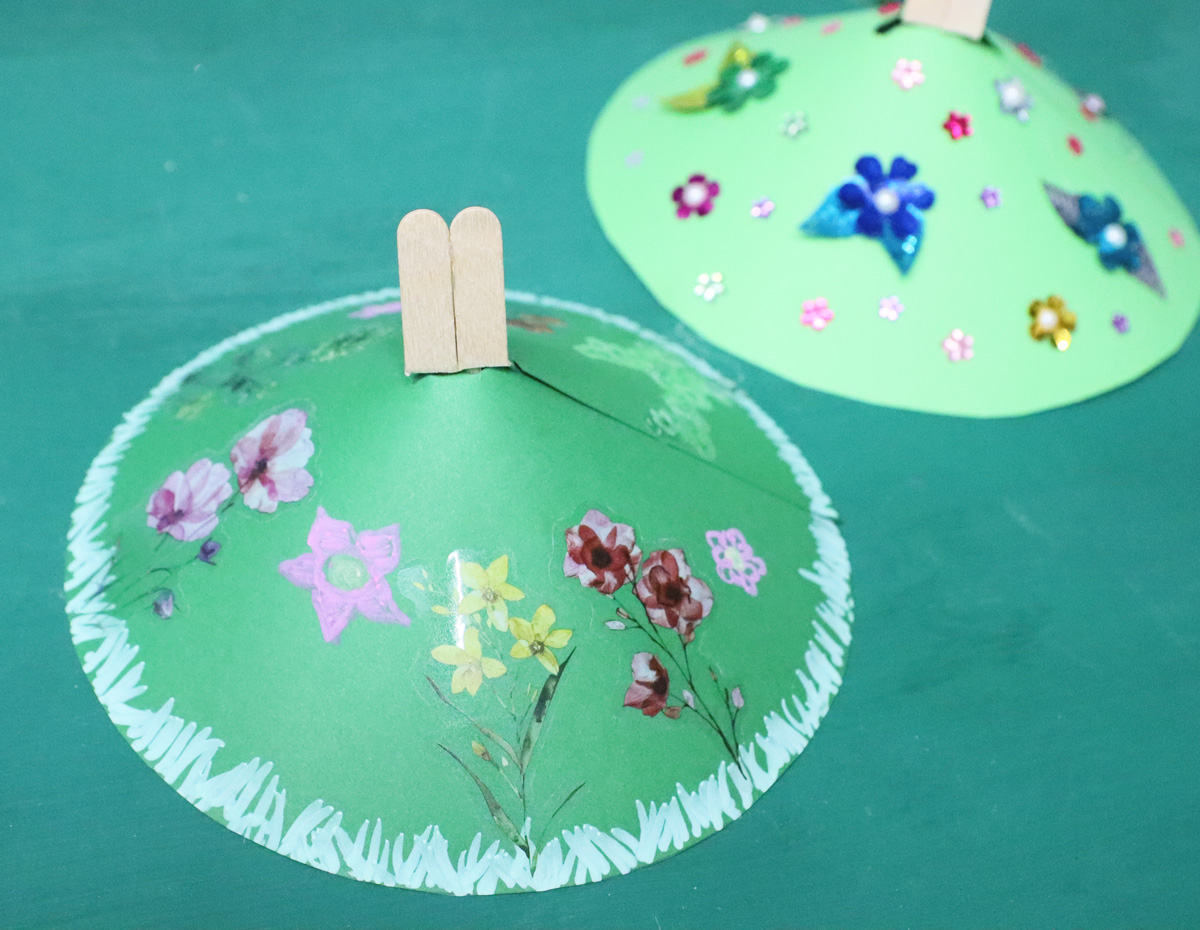
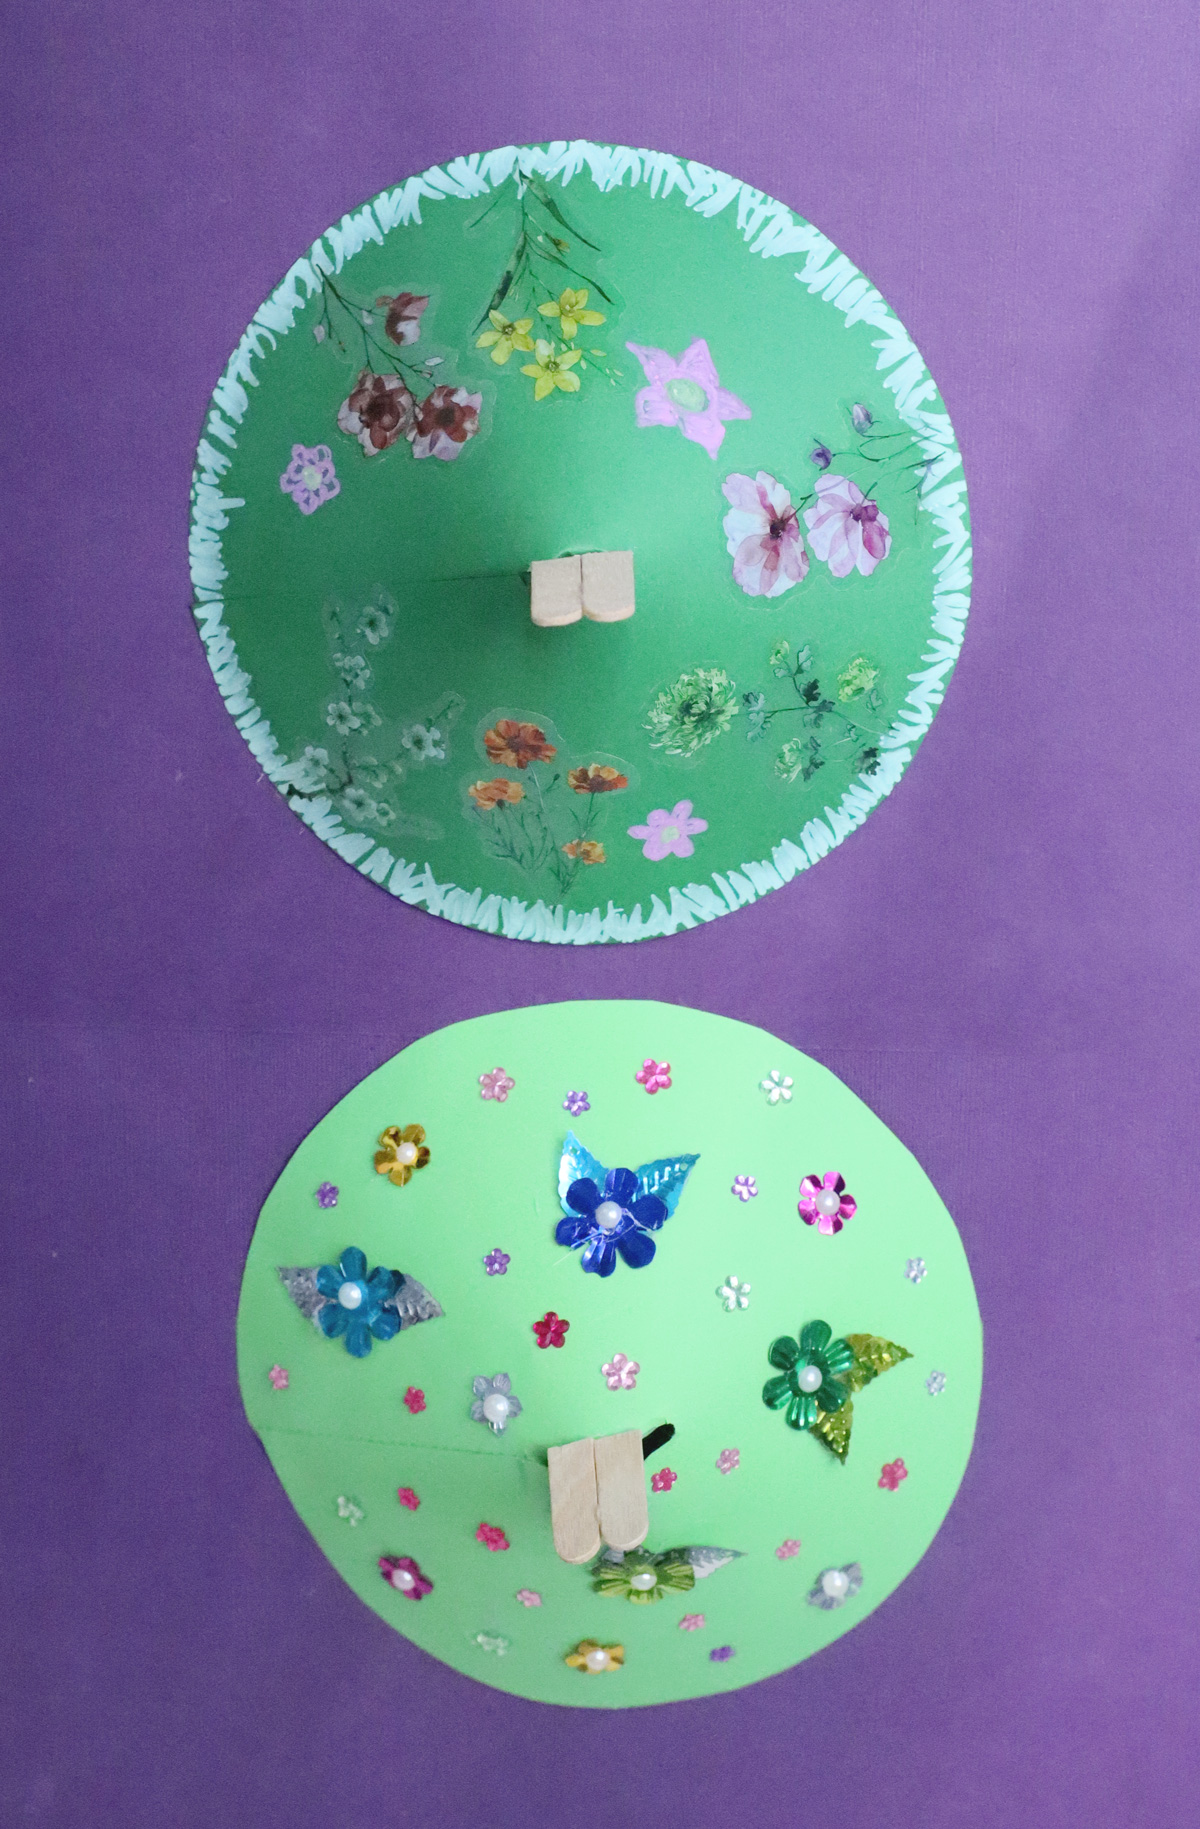
2. Start decorating while it’s still flat! On one, I made a grass border using paint markers.
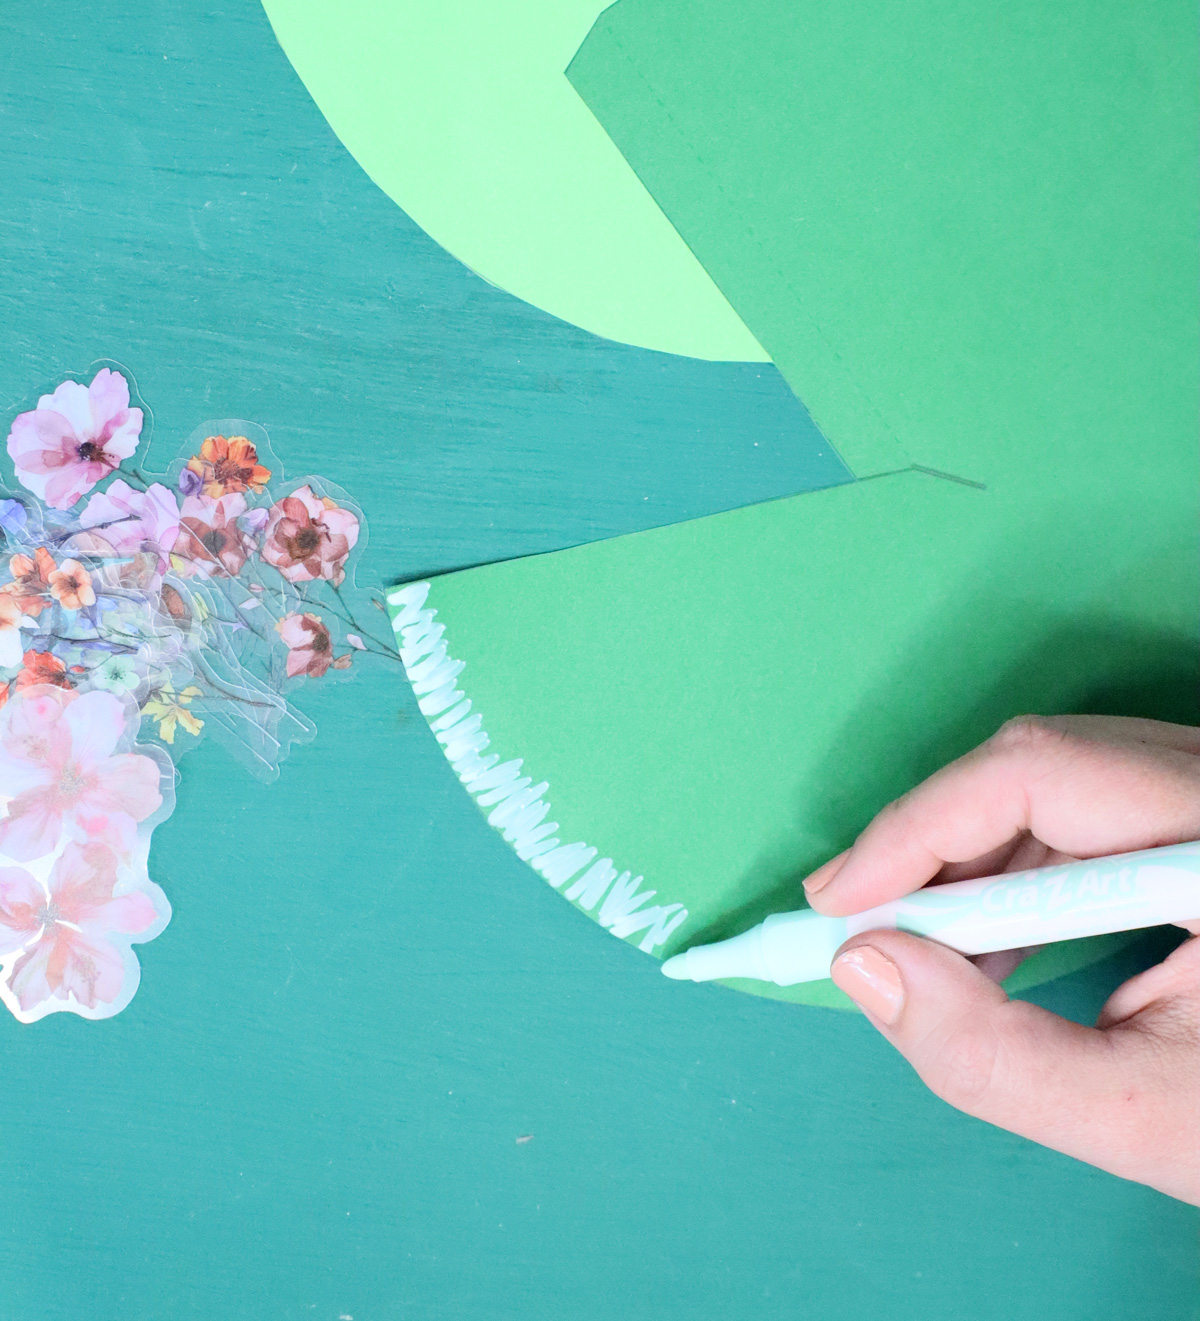
Then, I drew on flowers.
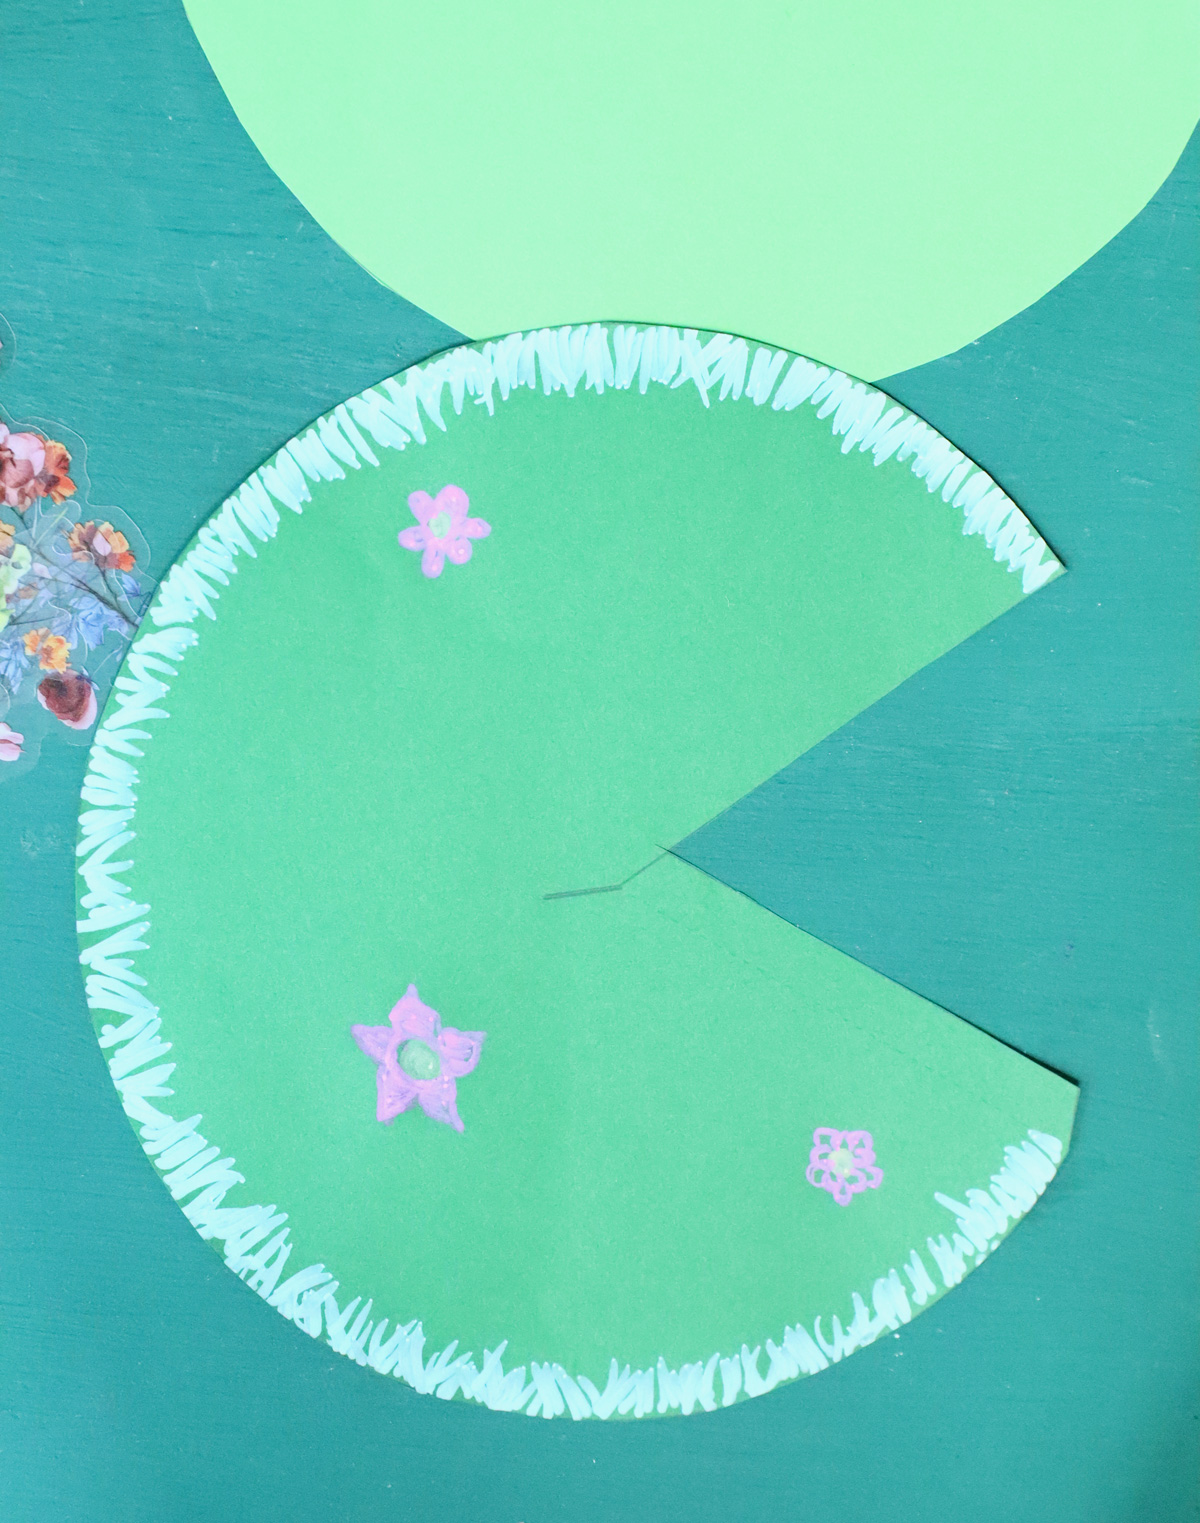
Flower stickers finished the look on this one.
On the other, I started with flower and leaf sequins.
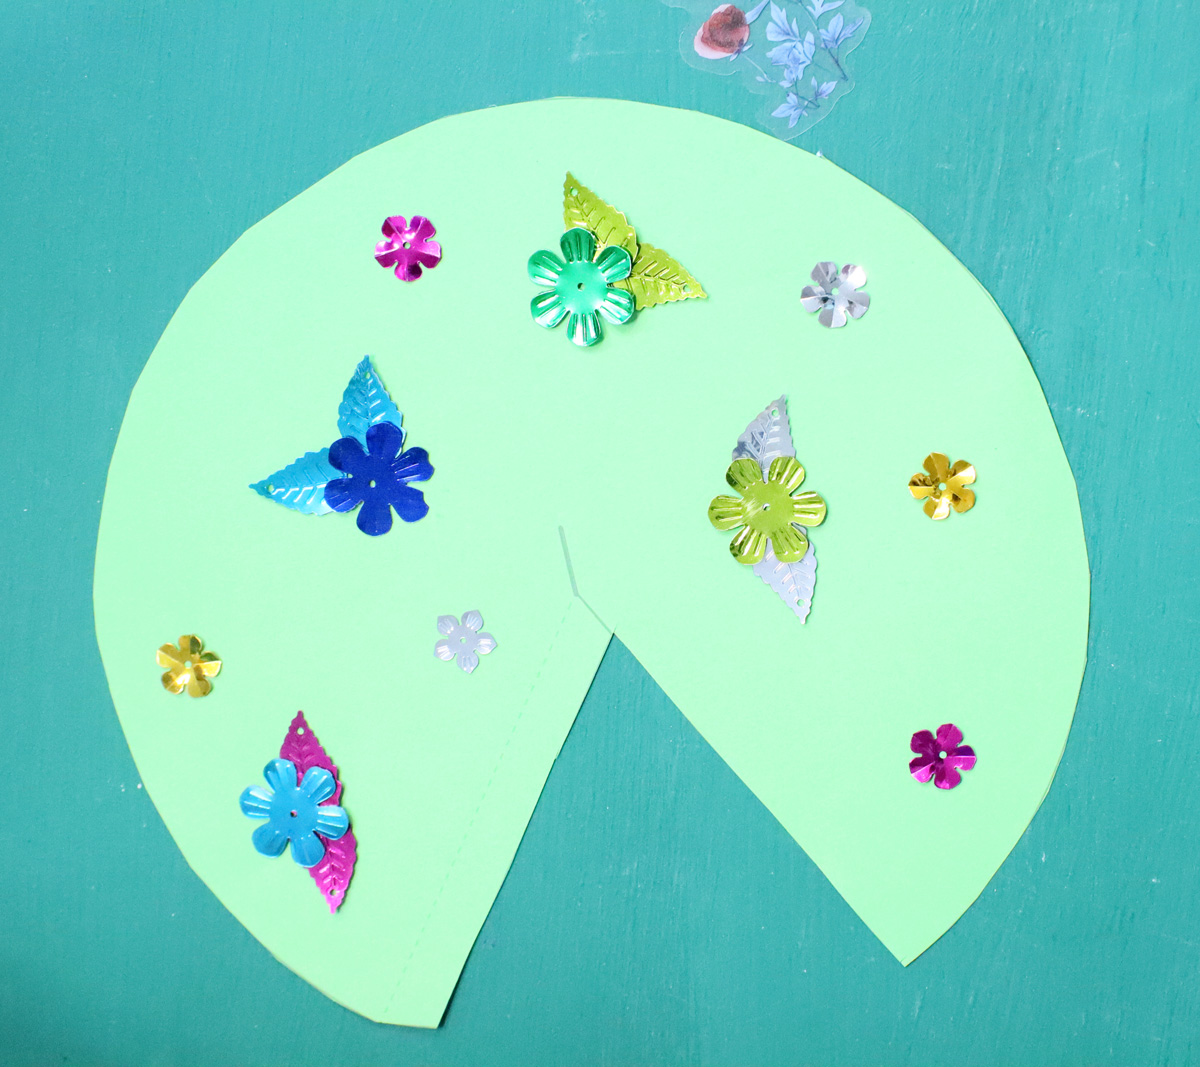
I added adhesive pearls in the centers of the sequins.
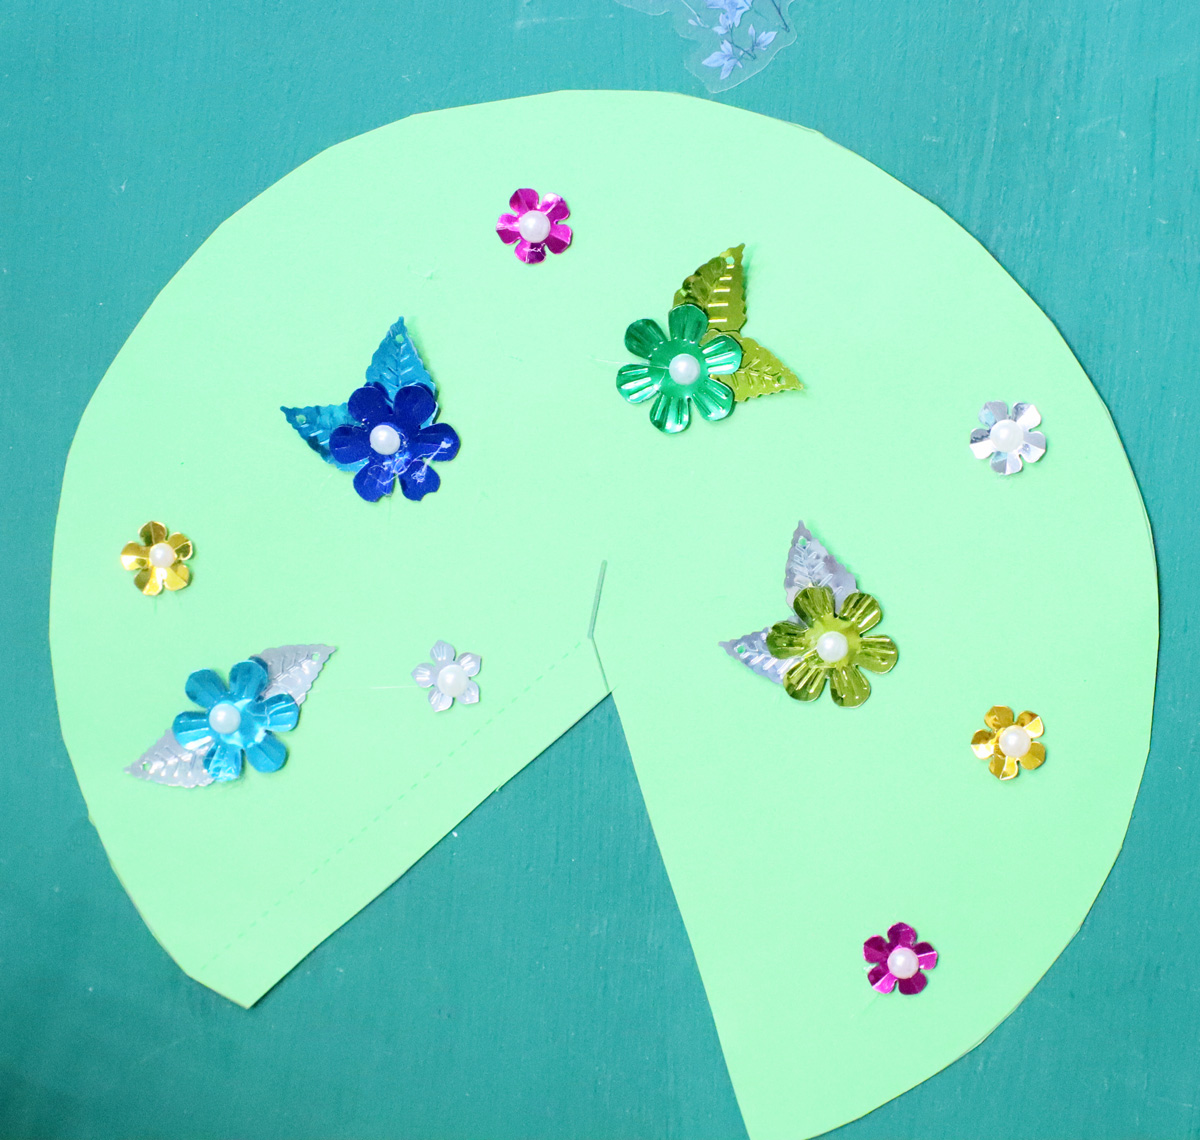
And adhesive flower gems finished the look.
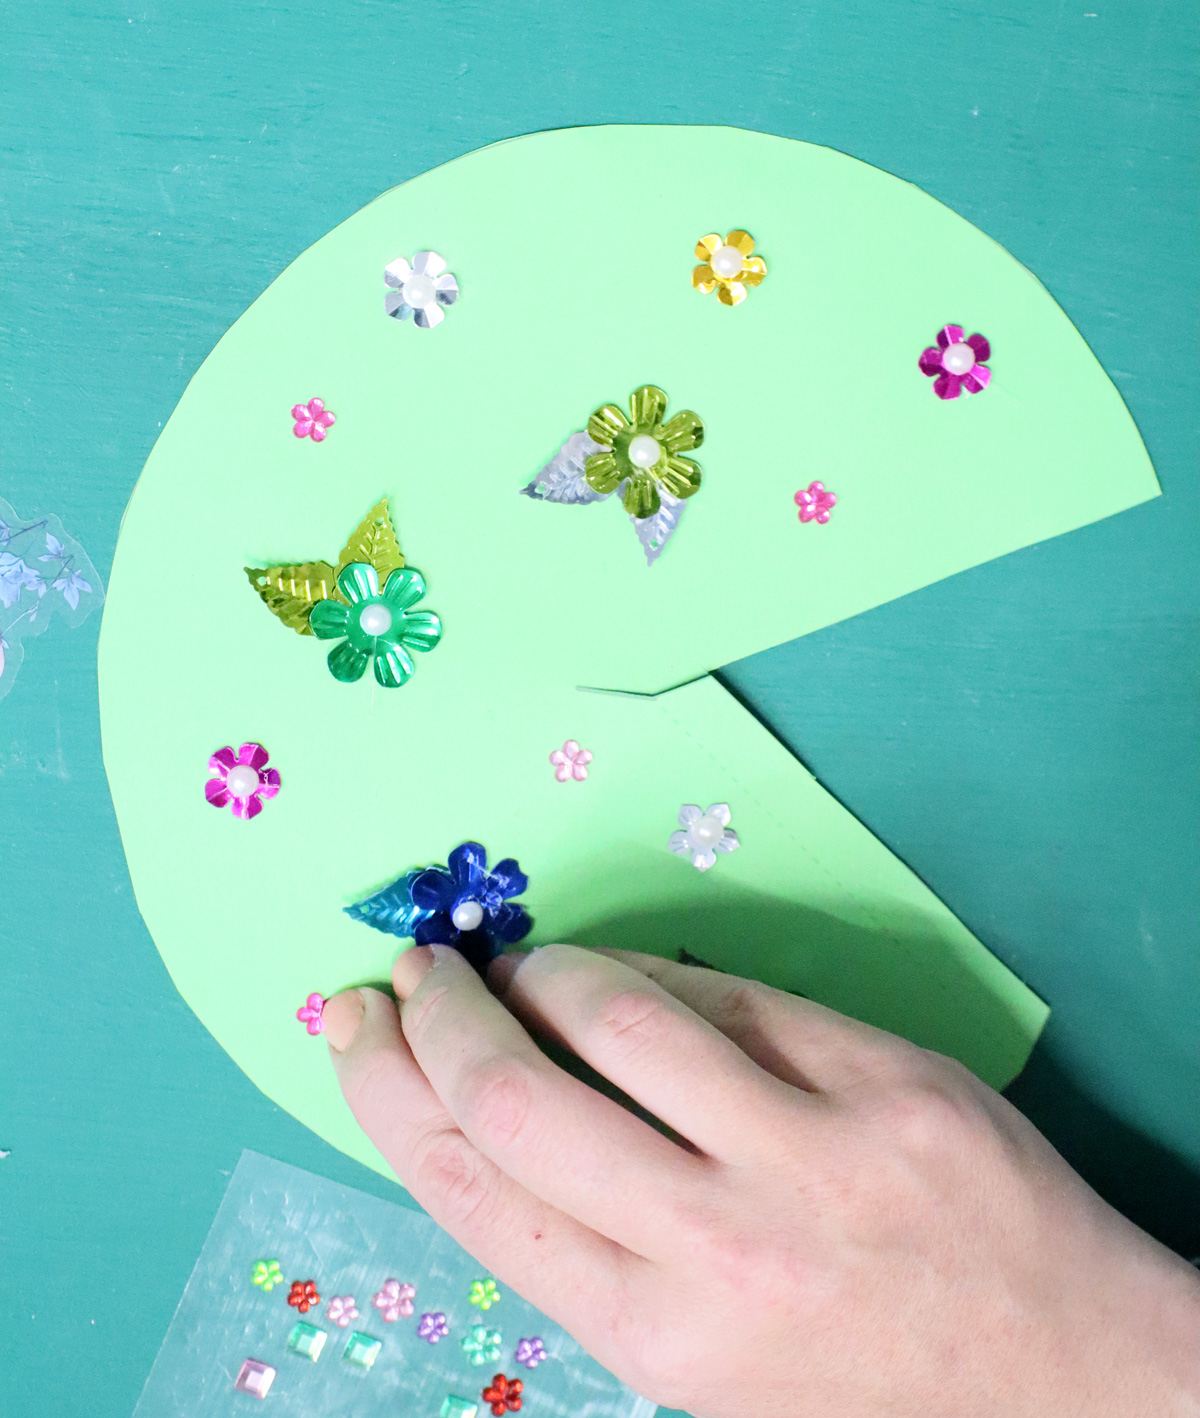
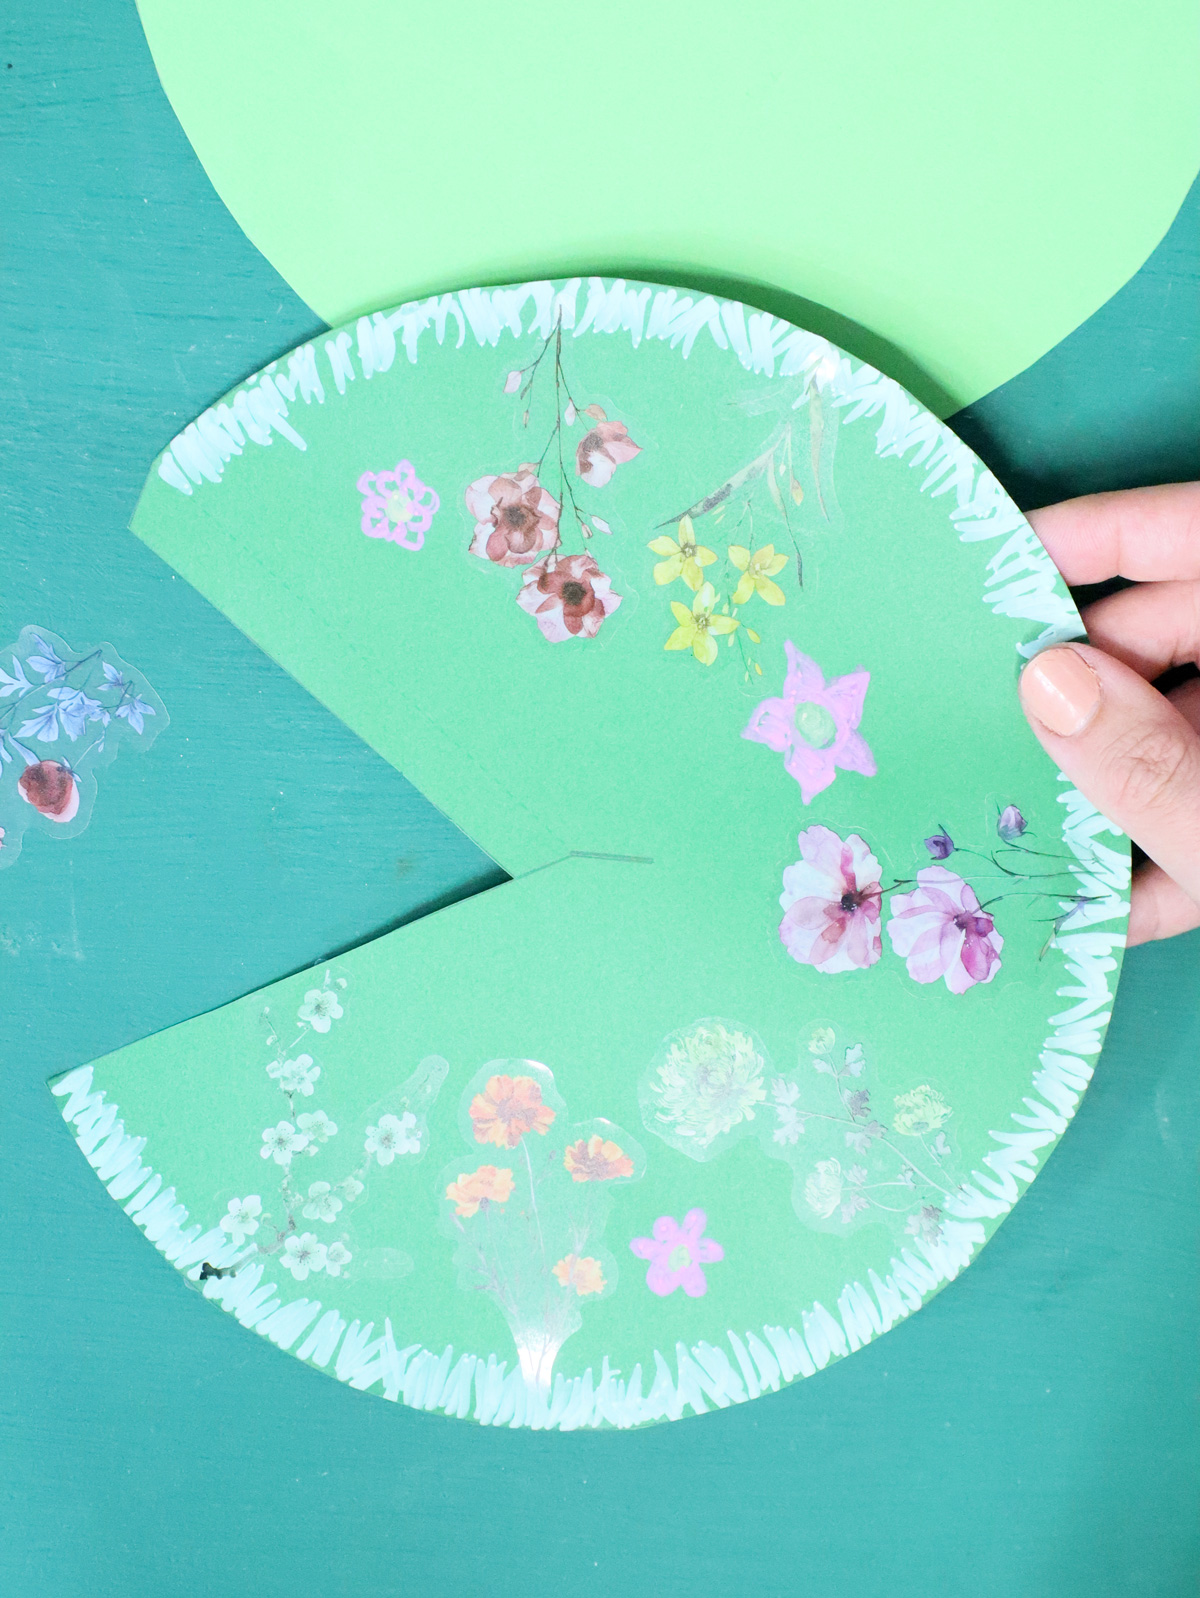
Tip: avoid the area within the dashed line – that little flap, as that’ll be overlapped when glued.
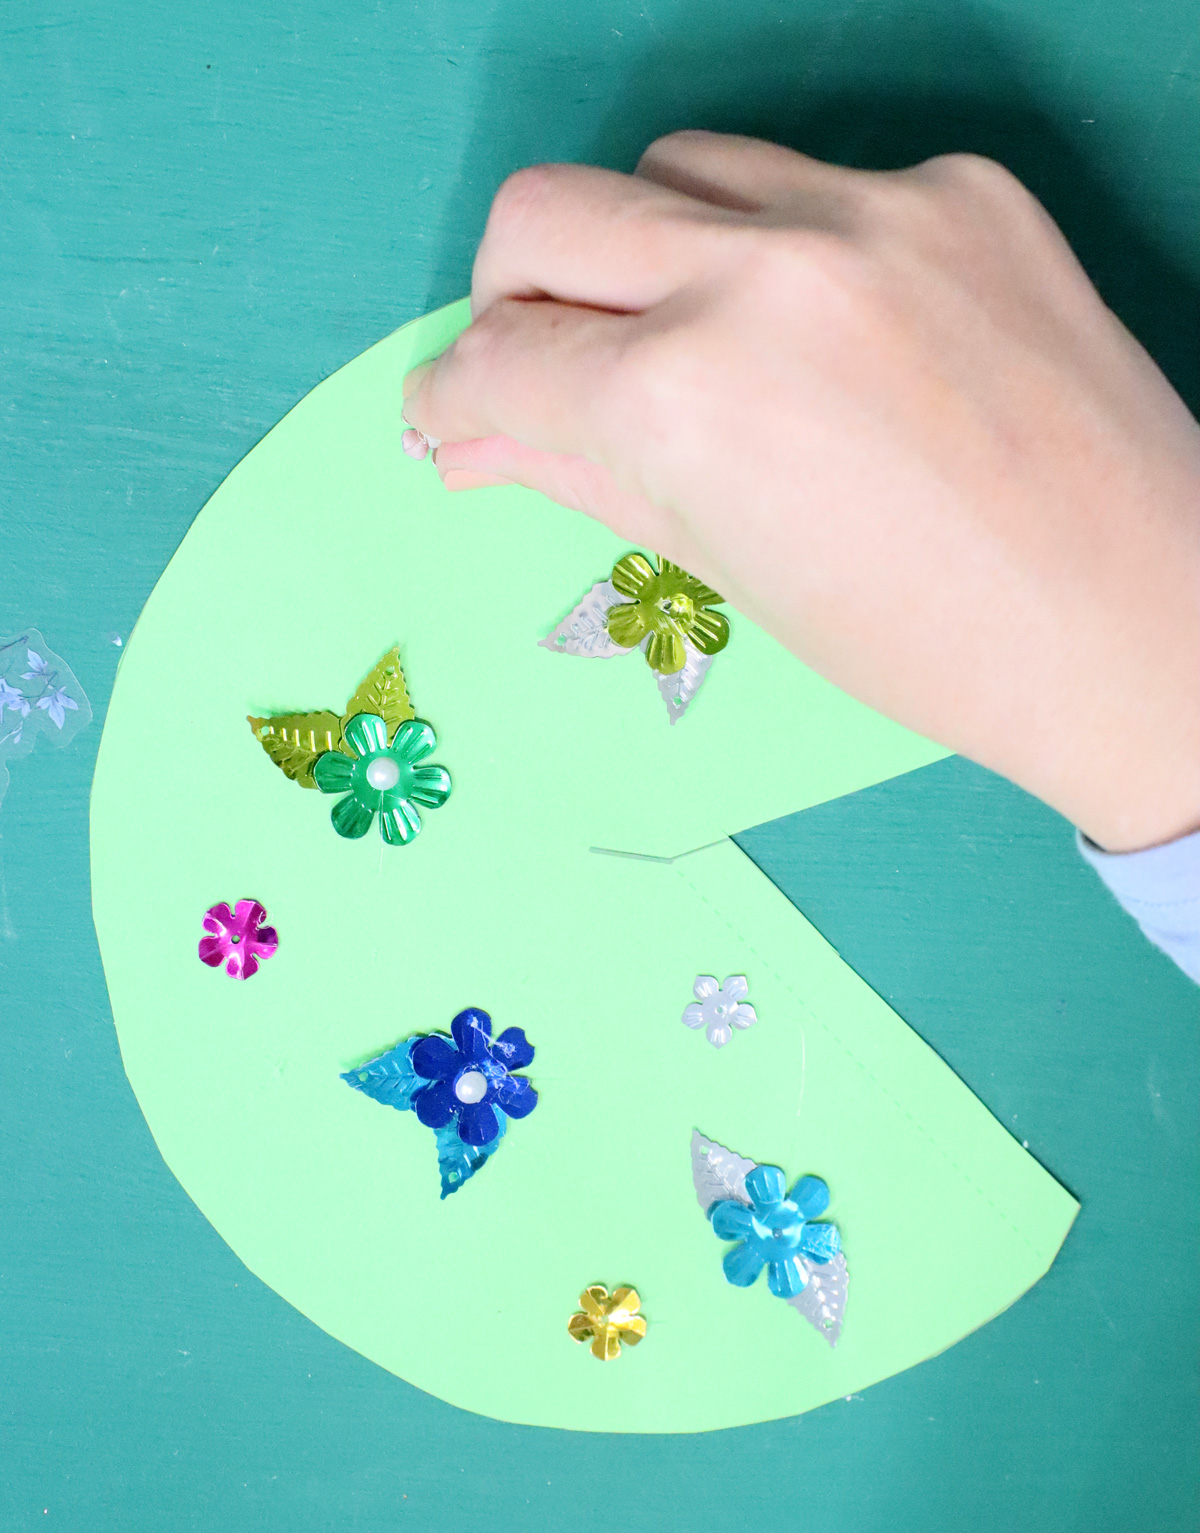
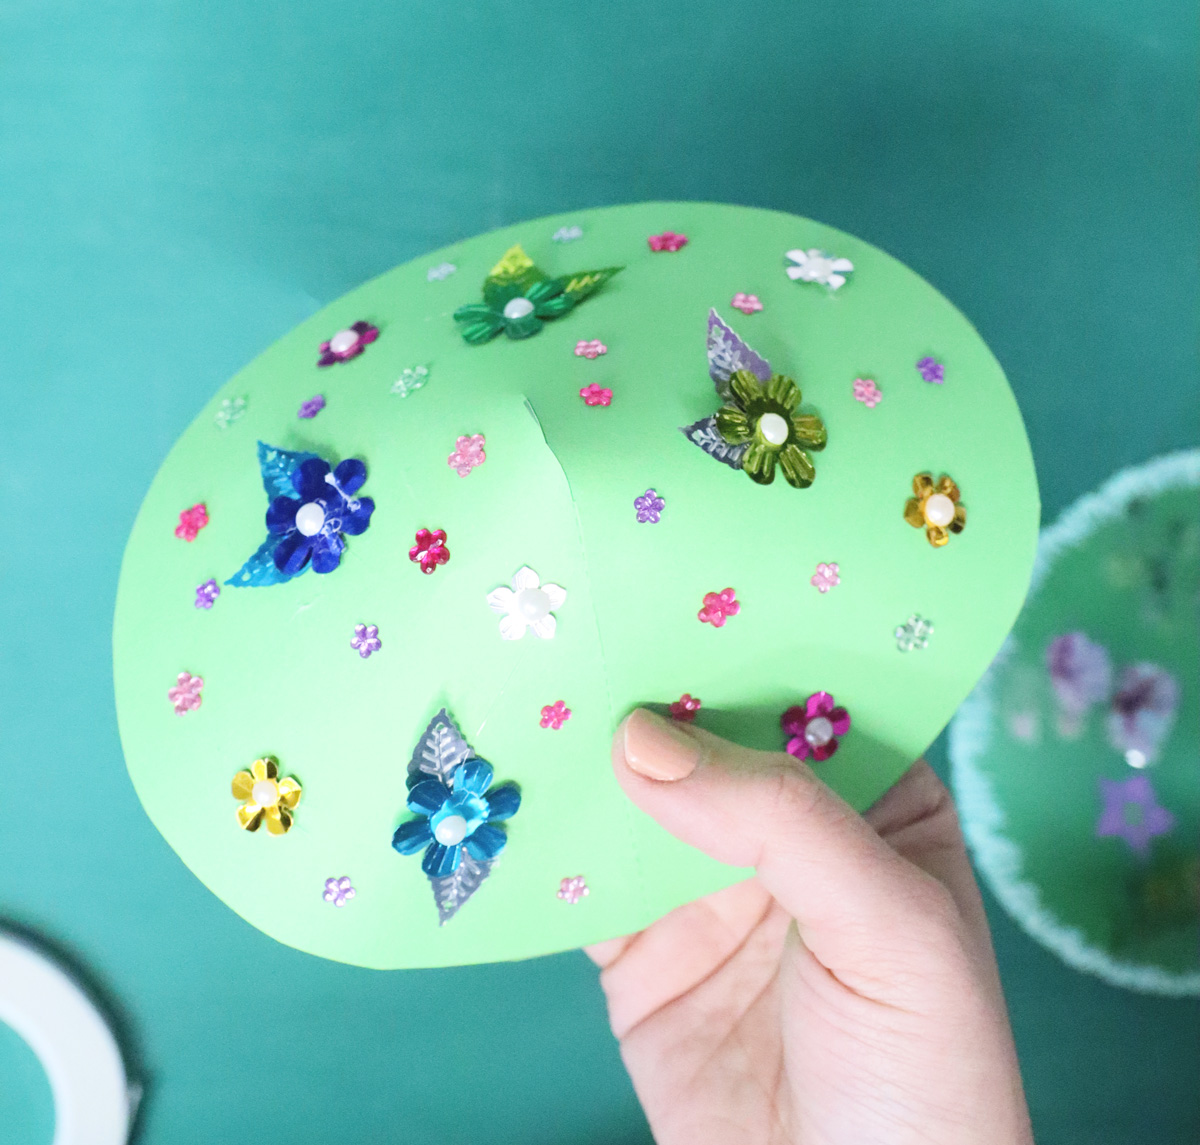
3. Put a strip of double sided tape or glue on the flap, next to the dashed line.

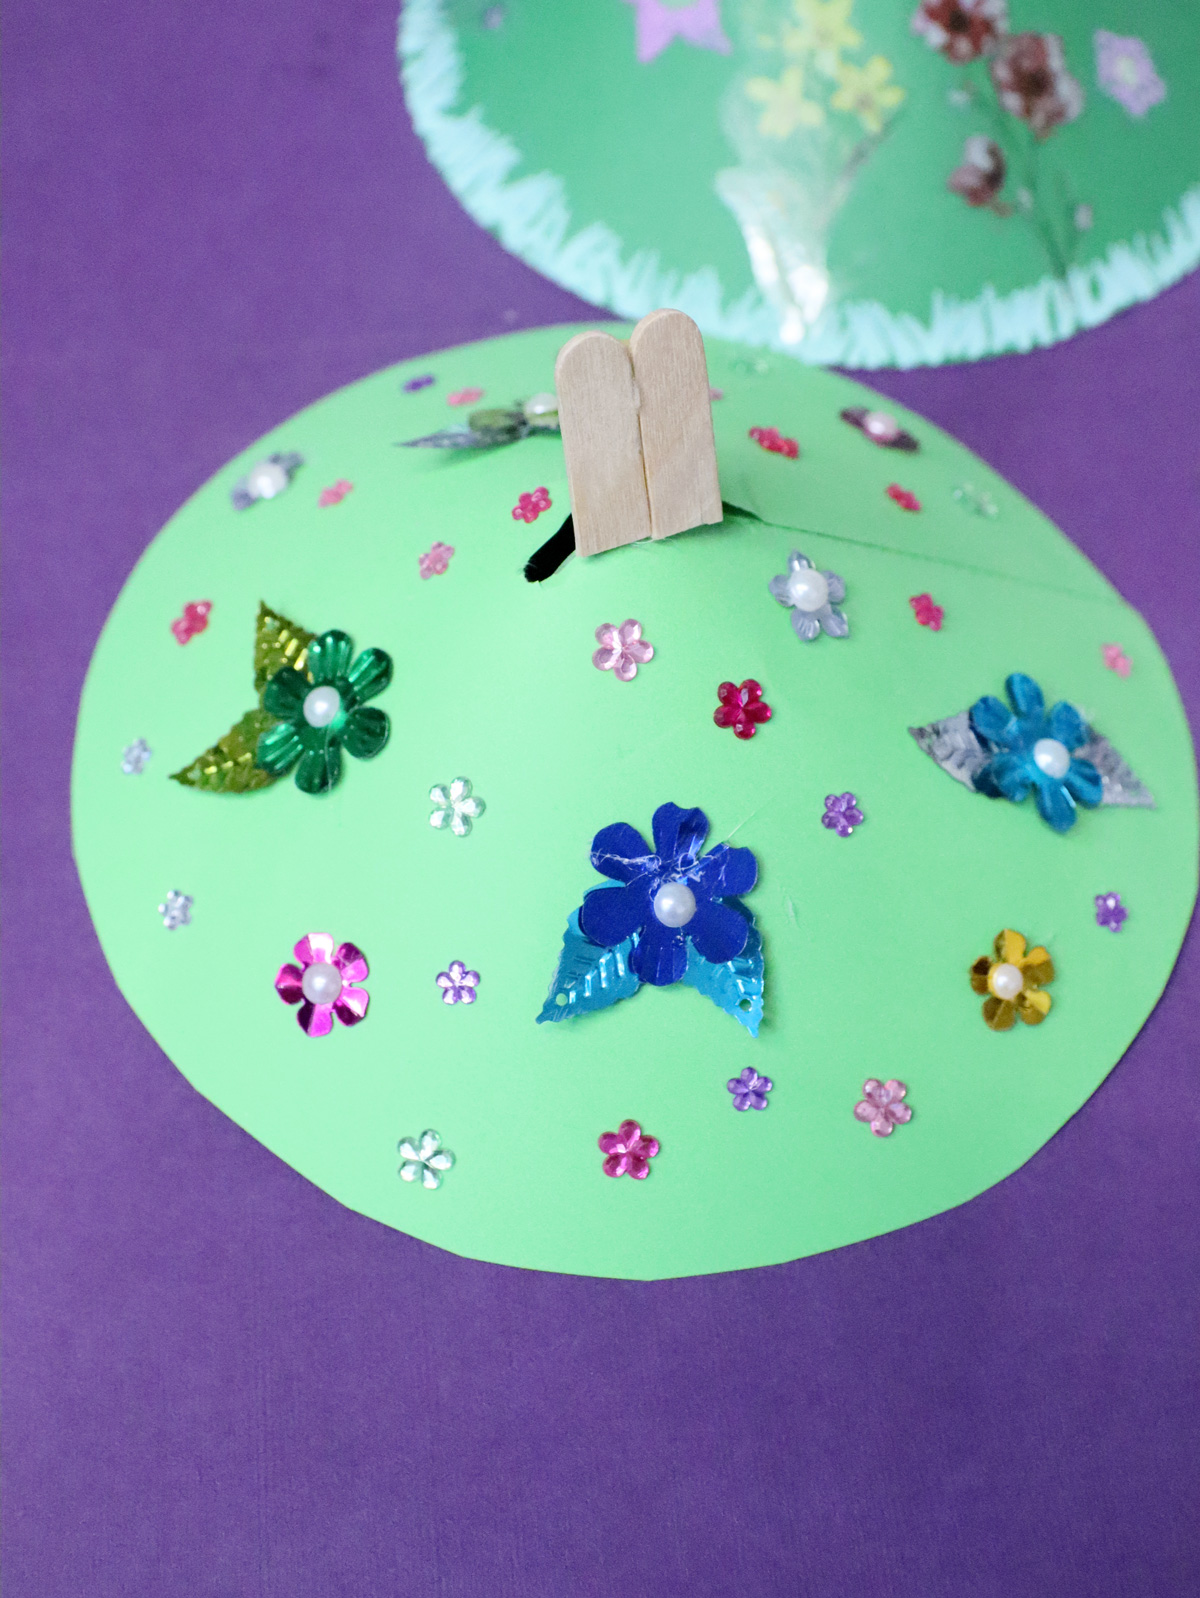
4. Form a cone shape, remove the backing of the tape, and adhere that flap to the back of the corresponding end of the cone.
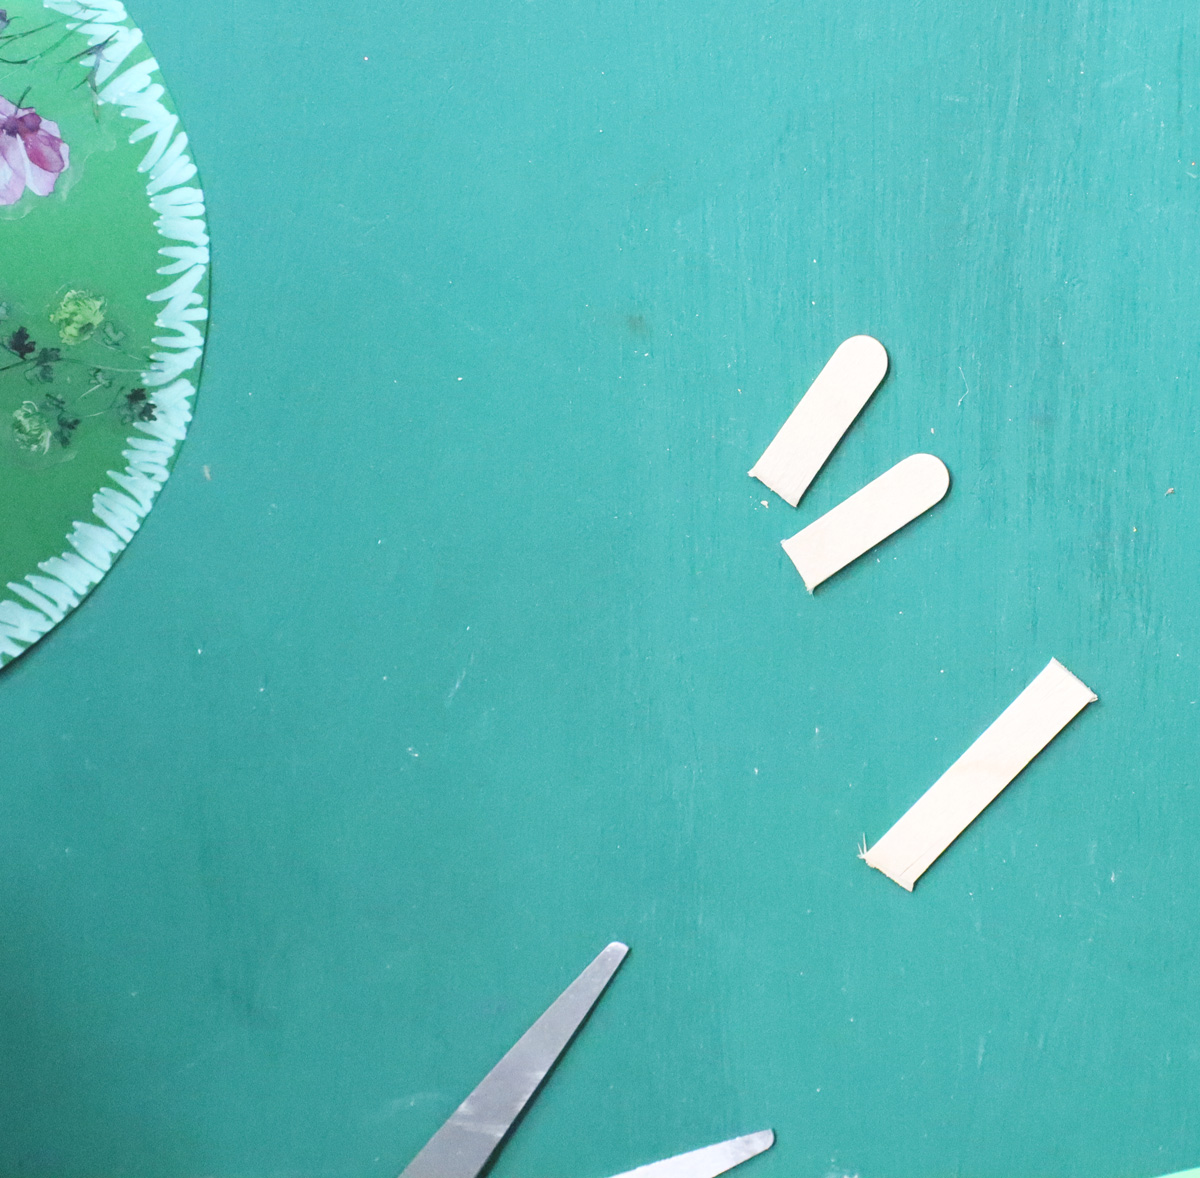
5. Now let’s make Luchot! Snip about an inch off each end of a craft stick. You’re left with about 2 inches in the center.
6. Glue the craft sticks tips side by side, with the rounded end on the same side. You can use hot glue if you want it to dry instantly, but tacky or wood glue would work too – you’ll just need to position it in place until it sets.
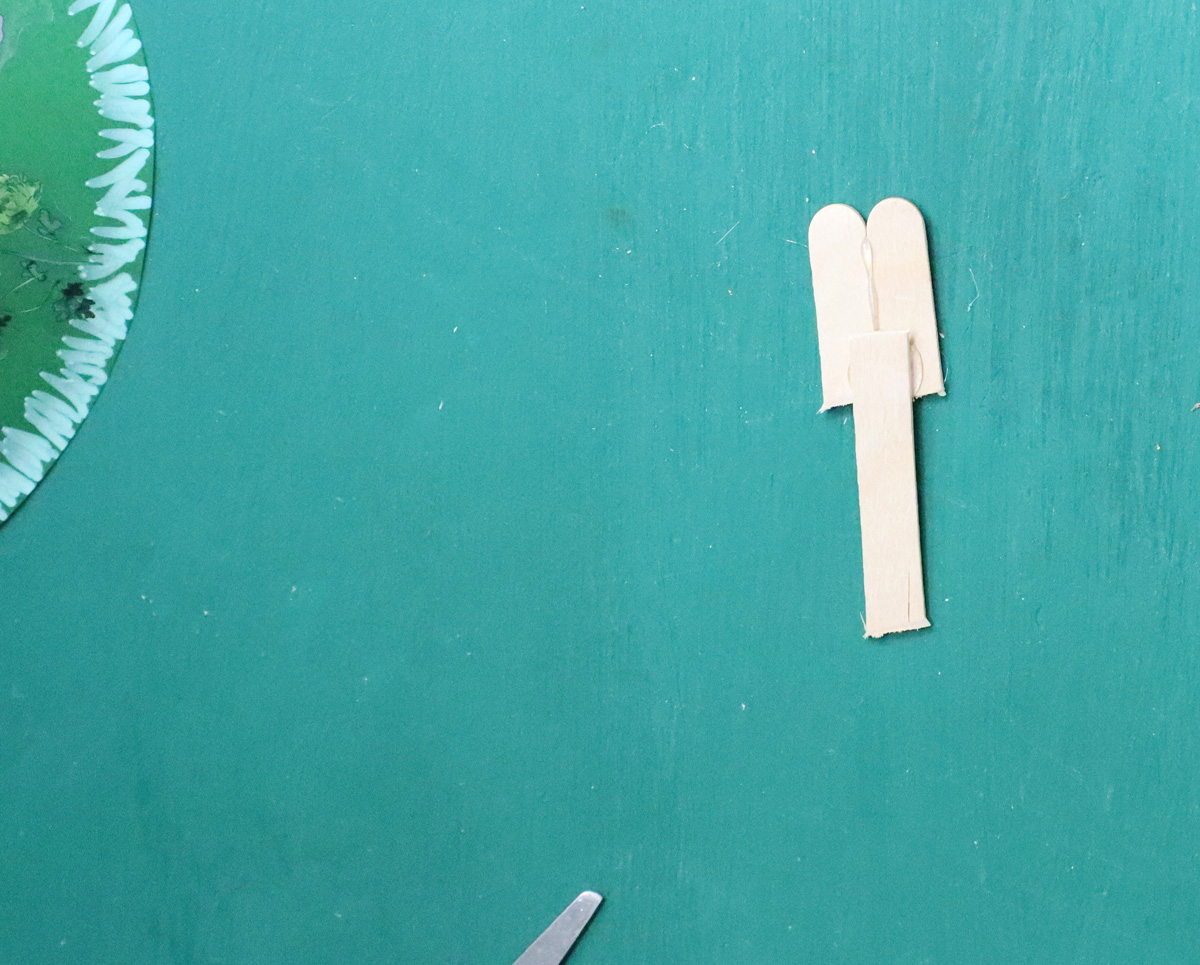
7. Glue the extra bit of craft stick to the back bottom portion of the Luchot to form a “handle”.
8. Stick it into the center slit of your paper Mount Sinai craft. You may need or want to widen it a bit, and you can secure it with some hot glue from the inside if you’d like.
Your Mount Sinai Shavuot craft for preschool is complete!