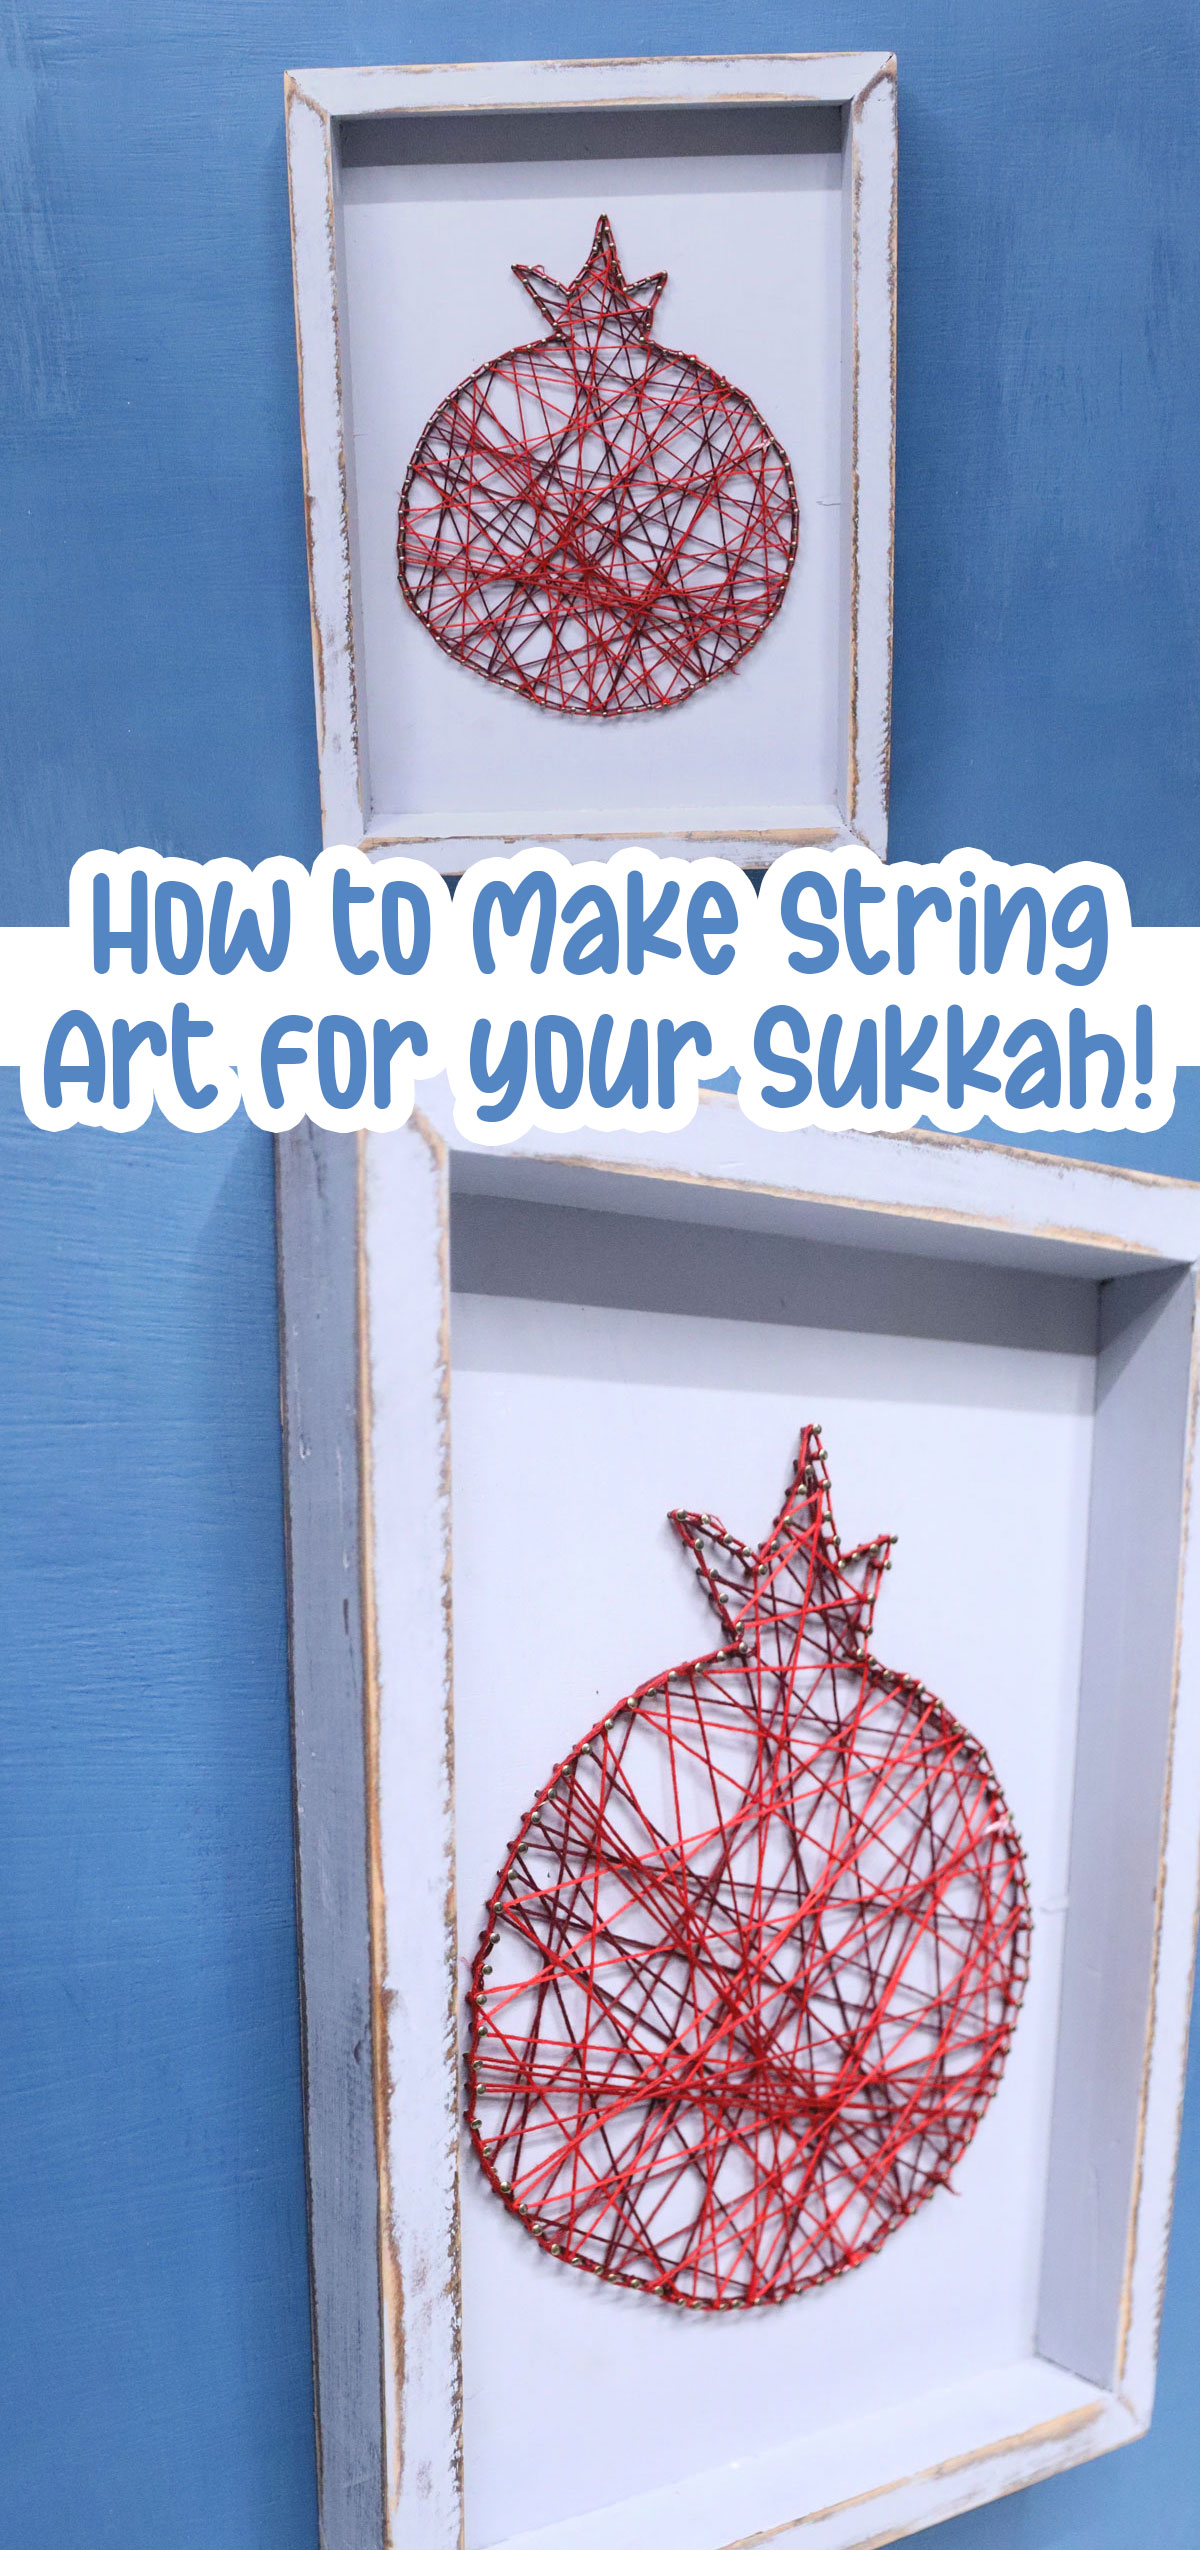
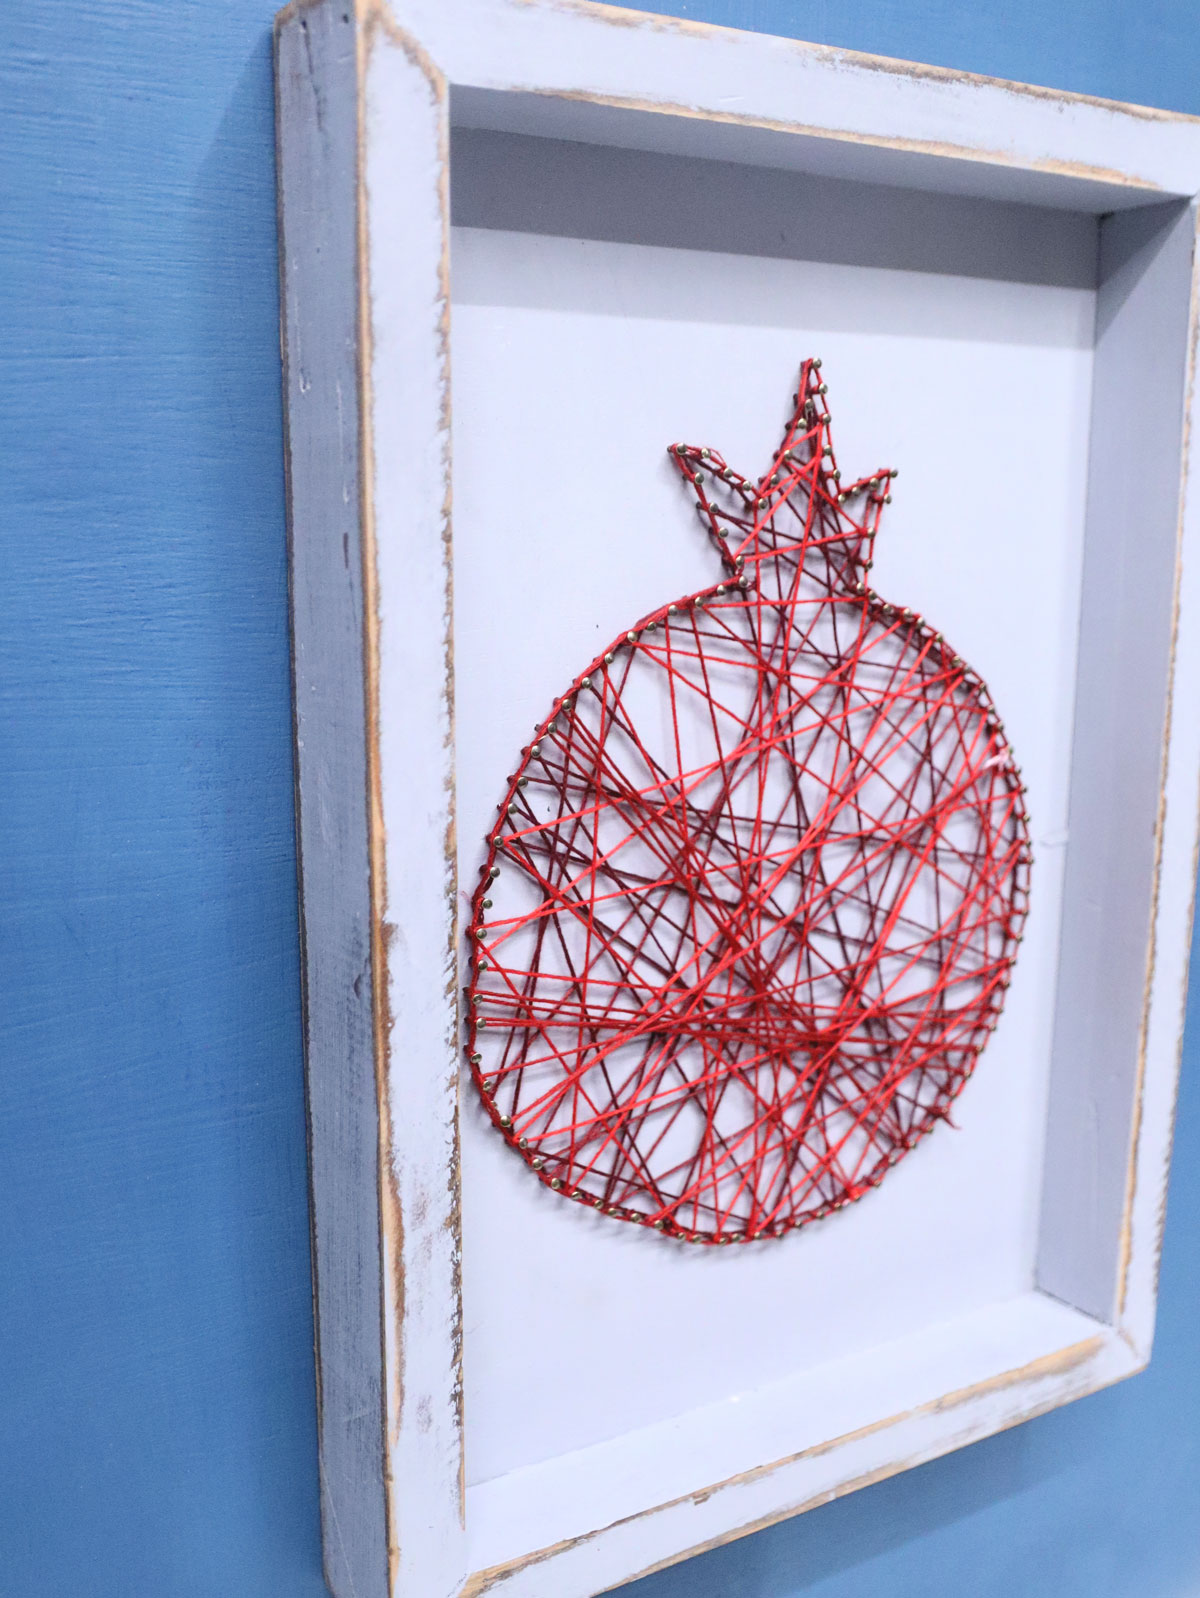
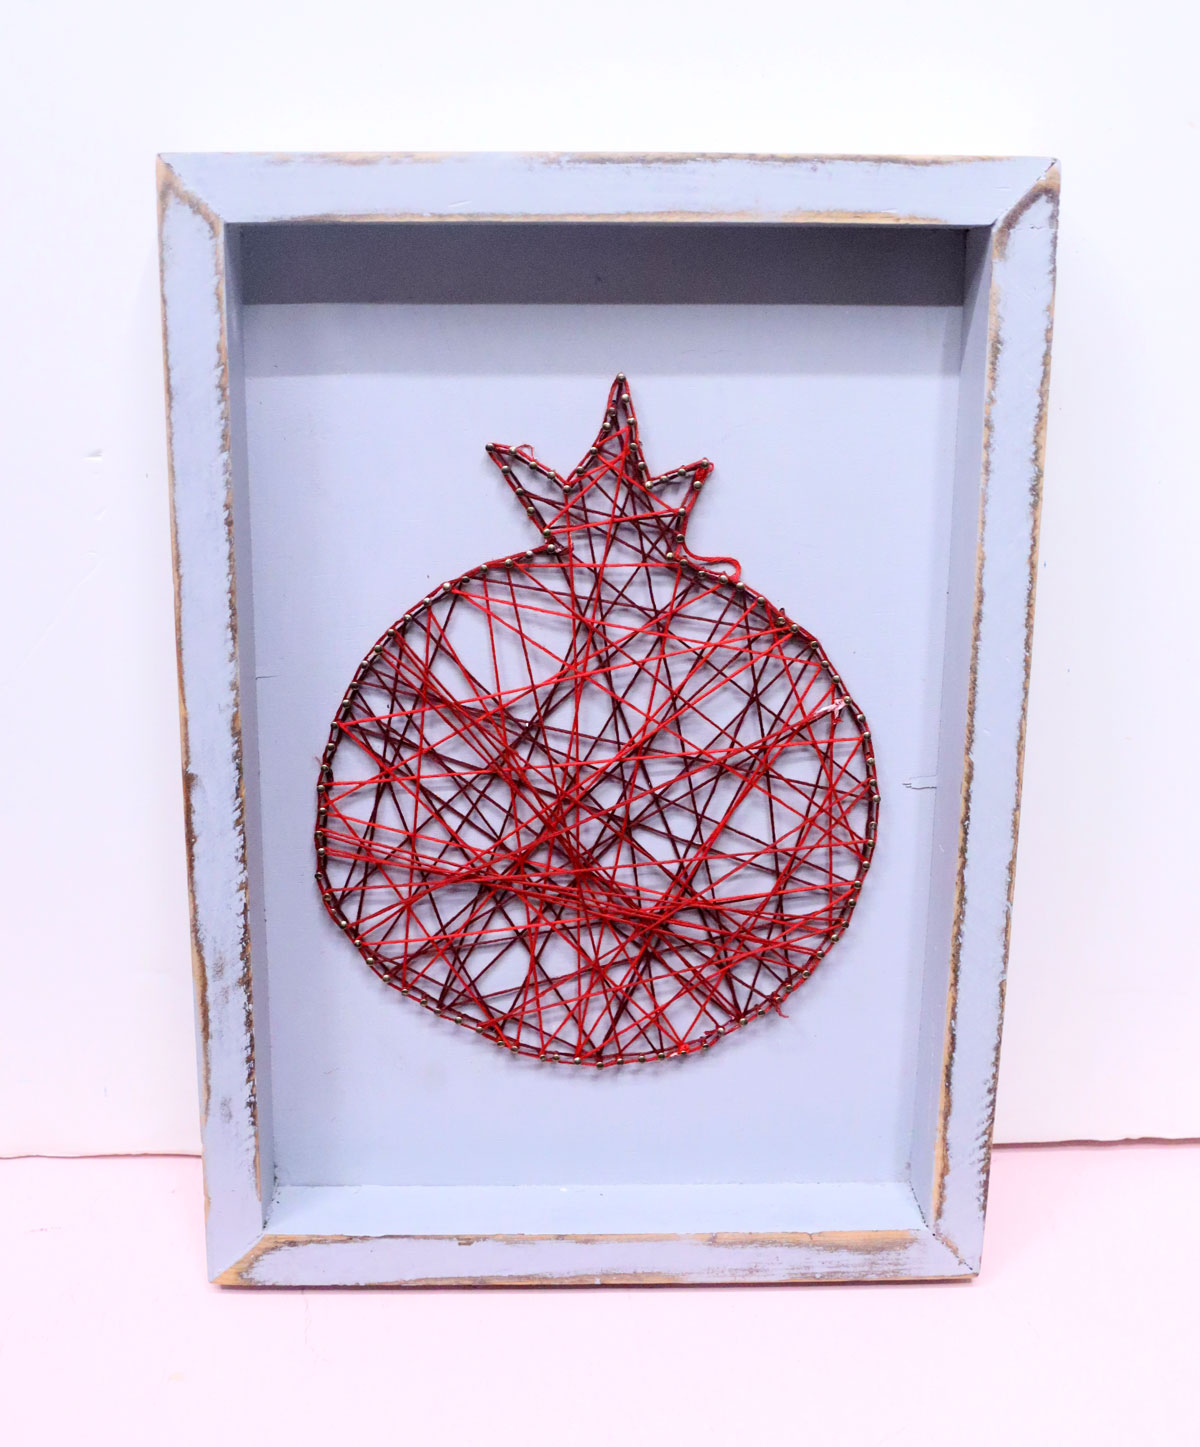
Pomegranate String Art – Free Template
Craft some gorgeous pomegranate string art for your Sukkah or home using this free template. When you’re done, go ahead and try these pomegranate coloring pages for adults, too. This post contains affiliate links.
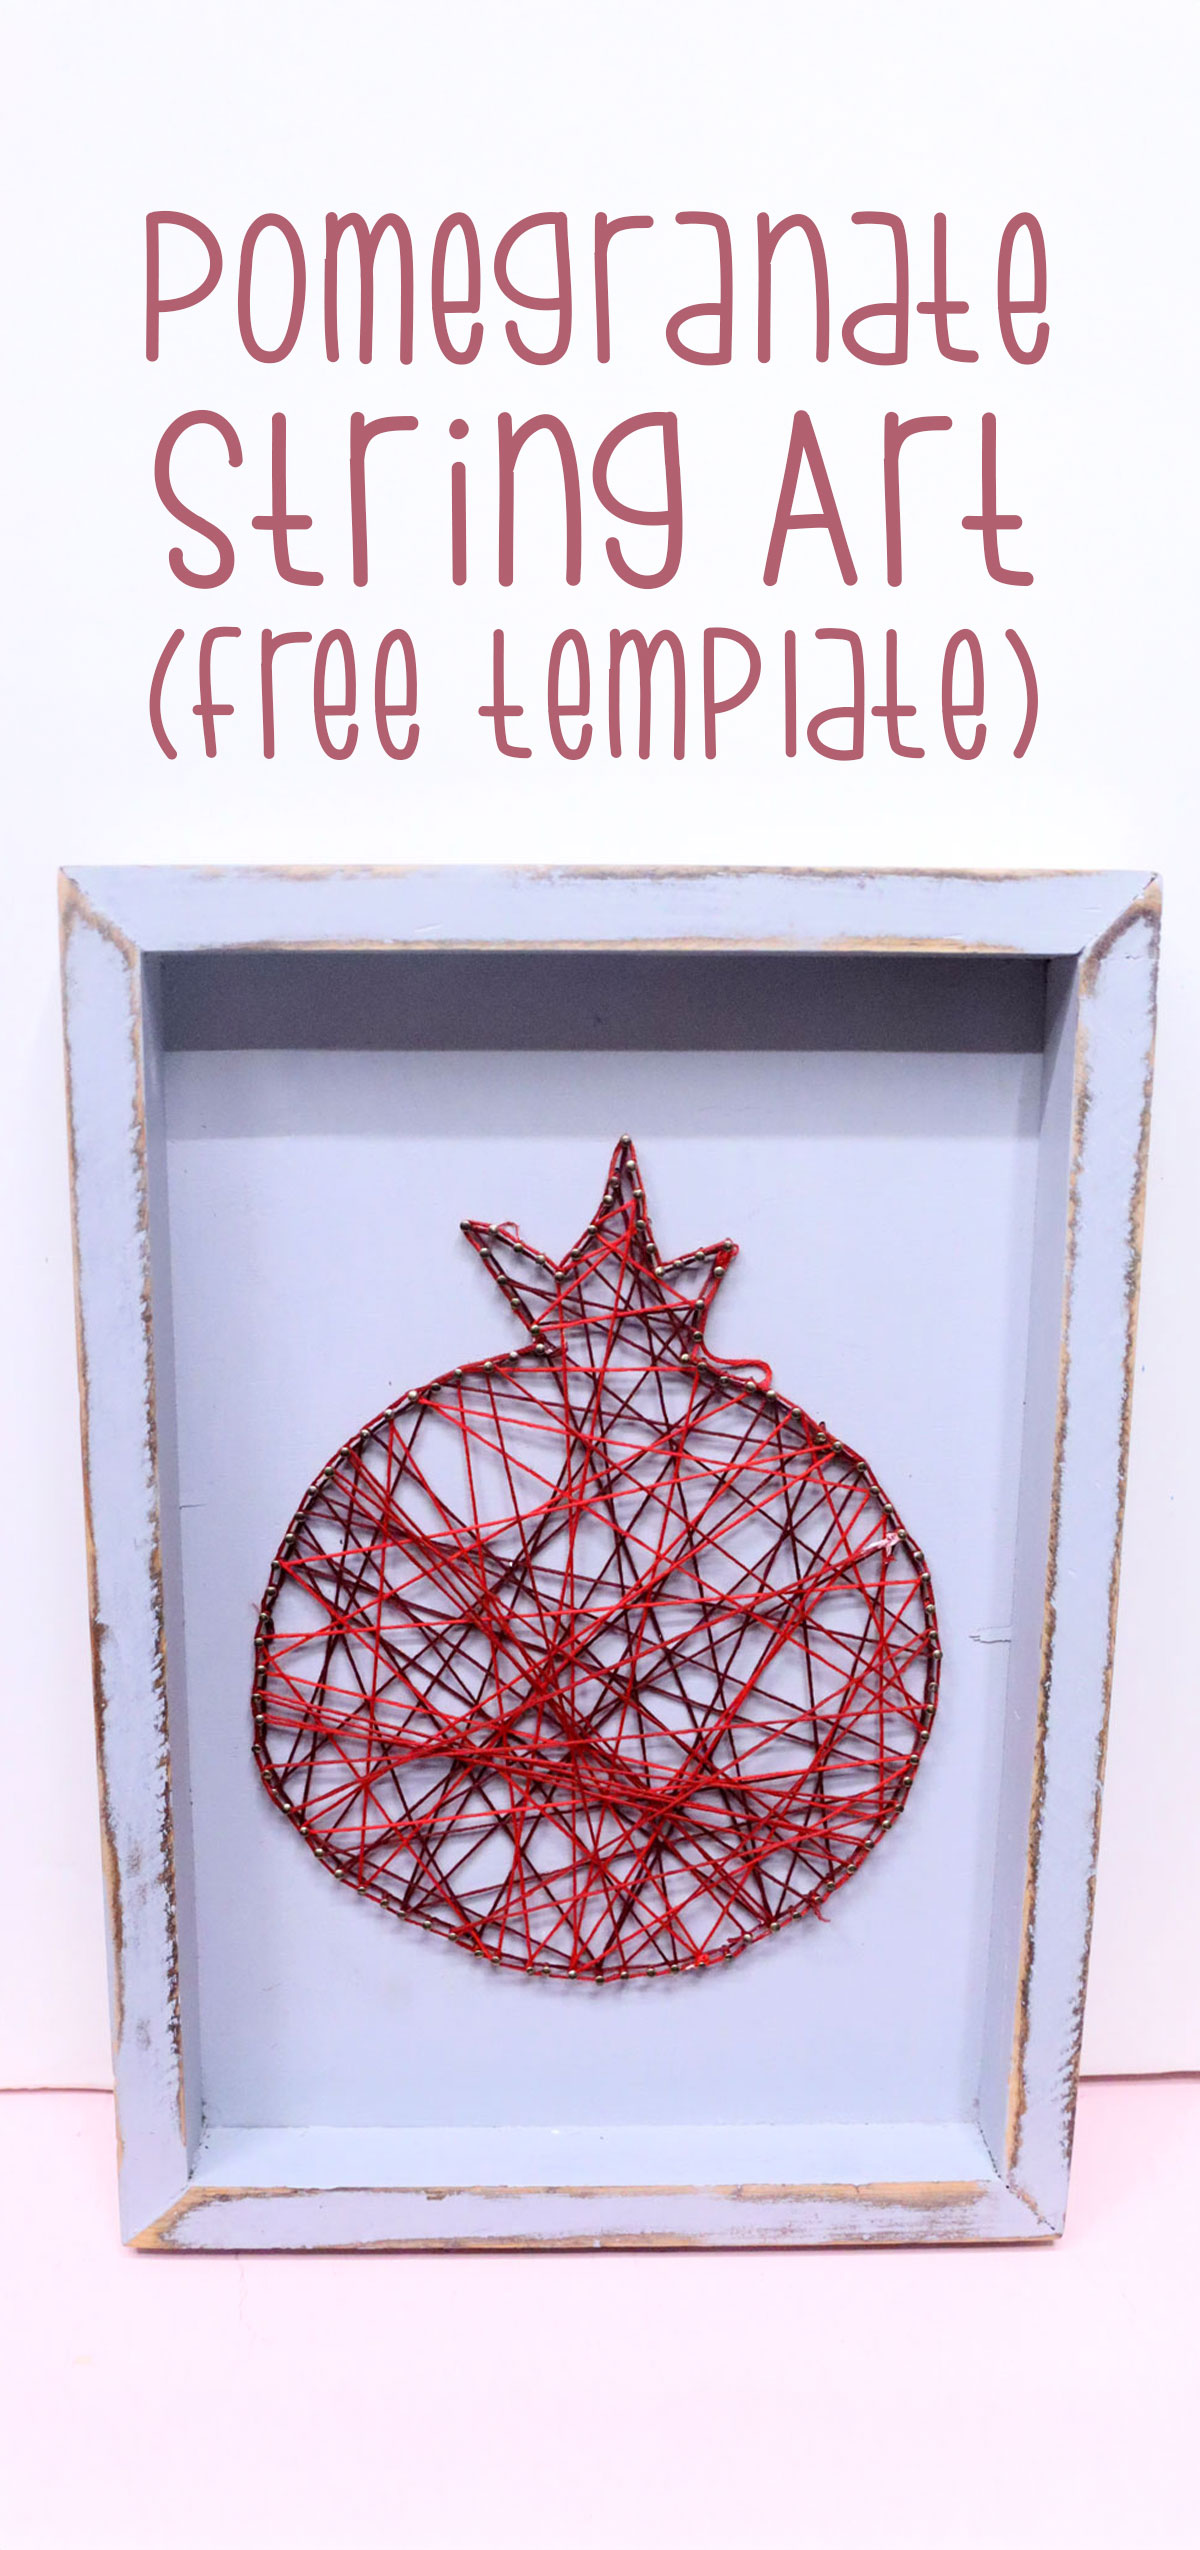
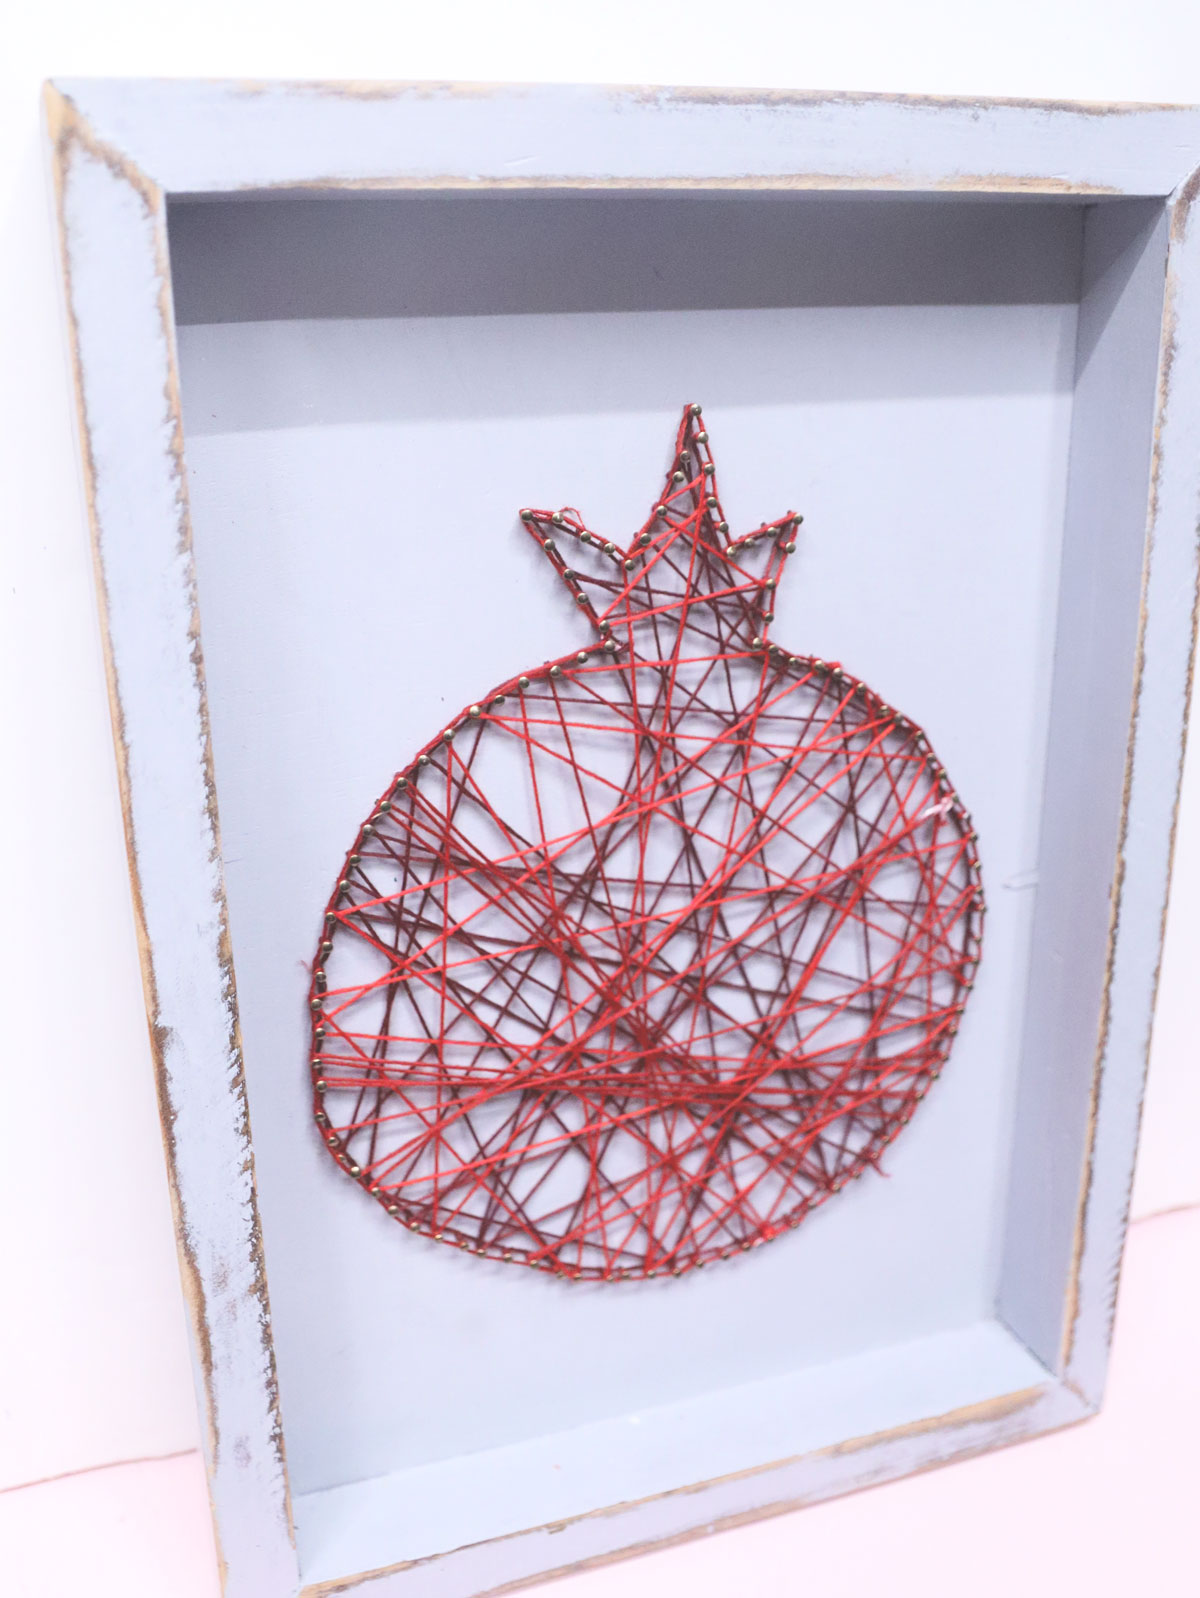
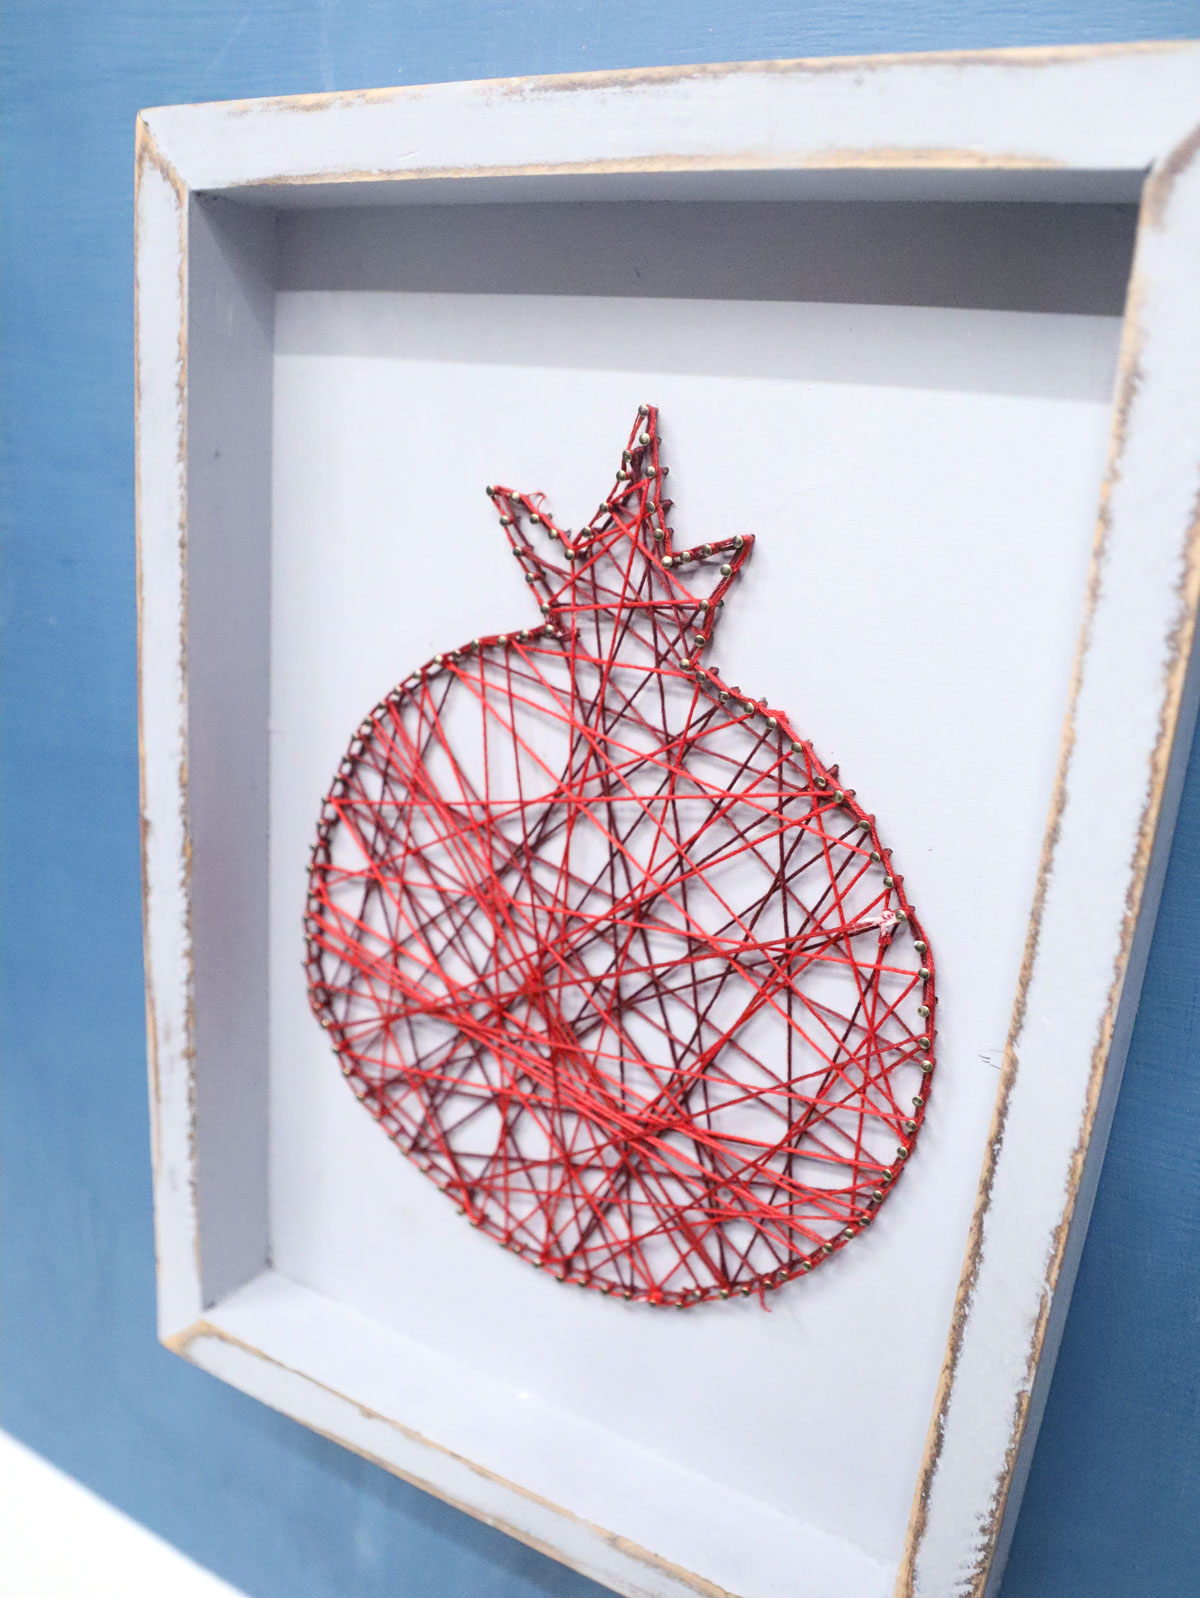
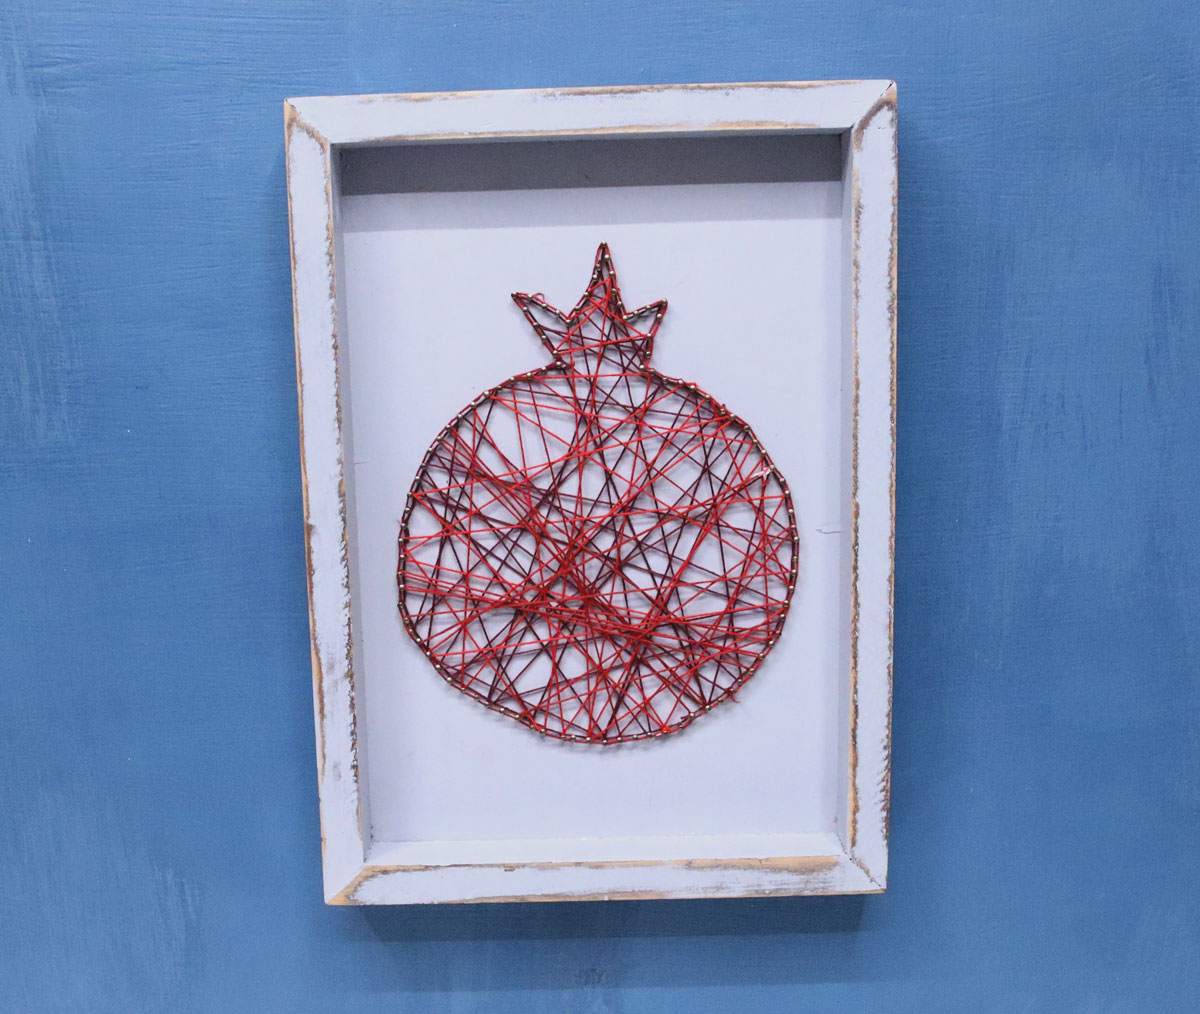
The pomegranate motif is a gorgeous one and perfect for the Sukkah! We love crafting DIY Sukkah decorations, and this one is a win.
String art is a mid-level craft: you don’t need experience to get started, and beginners can do it, however, it does require some level of dexterity. The results, though, are amazing – and yes, they are art!

The cool thing is that with a template, anyone can do this, including older kids and up. You need to be of the age that can be trusted with some hammers and small nails. The biggest challenge is getting the string looped around the nails and in place. Otherwise, we kept the wrapping simple and crisscrossed it in random patterns for a fun, layered look!

Choosing your materials for pomegranate string art
The wooden base
String art is typically created by hammering nails into a wooden foundation. I hit up thrift stores for mine, and found this really fun shadow box that was perfect for string art! Since I can’t exactly link what I used, here are some ideas:
- A wood art board – you can even flip this backwards for the shadow box effect.
- You can even use live-edge planks for a more unique look
- Or go for wood crafting bases in fun shapes, such as a circle or oval
- Thick chipboard is a great base
- Foam board is a great option for younger crafters (but they still need to be trusted with the nails)
- A canvas can work as well, but is slightly less forgiving.
When looking for wood, pine is ideal as it’s a soft wood. Mine was hard and a bit tougher to work with (though it looks fab!)
If you’re hanging this in the Sukkah, you will want to consider waterproofing it (such as sealing the wood with outdoor Mod Podge or a similar product). Don’t worry about the string absorbing water – it won’t ruin it. Just make sure to dry it well before packing away! (Be prepared for some color bleed – you can hand wash your skein first if you want to minimize this.)
And if using an unfinished surface, you’ll definitely want to paint it first!
Which string to use
You do not need to stick to a specific string type, though you DO want something with a bit of traction like yarn or embroidery floss (and not totally slick like plastic lacing).
Keep in mind that if you’re using very small nails closely spaced, you’ll want something with a maximum thickness of embroidery floss. You can use fluffier yarn with larger nails spaced more widely apart than on the template. Just place them at every other dot.
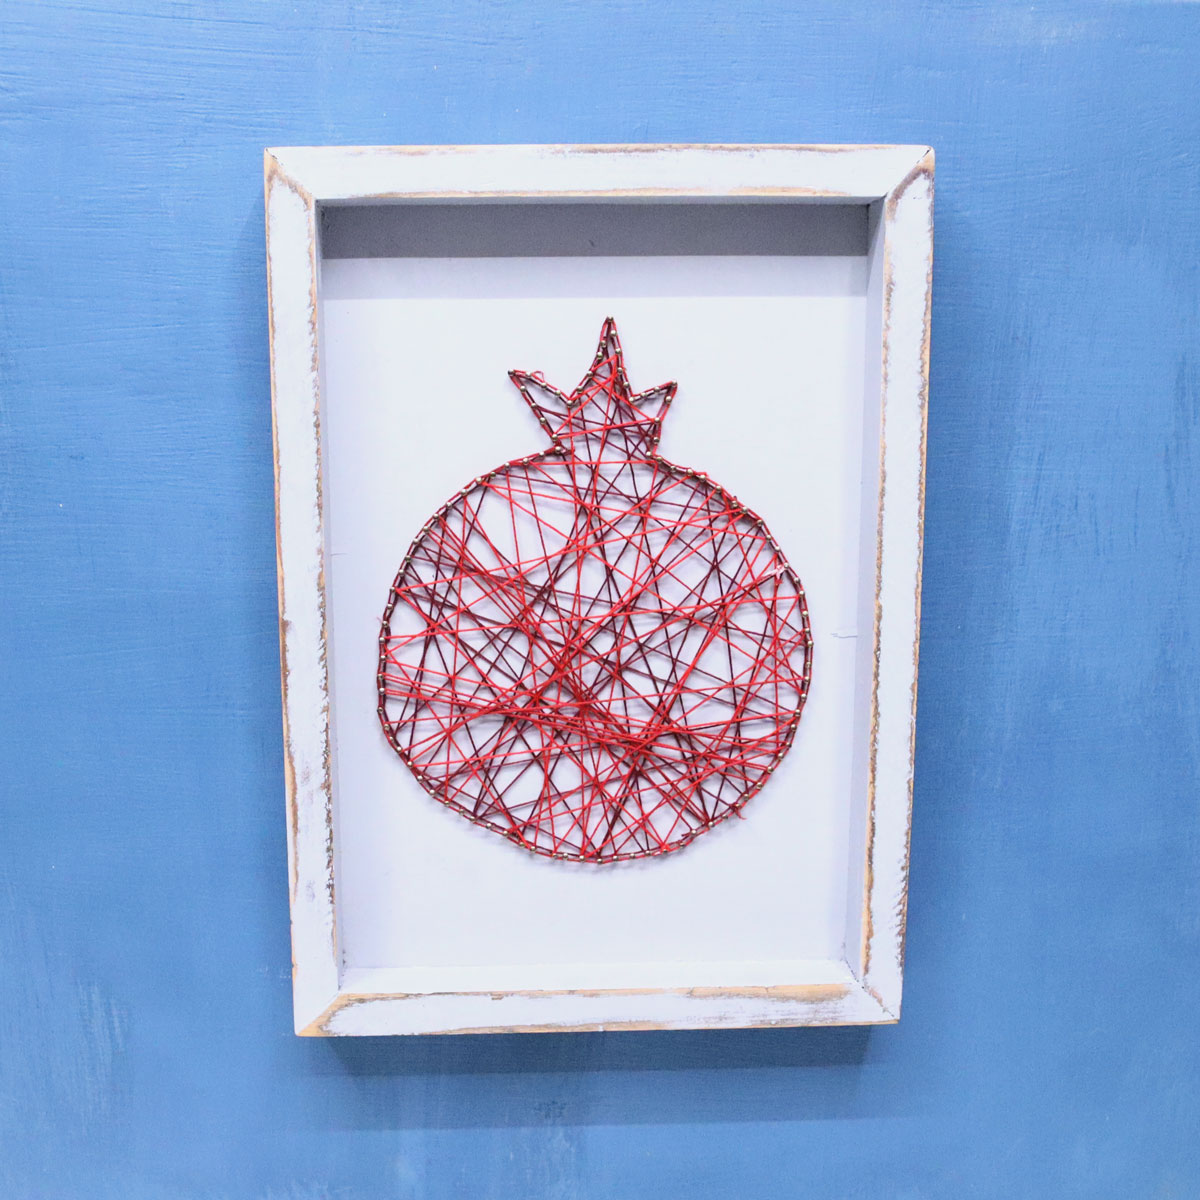
Other fun ideas can be metallic floss for adding that extra sparkle or thinner threads for a finer look. Think outside the box with color, since pomegranates have a distinctive enough shape to move away from nature. I stuck to shades of red, but you can totally deviate.
You can even use rustic materials like cotton twine or jute for a rustic look.
How to make pomegranate string art
You’ll need
- A wood base (soft pine is fabulous – I used a thrifted shadow box). The template fits an 8.5×11 paper, so something that size or larger is ideal.
- If the base is unfinished: paint, paintbrushes
- If hanging it in the Sukkah – outdoor Mod Podge or some other waterproof sealer
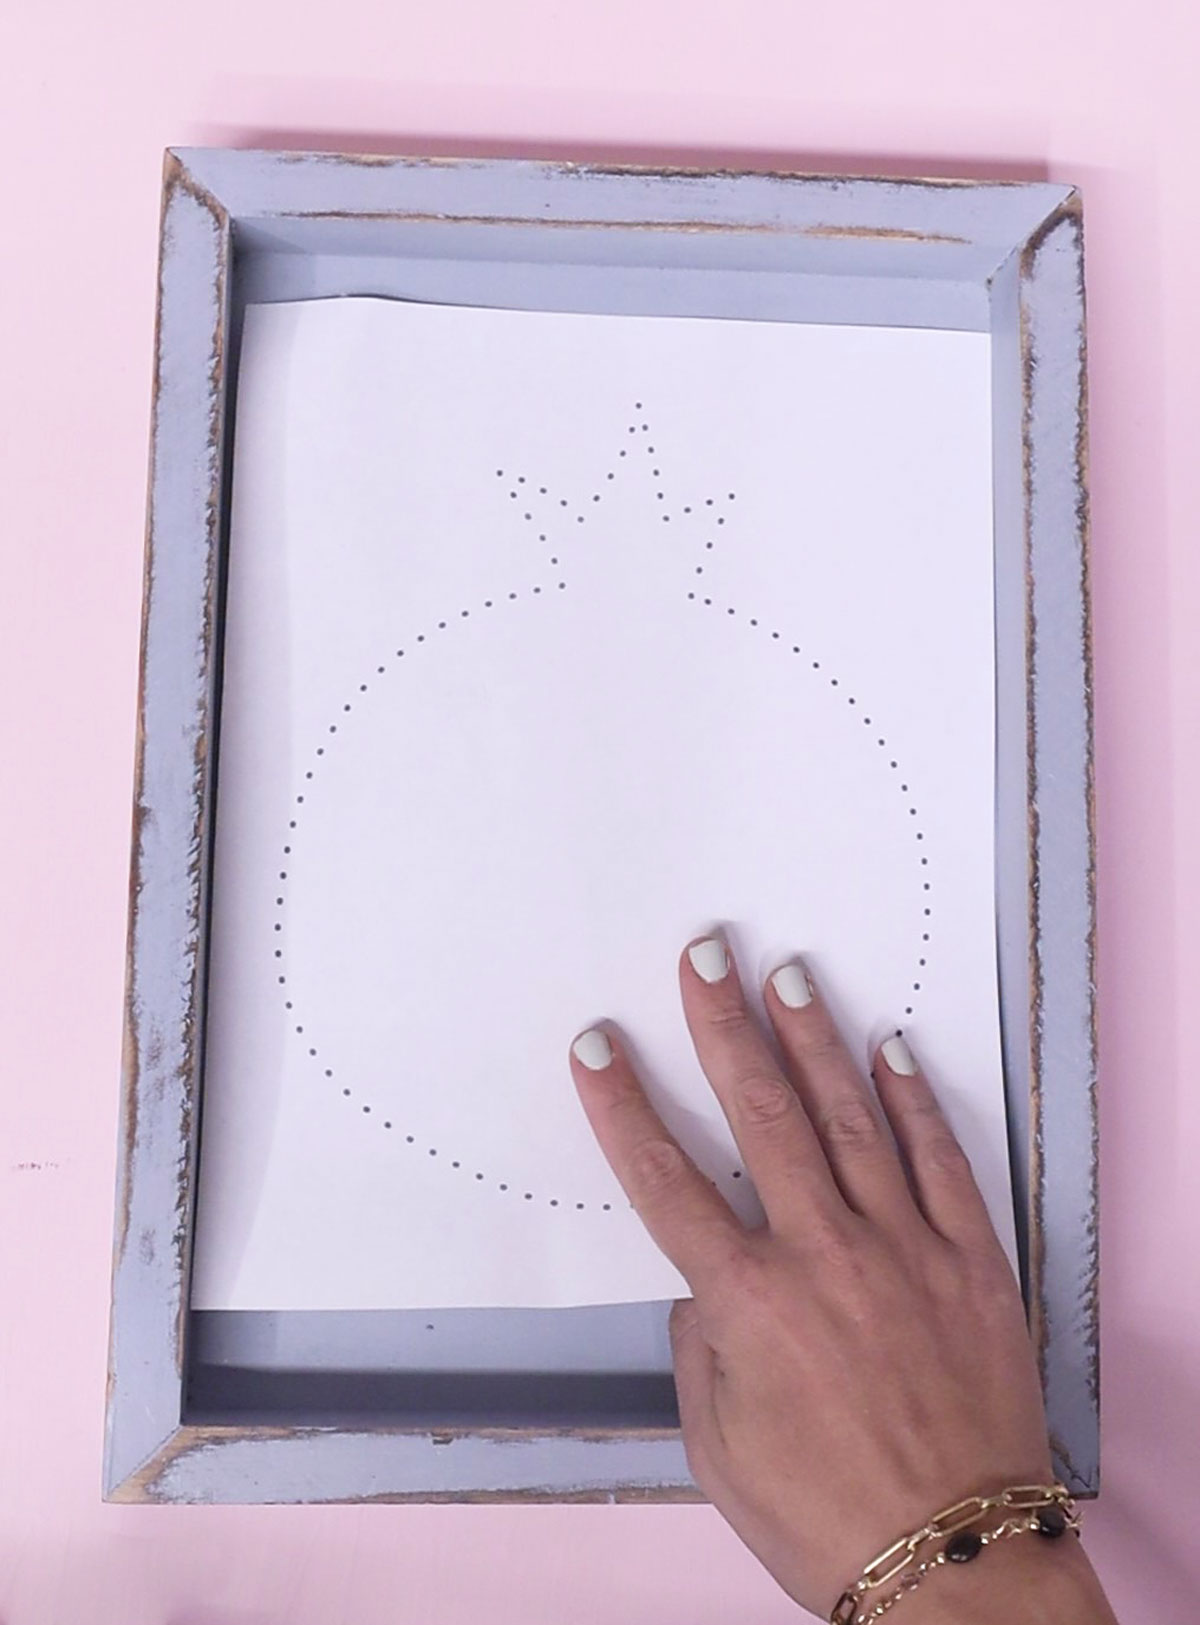
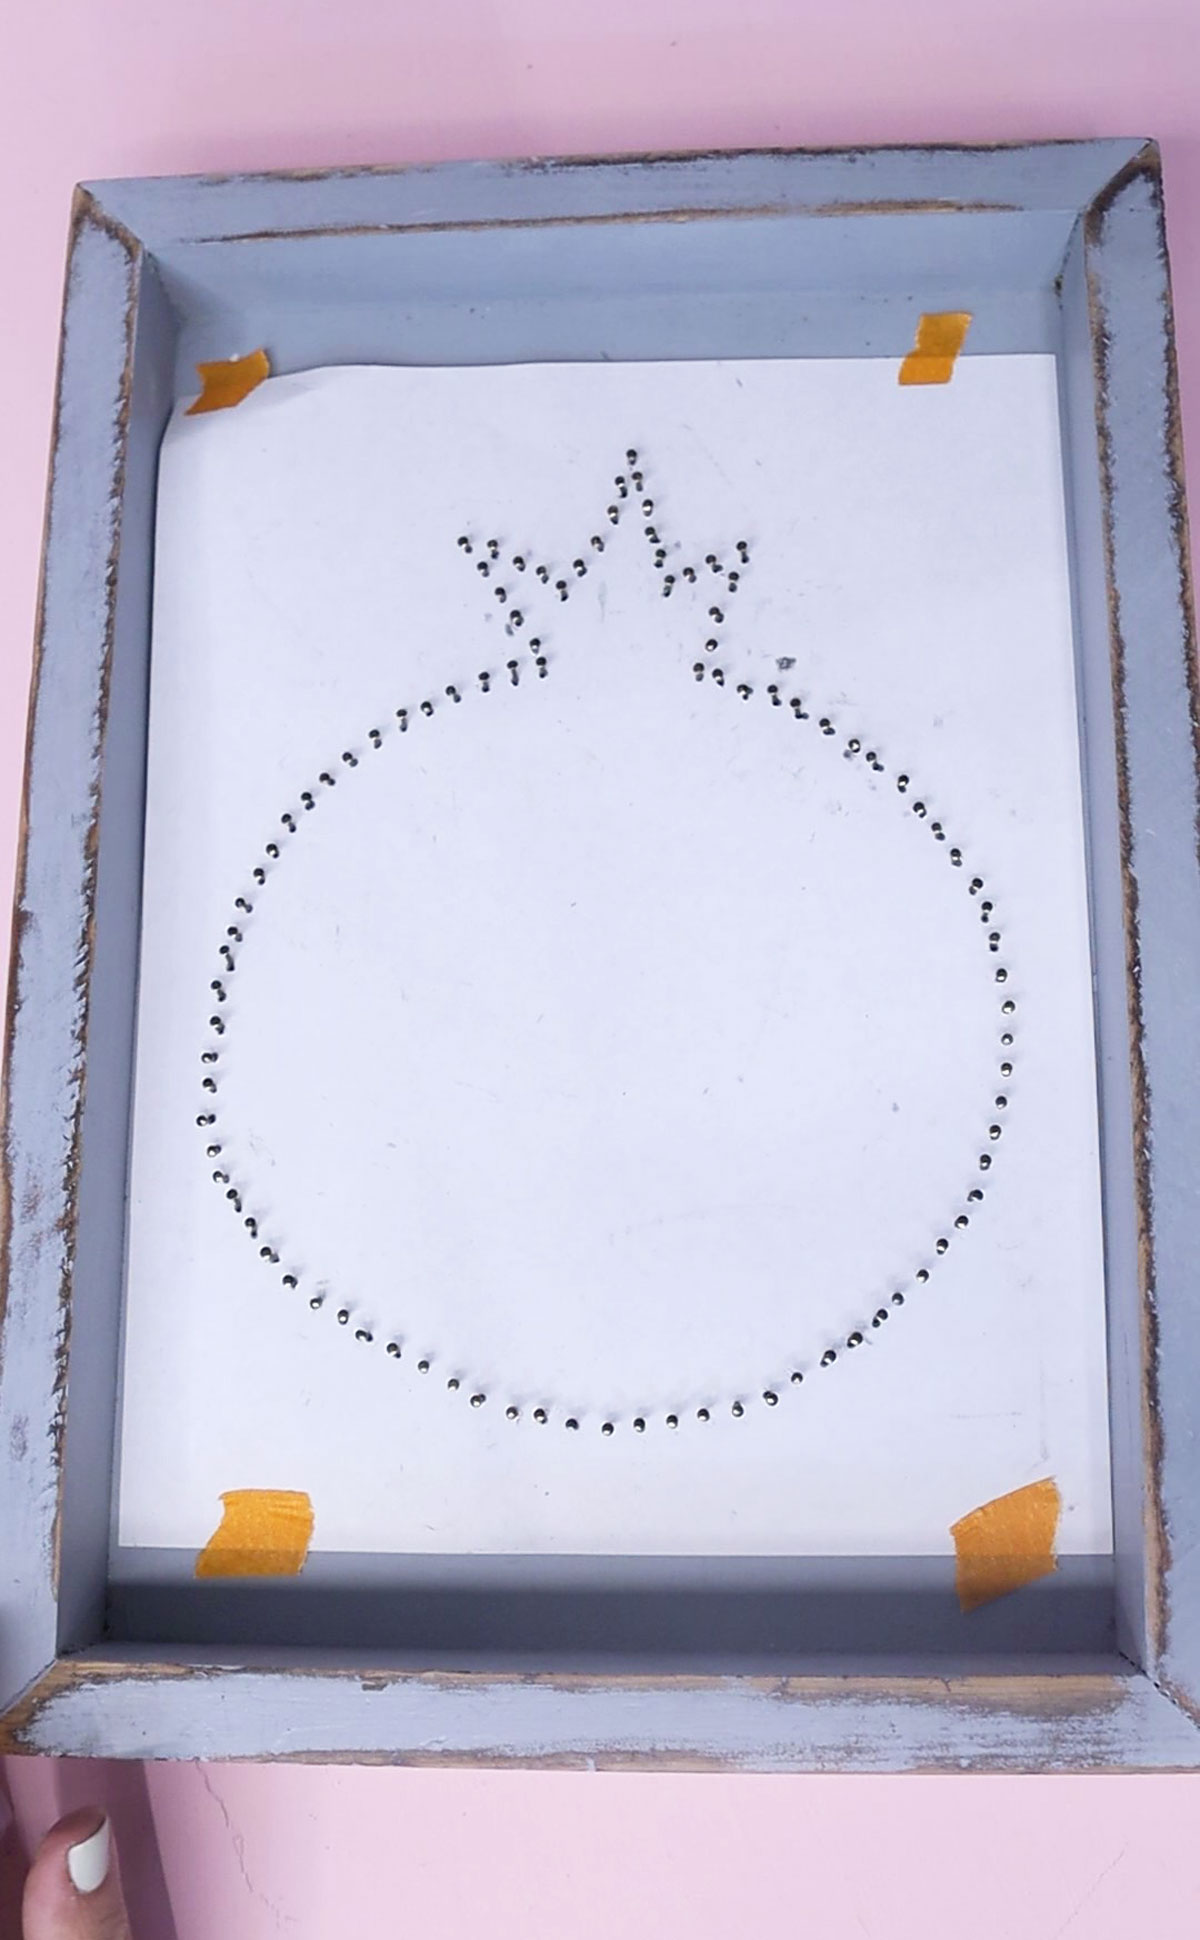
- The template (print it at the end of this post) printed on paper, not cardstock
- Washi, masking, or painter’s tape
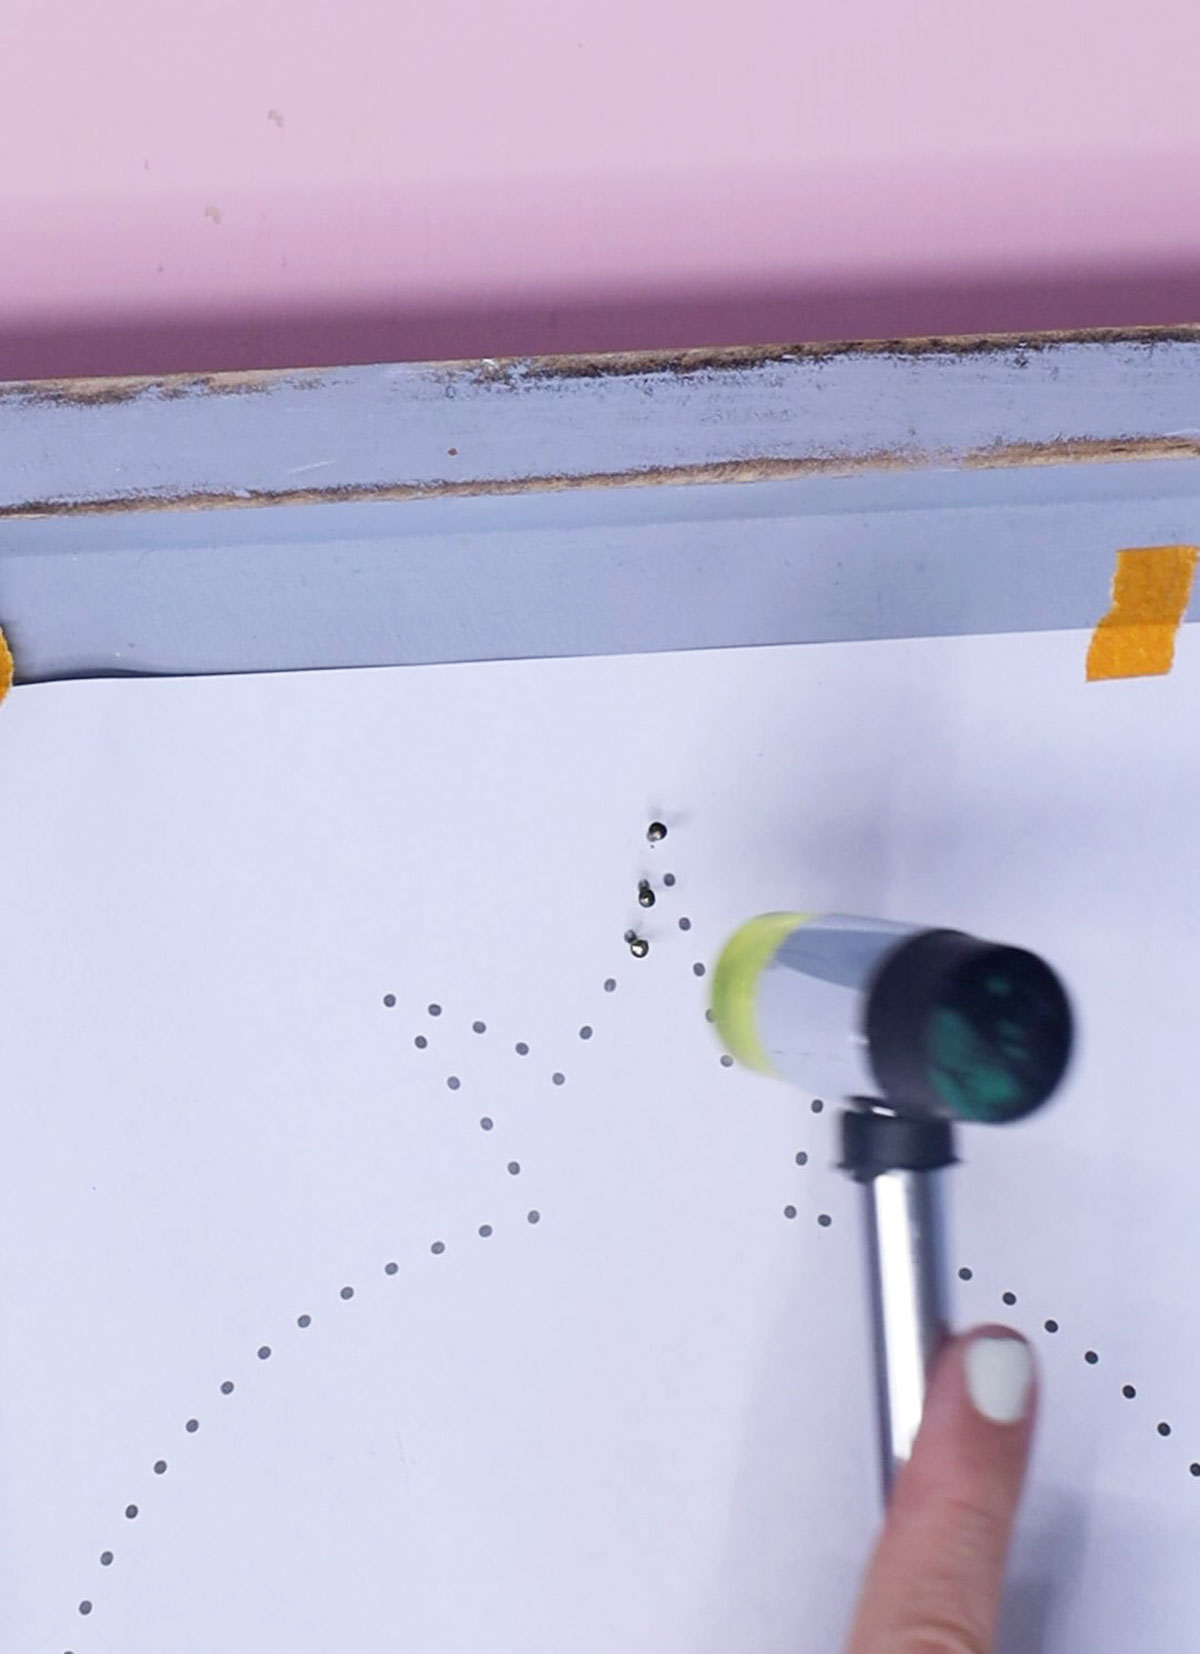
- A hammer – I used a rubber-ended mallet
- String art nails – I used these, you can go for slightly longer ones if you want it to be a bit easier to string
- Recommended: serrated jaw needle nose pliers
- Embroidery floss (I used shades of red, but you don’t have to)
- Scissors
- A bit of glue (most glues would work) to finish your knots
Watch the video
Watch the full-length video on YouTube if you prefer to learn that way! Or scroll down for written instructions with photos.
Process
1. If your base isn’t finished, go ahead and do that first, and allow it to dry completely.
2. Place your template where you want it on the base and tape it in place.
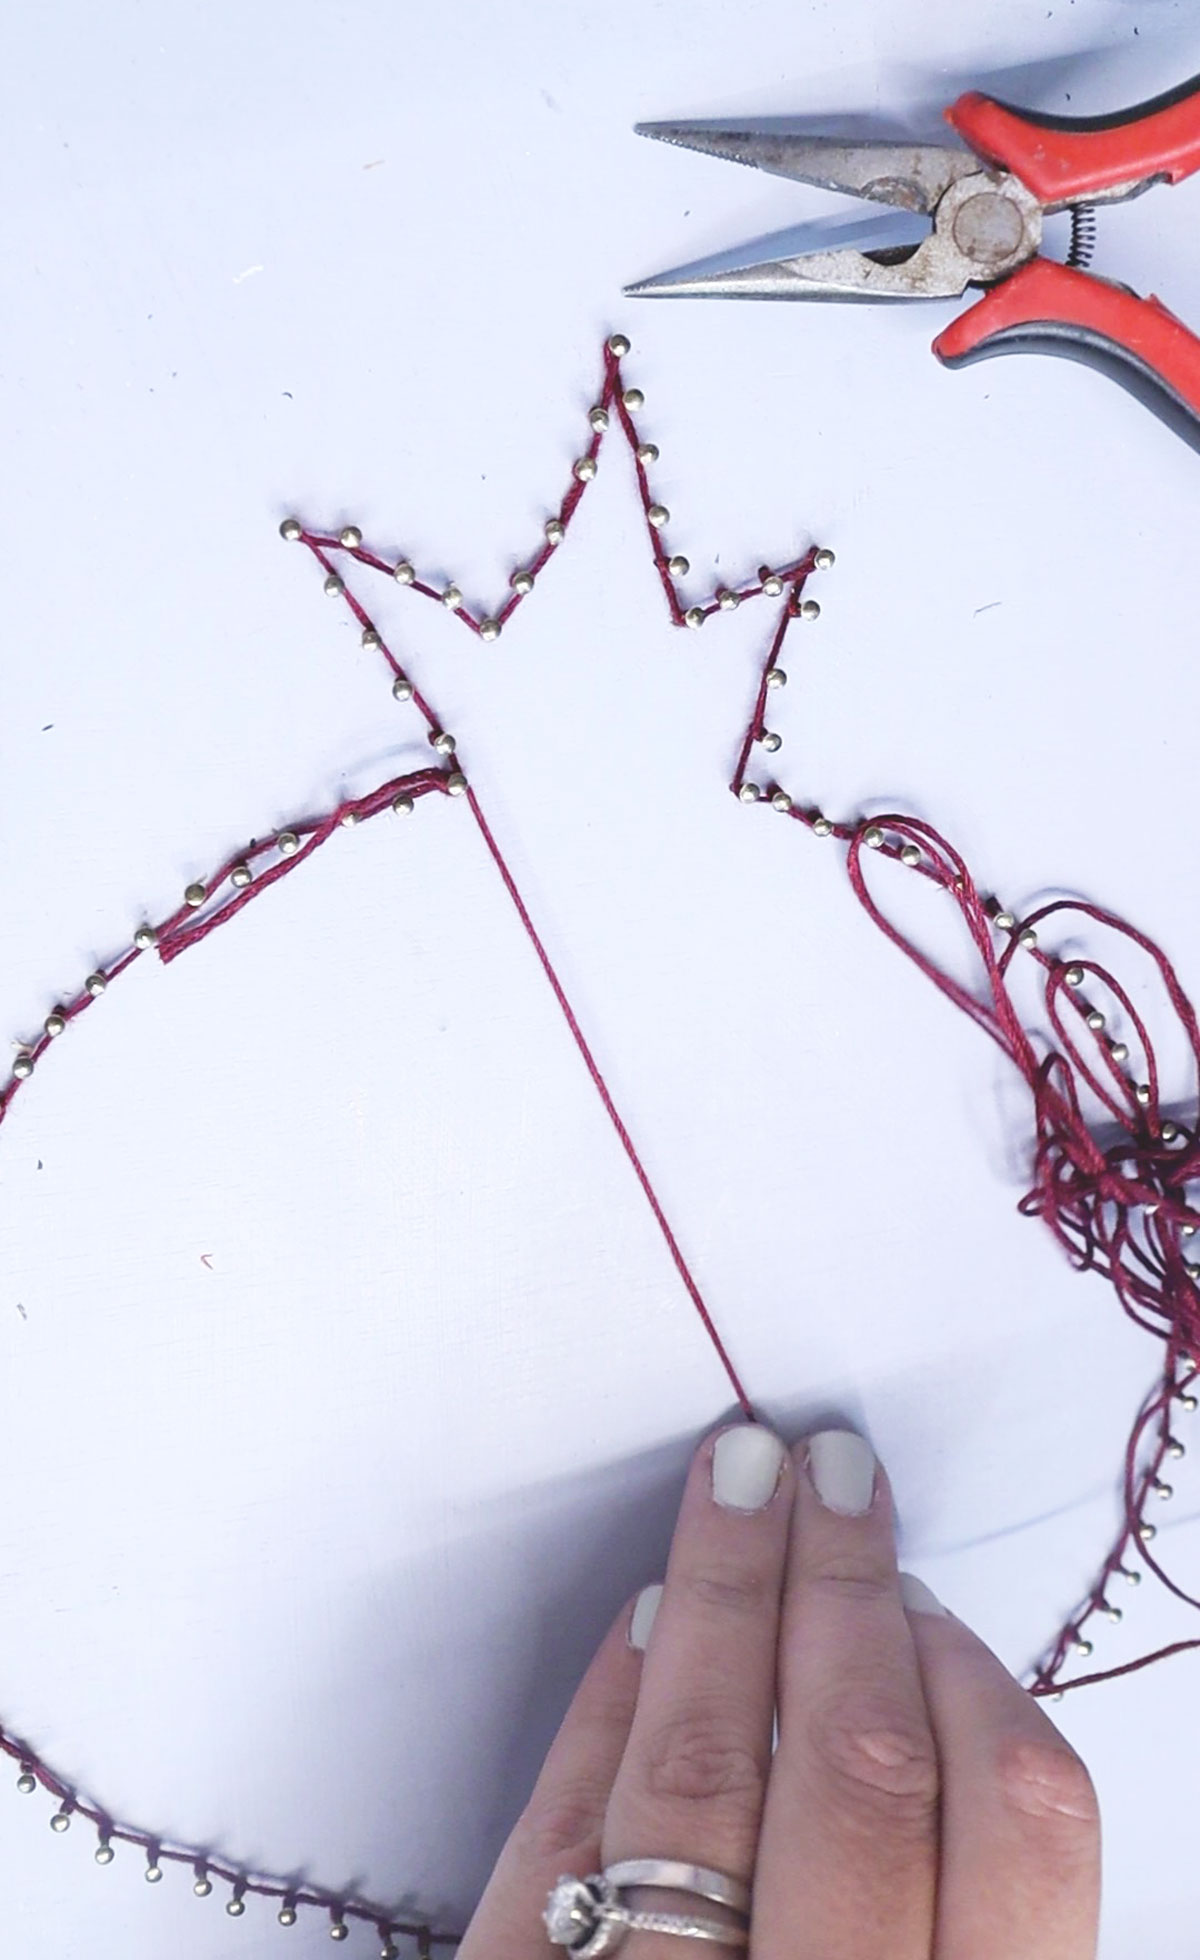
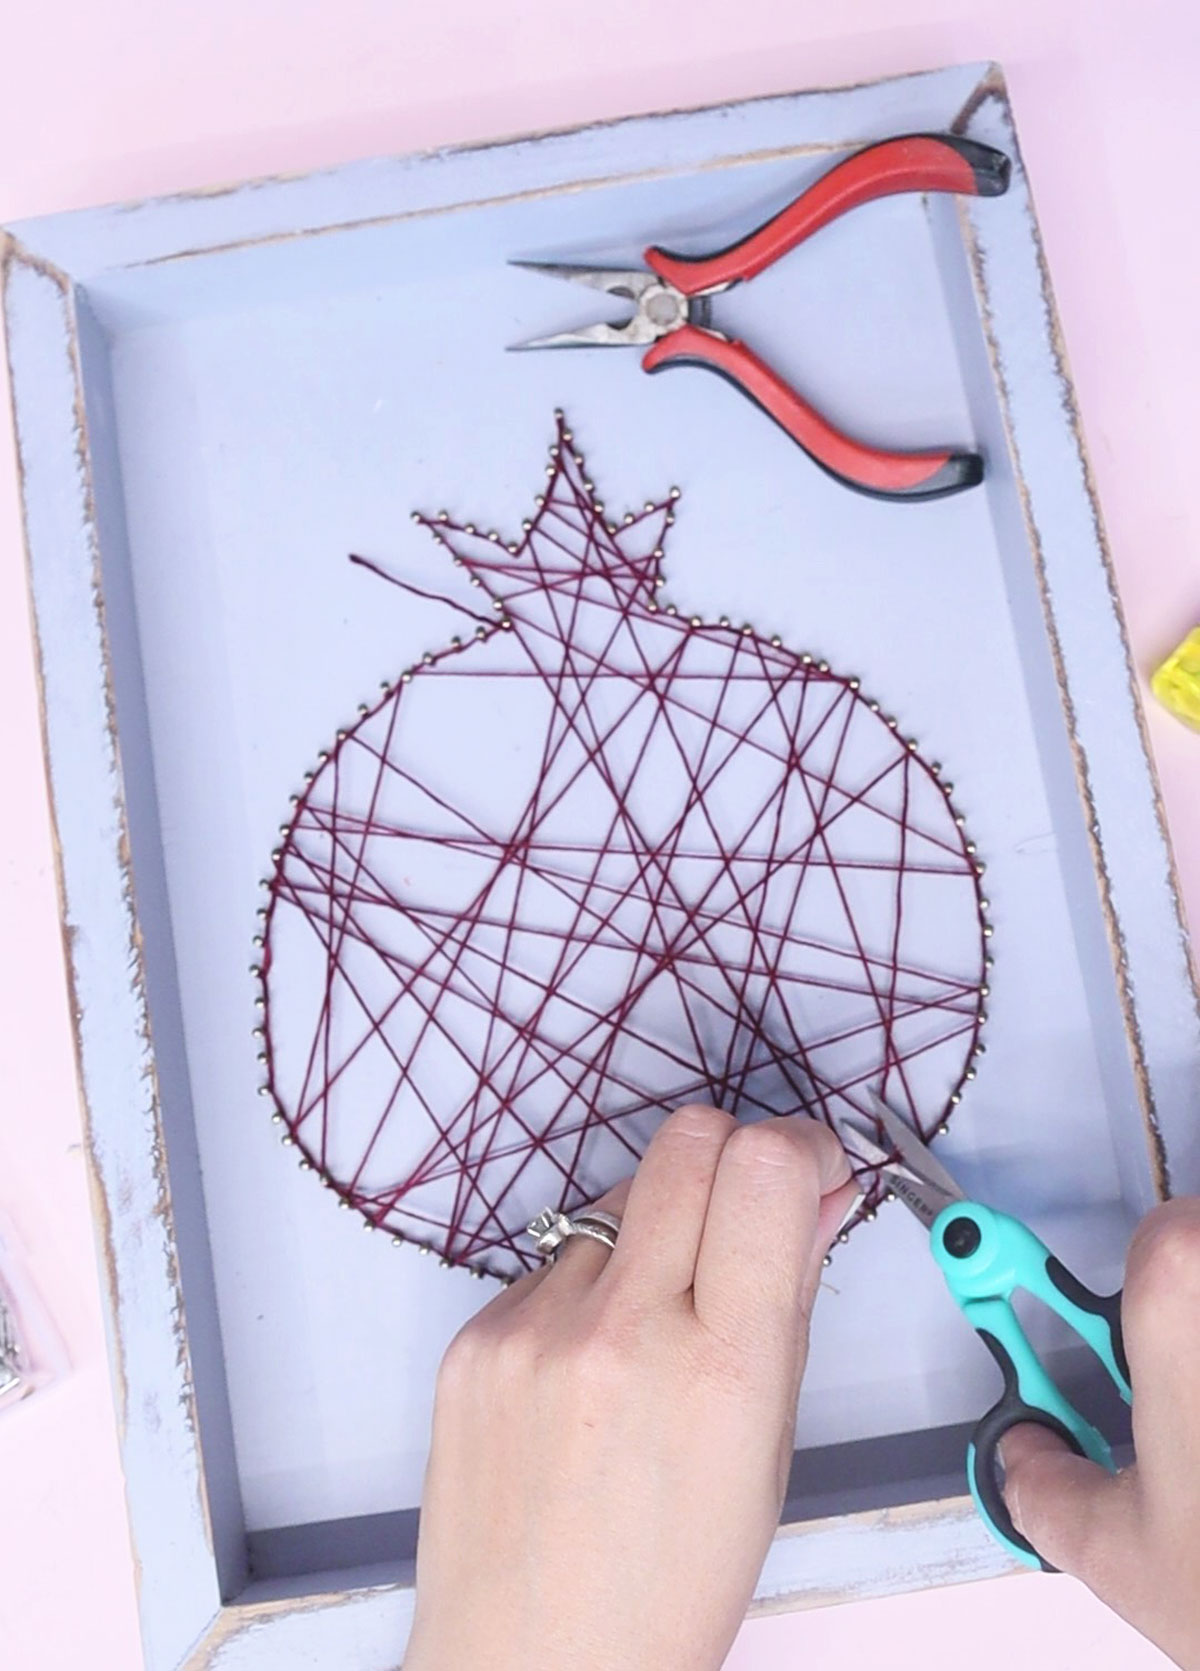
3. Protect your surface in case you hammer nails through to the back by mistake. Place each nail on the corresponding dot on the template. Hold it in place with pliers if needed.
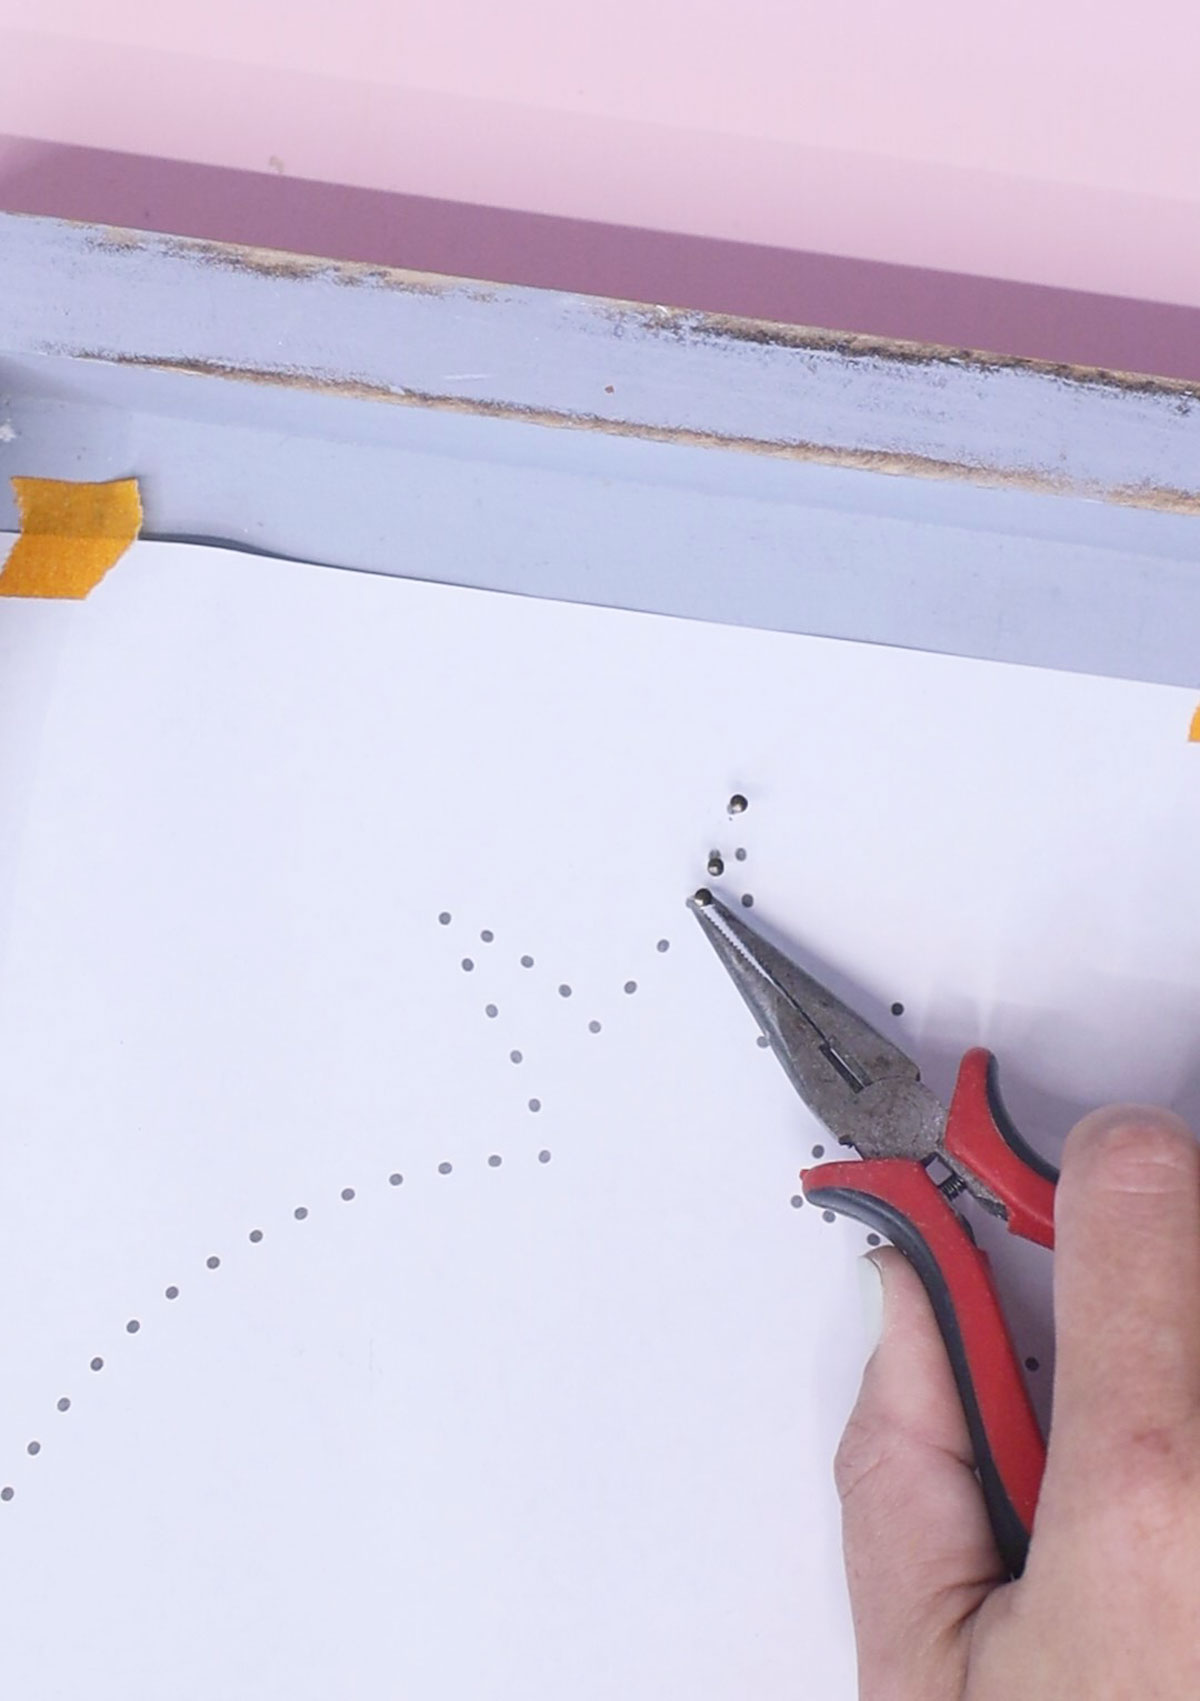
4. Tap it straight down a few times to nail it in place. It should be nailed just enough to hold securely, but not so deeply that it penetrates the back. Most of it should stick up for easier wrapping.
5. As needed, use the pliers to straighten out the nails as you go along.

6. Add nails around the pattern until it’s complete. Fix it up, make sure all nails are straight and secure.
7. Start removing your template slowly, tearing it off from around the nails. You want to pull back, not straight up, to avoid removing any nails.
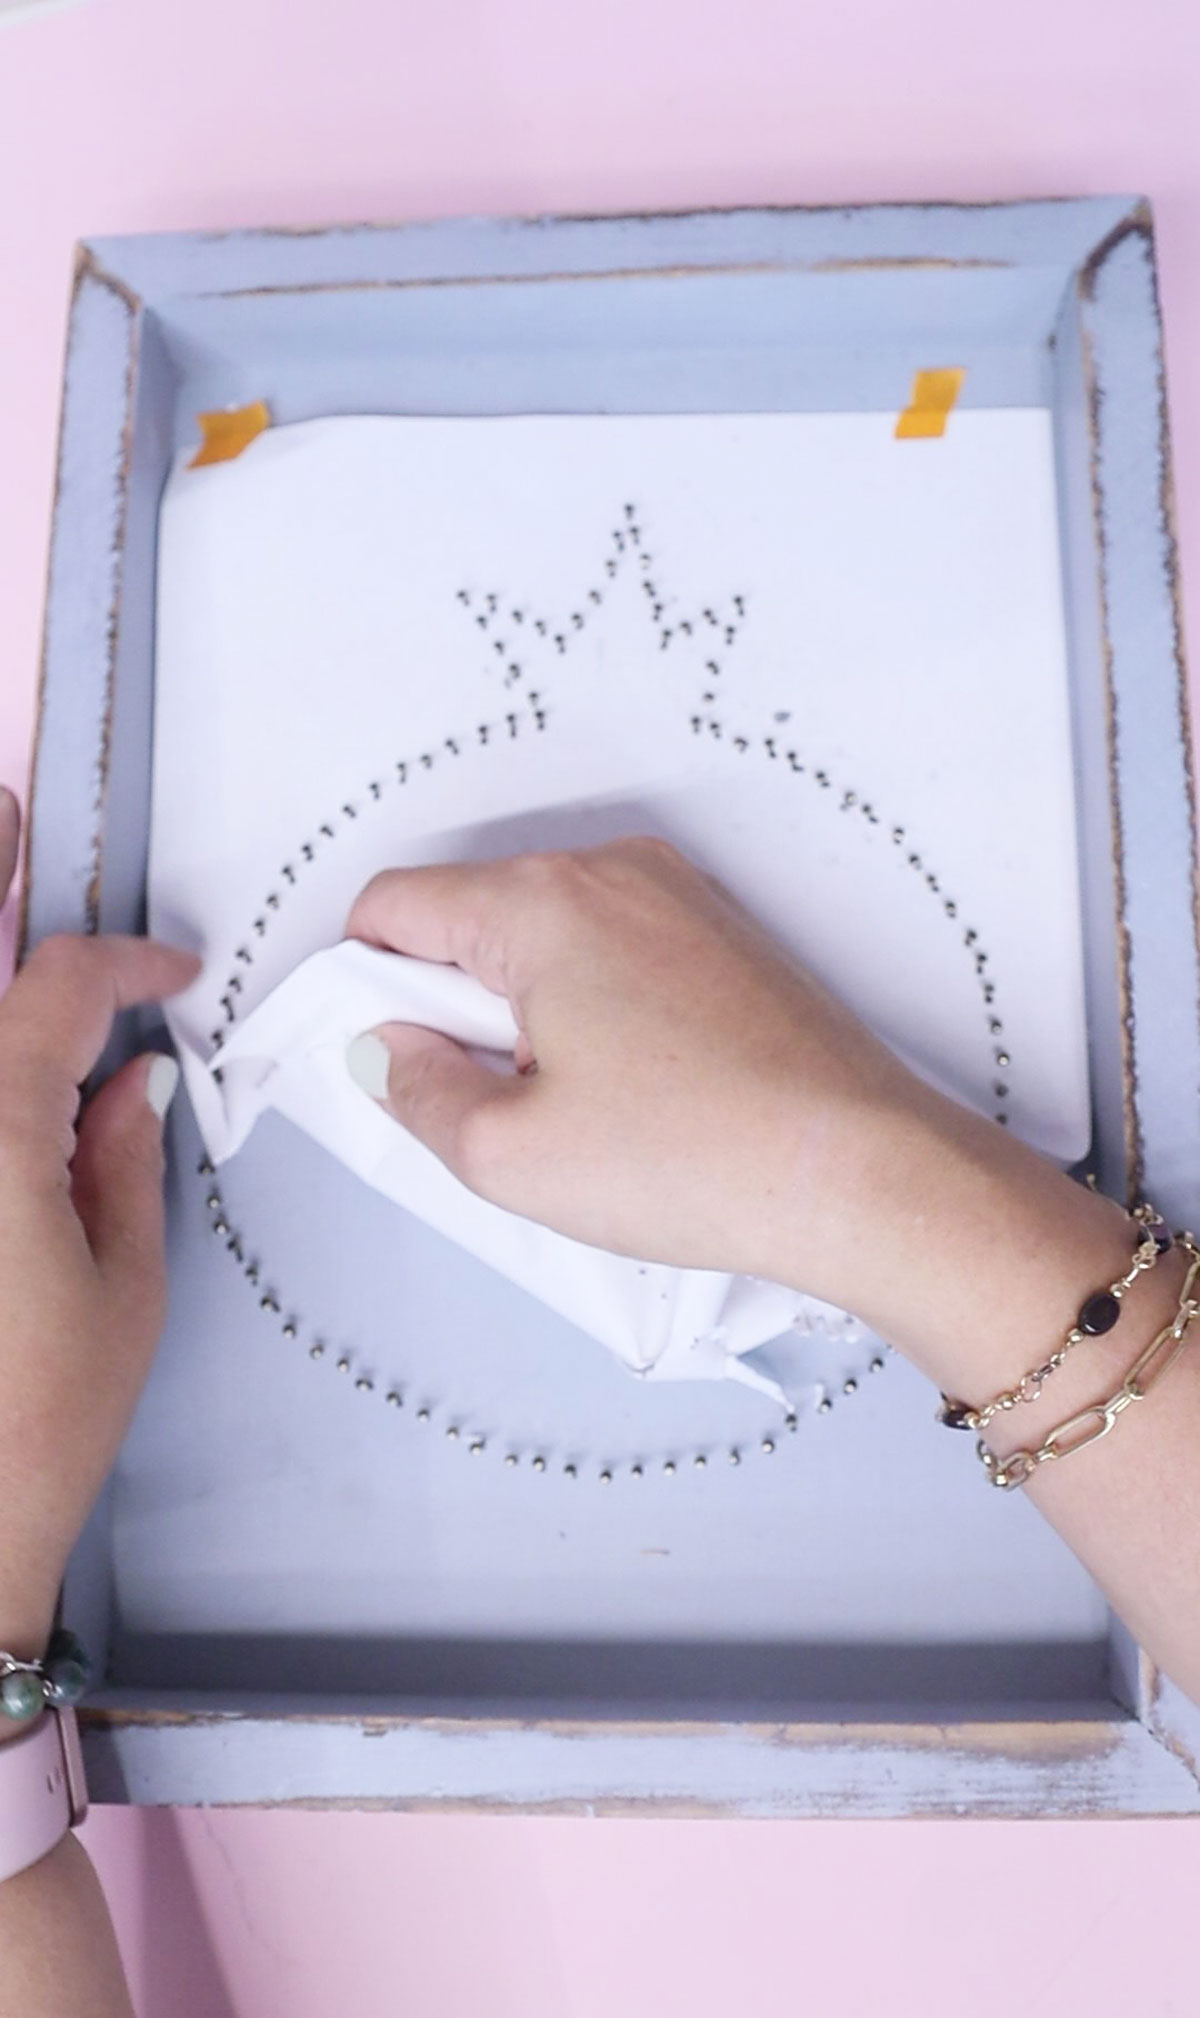
If any do come out, you should have a mark there and you can replace them – a little deeper this time!

8. Now the fun part can begin! Start by tying an open knot at the end of your string and placing it over the first nail.
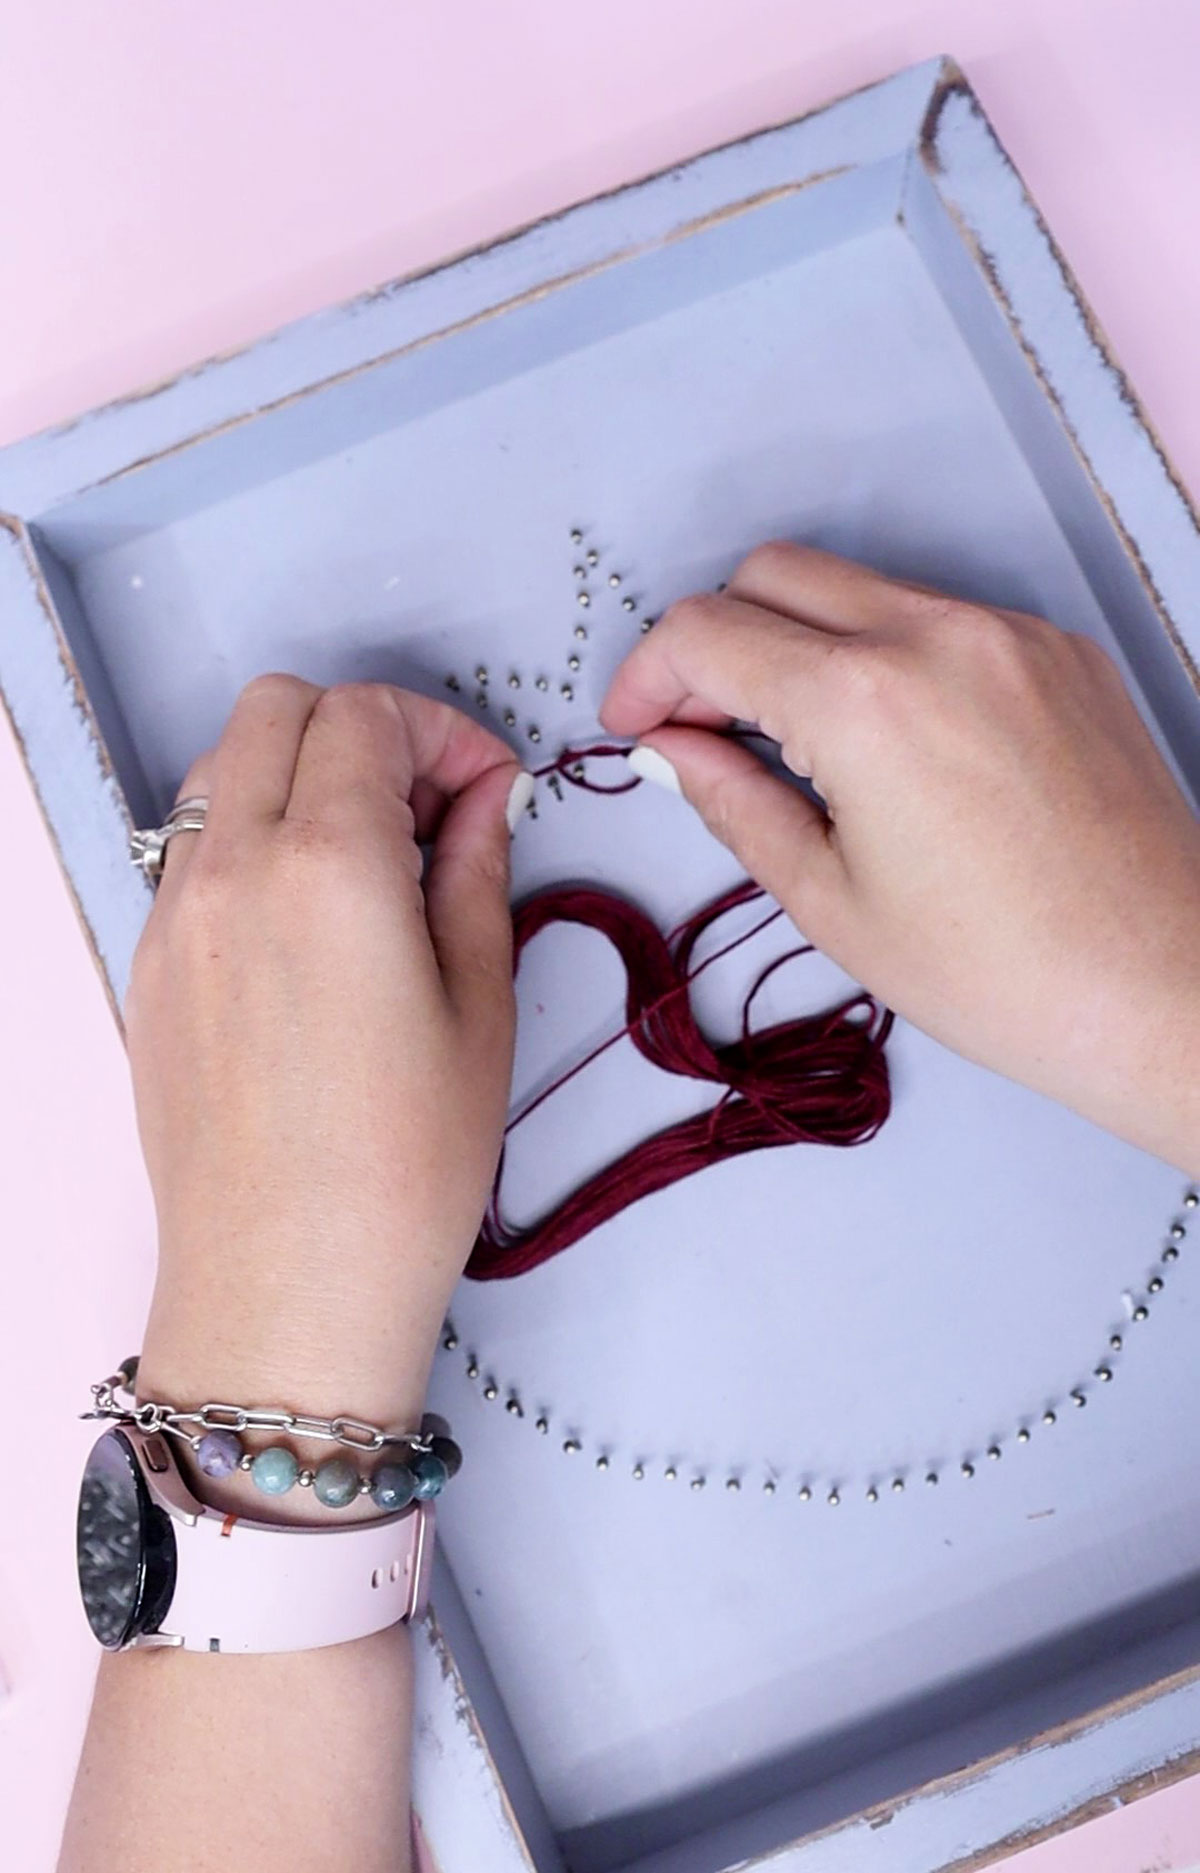
9. Tighten it around that nail.
10. Knot again to form a double knot.
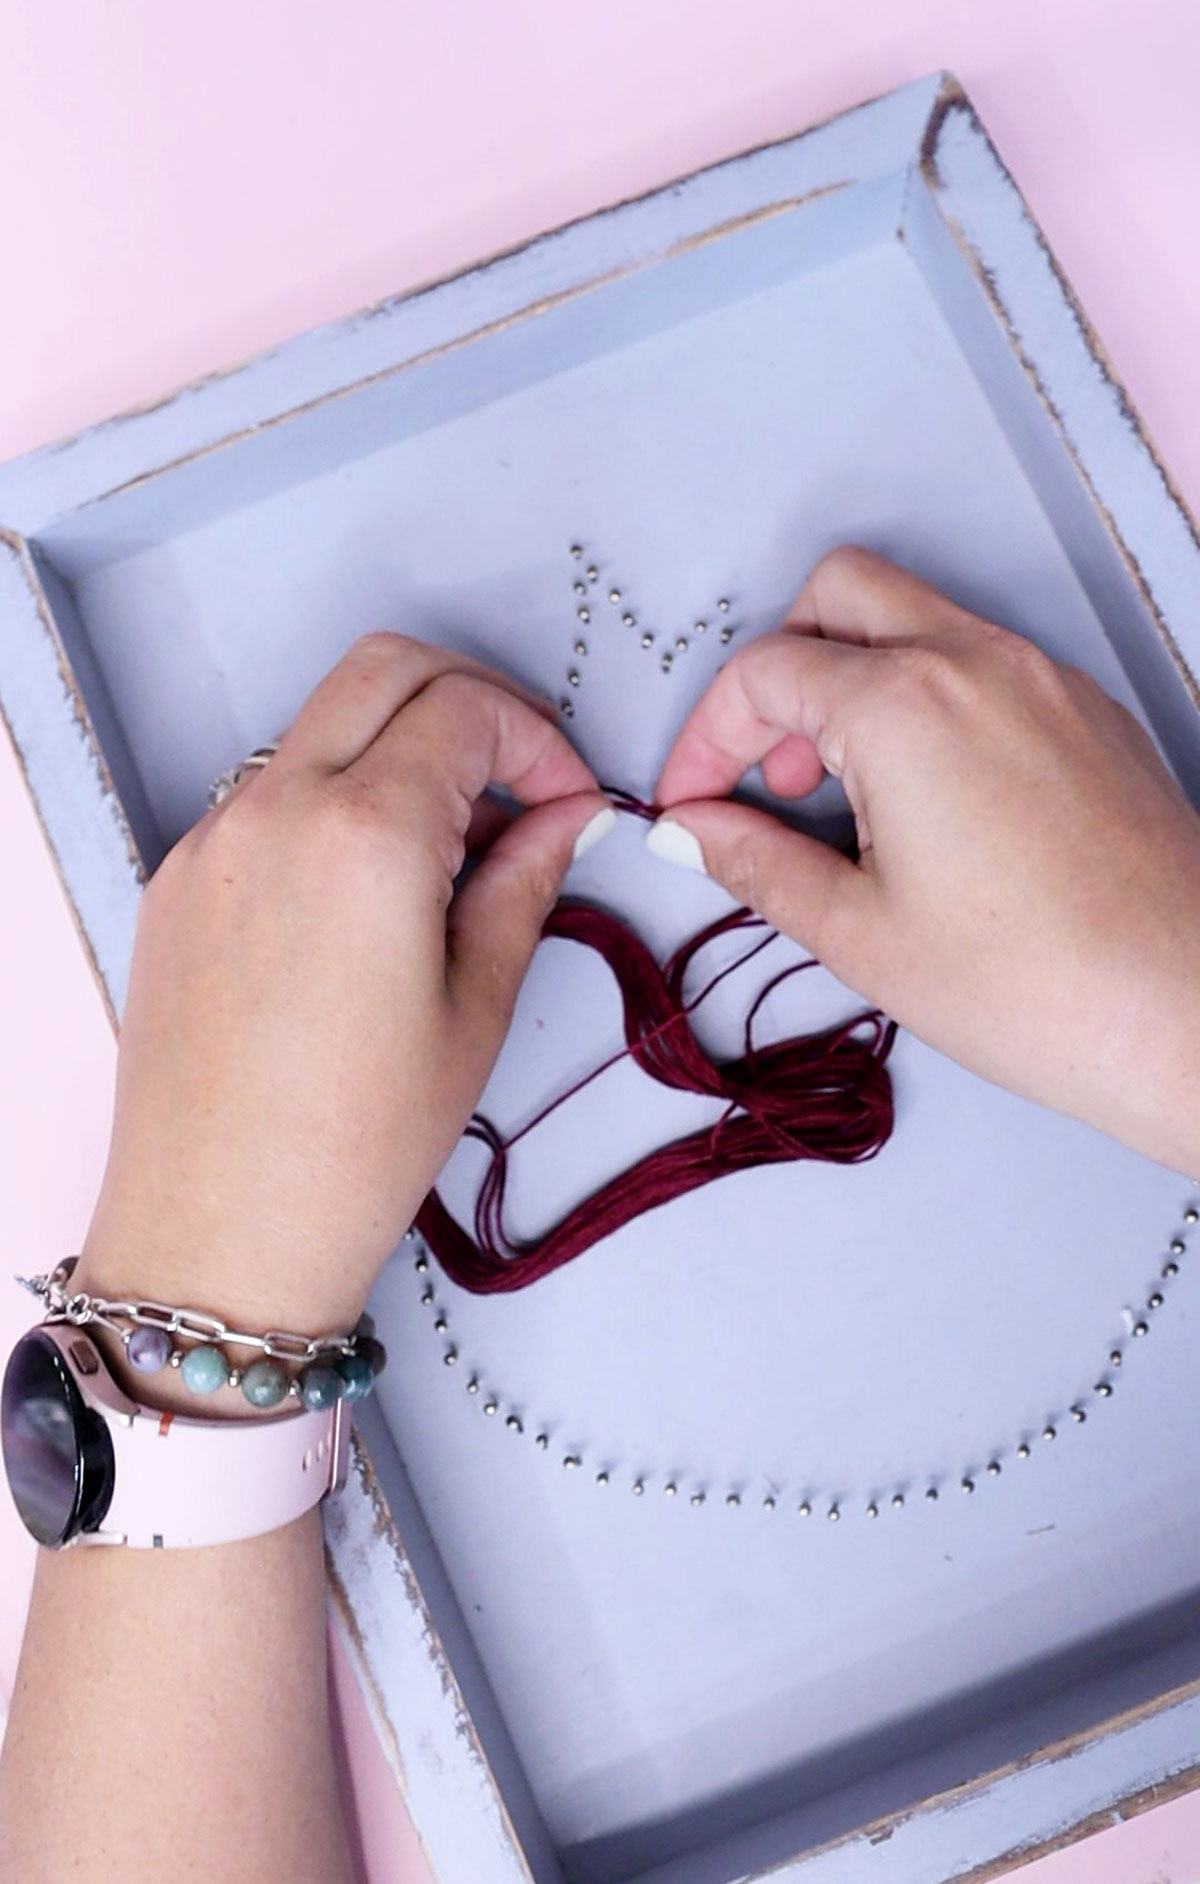
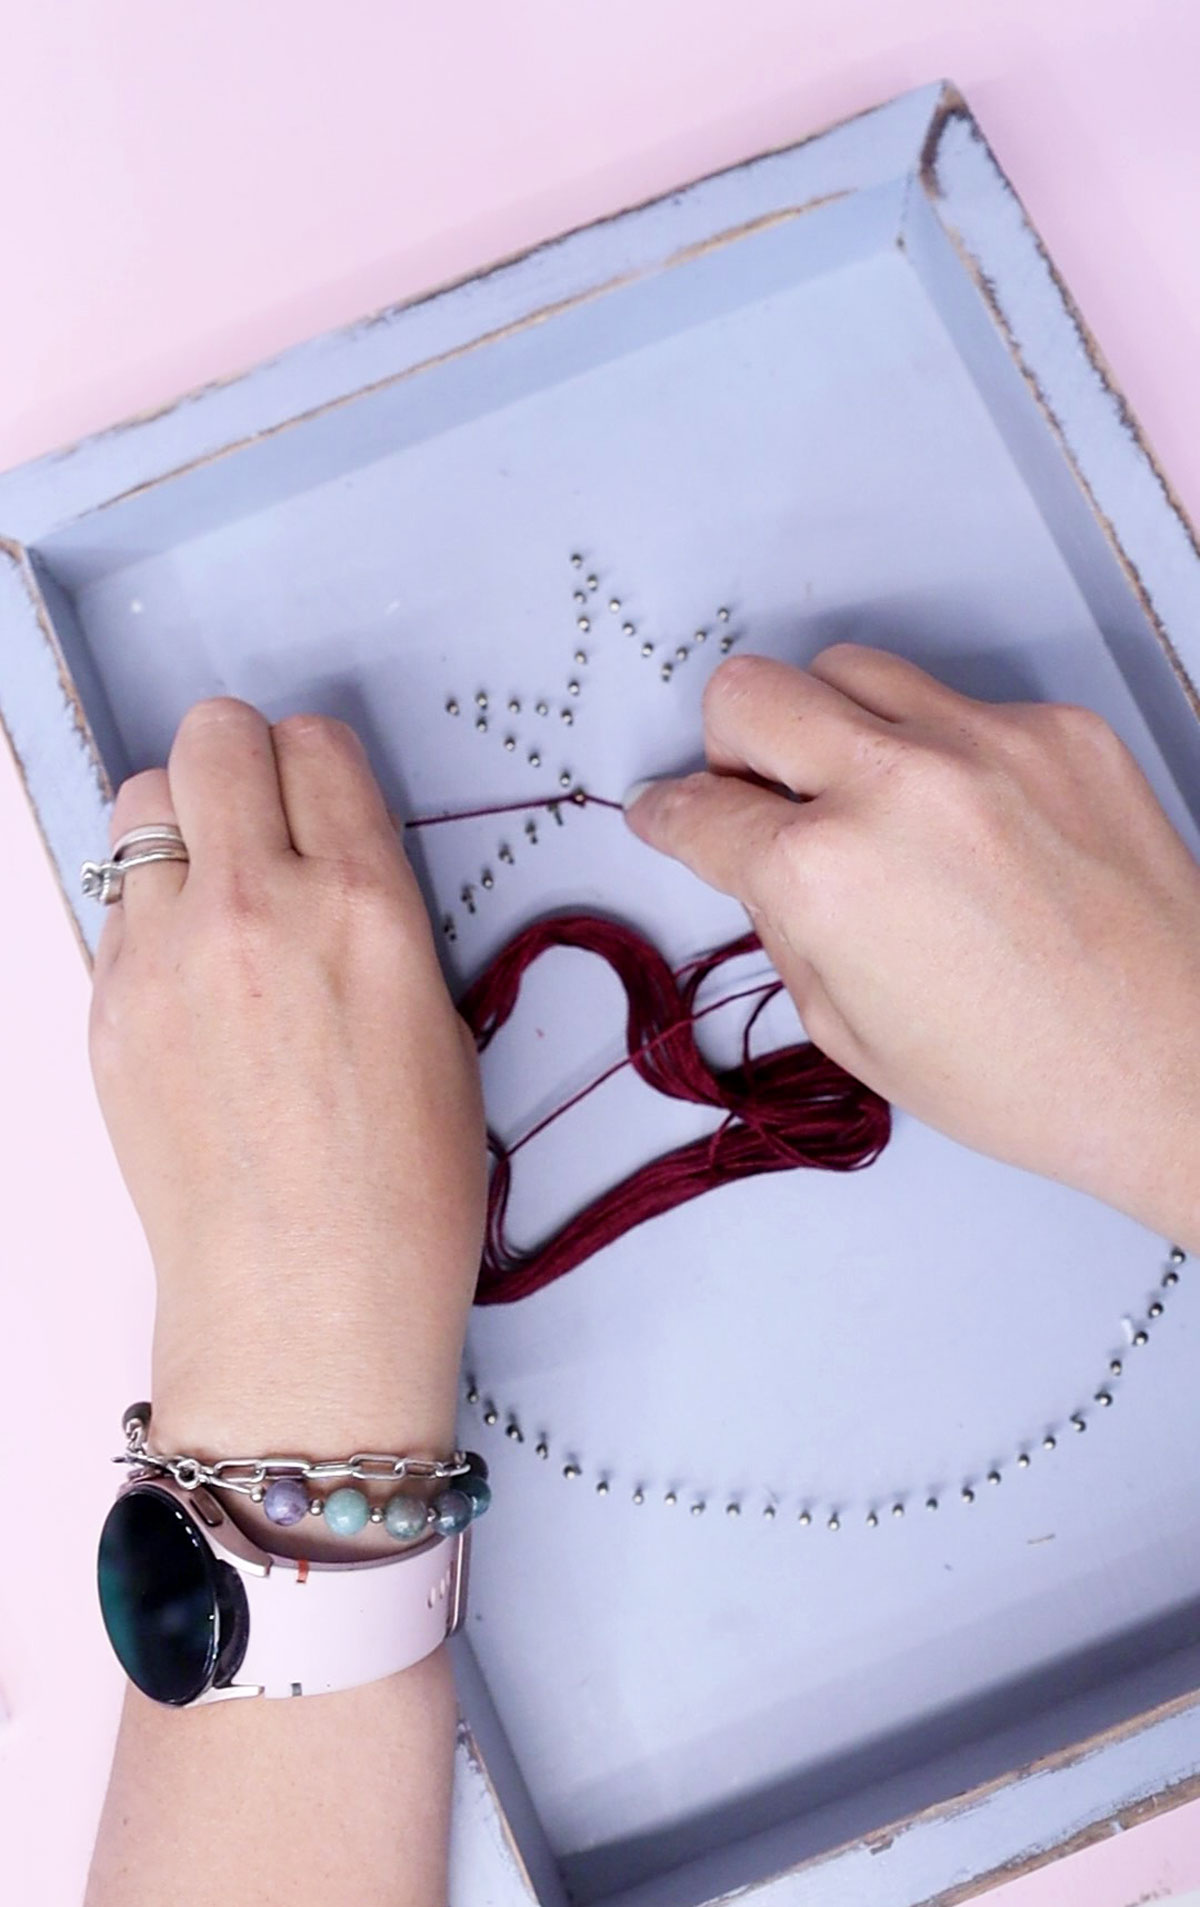
11. Start wrapping around the perimeter of your string art pomegranate. Go once or twice FULLY around each nail for security and then move on to the next.
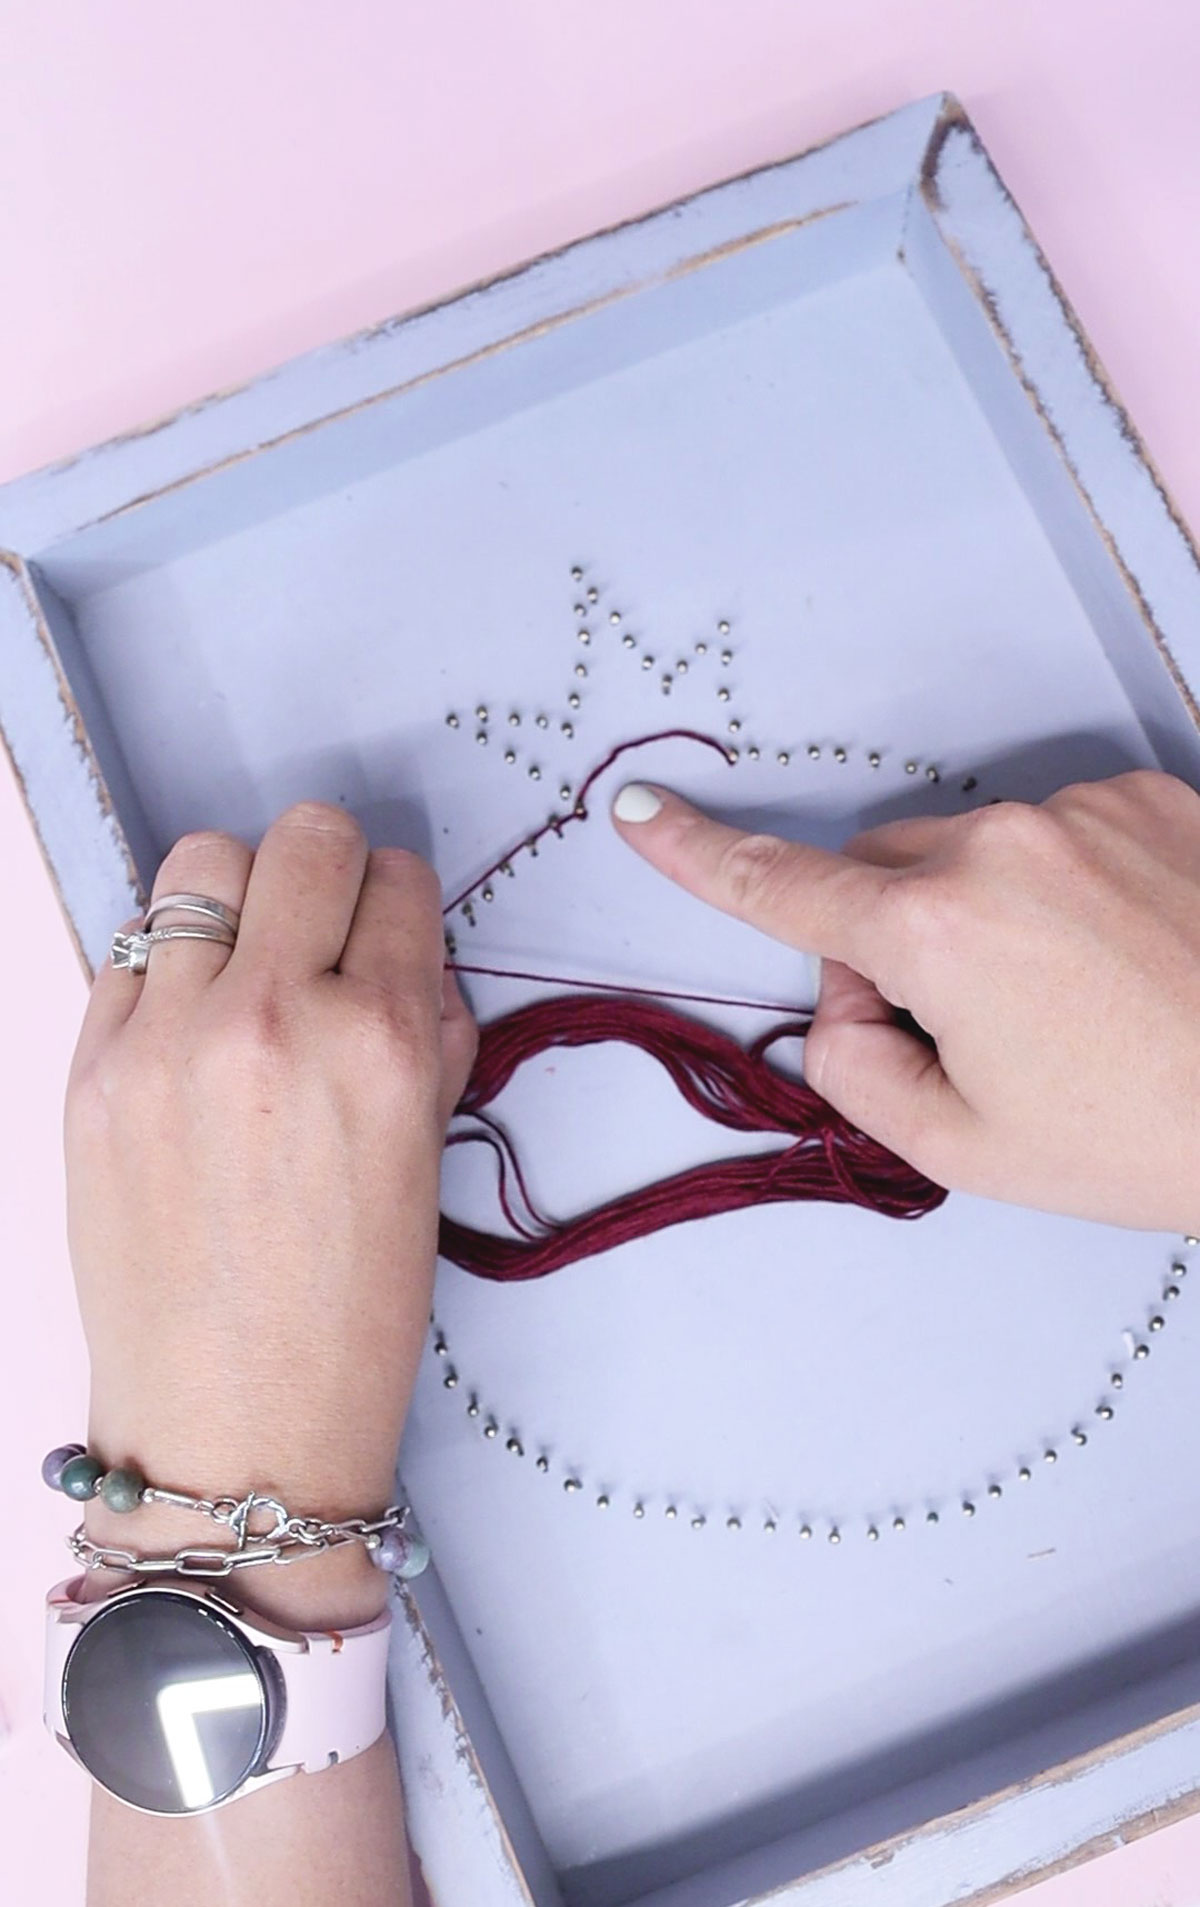
Keep pulling the string taught as you go along to avoid it popping right off.
12. If you’re having a bit of trouble in tight areas, use the pliers to hold it down between the previous two nails as you string up the next.
13. Keep on going all the way around the edge to define your shape.
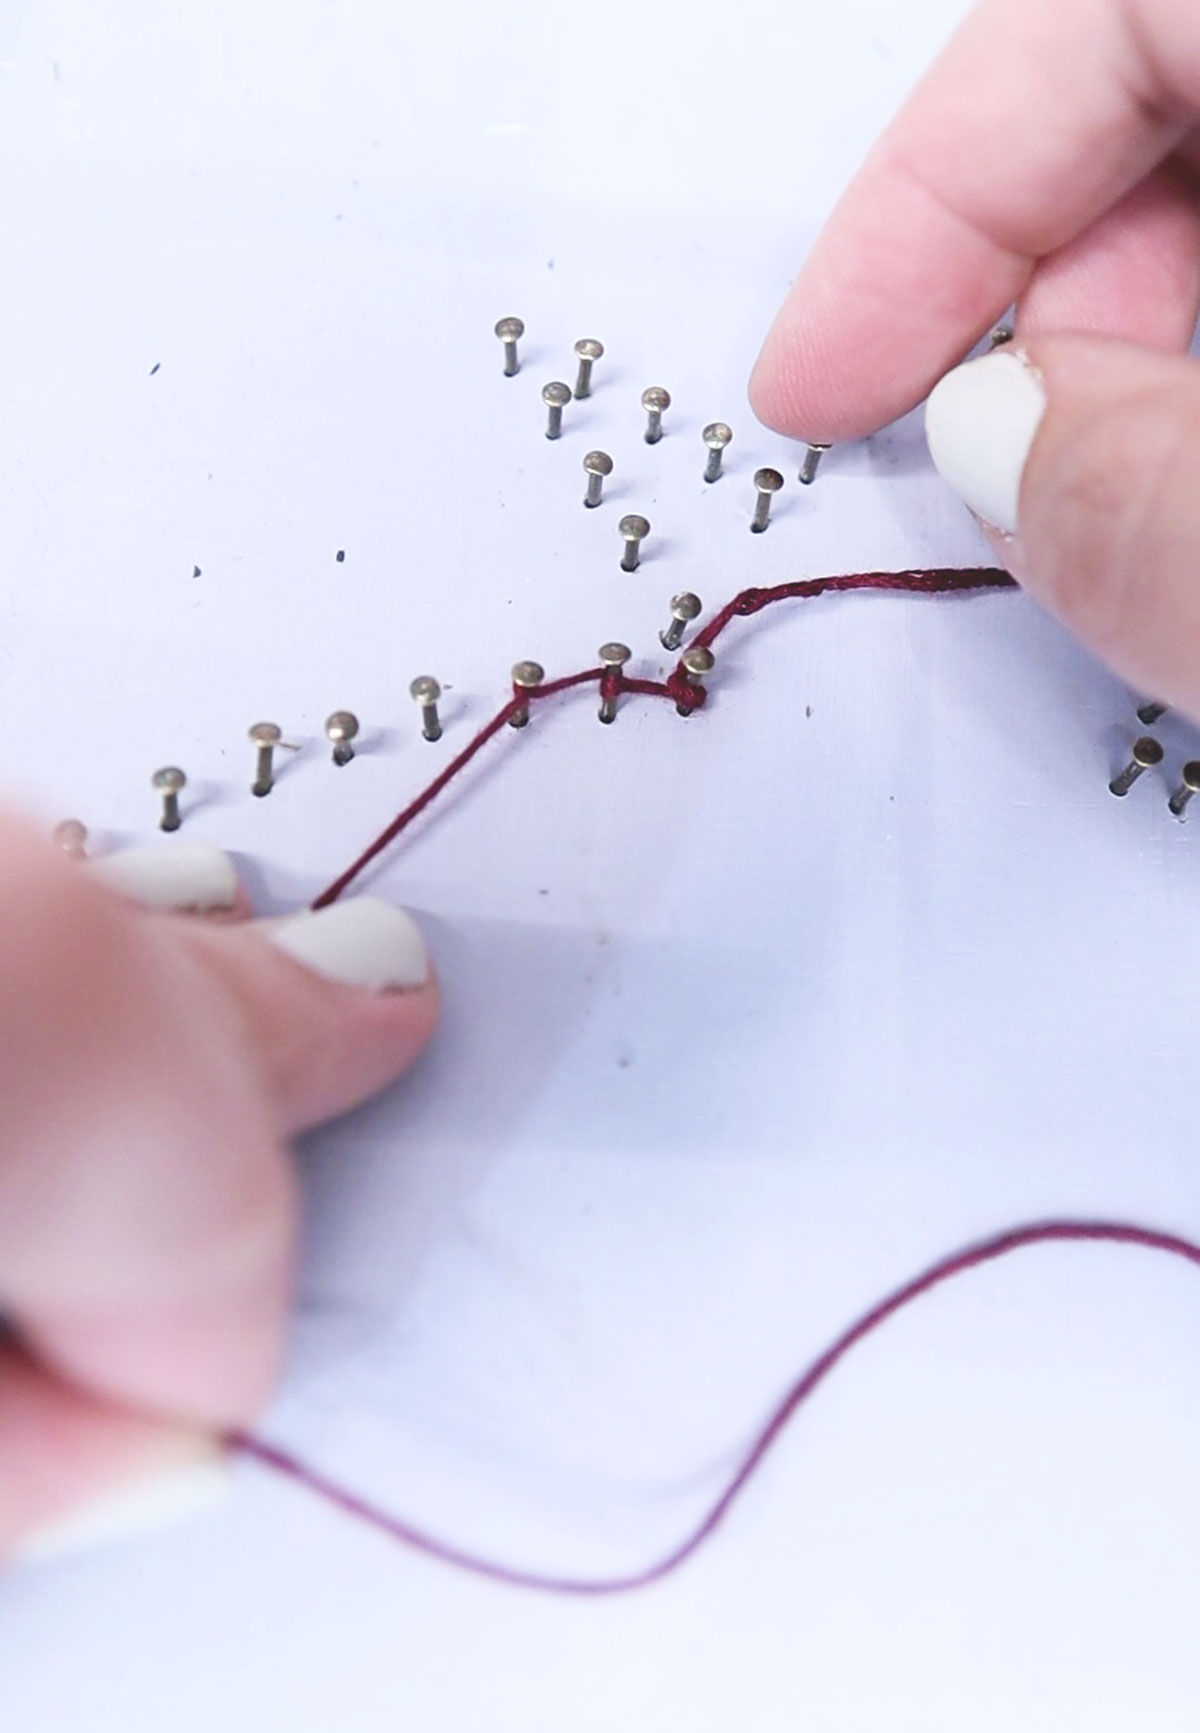
14. Now, start crisscrossing within your design to “fill it in”! Keep it within the design and don’t go between two nails on the outside of the crown.
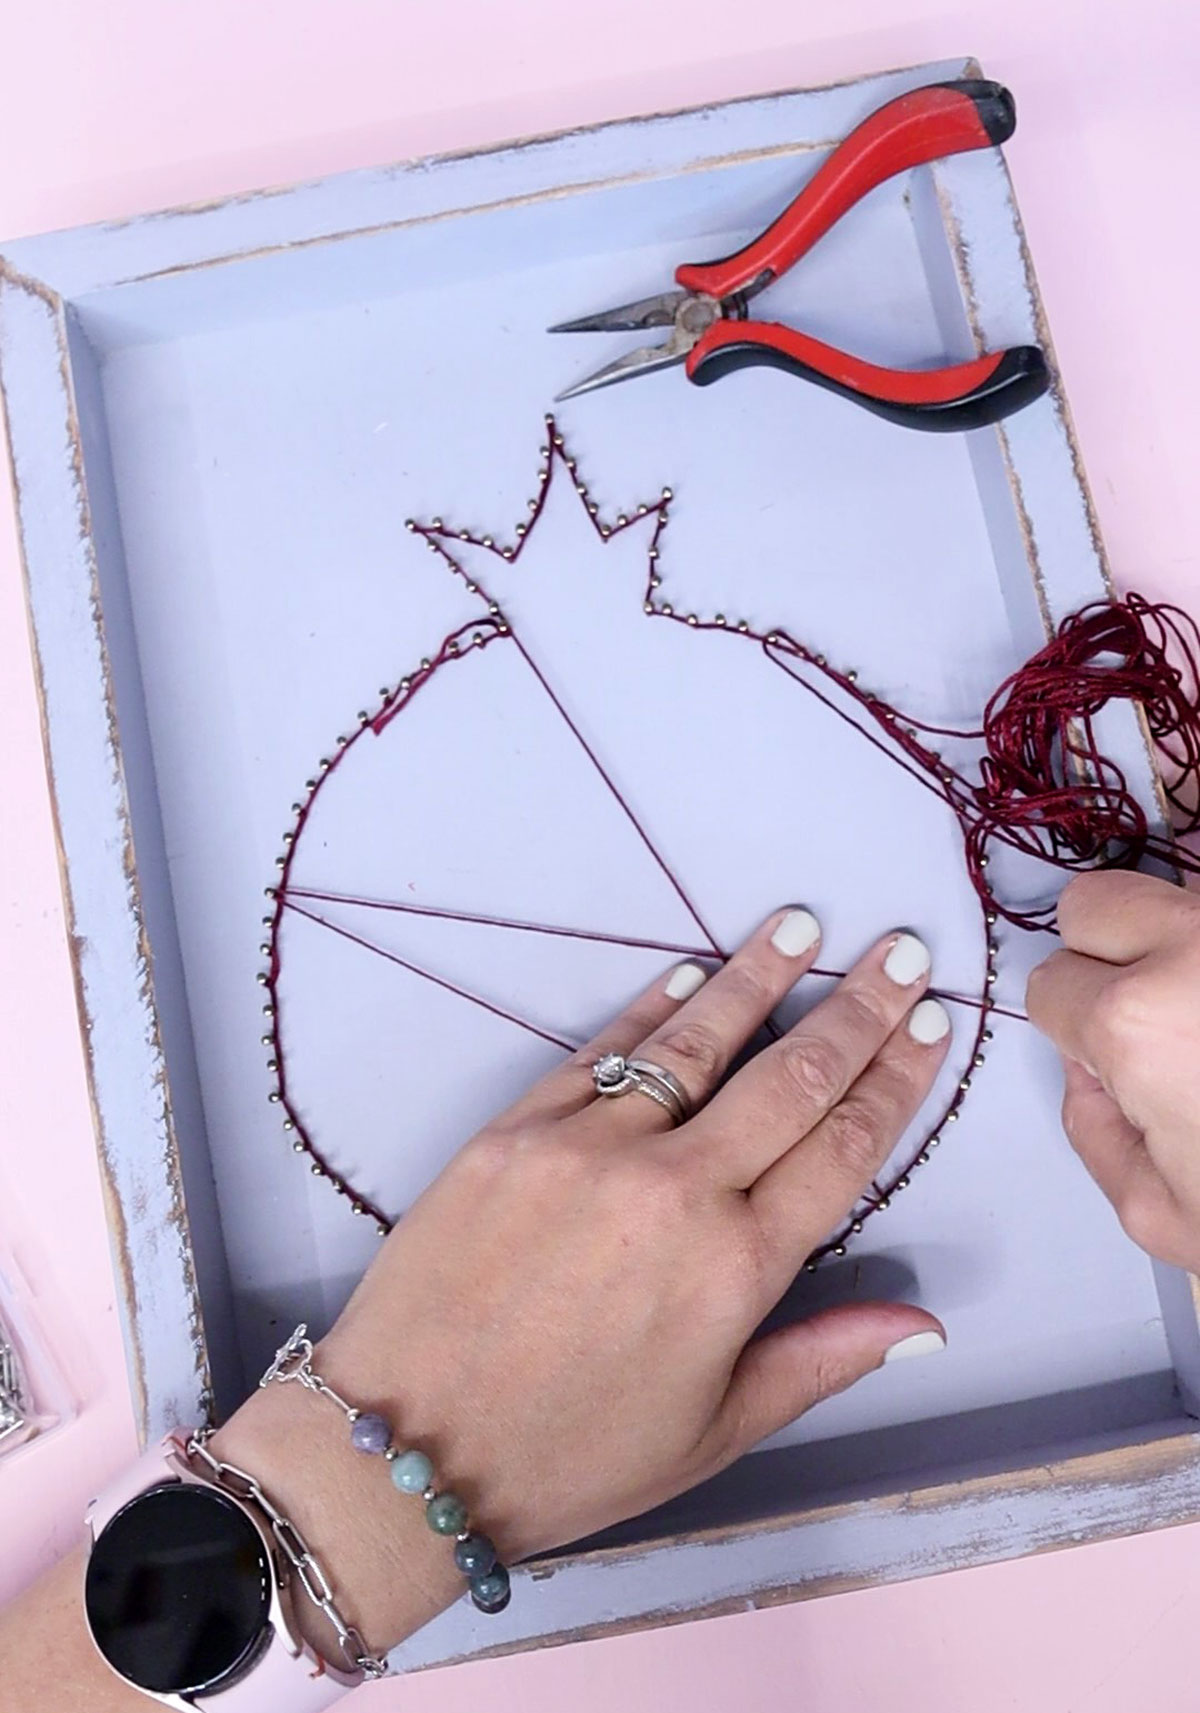
15. You’re wrapping at random the same way – once or twice fully around each nail so it holds.
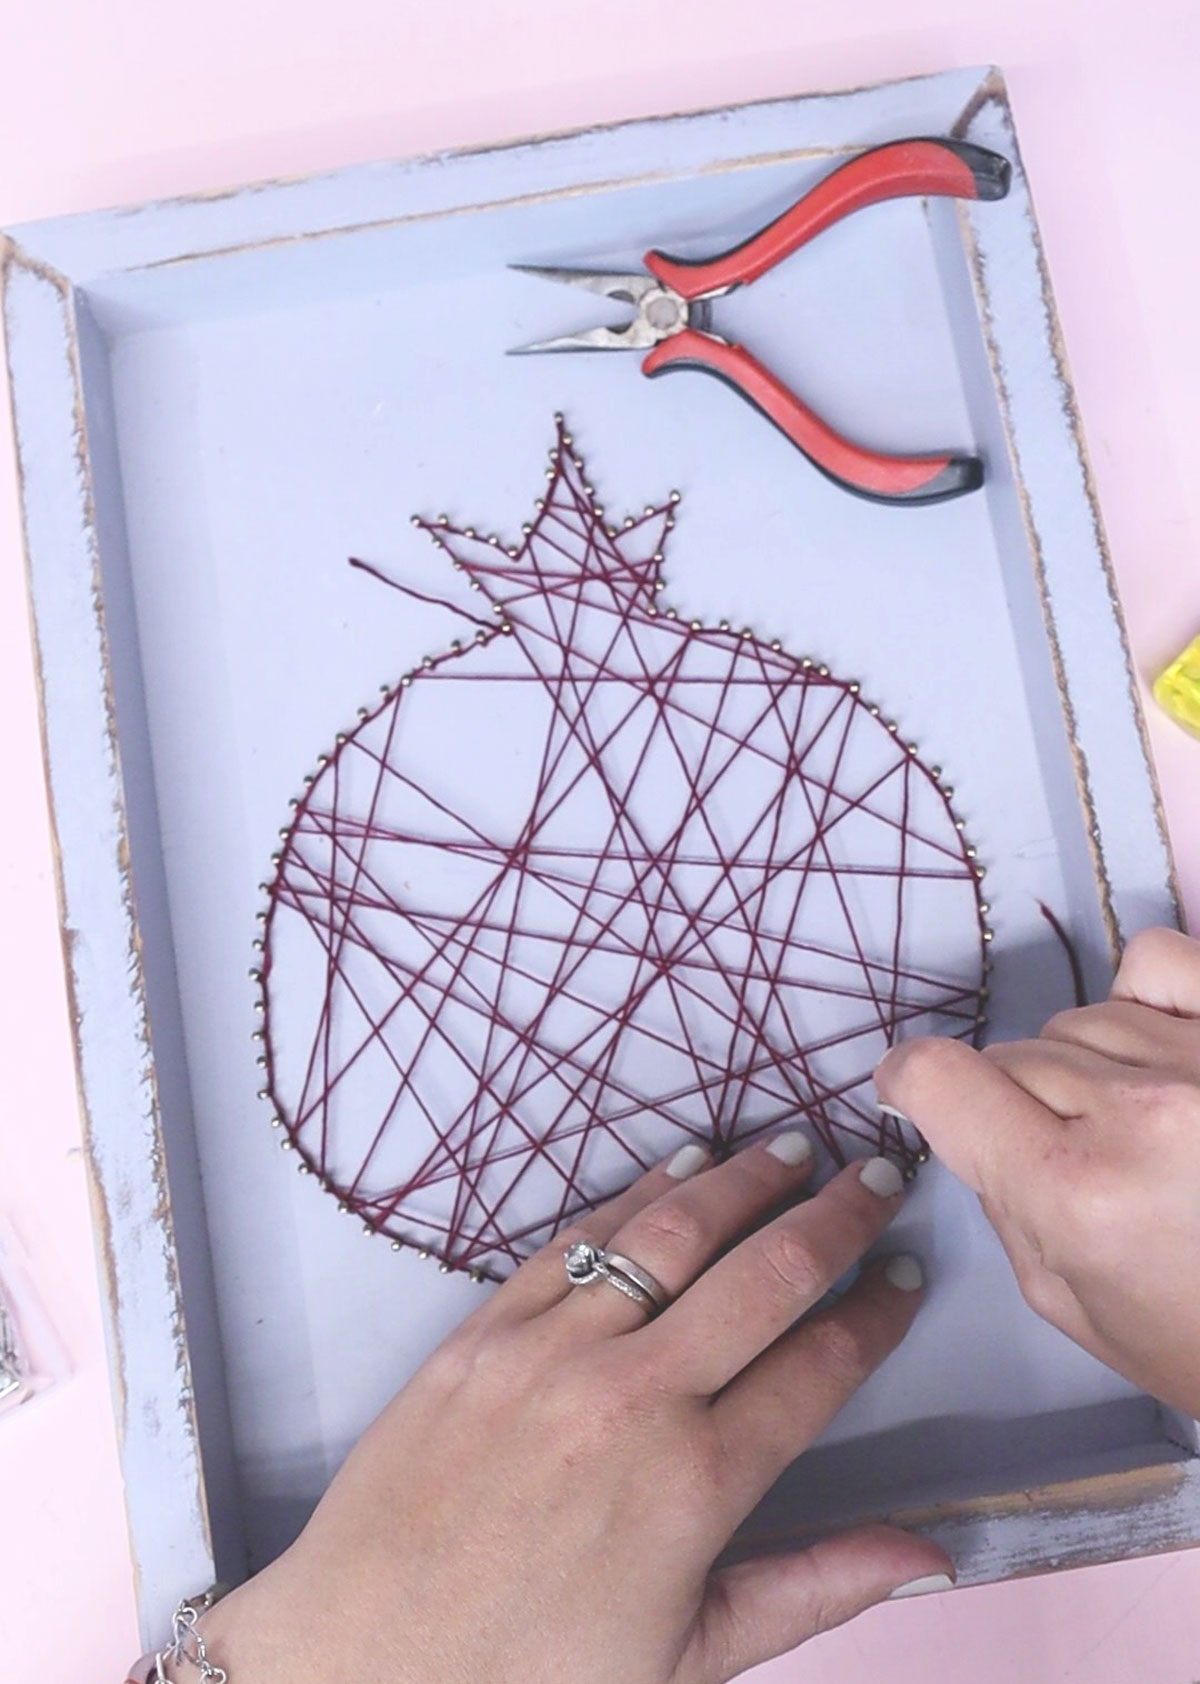
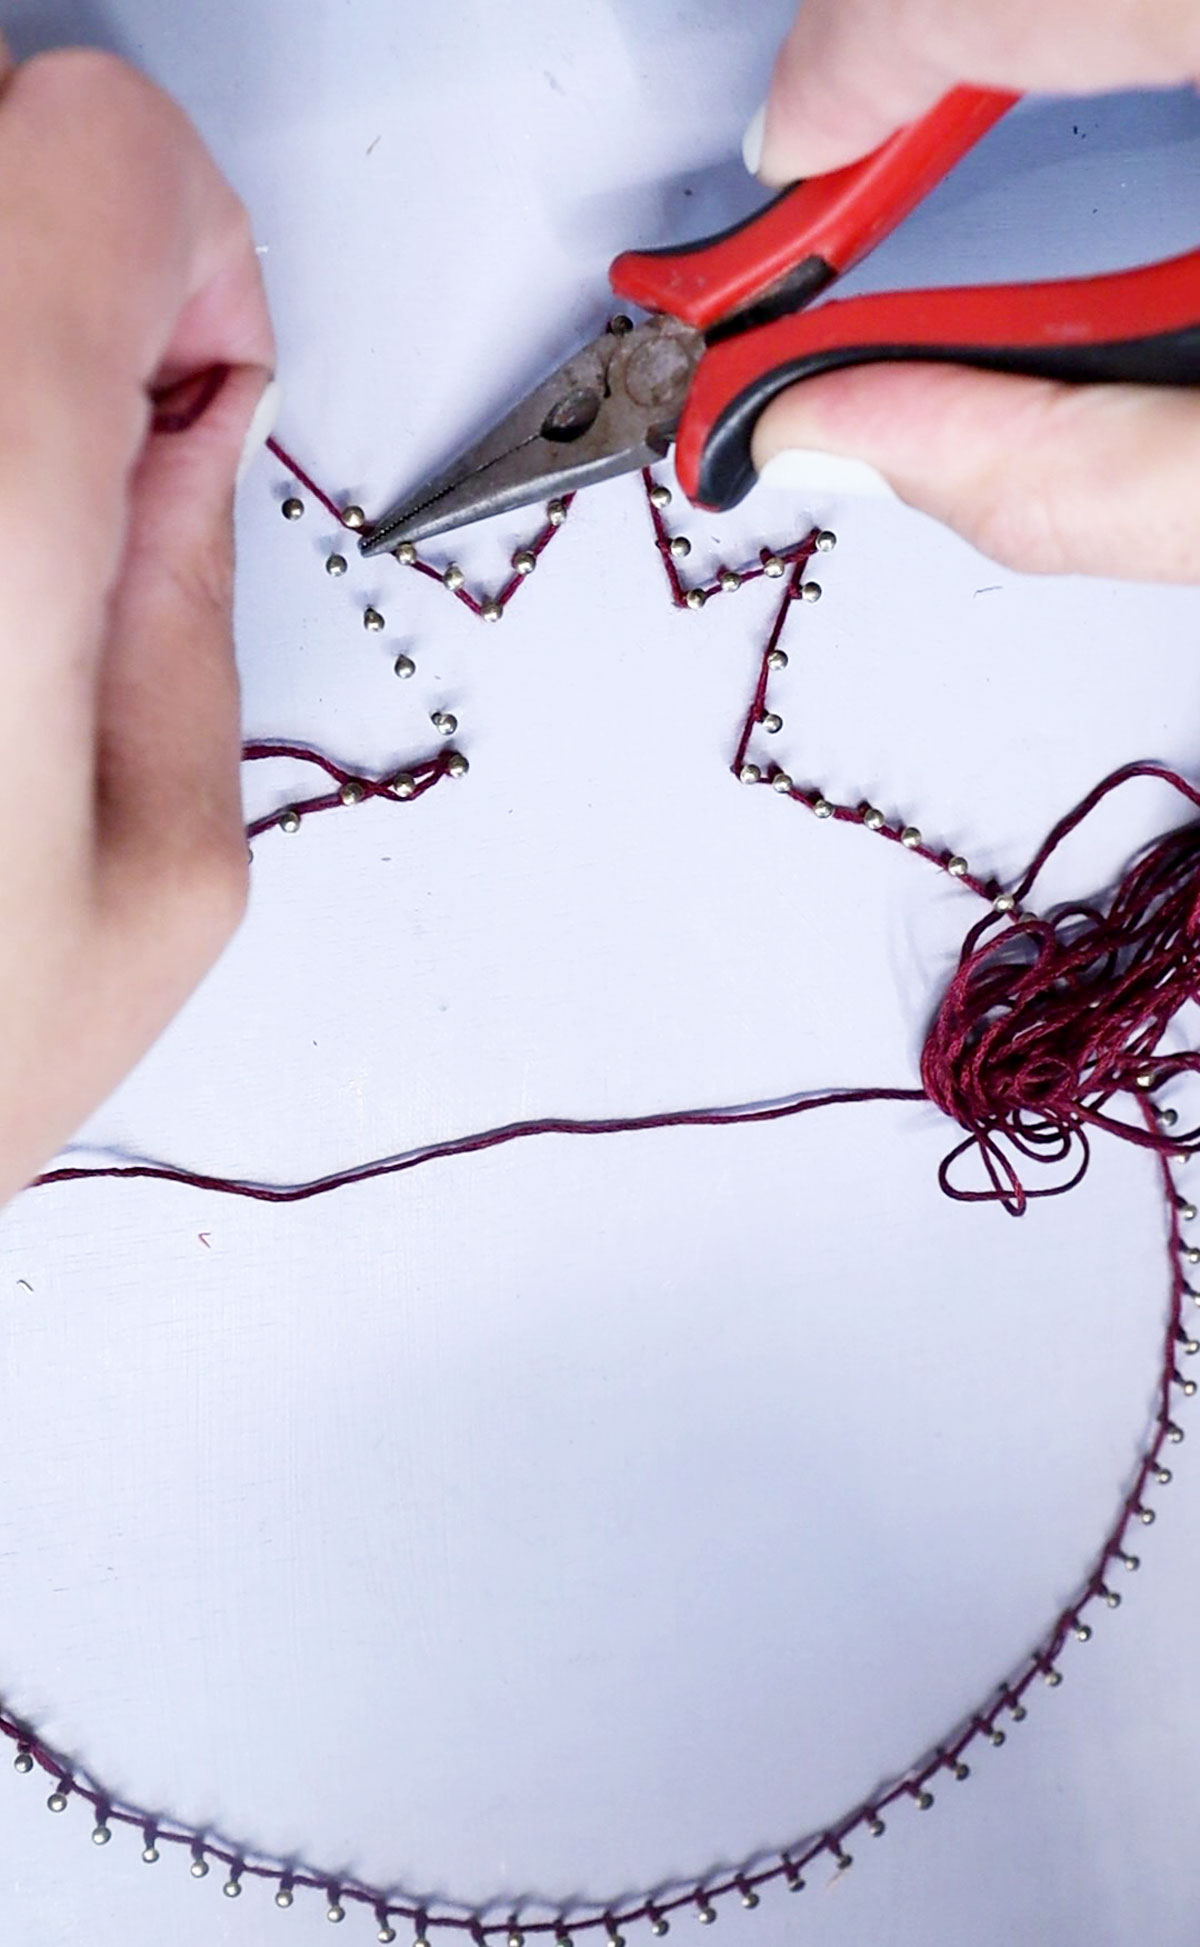
16. You can switch threads in the middle if you run out or want to change colors. Just triple tie the string around your final nail, glue the knot, and trim it (I recommend trimming with a one-inch tail until the glue dries – you can trim it later).
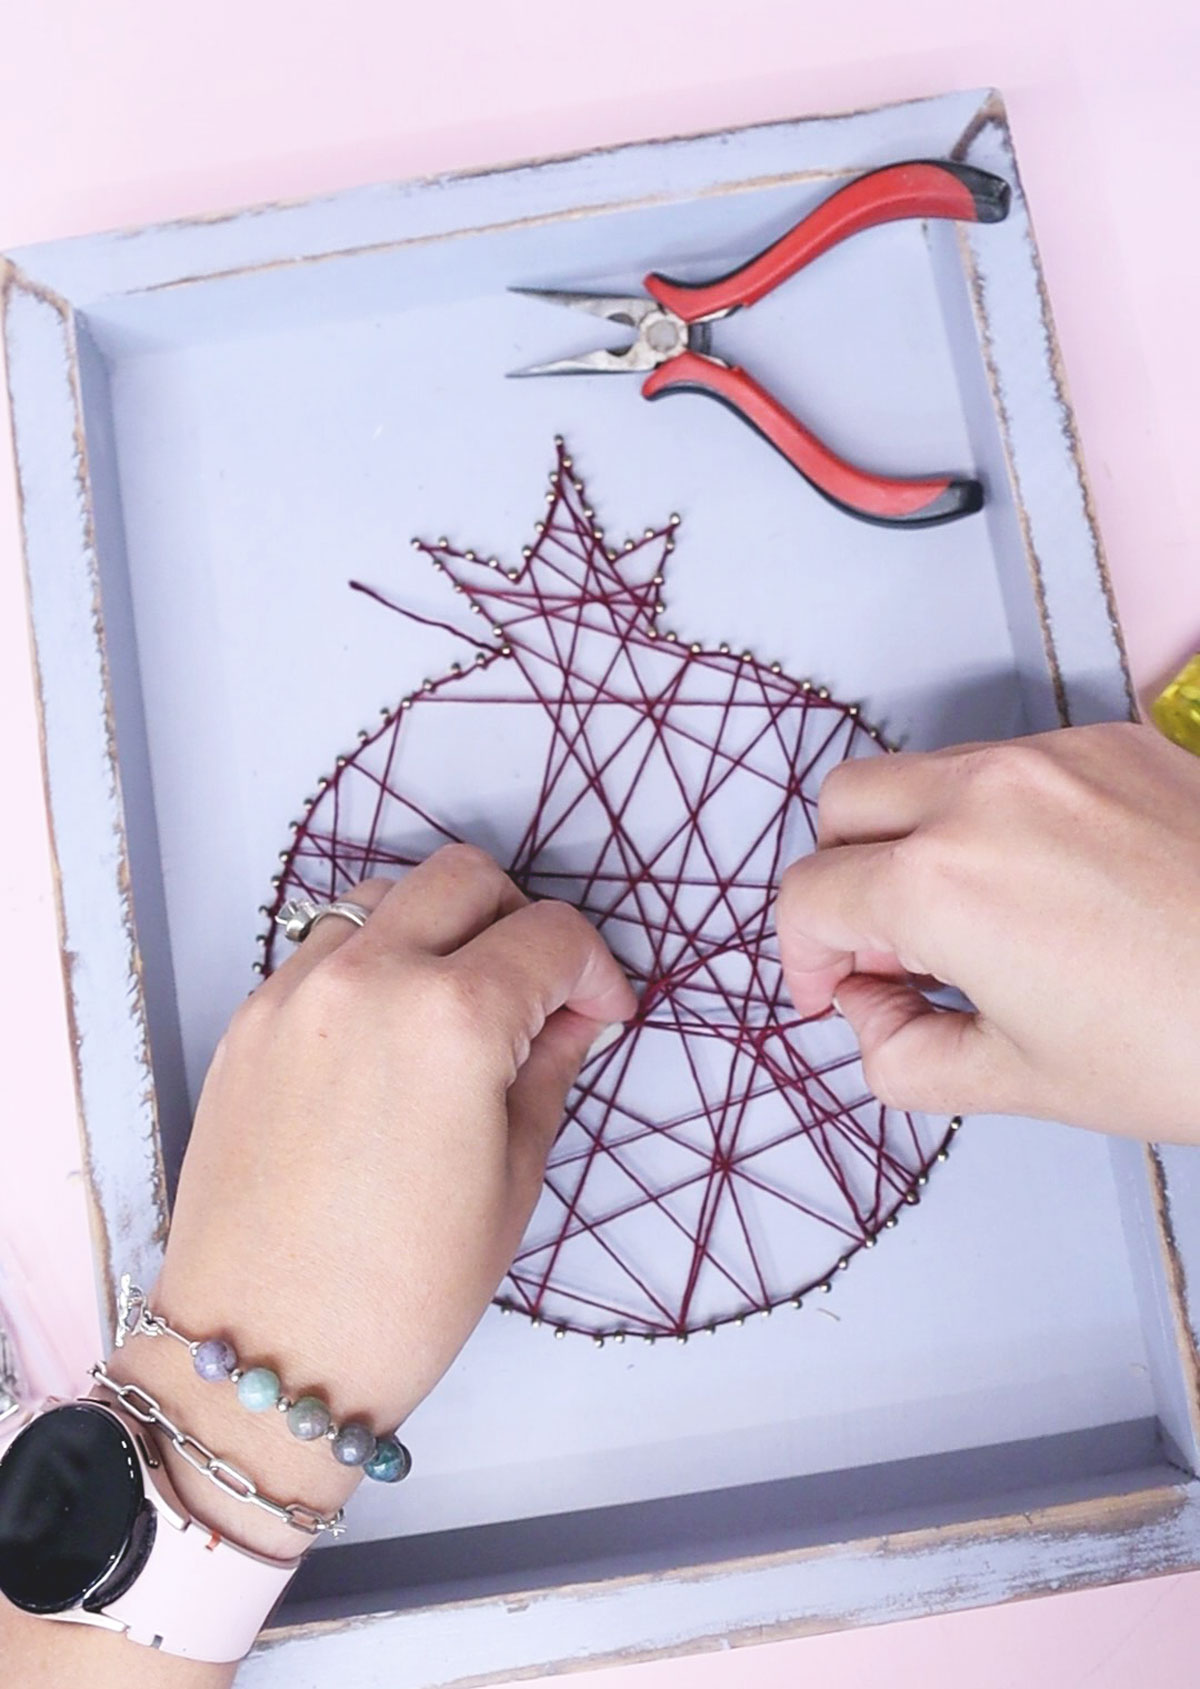
Start the next color like you did the first and keep wrapping until you’re happy with how your string art pomegranate looks!
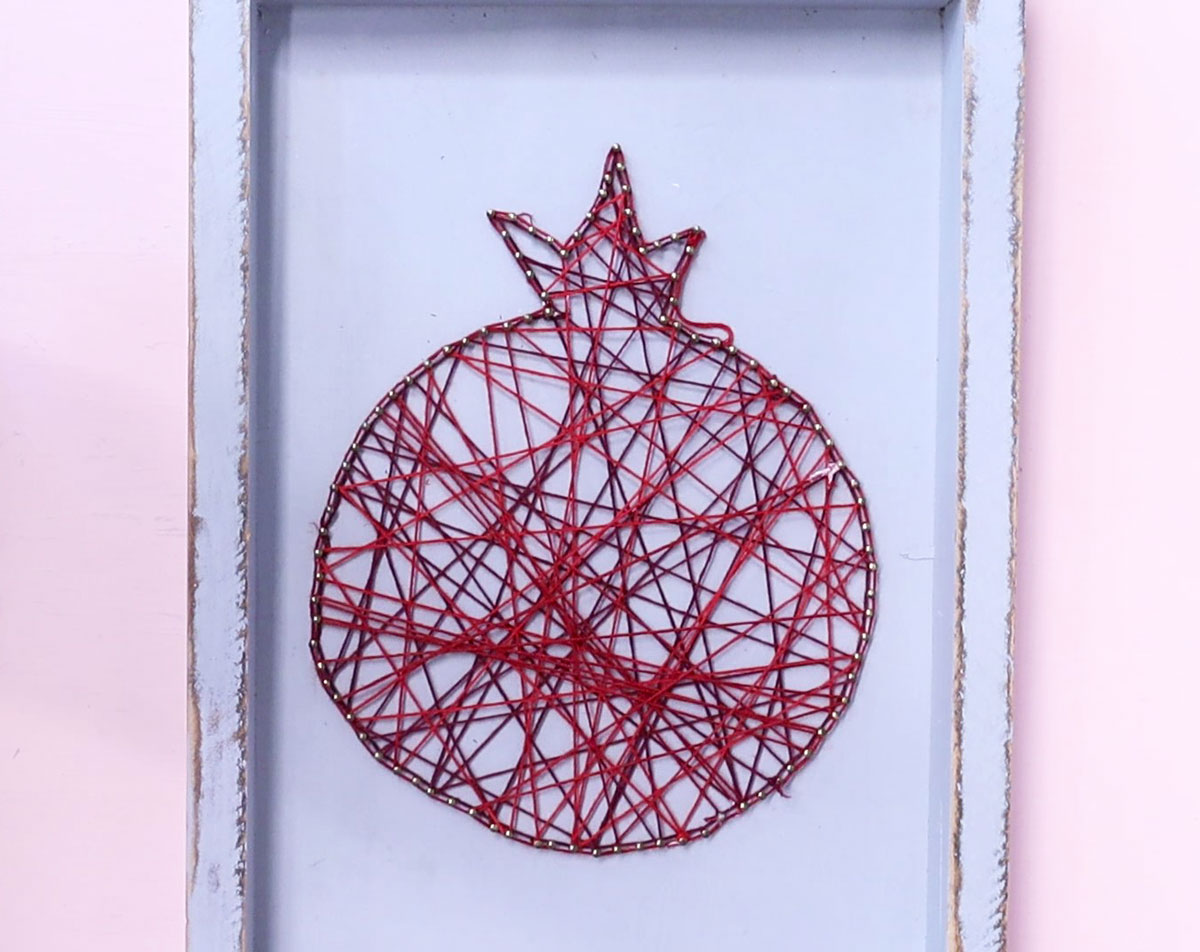
Your string art pomegranate is complete! Where will you be hanging yours? Comment below!
Get the string art pomegranate template
Download your free template! It’ll arrive right in your inbox. By downloading, you’re subscribing to our FREE newsletter with updates on cool printables like this, ideas to simplify Jewish life, and more. Unsubscribe at any time at the bottom my emails. I respect your privacy and the law, and won’t share or sell your email address.