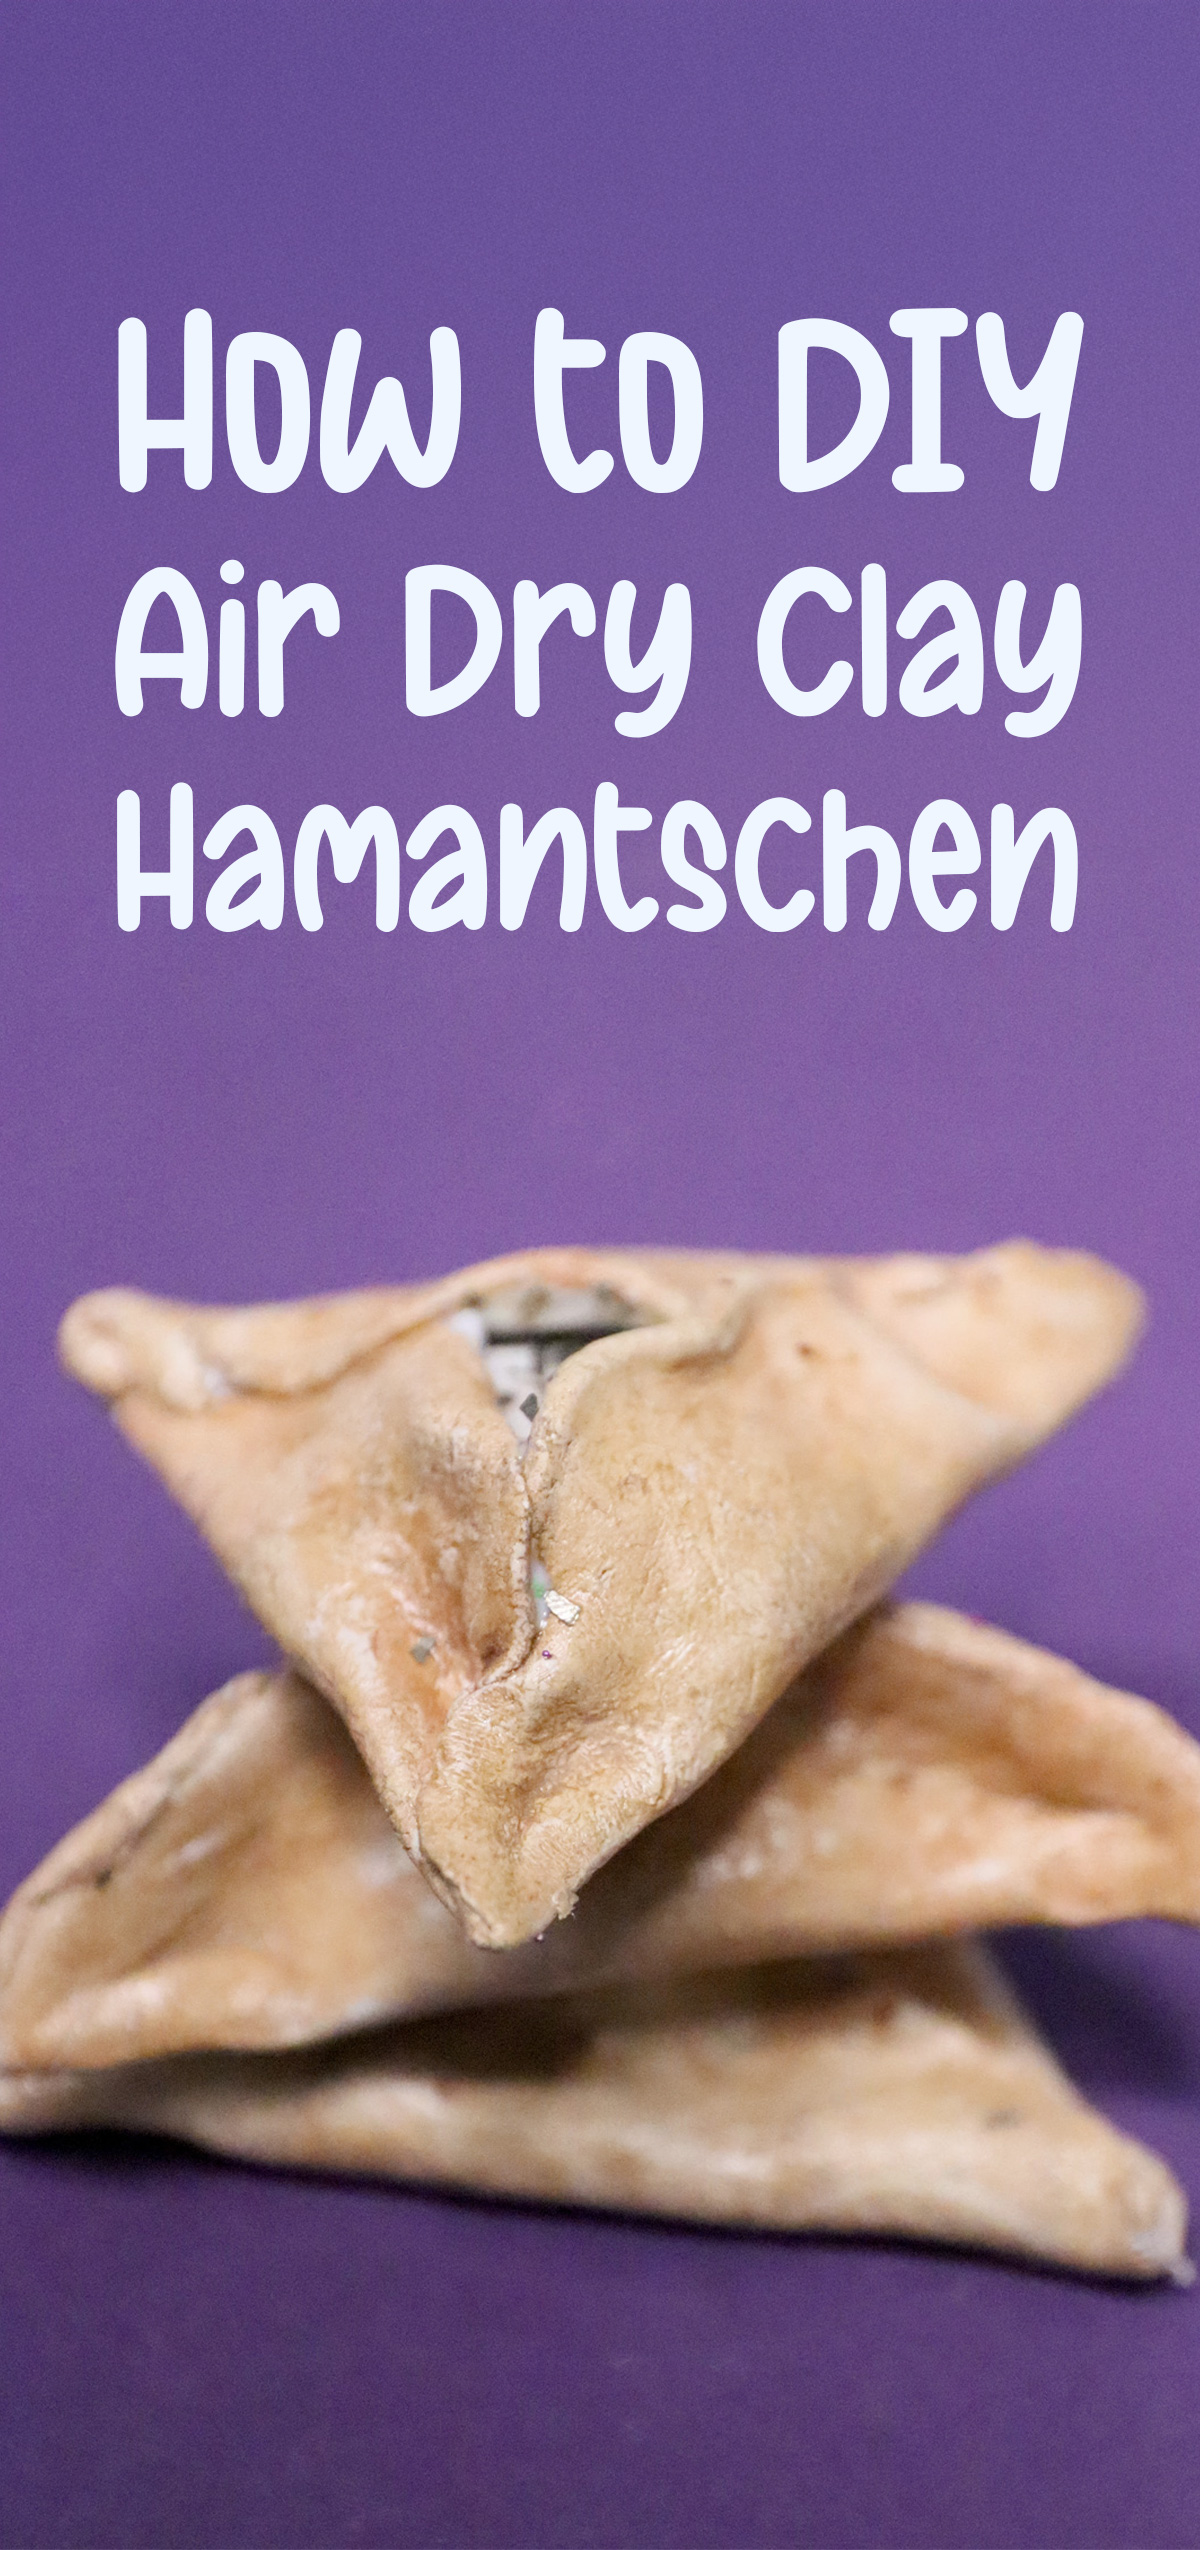
How to Make Clay Hamantaschen from Air Dry Clay
Learn how to make easy air dry clay hamantaschen – perfect for practice or pretend play! When you’re done, try these DIY hamantaschen earrings too. This post contains affiliate links.
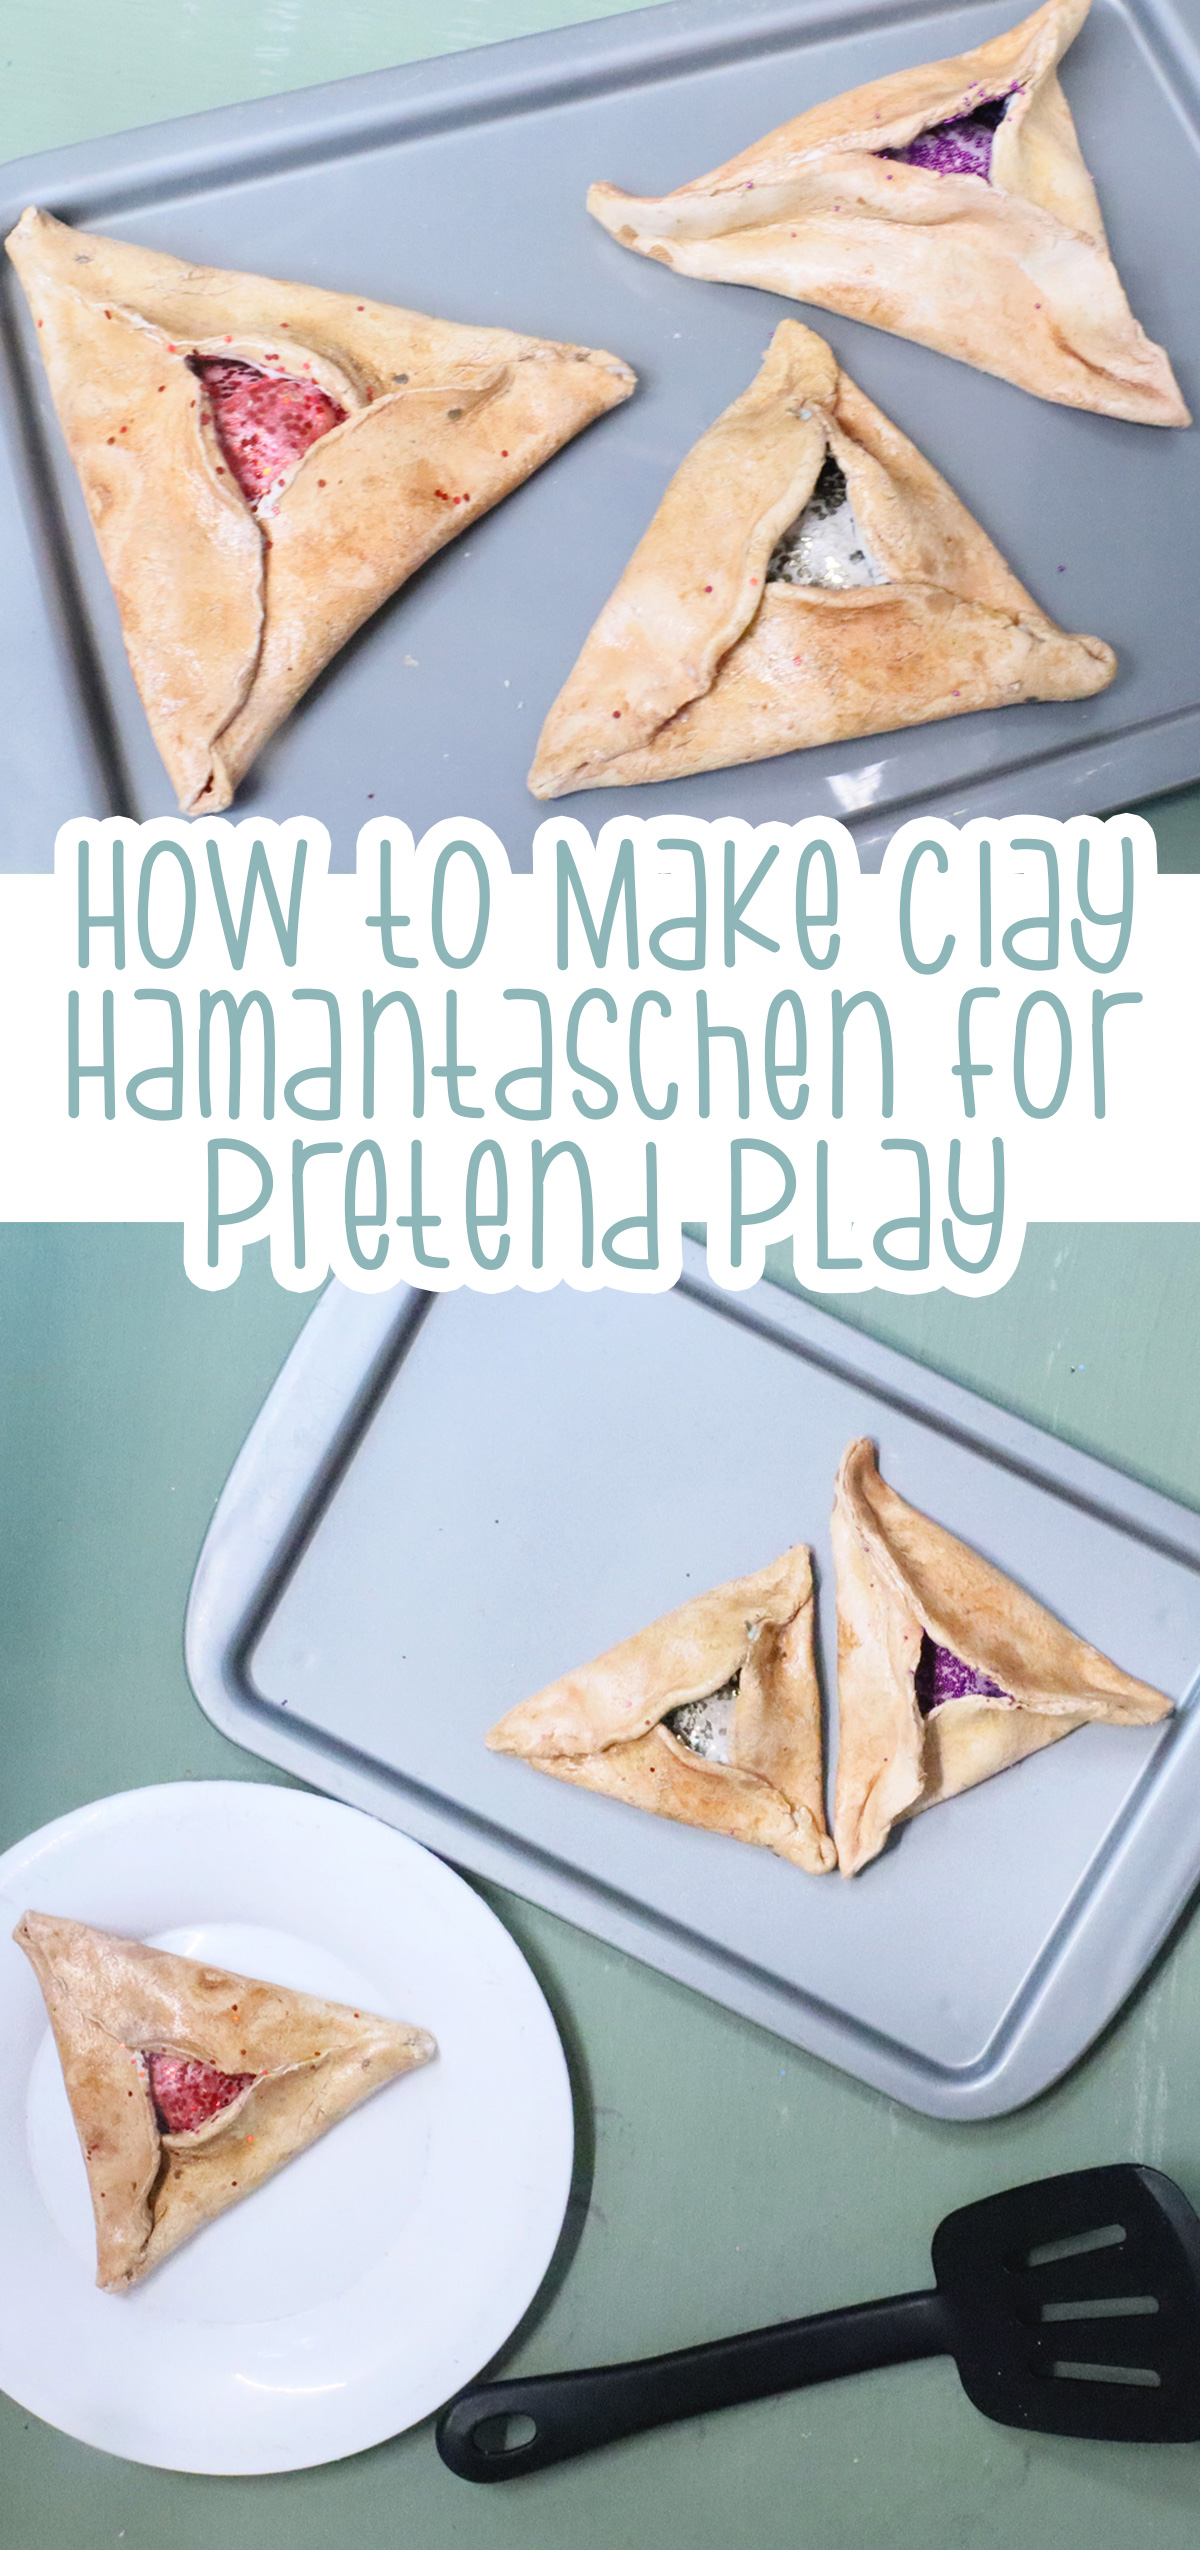
When I was making my triple chocolate hamantaschen a couple of years ago, I realized that it would be so cool to practice on air dry clay! I decided to craft these quite simple clay hamantaschen this year as a fun little Purim craft that’s fabulous for kids and adults.
Adults can make it for little kids to play with, and kids can make it to just have fun and learn the basics of how to make perfect hamantsachen. Well, it won’t quite take them all the way to perfect, but they’ll have fun making it.
The idea is that they can get really hands on and do it “for real” but not on food, and without dealing with messy jelly!
Including DIY Clay Hamantaschen in your Purim prep
I figured before I dive into the clay Hamantaschen tutorial, I’d share with you some ways you can include them in your classroom or home pre-Purim prep.
What to do with them when you’re done
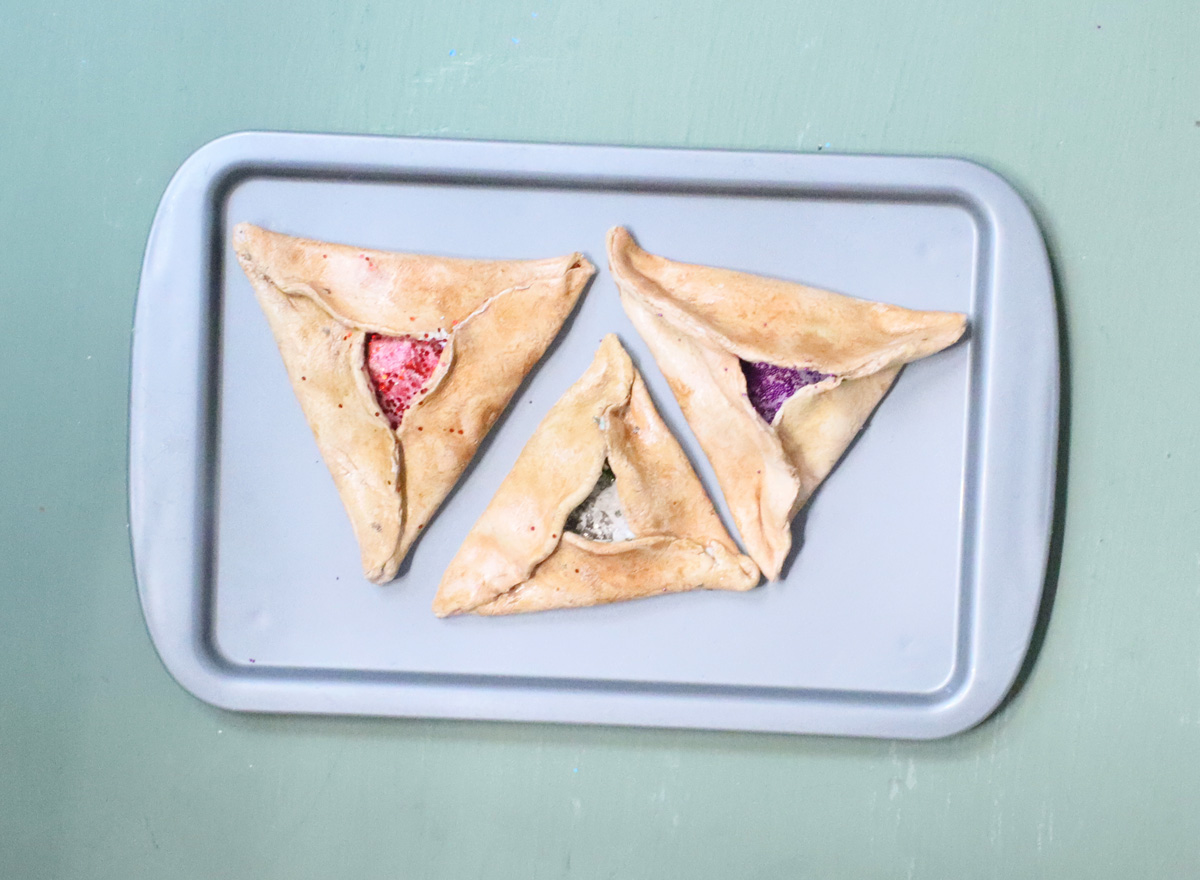
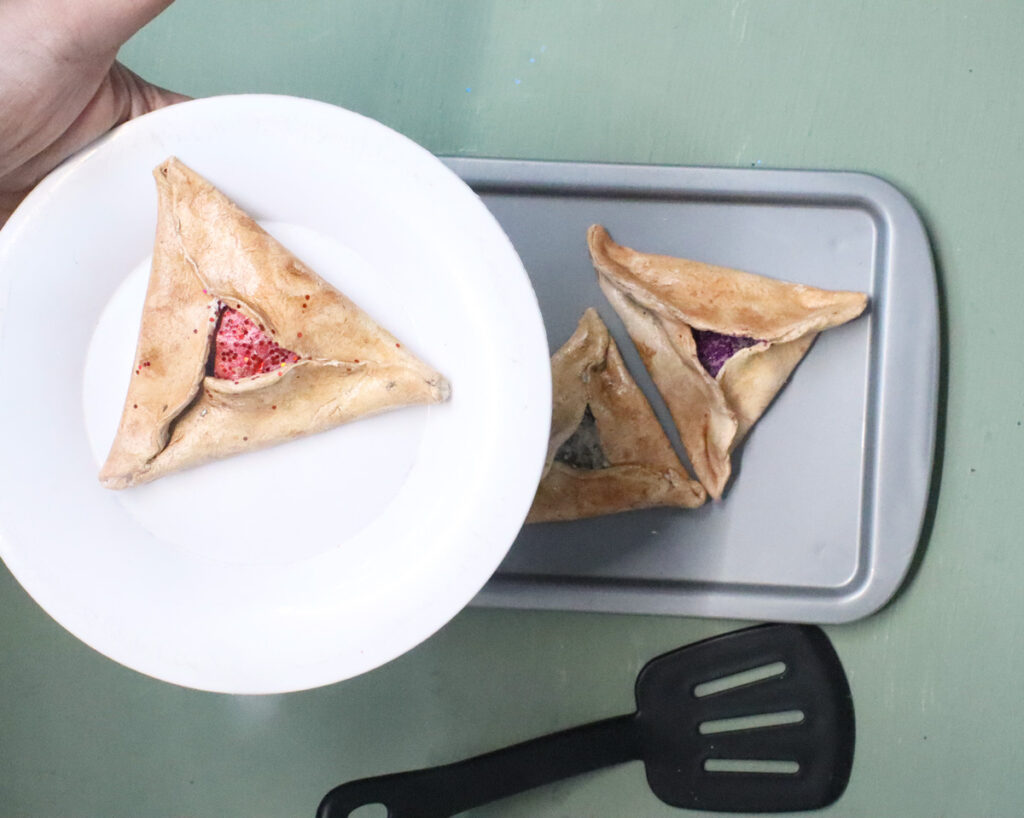
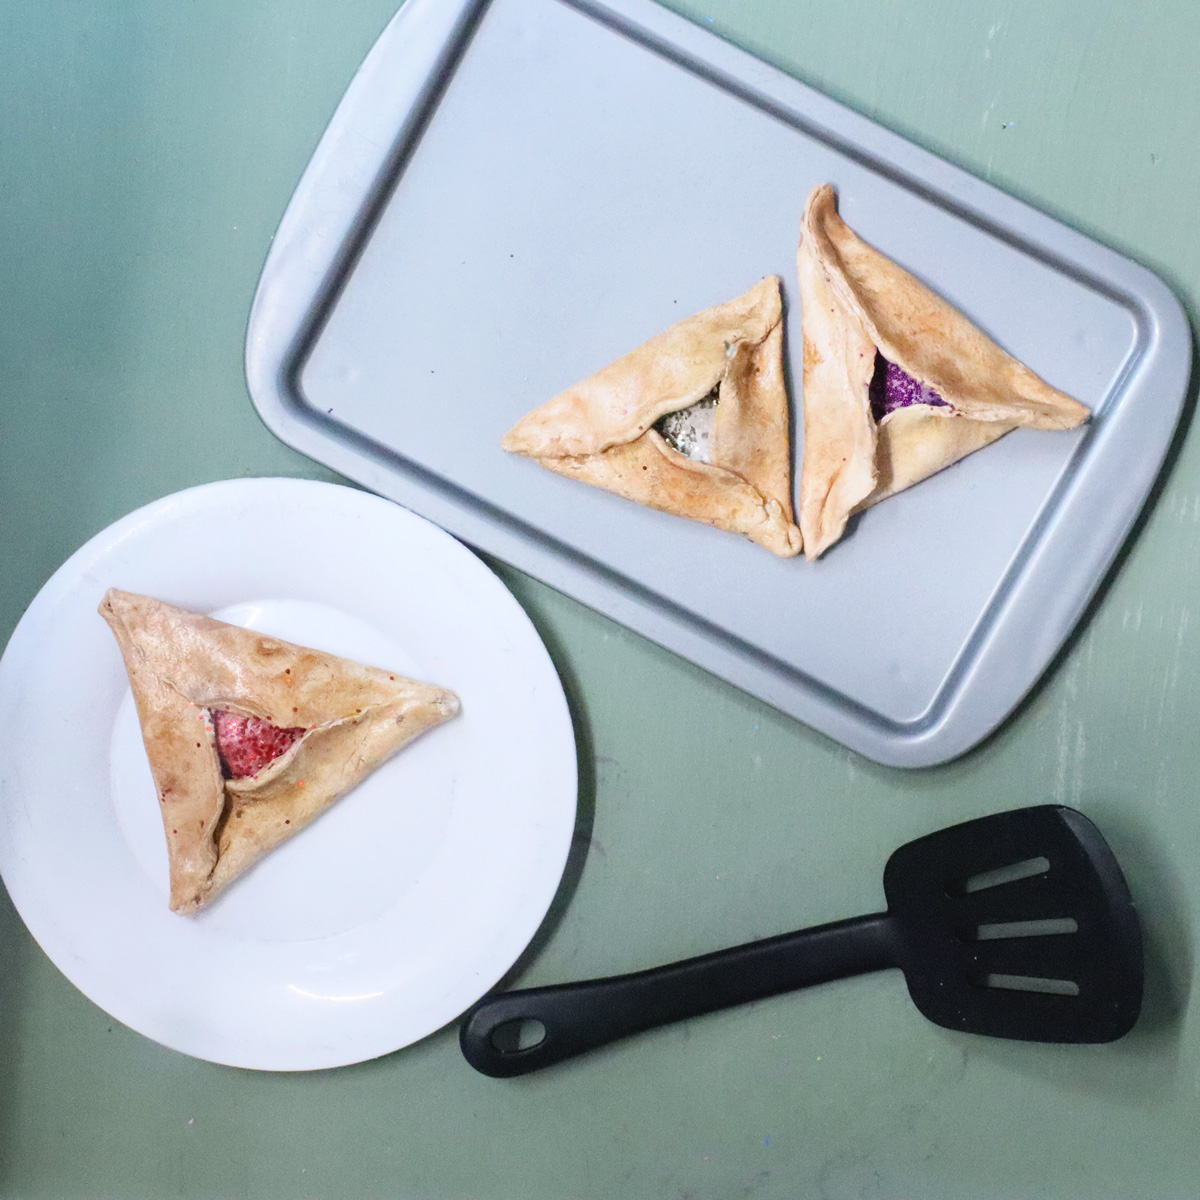
I made these having in mind my kids’ play kitchen. I love updating it with seasonal supplies and I know that many classrooms convert their play kitchens seasonally. We did this with felt hamantaschen in the past, but clay really does mimic the real thing better.
FYI the kitchen toys I have pictured are from this set – a favorite in our house.
Just a word of caution: if making it for younger toddlers, or any kids who might try to eat it, you’ll want to closely supervise it at the very least. J tried taking a bite out of it, and he didn’t manage to, but he did break it. Air dry clay can mimic ceramic when cured so it’s not exactly a shatterproof toy. It’s more likely to crumble, and really just a corner came off, but again, young kids might abuse it .
They are still totally functional, just not as nice!
Some more fun ways to use these clay hamantaschen after you craft them – beyond the play kitchen:
- Use them as part of a Purim sensory bin.
- Have them as a seasonal bowl filler that almost looks real.
- Or add them to a tiered tray.
- Play Purim jokes “shtick” with them (on the right people).
- String them up into a garland (either by folding it around a string and letting it dry that way or by hot gluing a string to the back.)
Adapting this for younger kids’ crafts
This was a mom-made craft, but it’s totally the type of thing that older kids can nail. In fact, if you’d consider offering your kids to help assemble hamantaschen, they can definitely help craft these!
If you’re doing these with younger kids, here are some adaptations:
- Definitely pre-color your filling – that’s a very messy part of the process. Just make sure to store it properly until it’s ready to craft with.
- Work together with them, one-on-one to fill the hamantaschen.
- Do the pinch-corner style and not the overlapping corner style of folding.
- Skip the glitter!
- Consider making a small mark (such as by pressing in a toothpick to make a line) at the corners so they know where to pinch.

More tips for making clay hamantaschen
Here are some tips for success. These are designed to help you understand a little more about the process and my material choices so that you can make it work for you.
Coloring and painting options
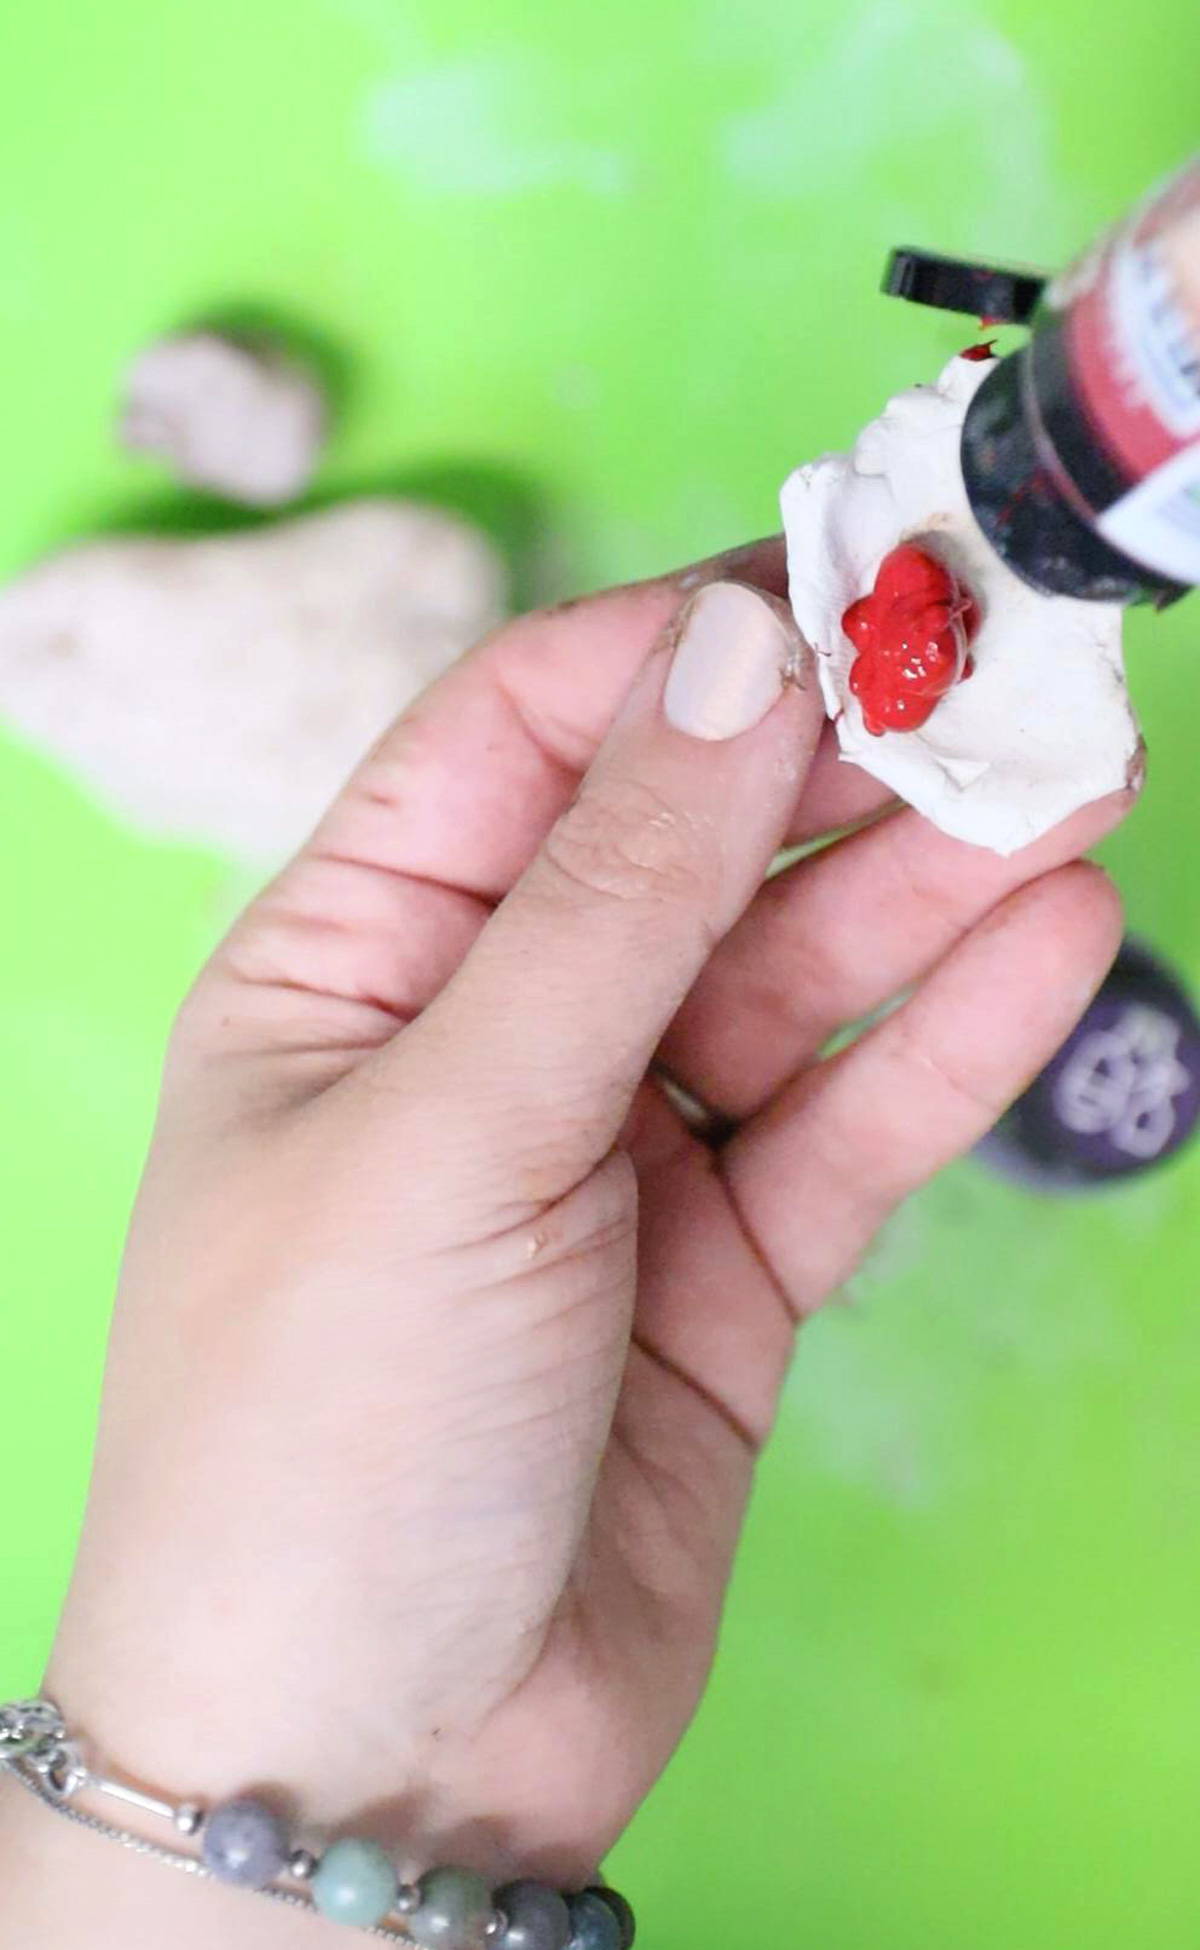
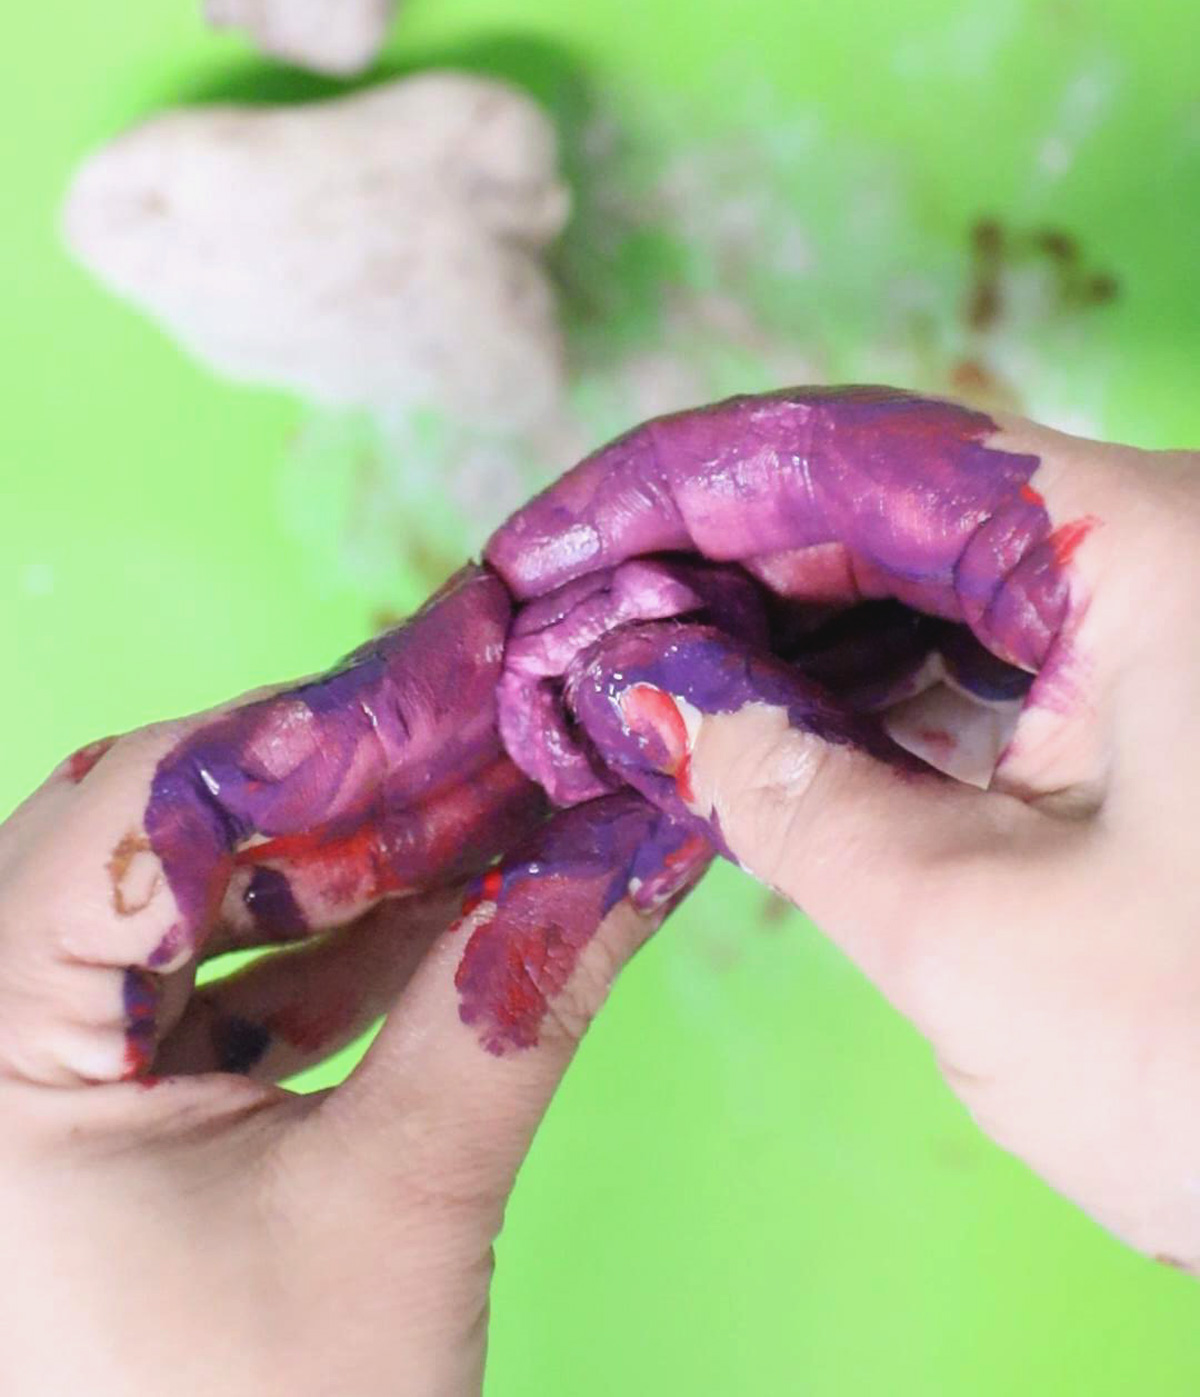
There are so many ways you can color air dry clay (which typically comes in white or terra cotta colors). One of the absolute messiest ways to do it is to add paint ot your clay. That’s probably how you want to paint your filling, because you will have a hard time painting it when you’re done!
For the outside, watercolor paints just look so cool – like freshly baked hamantaschen. You can also use acrylic paints – or washable paints. You can even color it with paint markers, but it may ruin the marker, so get cheap ones for one-time use.
There are also all sorts of things you can press in. I really wanted to do the chalk pastel shavings method that I had done in the past on these seashell necklaces, but I couldn’t find my pastels (time to purge the craft room!)
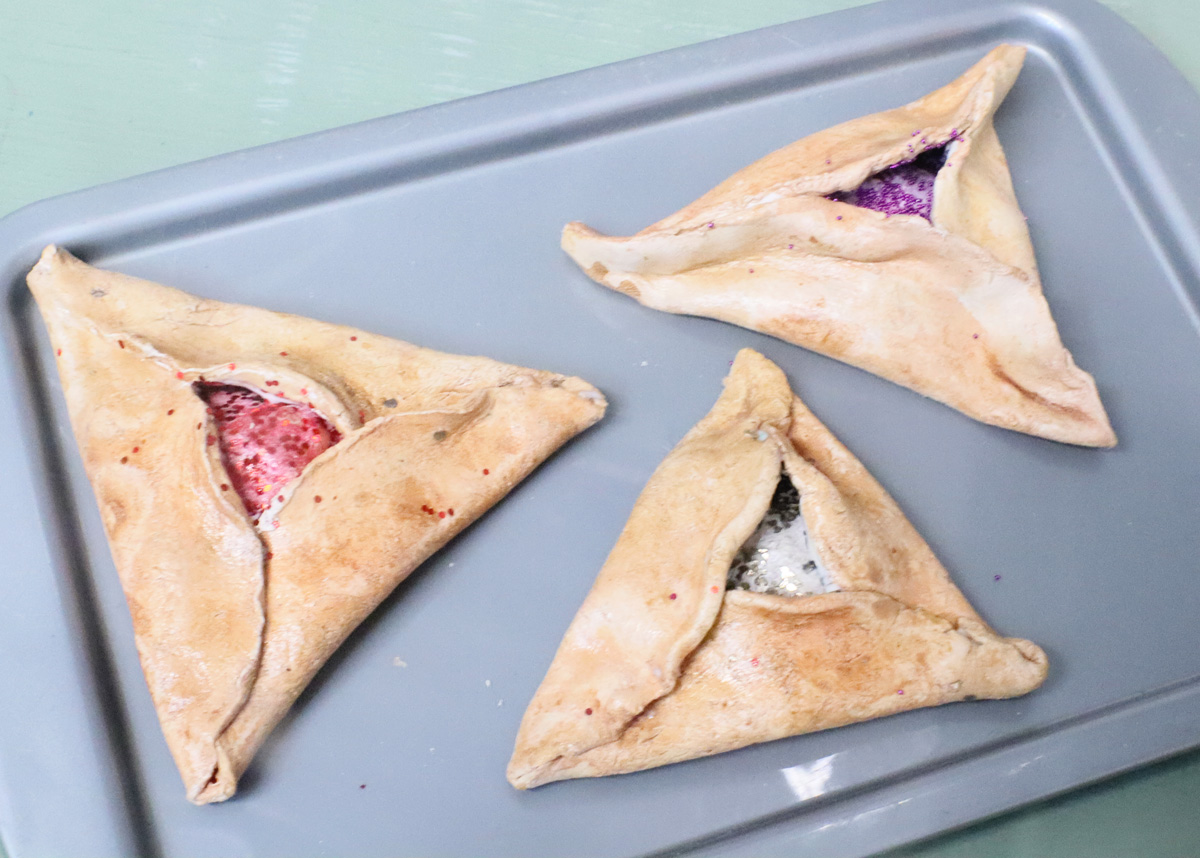
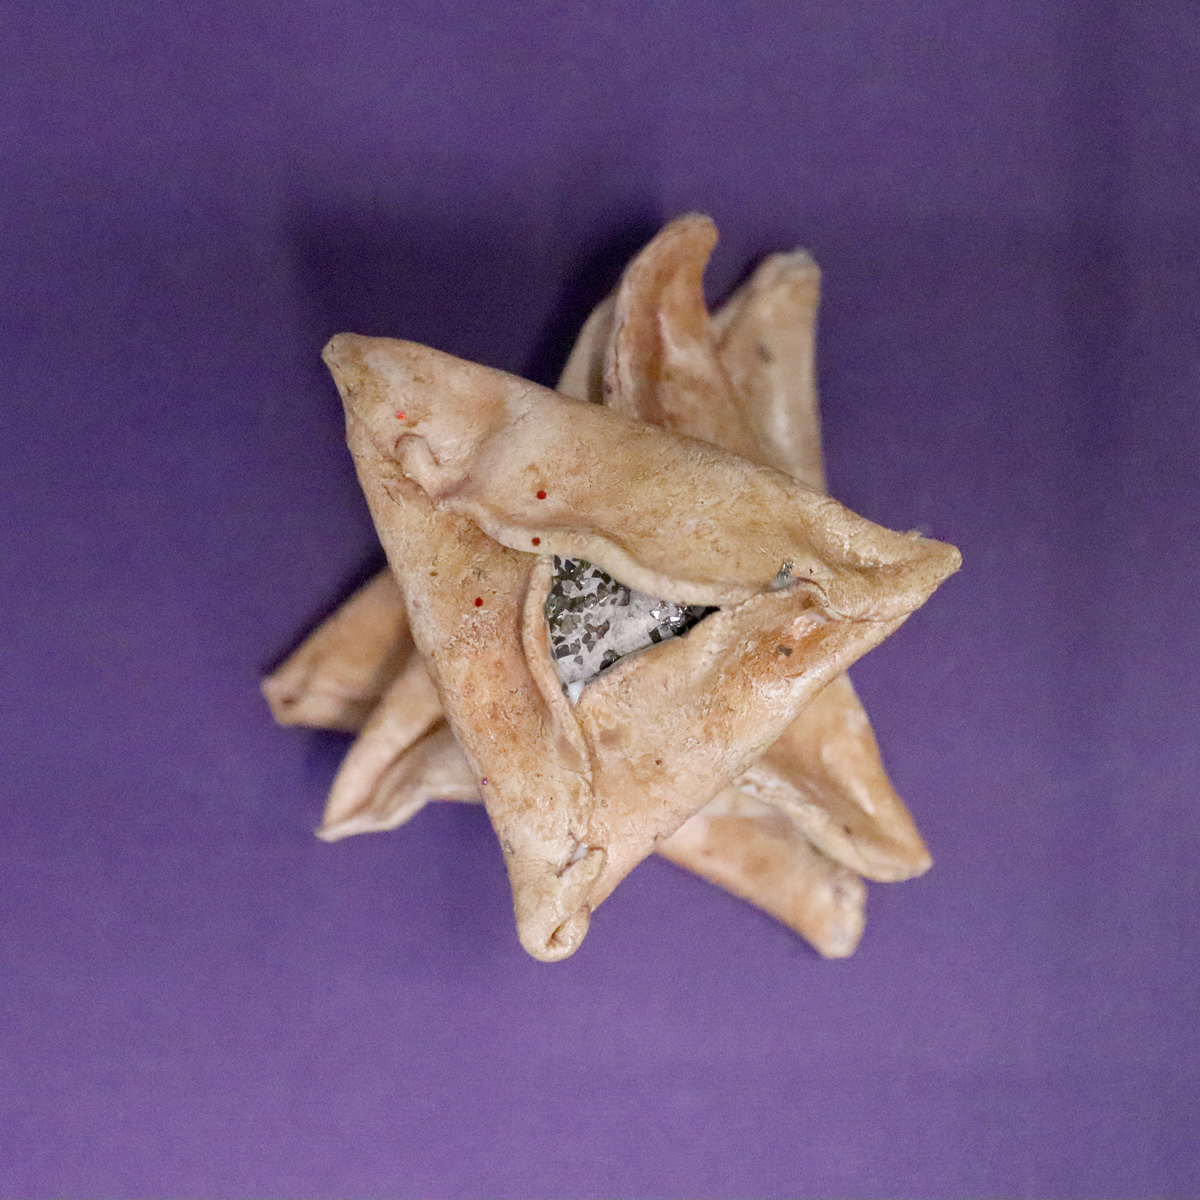
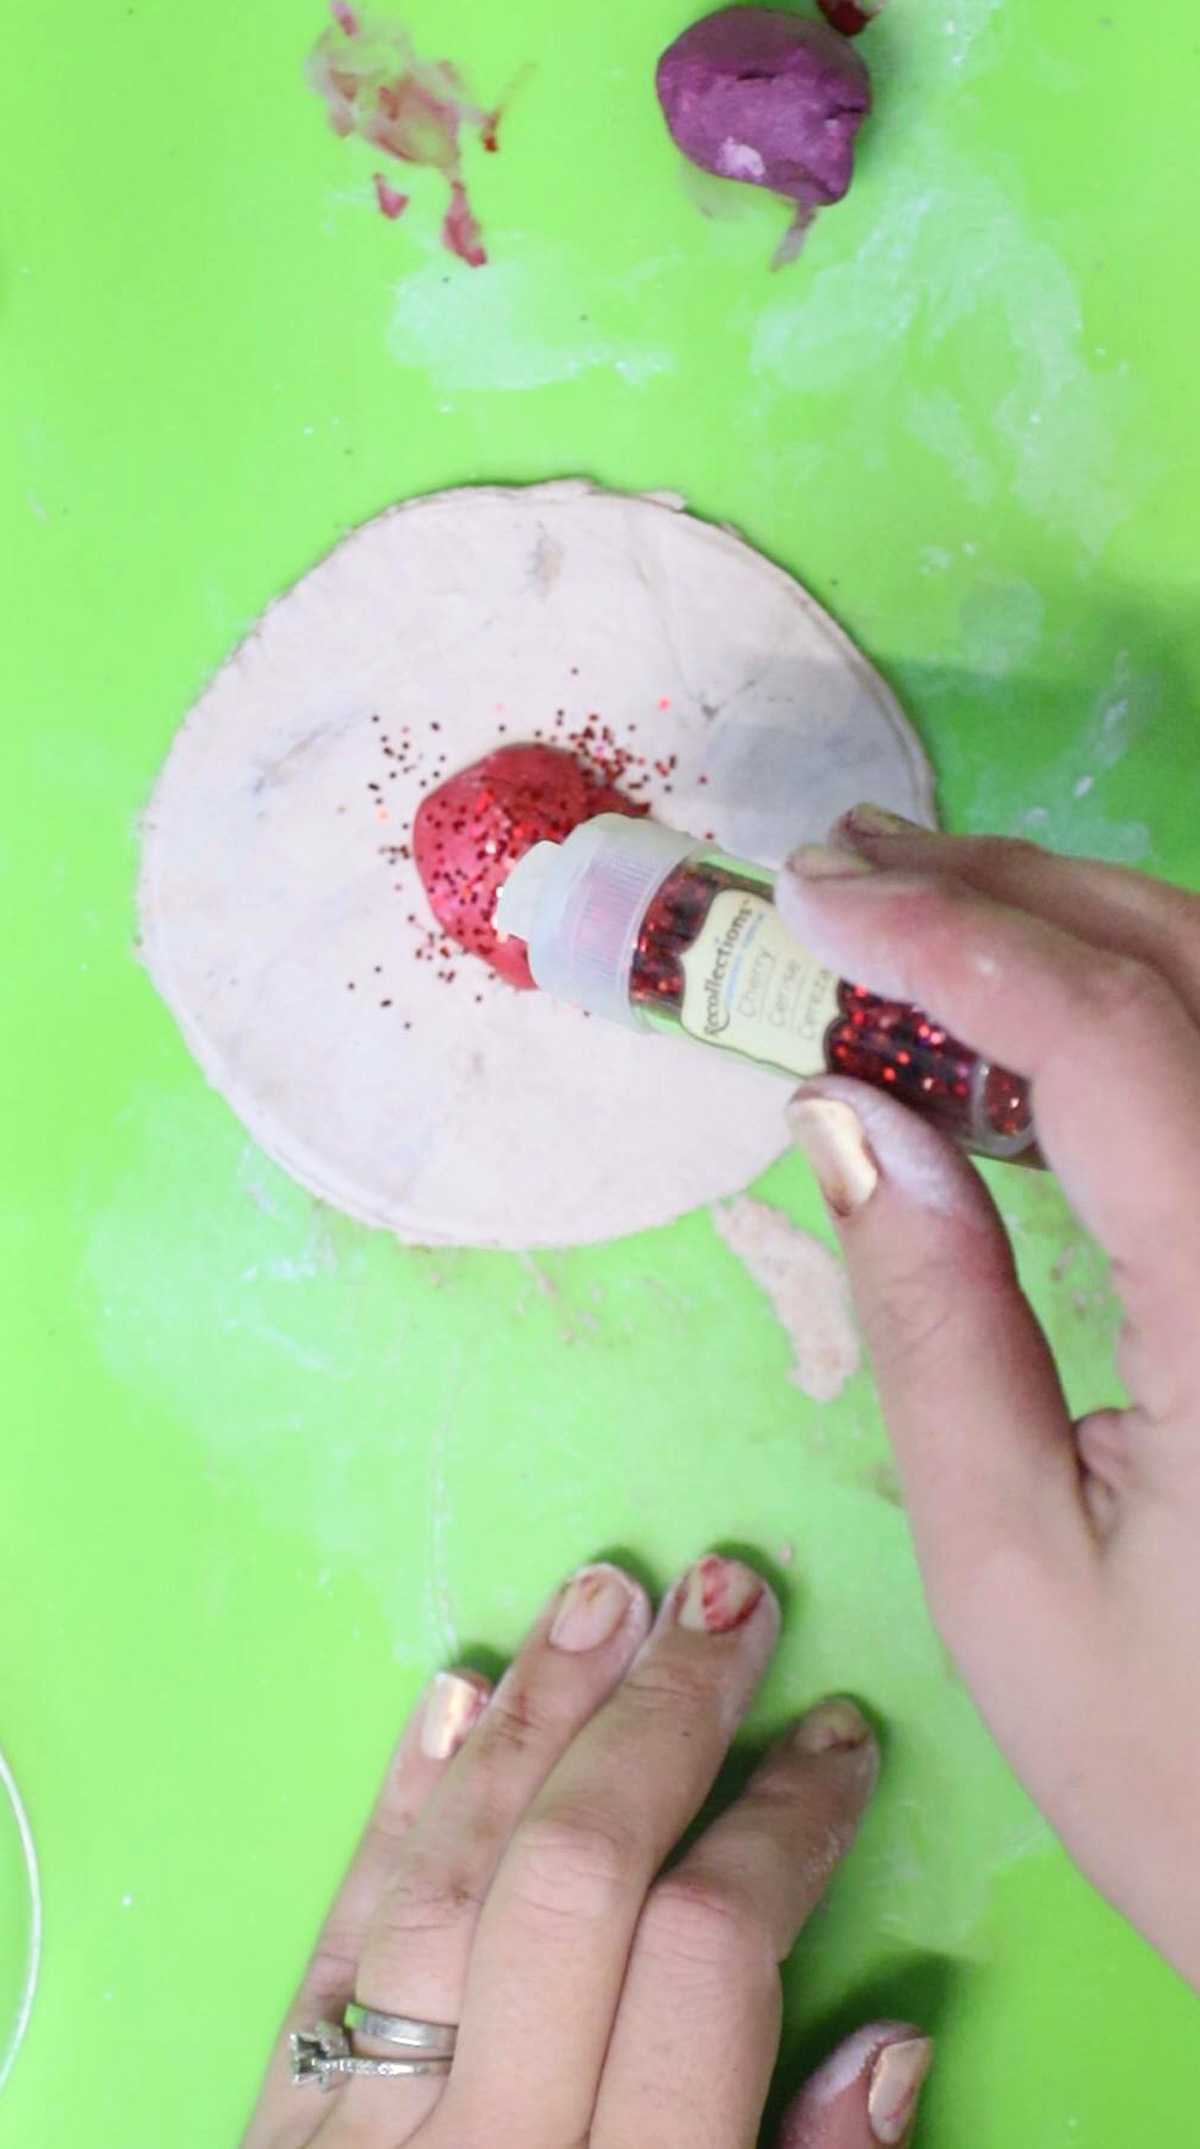
I instead pressed in glitter. Glass glitter works the best for this (and doesn’t get on everything), but I also used tinsel glitter and microbeads.
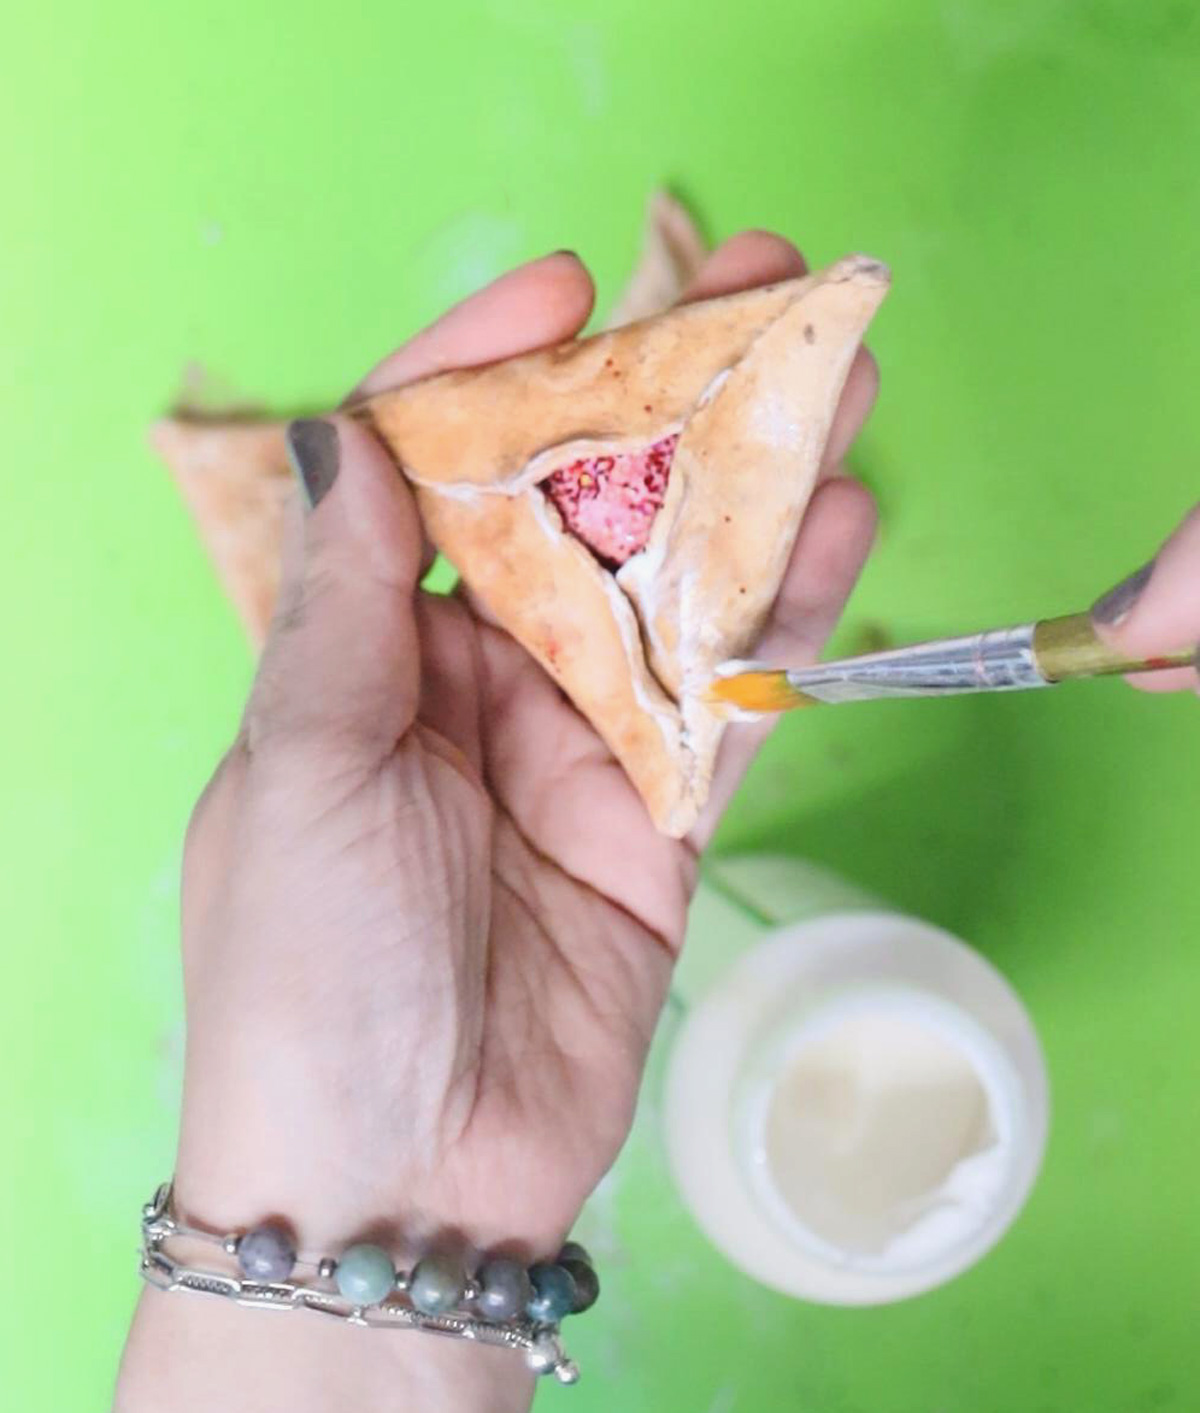
Sealing the clay Hamantaschen
I chose to seal my clay hamantaschen with outdoor Mod Podge for a water resistant finish. You can use dishwasher safe Mod Podge as well (it takes 28 days to cure but will be playable after a few days).
If I had the time, I’d seal them with UV resin for a real hard finish. I think that would have made it more durable and less crumble-able.
Whatever you use, choose something non-toxic if you’re using it as a toy.

How to make clay hamantaschen
What you’ll need
- Air dry clay – I’m a big fan of the quality of DAS brand
- Acrylic paint in red, purple, etc.
- Optional: glitter
- Rolling pin dedicated to clay
- Watercolor paint
- Paint brush
- A bowl/glass about 3 inches round to trace – and a clay-dedicated craft knife (if it’s a good, straight edge glass, you may be able to just press it in to cut it) – or a cookie cutter that shape and size
- Hard finishing Mod Podge (such as Super Gloss, Outdoor, Dishwasher Safe) or UV resin to seal it.
Watch the video
Watch the full-length video on YouTube if you prefer to learn that way! Or scroll down for written instructions with photos.
Step by Step tutorial
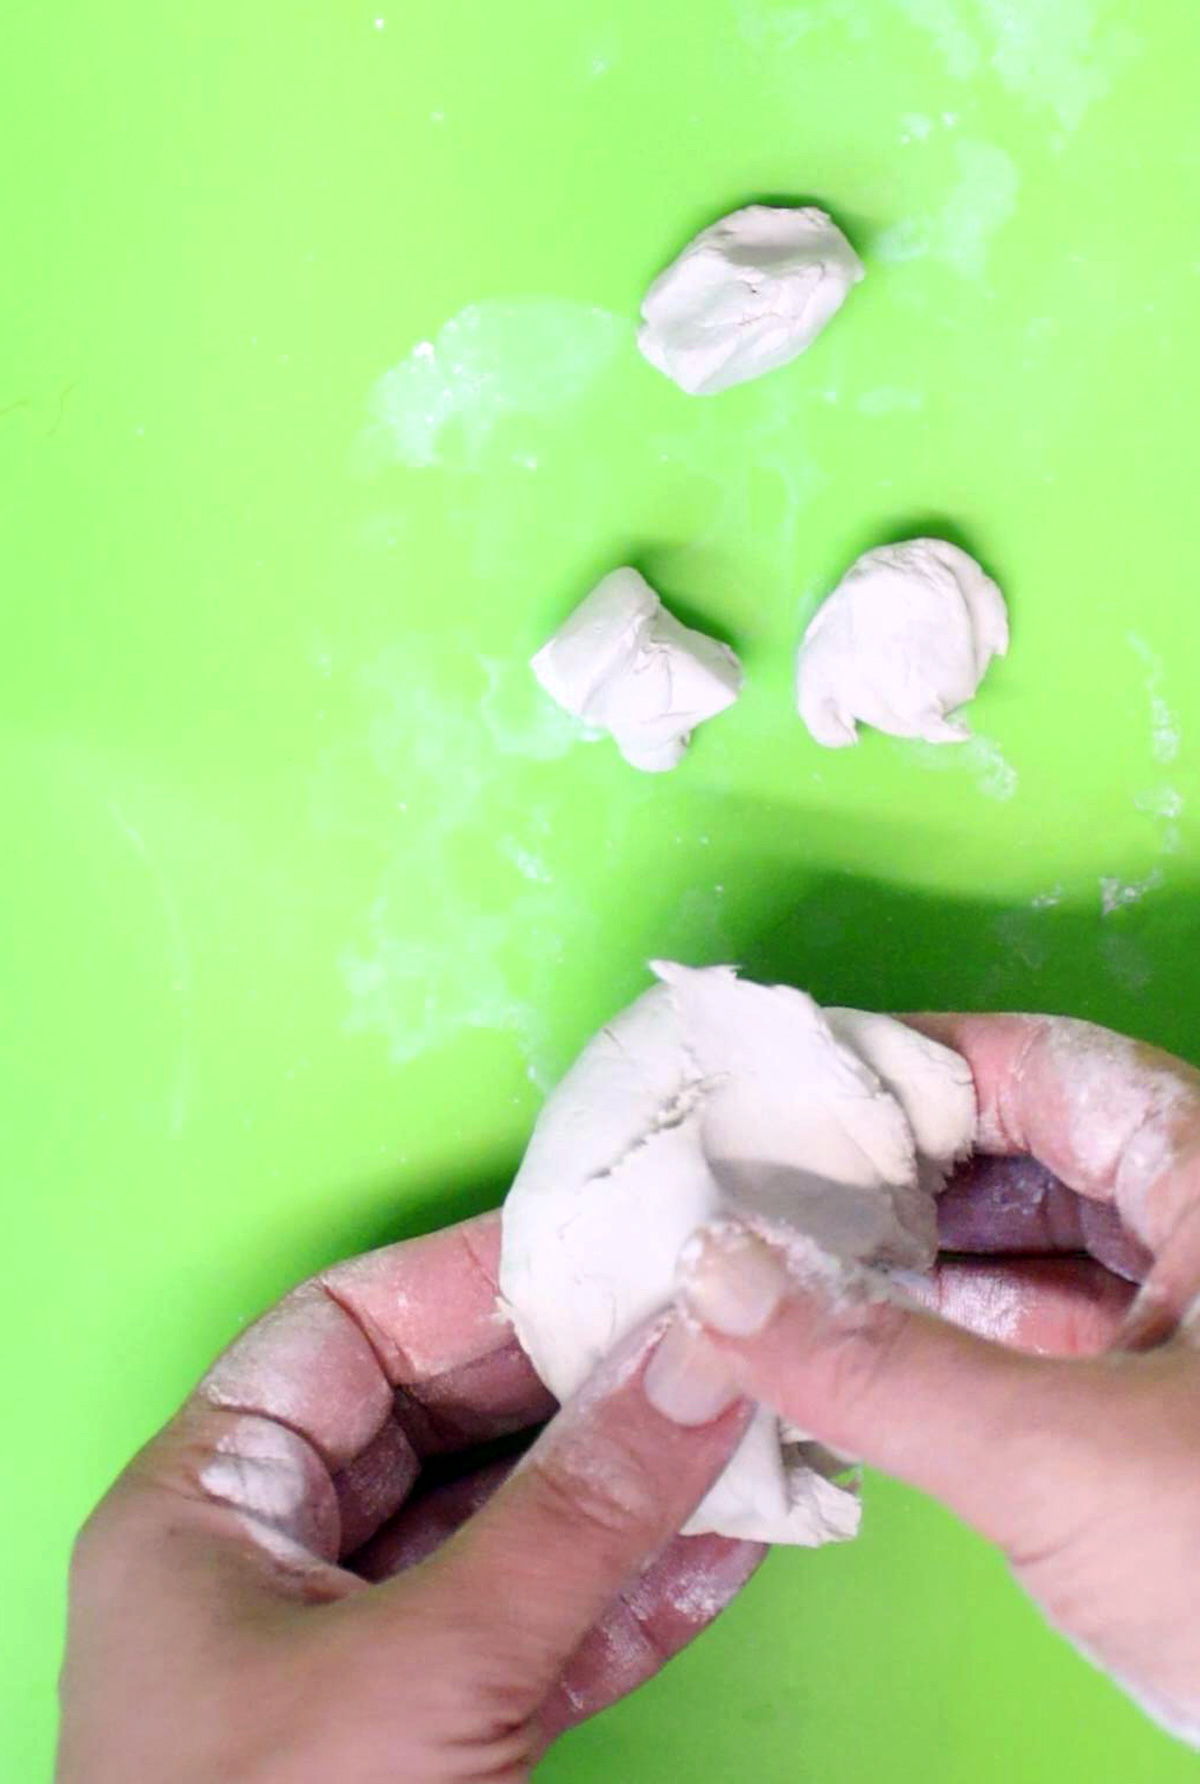
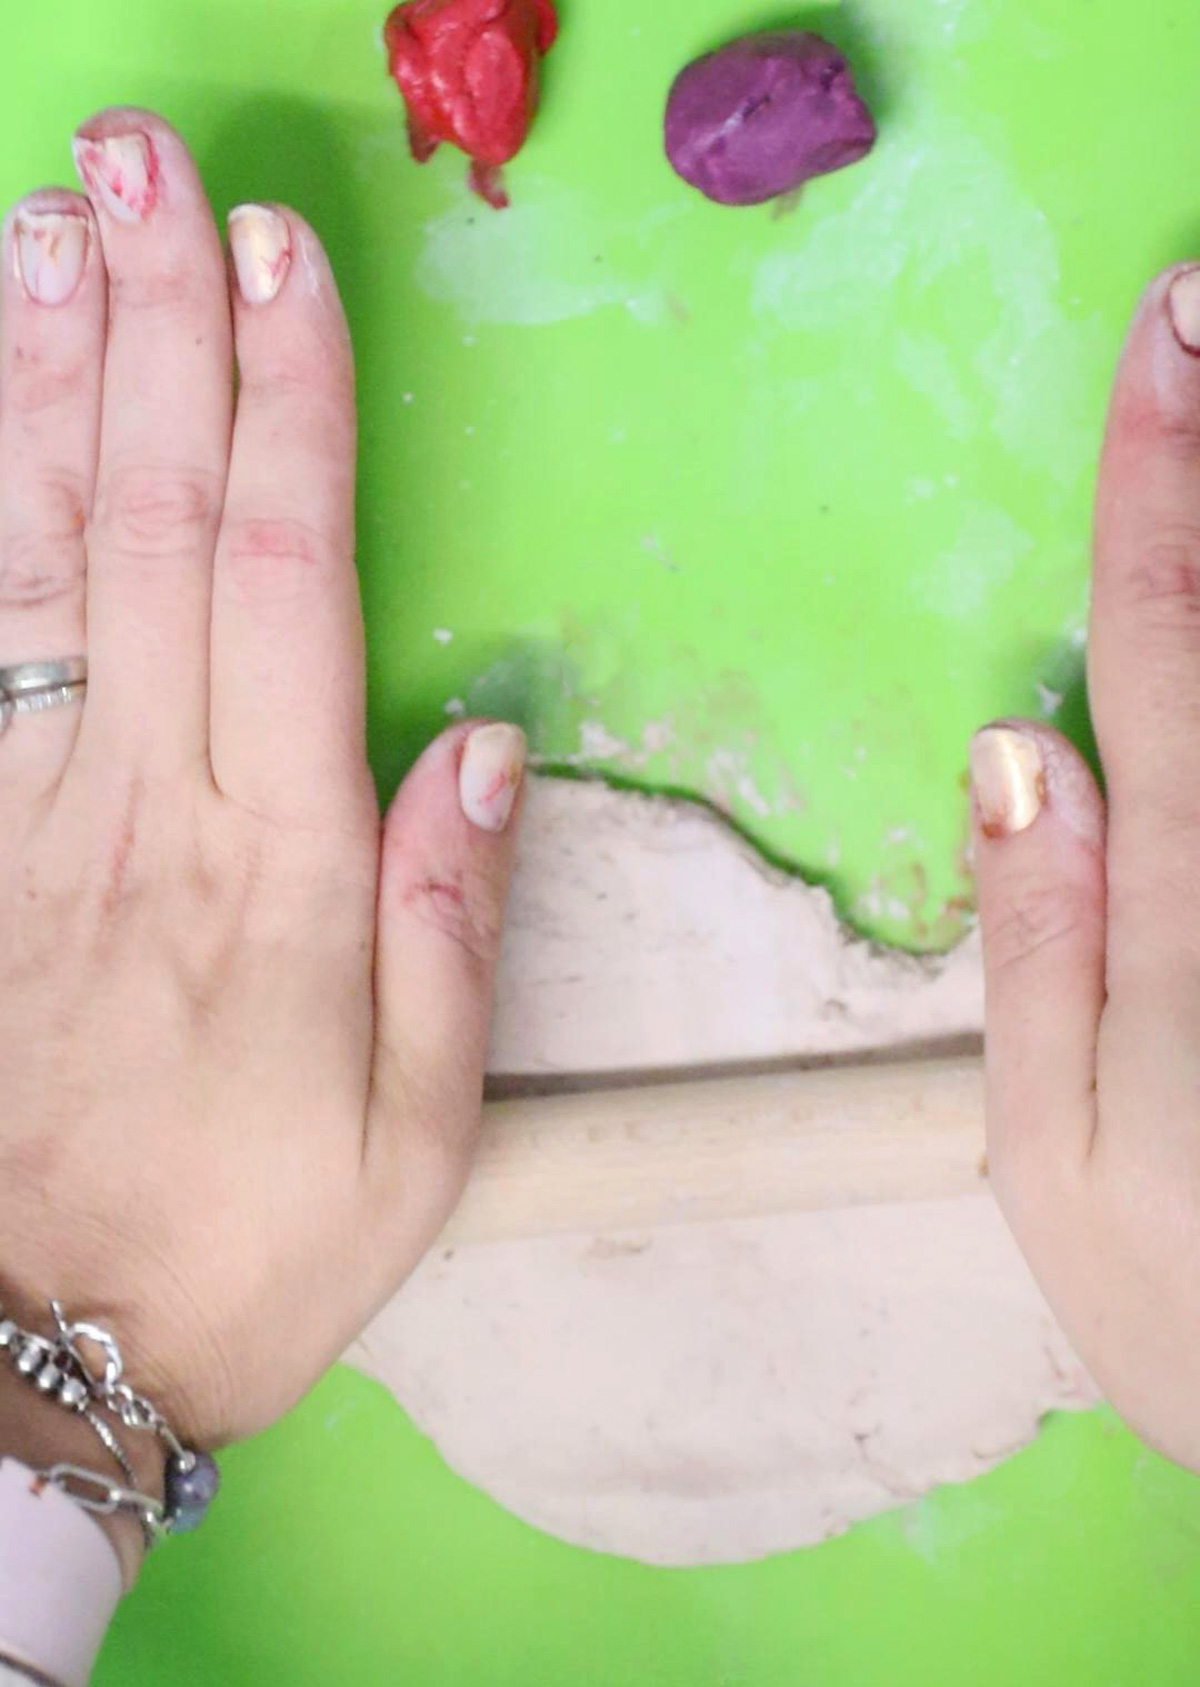
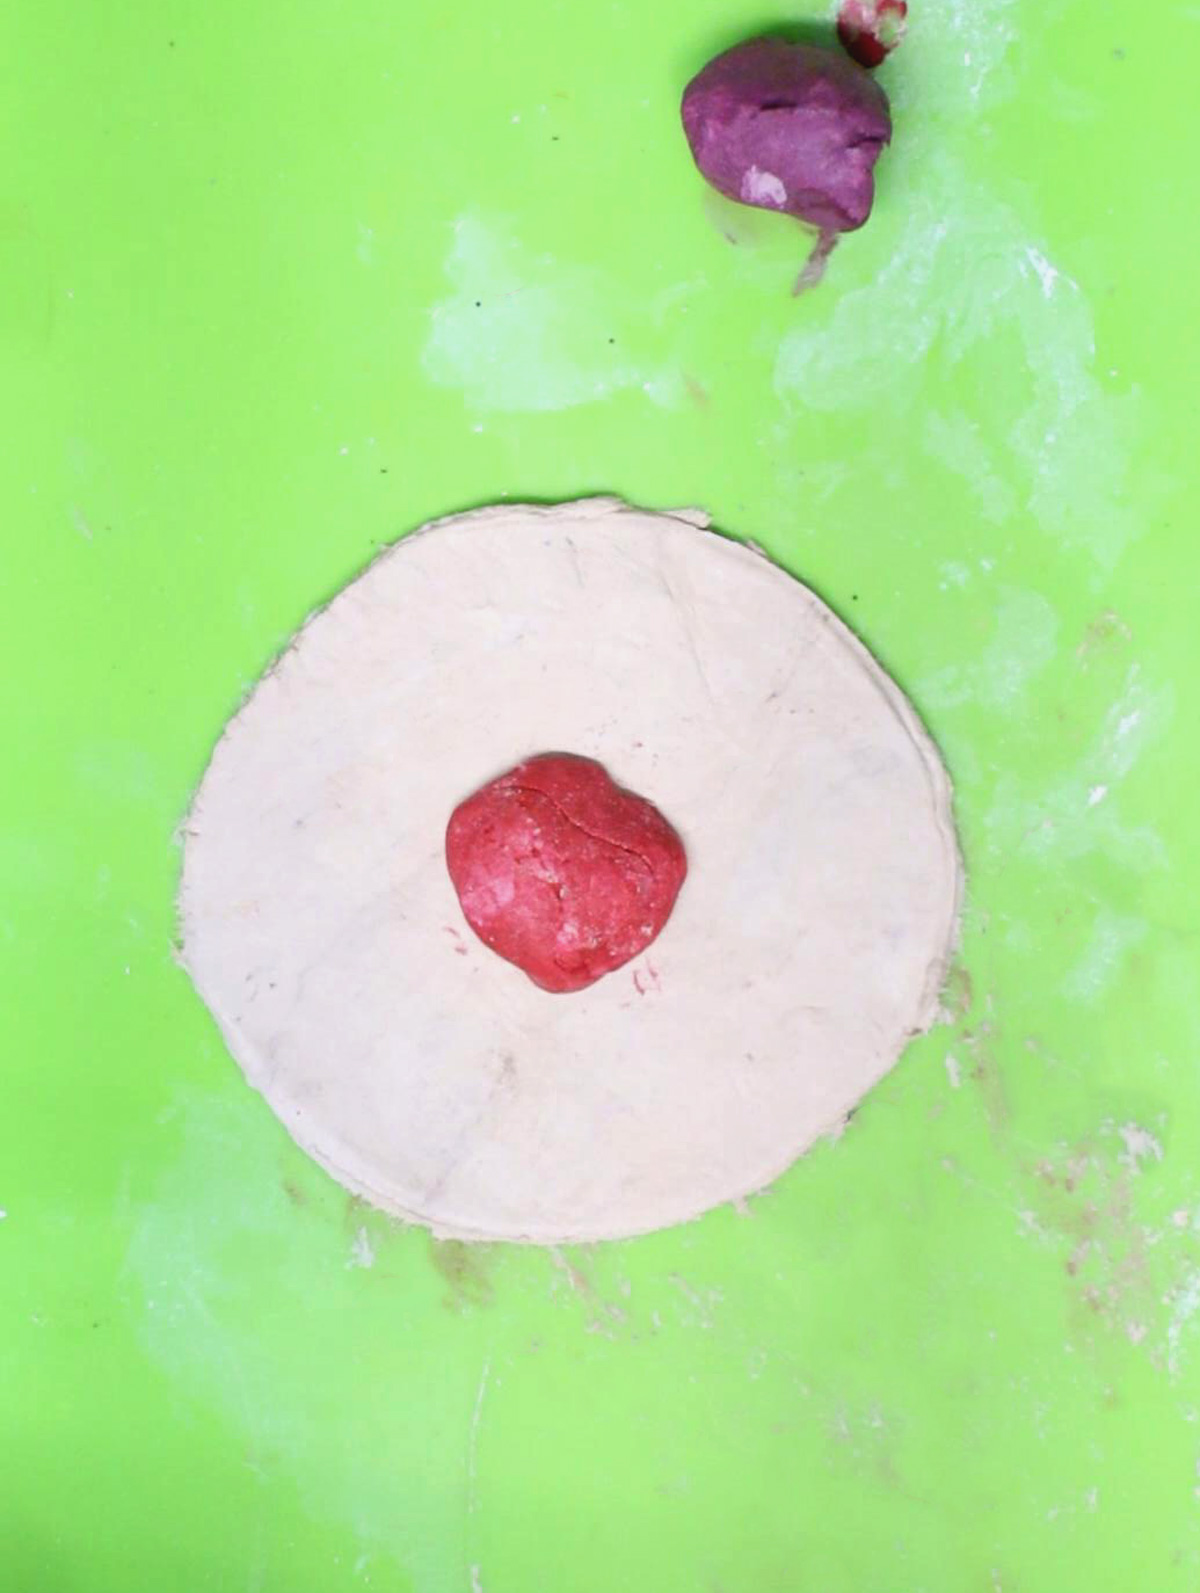
1. Protect your surface. Start by softening your clay if needed (just knead it in your hands a bit) and separate small bits of clay for the filling – a bit bigger than a marble.
2. This part is messy: add a glob of acrylic paint to your filling and mix it in. It’ll be very diluted in color.
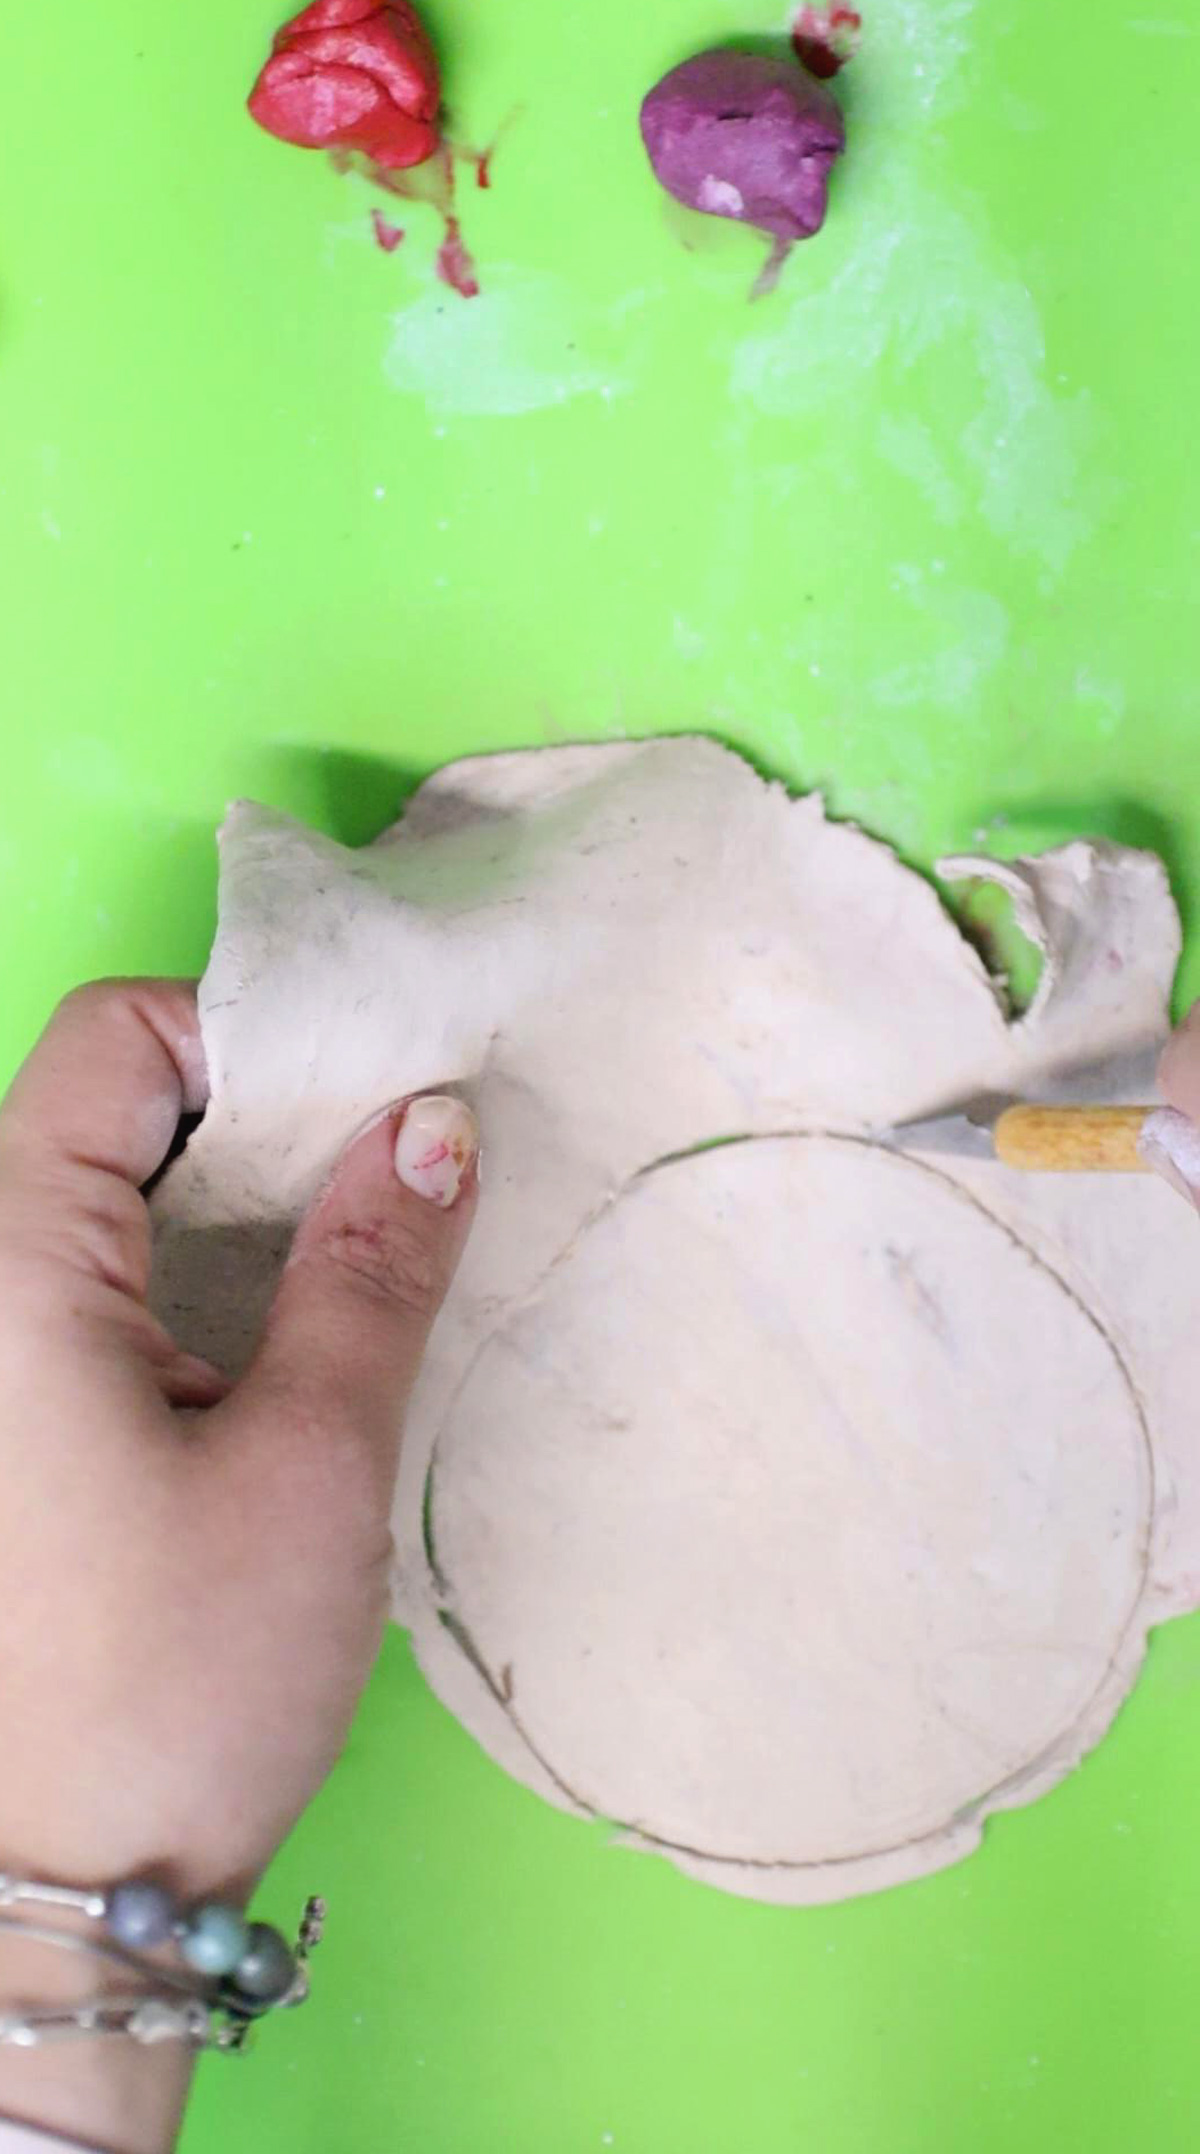
3. Roll out your clay to about 1/8 inch thick (don’t measure! It should be thick enough to be durable but not crazy thick).
4. Trace and cut out your circle.

5. Carefully remove the excess.
6. Place your filling in the center of the circle.
7. If you’d like, you can add glitter on top.
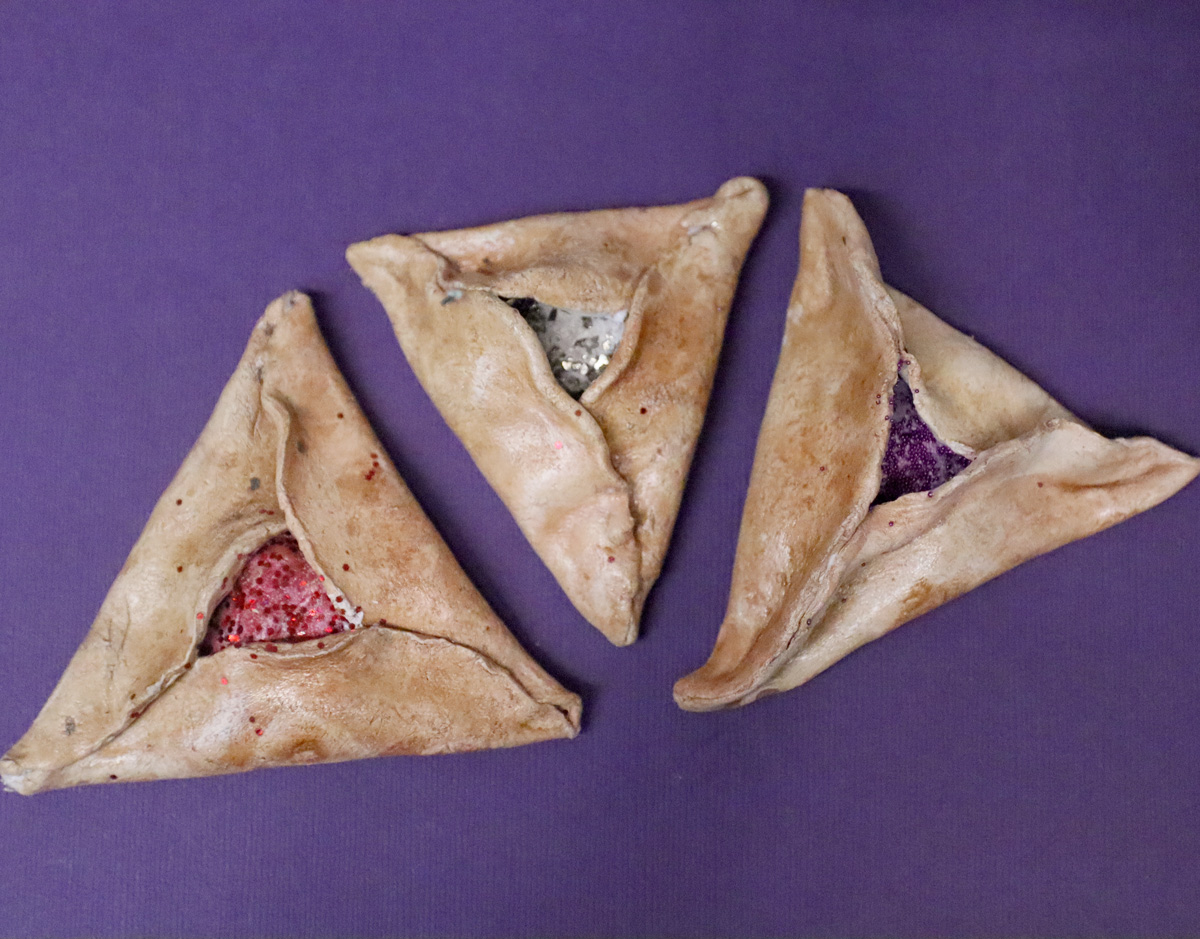
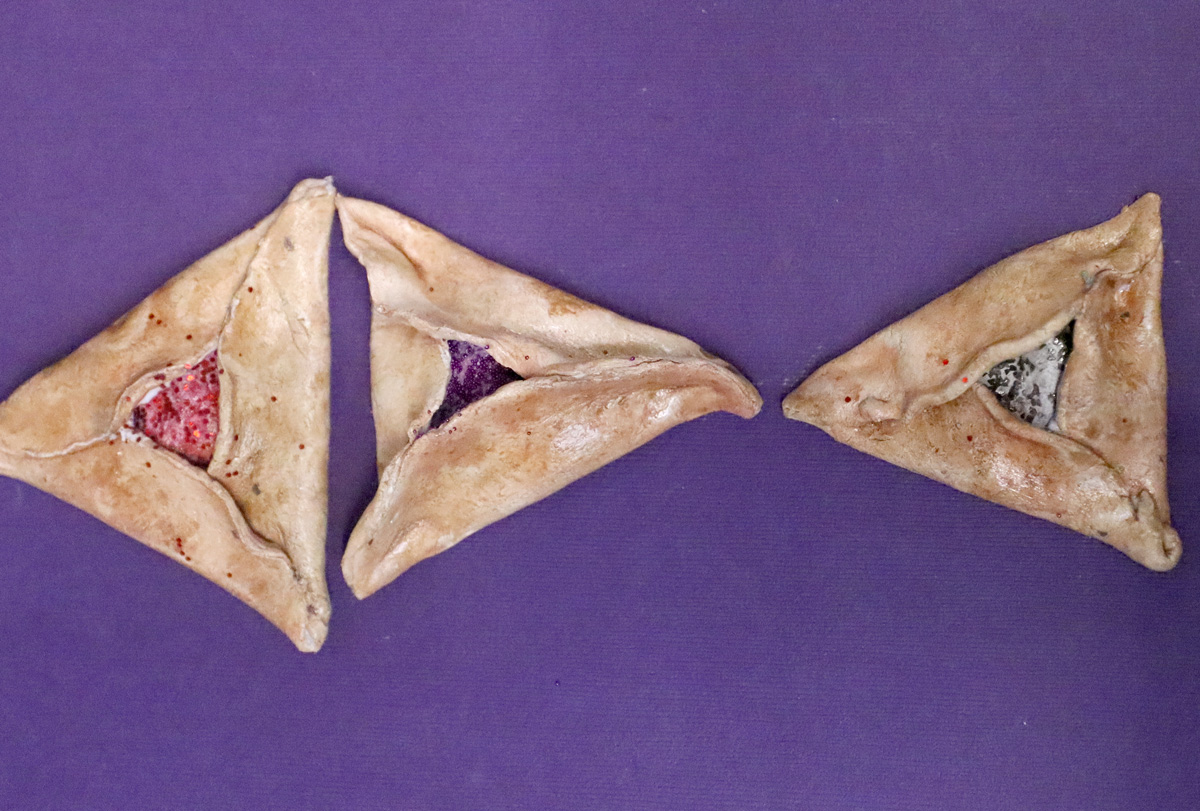
8. Assemble your Hamantasch! There are two ways to do it. One way is to fold over each third of your circle towards the center.
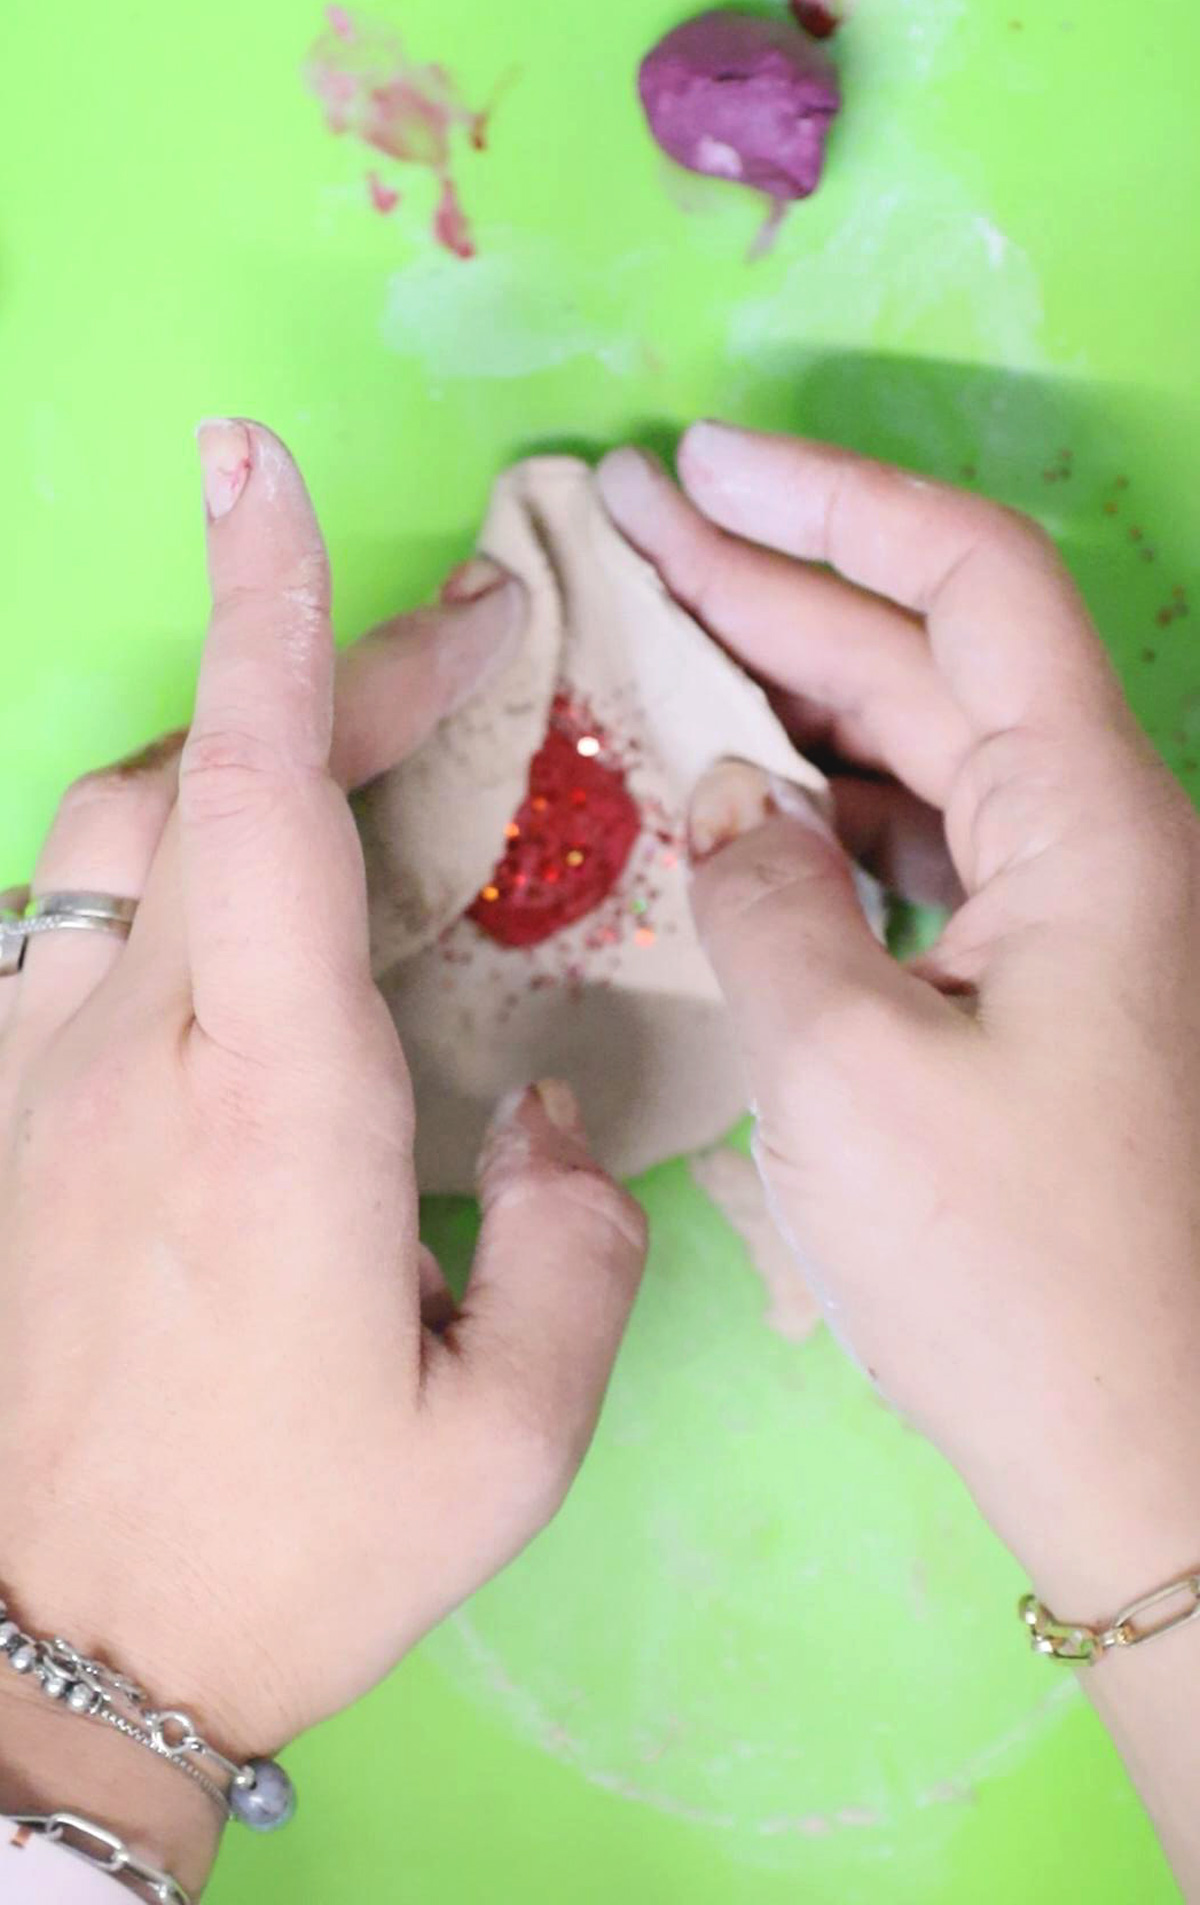
Overlap the sides – each side should go over one side and under the other.
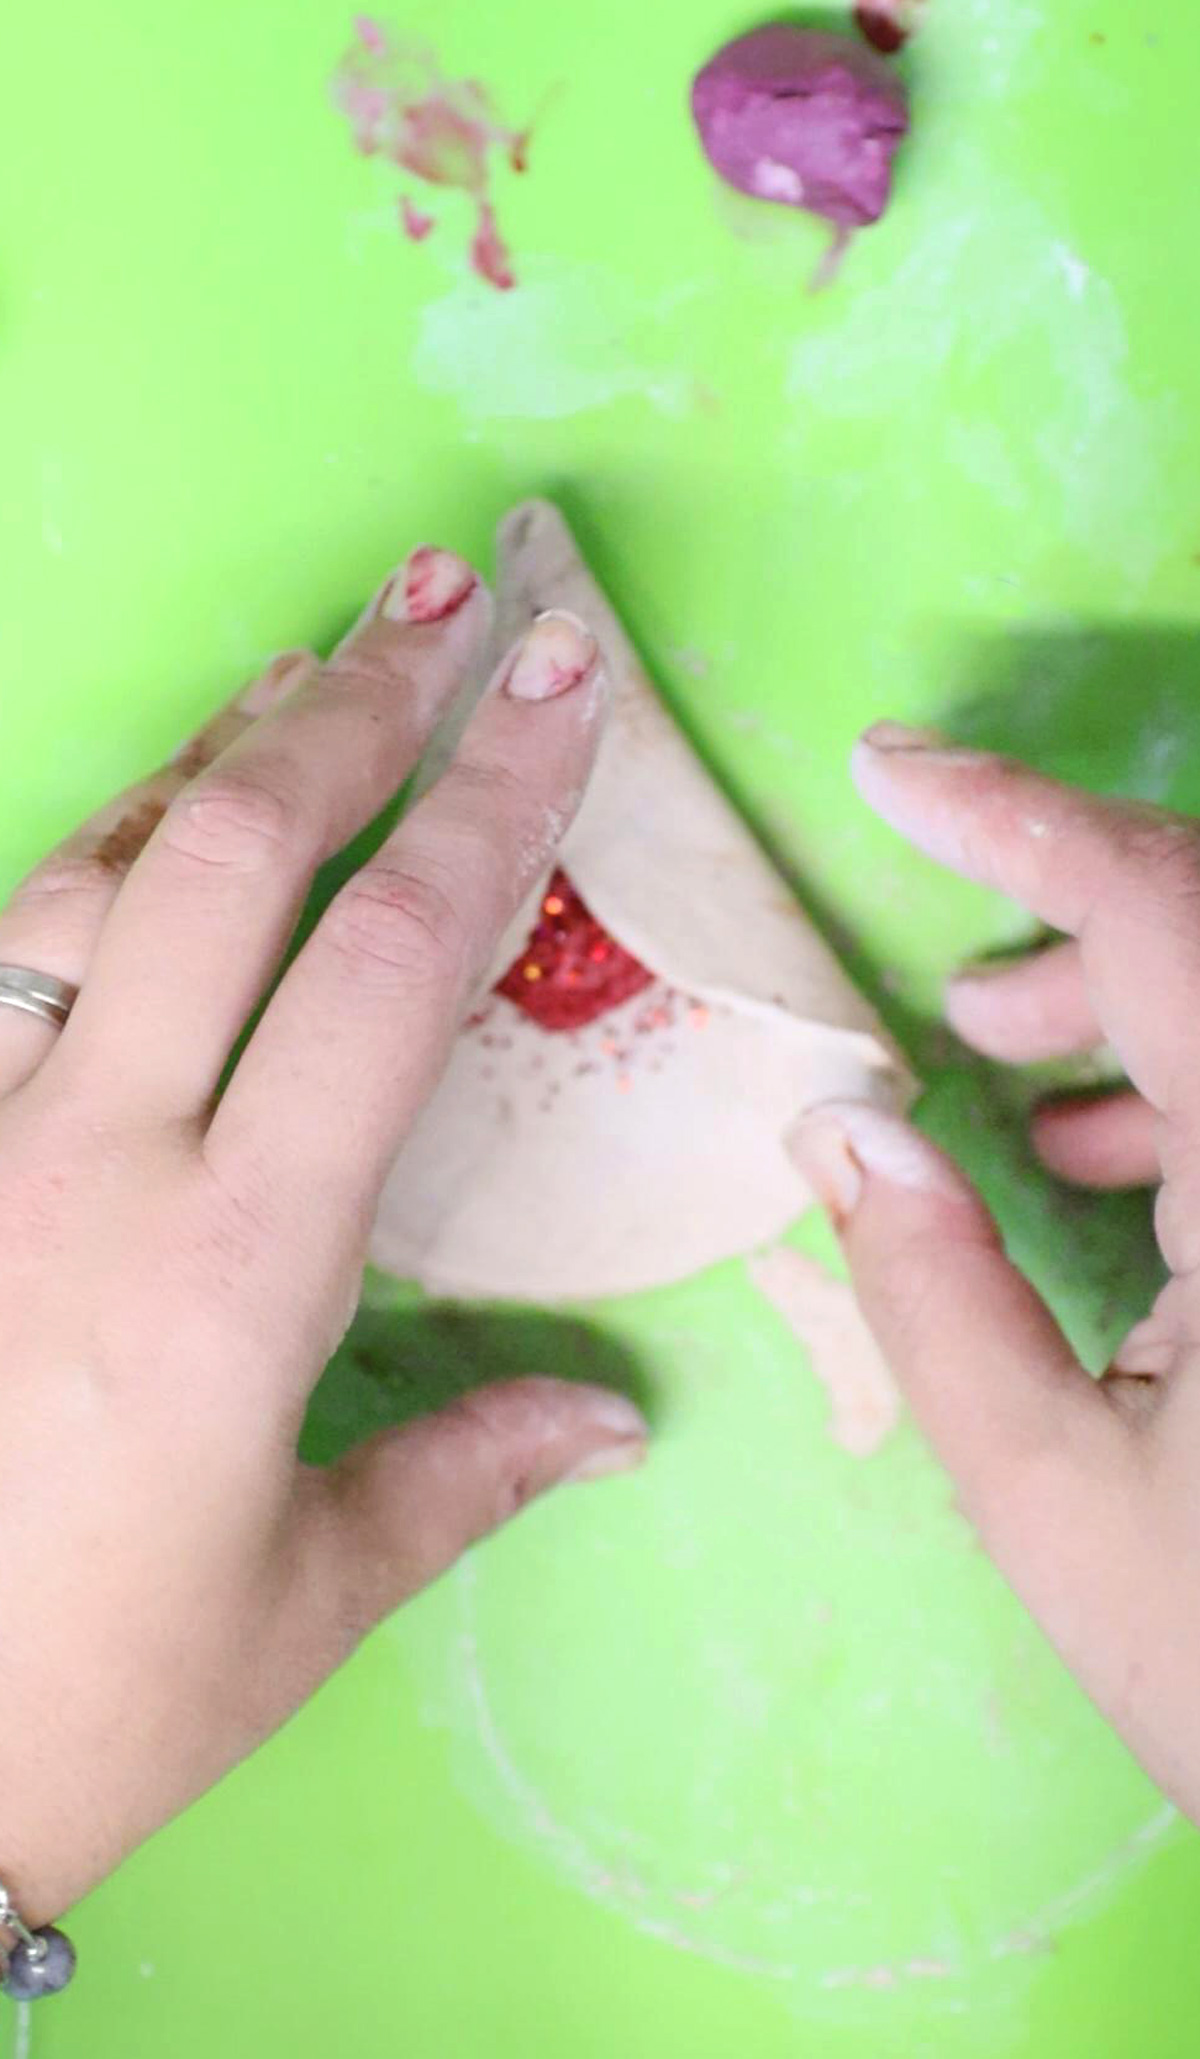
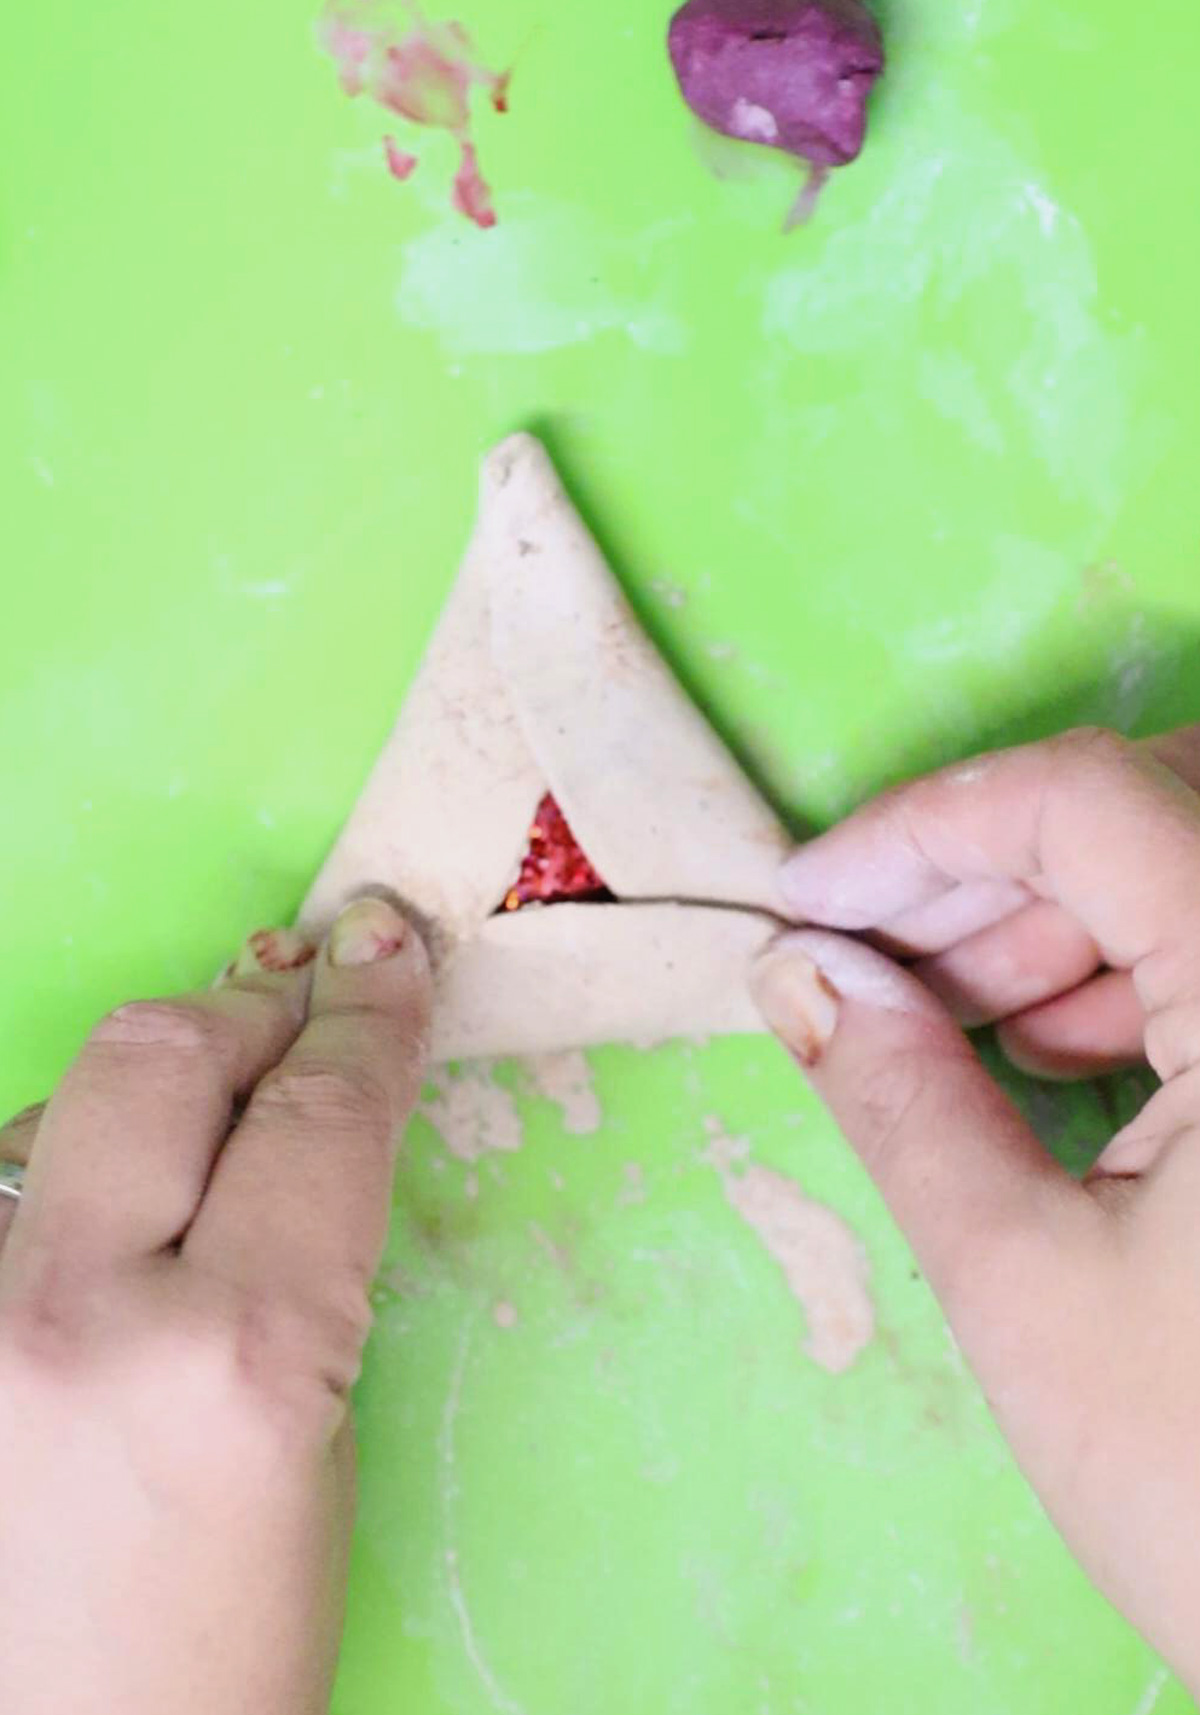
Give a little pinch at the corners to secure them. Make sure the center opens up a bit to reveal the filling.

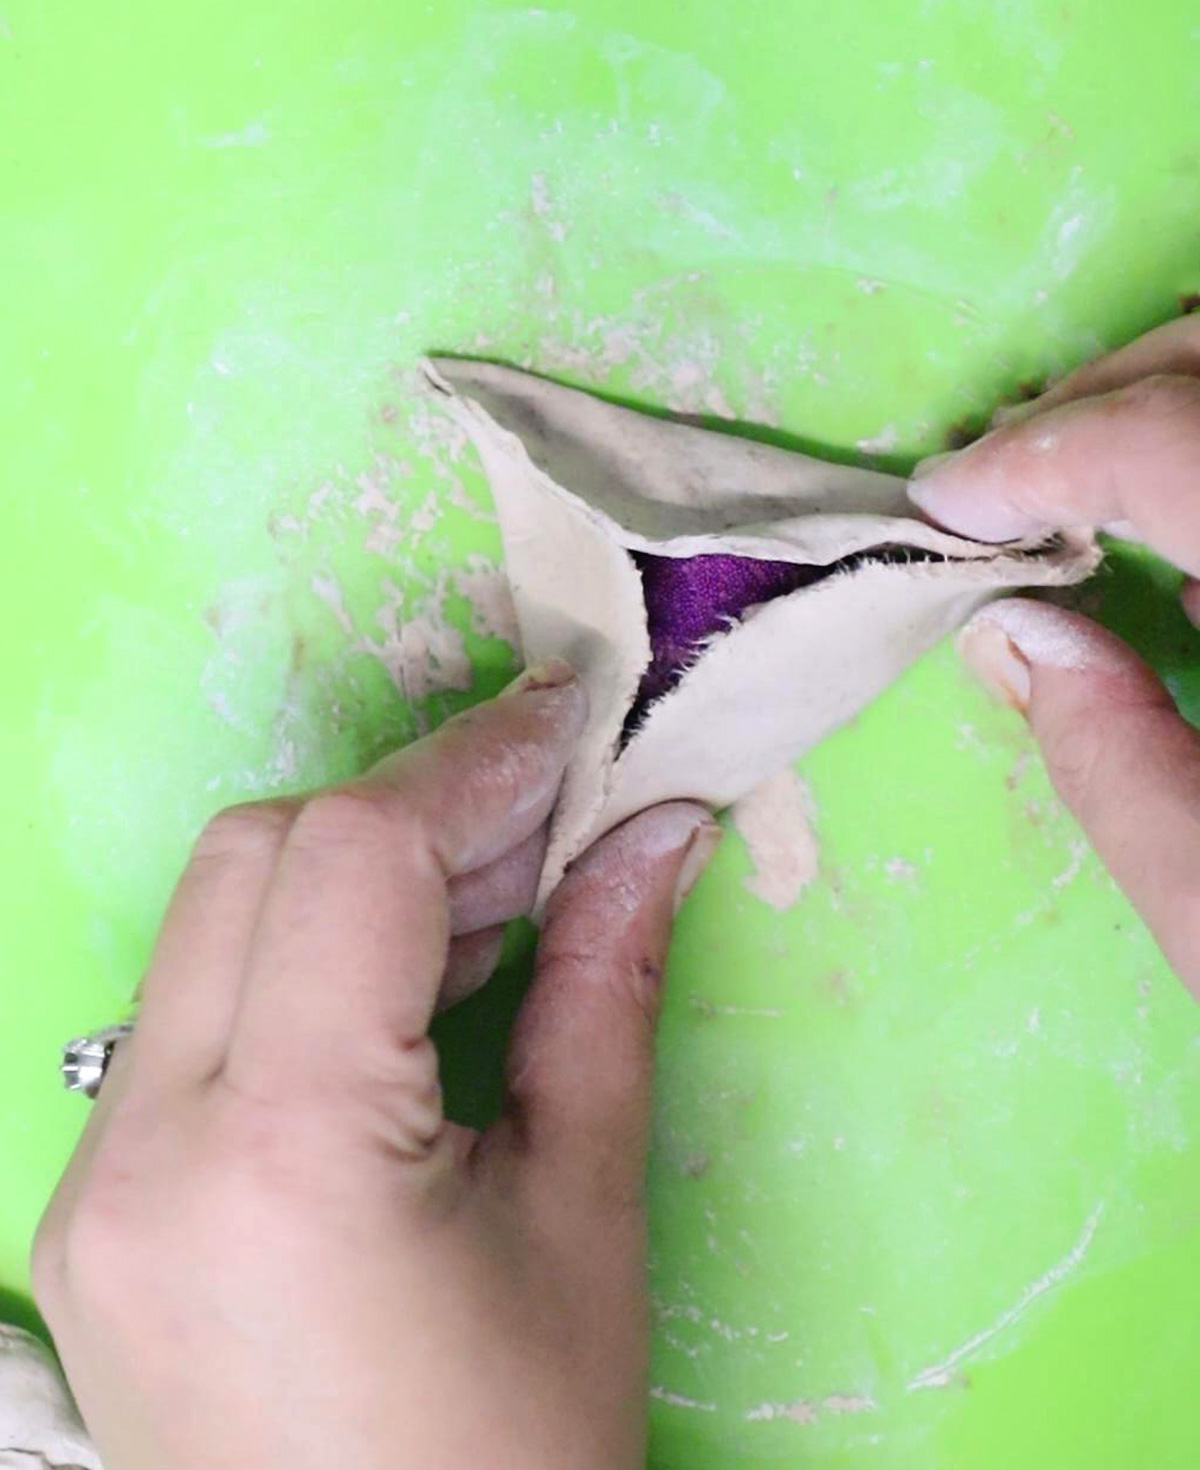
9. The less-neat-but-easer method is the pinch method. Pinch each corner (fold up the sides of the circles in three spots to form these corners.
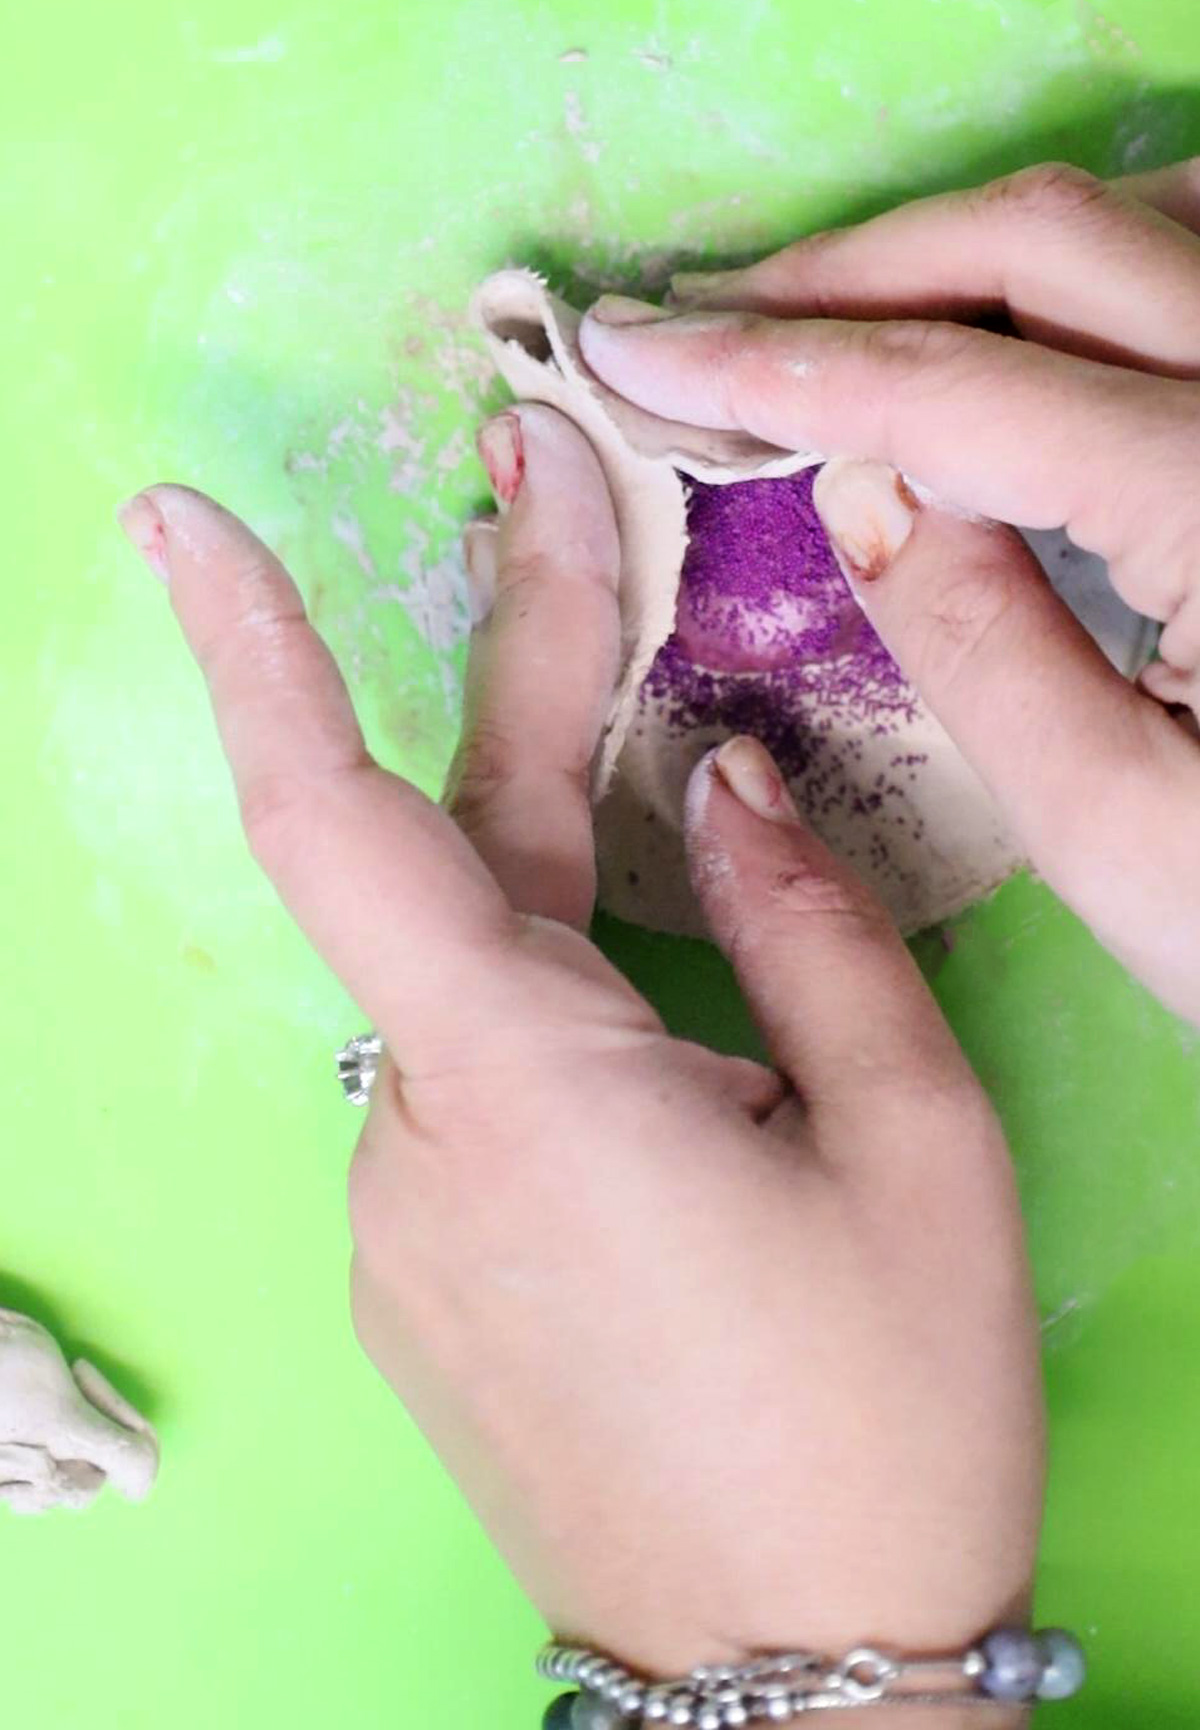
And pinch them together to form your triangle.
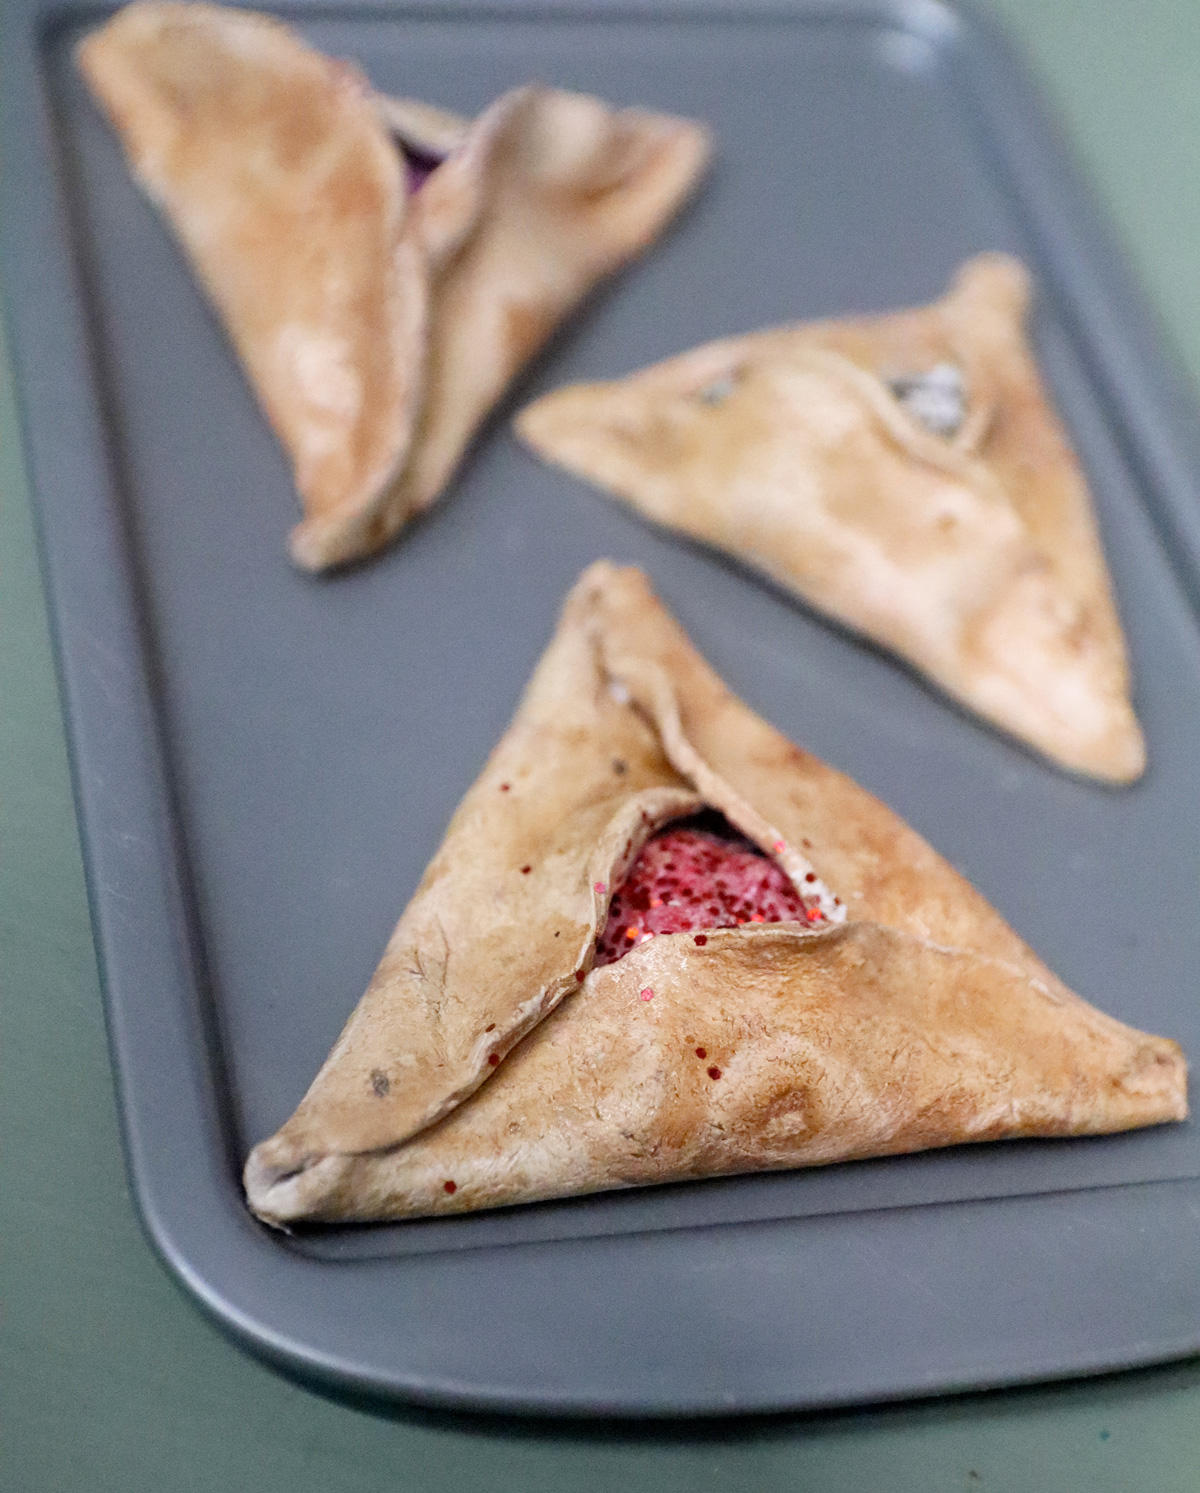
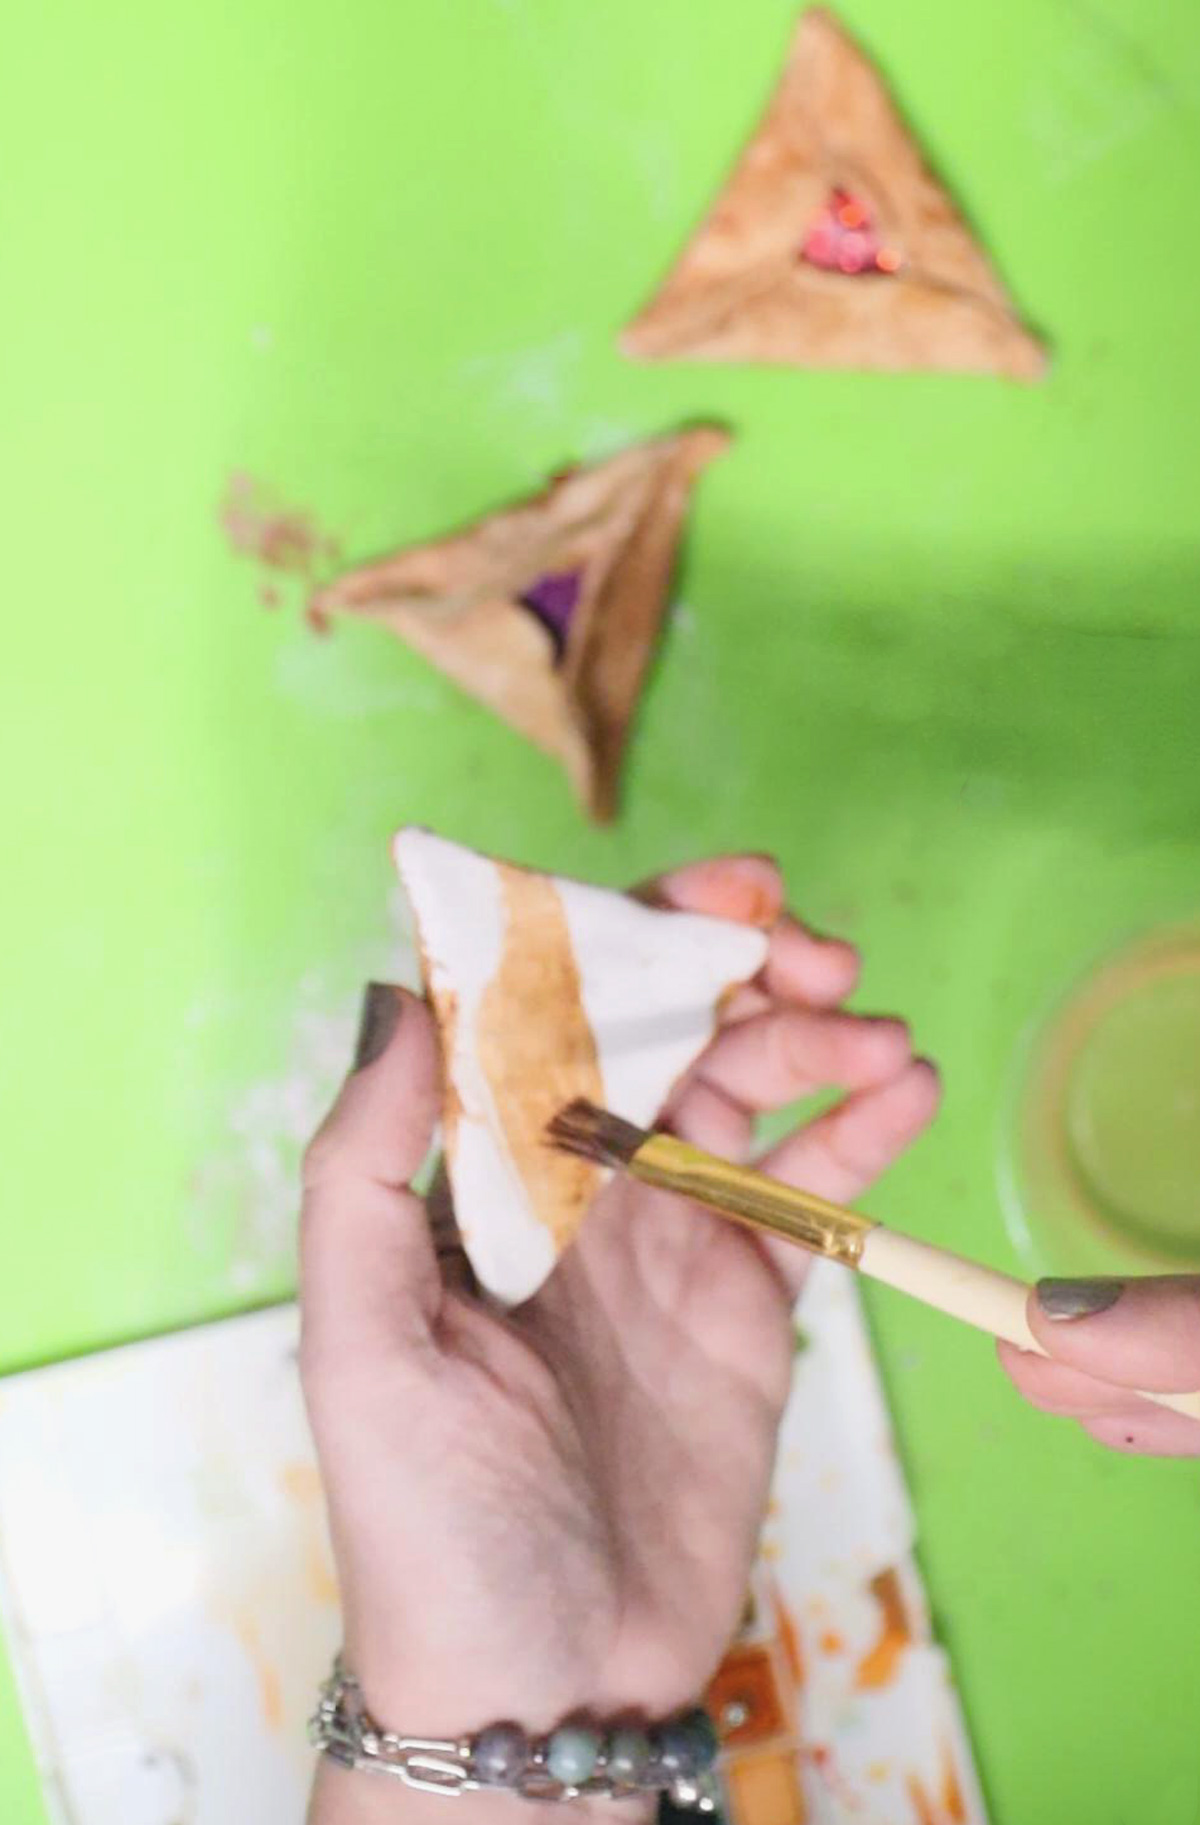
10. Allow your clay hamantaschen to dry completely. How long it takes will depend on your environment – temperature, humidity, etc. Then, paint it with a wash of brown watercolor paint.
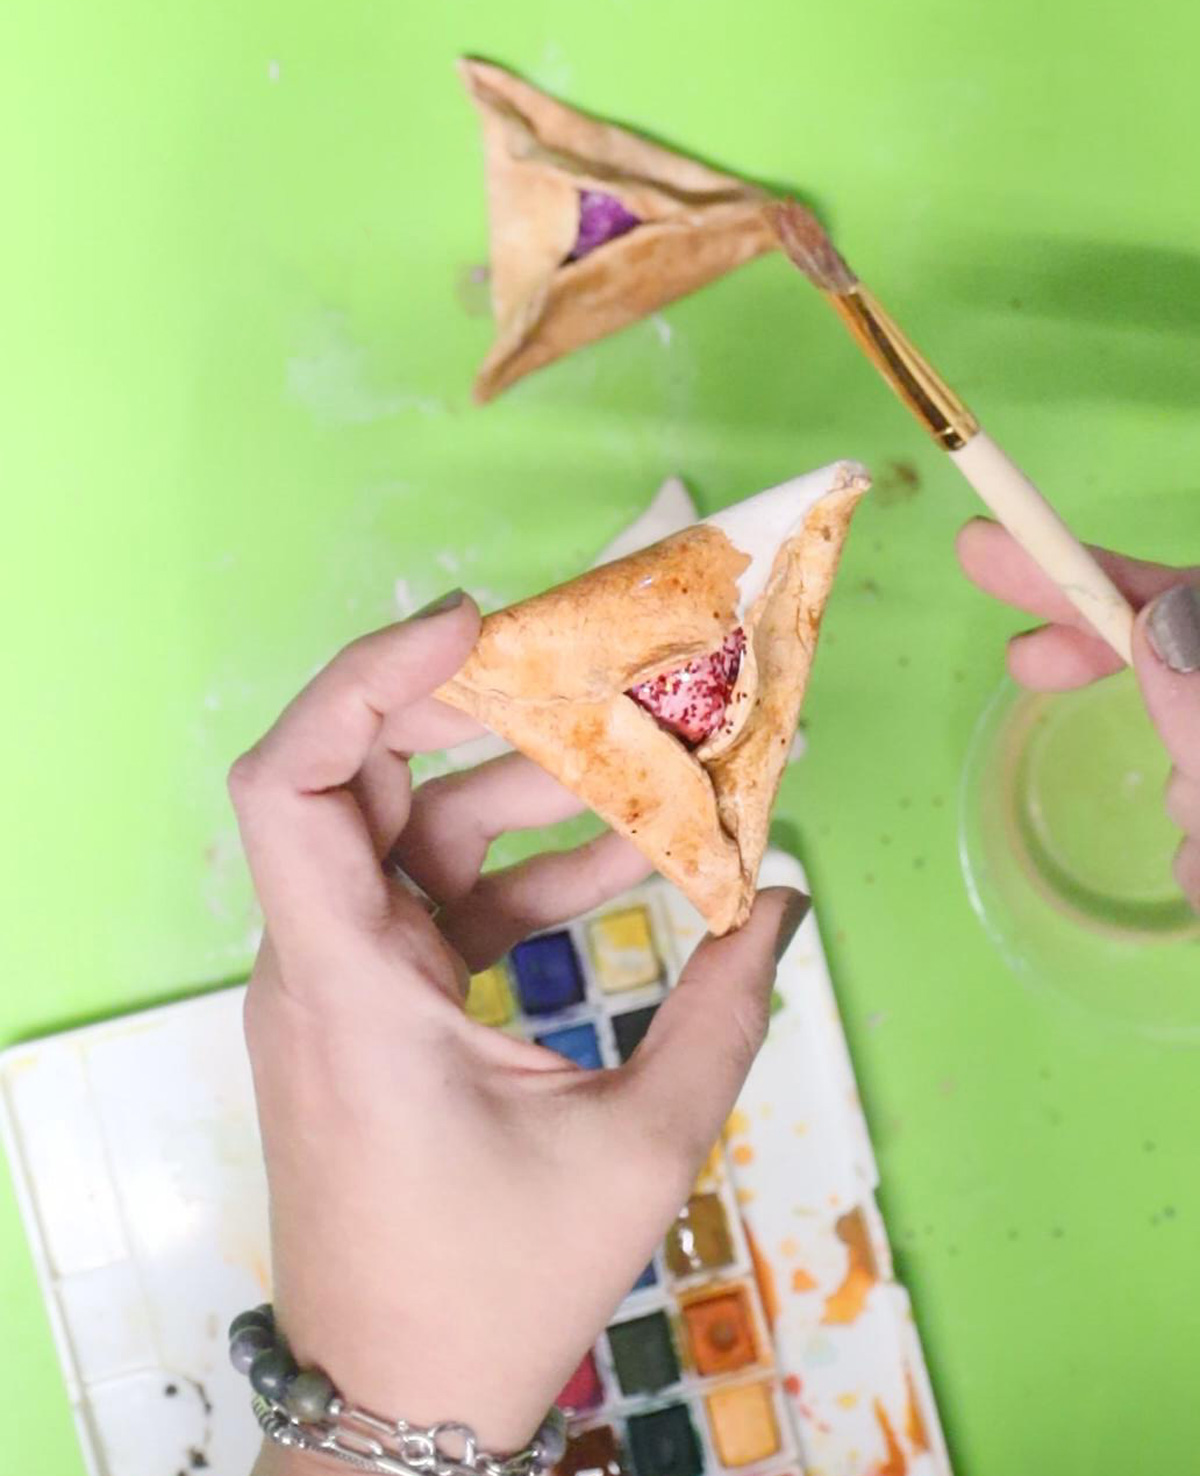
11. When the top is dry to the touch, flip it over and paint the back. Just a tip when doing watercolors on air dry clay – don’t overwork it or make it too wet.
12. Allow it to dry completely (an hour or so) and seal it with your choice of sealer.
Your clay hamantaschen are complete and ready to be played with!