Woven Paper Basket for Mishloach Manot
Create these adorable woven paper baskets to use as Mishloach Manot baskets, or to hold your treats and small gifts! When you’re done, check out these 25 easy Mishloach Manot ideas. This post contains affiliate links.
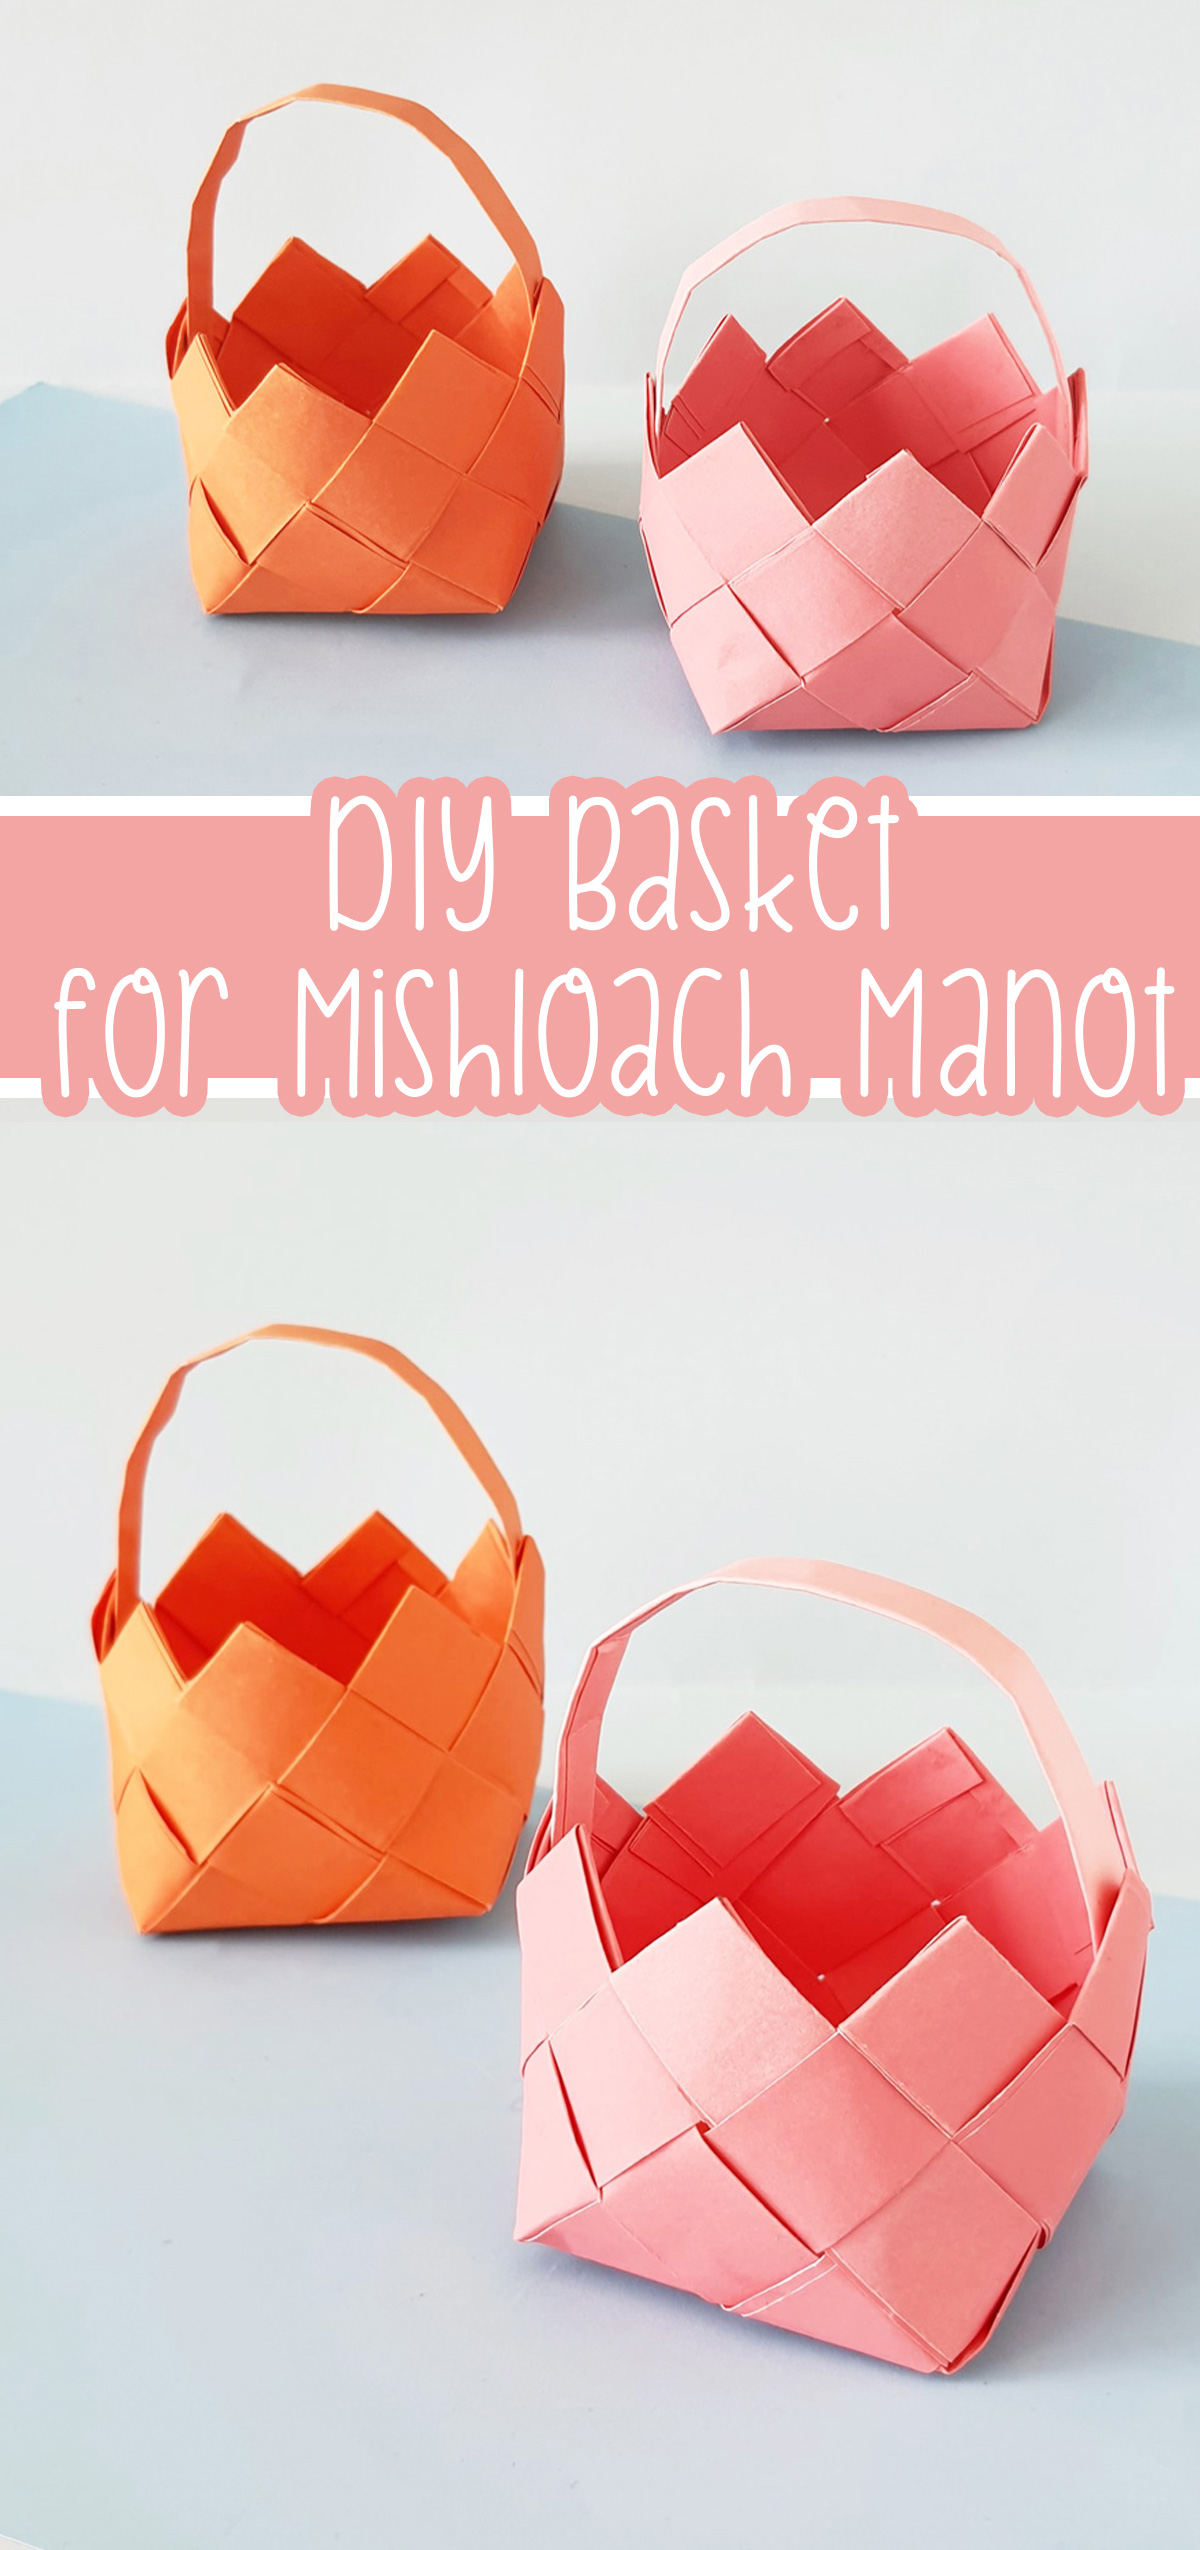
Purim is in the air, and we’re getting ready to celebrate with friendship and giving! These charming handmade baskets are perfect for treats and small gifts. Even young kids can make them and get into the spirit of the holiday while feeling personally involved – and having fun!
They’ll lend a special personal touch to your mishloach manot while keeping the kids busy, and you’ll hardly spend anything because they’re 100% paper (with a touch of glue).
Making your own woven paper baskets for Mishloach Manot is a fabulous activity for classrooms and for exchanges. Kids can craft, fill it with food, and hand it to a friend. Teachers can create it as a classroom activity and then give kids the snacks to fill it with in lieu of their own Mishloach Manot.

Isn’t it amazing how versatile good old construction paper can be? We’ve done a lot of creative things with paper together, including some fabulous origami projects.
Today we’ll be exploring a different way to work with paper in 3-D: weaving! This craft is excellent for grade-school level crafters – especially those who may already have tried weaving strips of paper on a flat surface and are now ready for thenext level. These instructions will make the 3-D weaving simple enough for children to learn, while the activity itself is also engaging enough for more advanced crafters.


You can use regular copy or construction paper for this craft, since the instructions include doubling it over to make it stronger. You can also use cardstock or other craft papers for even better durability.
If you choose to use something really thick, you can skip the doubling over step and just make narrower strips in the first place. The right paper can give this simple craft a really upscale look – try scrapbook paper in different patterns for different artistic effects or glittery paper for a fancier touch.
You can even repurpose magazines or newspapers!


If you’ve chosen a solid colored paper, you can decorate your finished product with glitter/glitter glue, ribbon, or stickers. Or just stay classic with the solid basket weave.
These small baskets are perfect for a class mishloach manot exchange, giving your child a chance to showcase their unique personality and handiwork without extra expenses. You’ll enjoy the process of making them, as it’s both engaging and simple. Once you get the hang of it, you’ll probably want to make more. You can even skip the handle and use them around the house as catchall bowls to hold trinkets or desk supplies.
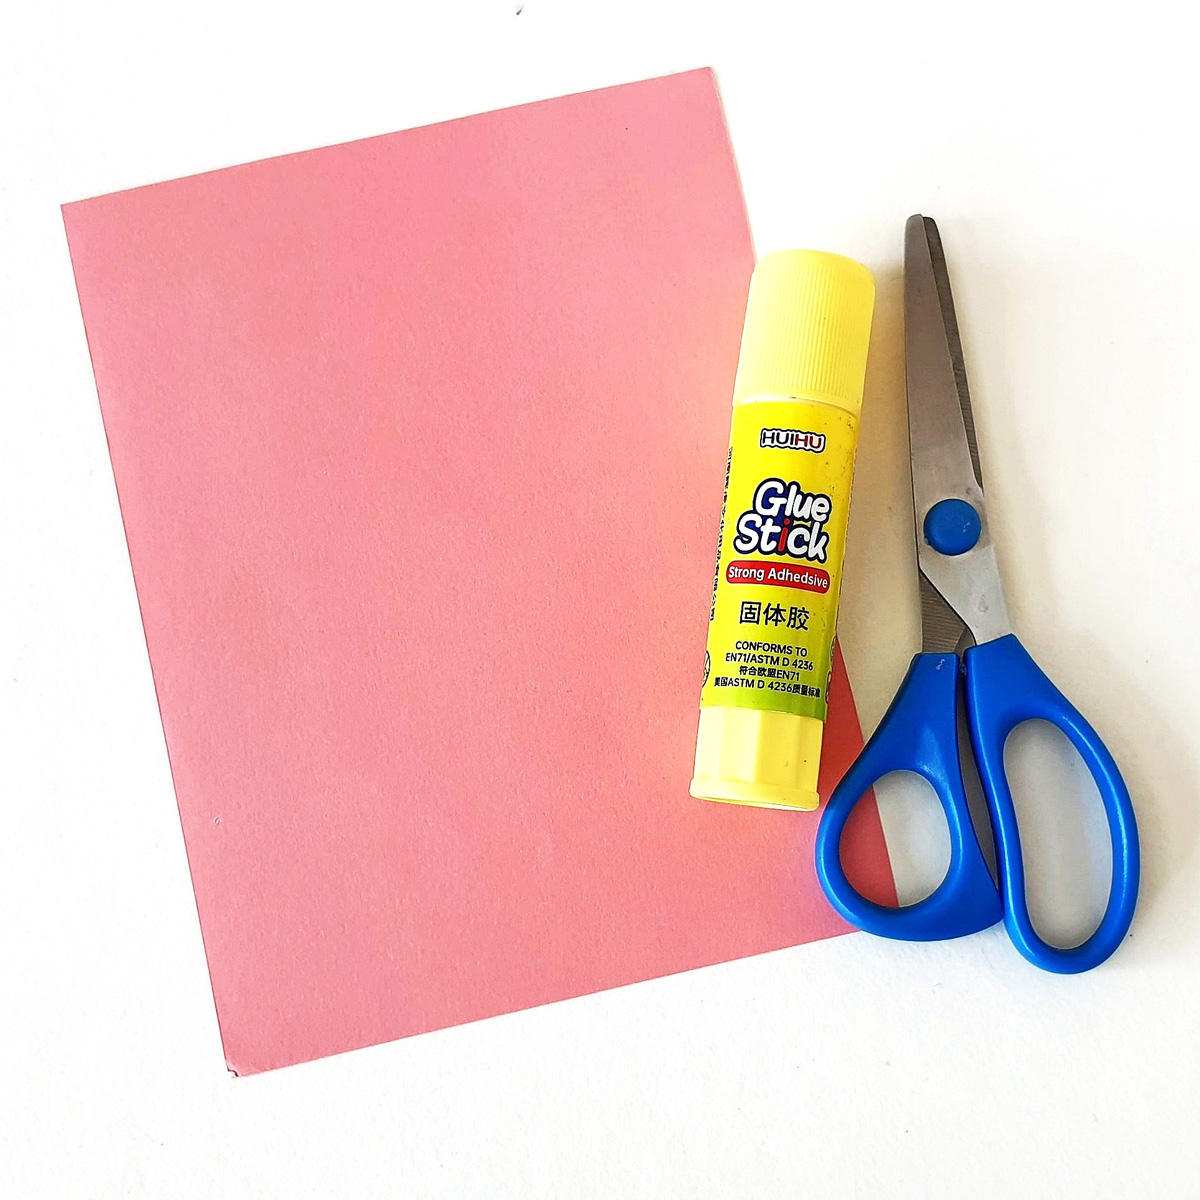
What you need
- Colored paper
- Pencil
- Scissors
- Glue
- Ruler
How to make a woven paper basket
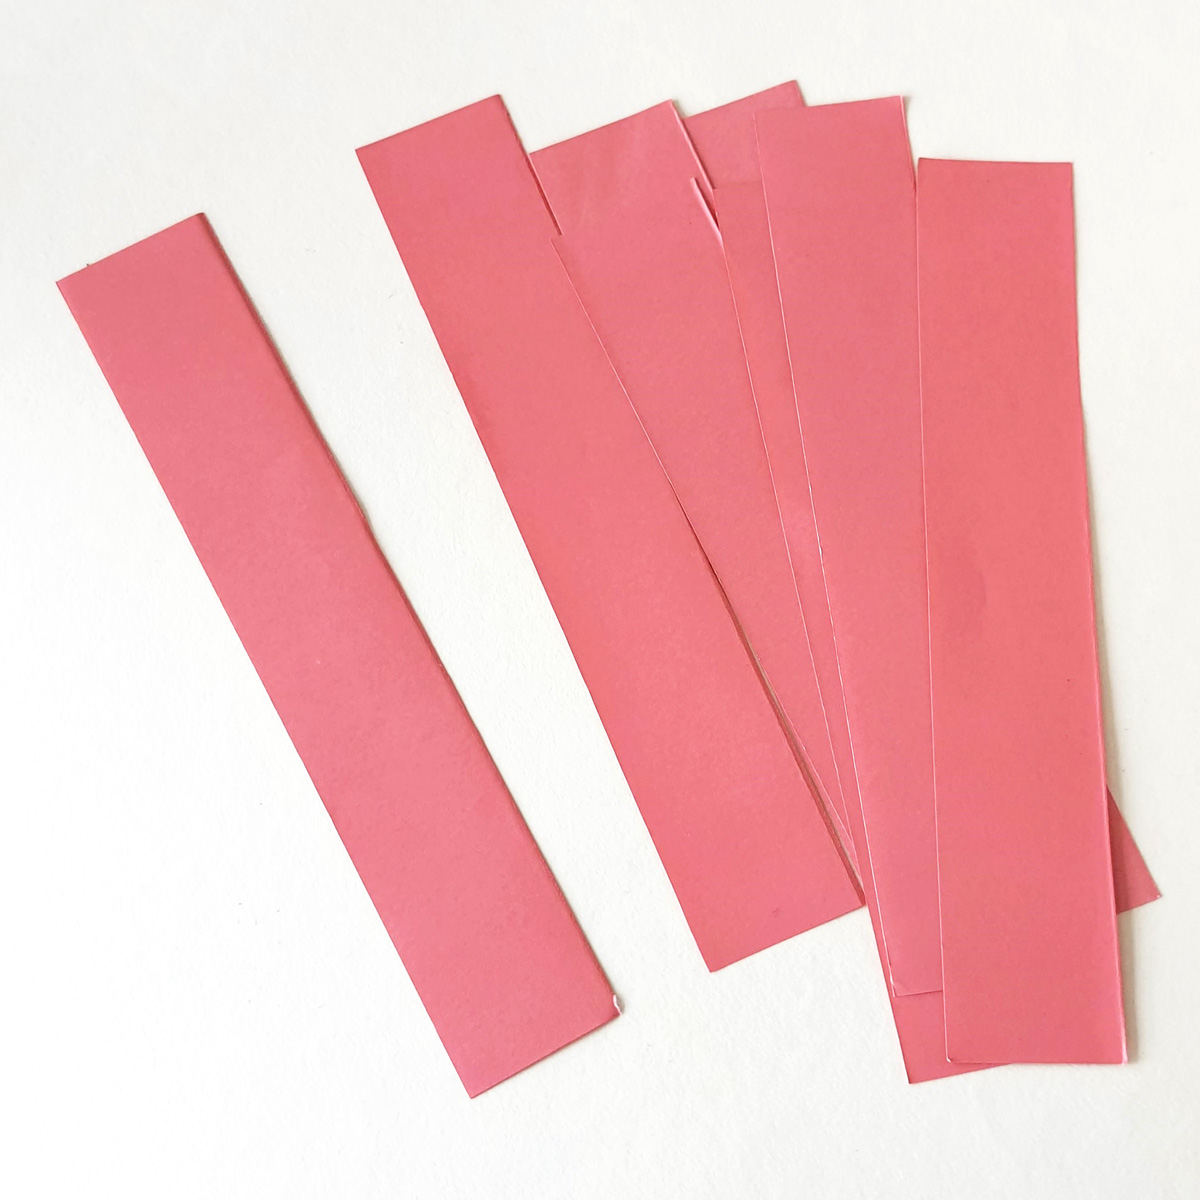
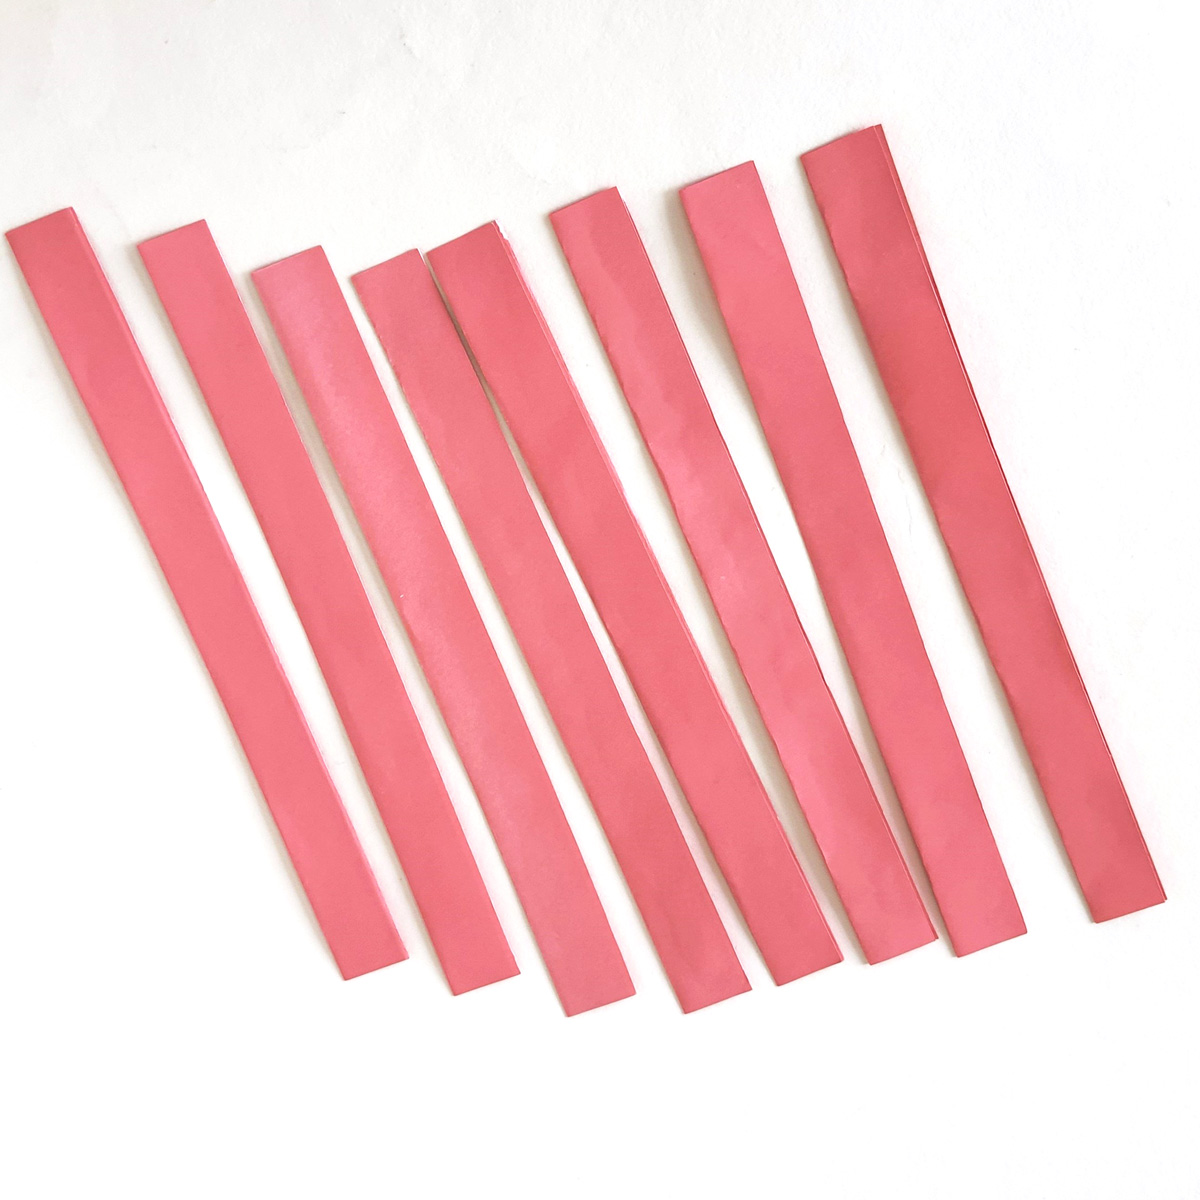
1. The basket is made of 8 identical strips. You can use a letter-size sheet of paper and cut it into strips of equal width. The ones we used run the short way of the paper and are about 8.5 inches by 1.375 inches.
2. Take any strip and fold it into half the long way to form one longer, skinnier strip. Use glue to secure it.
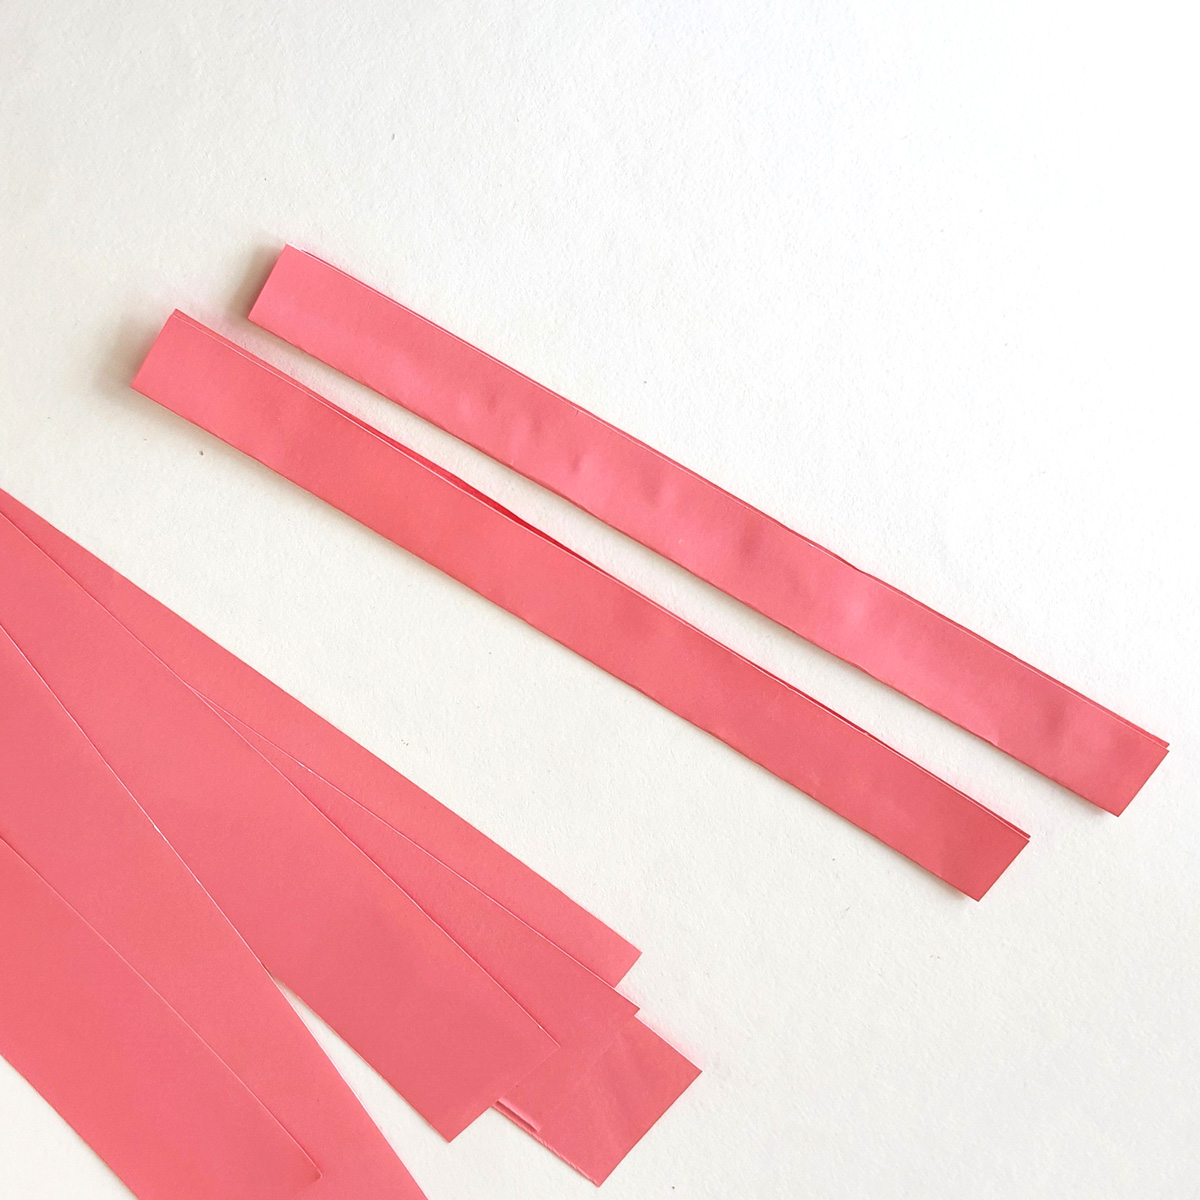
3. Repeat for all the strips.
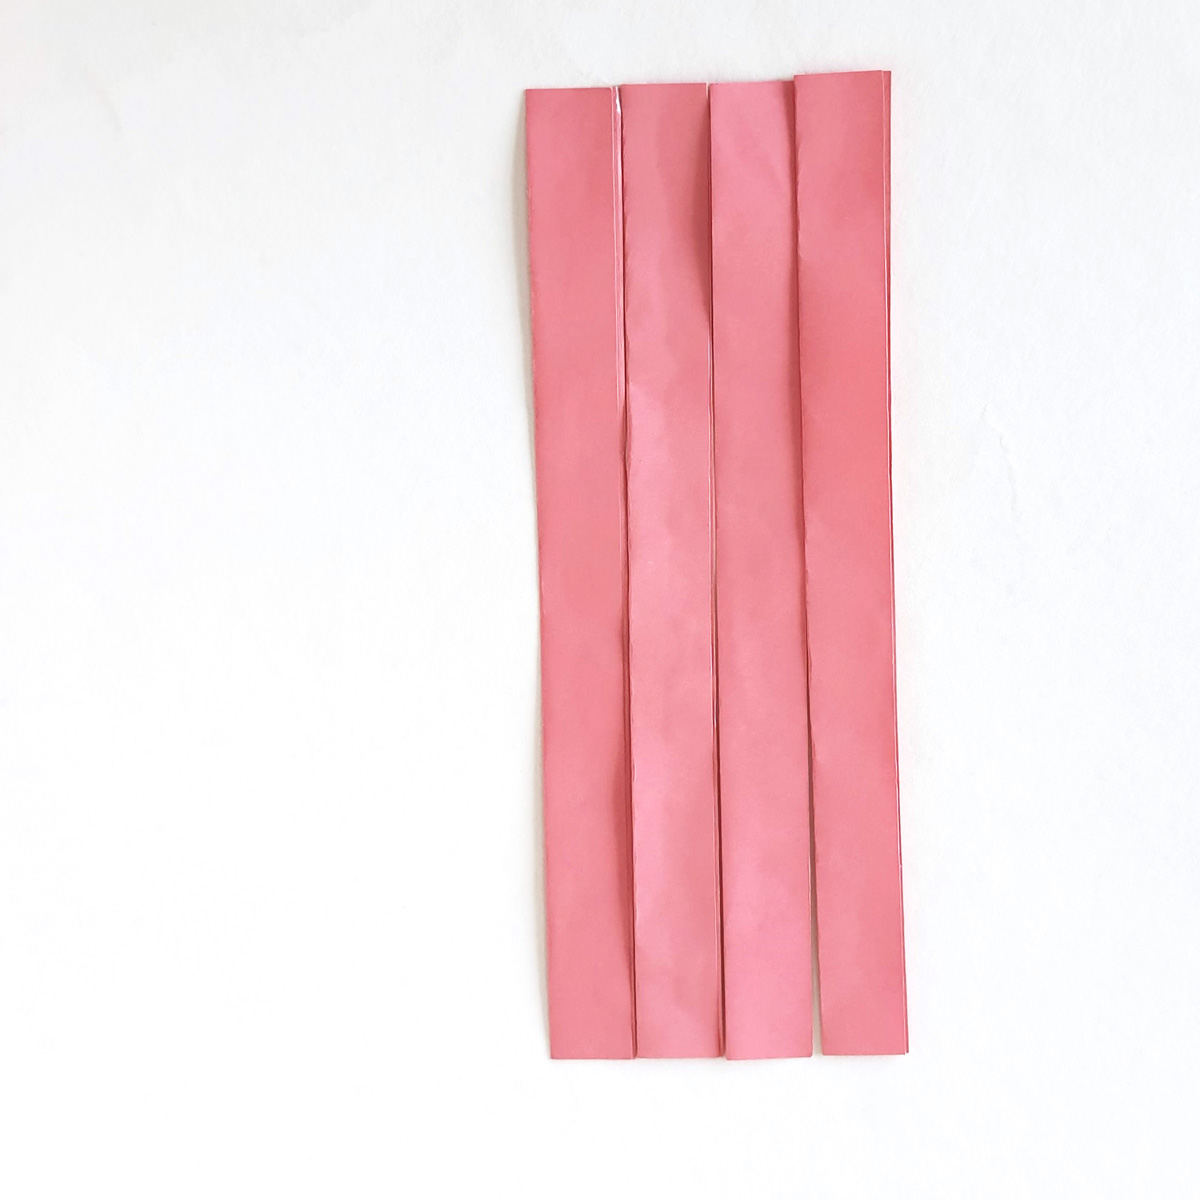
4. Line up 4 strips side by side on a flat surface.
5. Take one of the remaining strips. Weave it over and under the 4 that you laid out, near the middle.
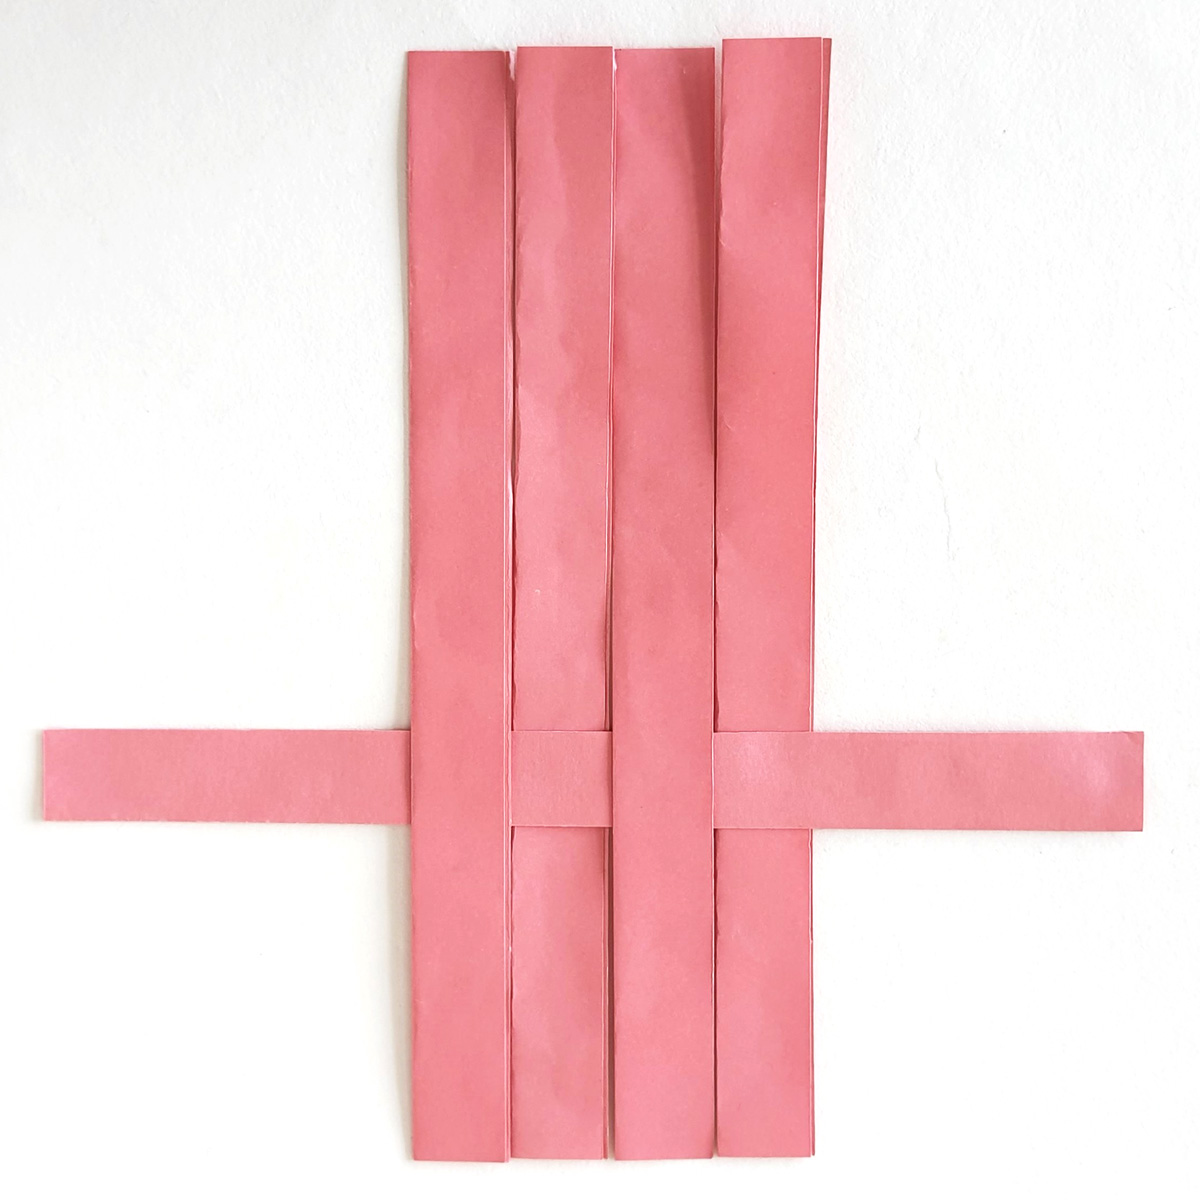
6. Take another of the leftover strips and weave it in and out in the opposite pattern – under/over instead of over/under. Slide it right next to the previous strip.
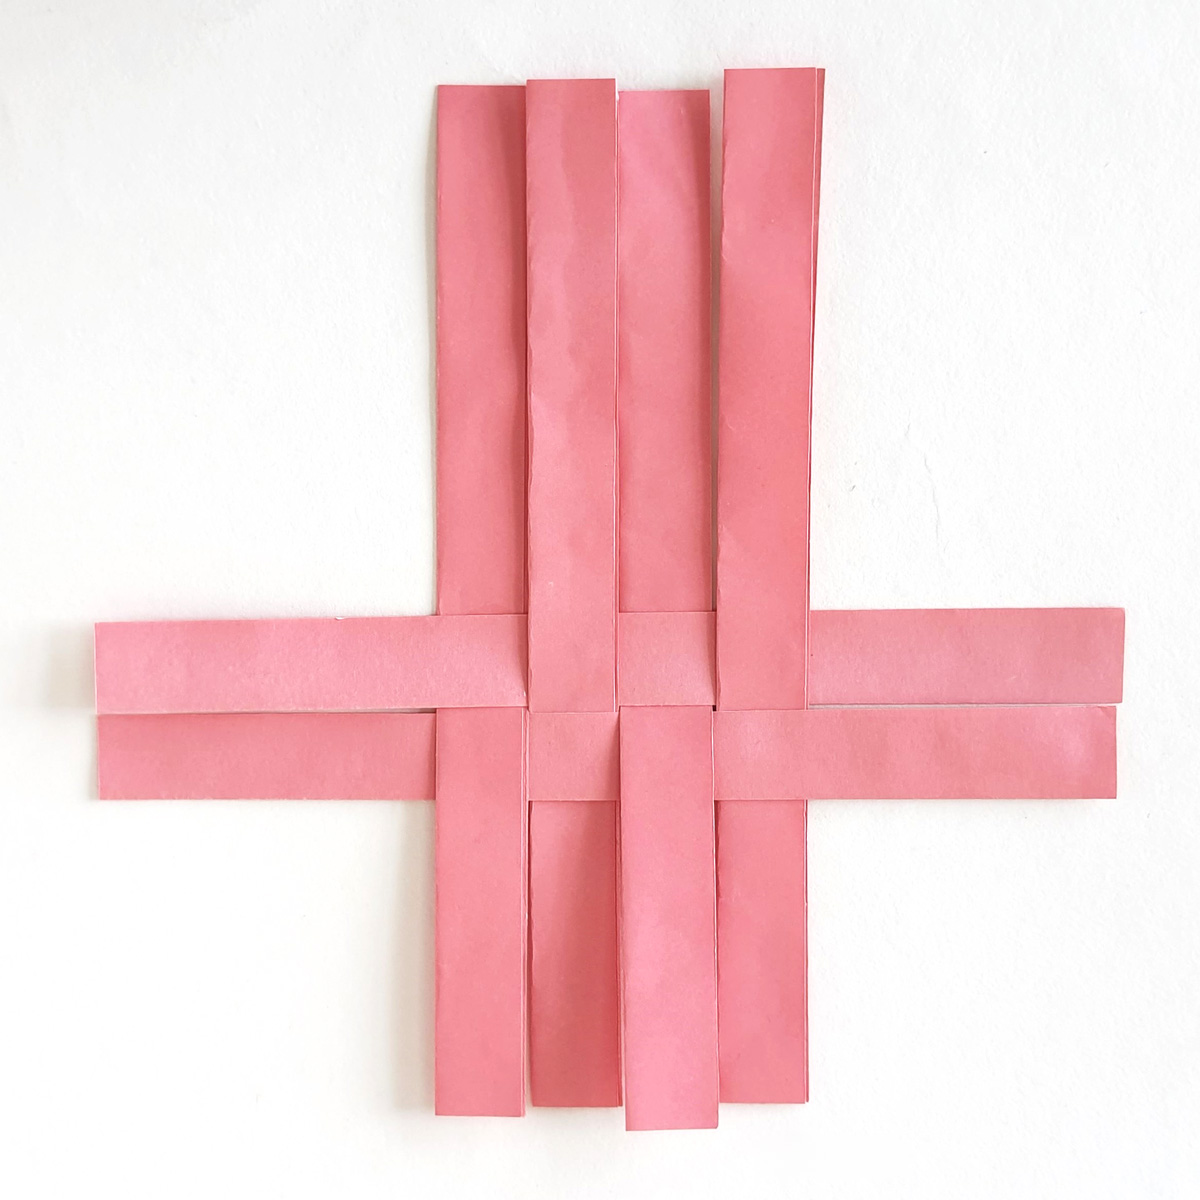
7. Weave the last two strips next to the first two. Arrange all the strips so that the woven part is in the center and all the strips stick out about the same amount. Use a little glue on the outer squares to secure the weaving.
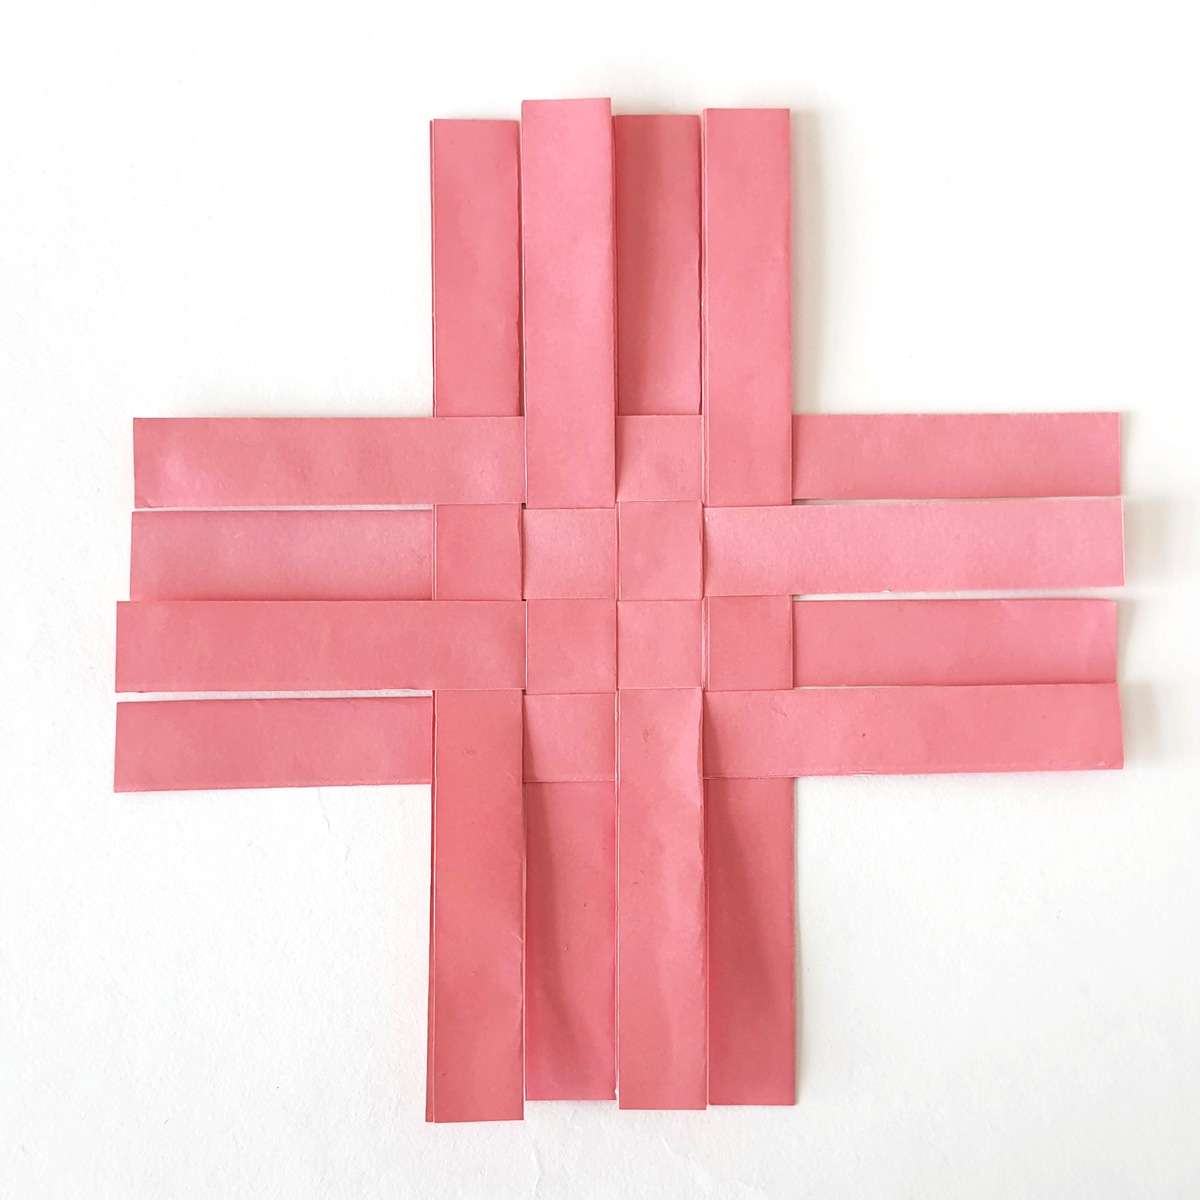
8. Use a pencil to outline a diagonal square on the base, as shown. This will be the bottom or base of the woven basket.
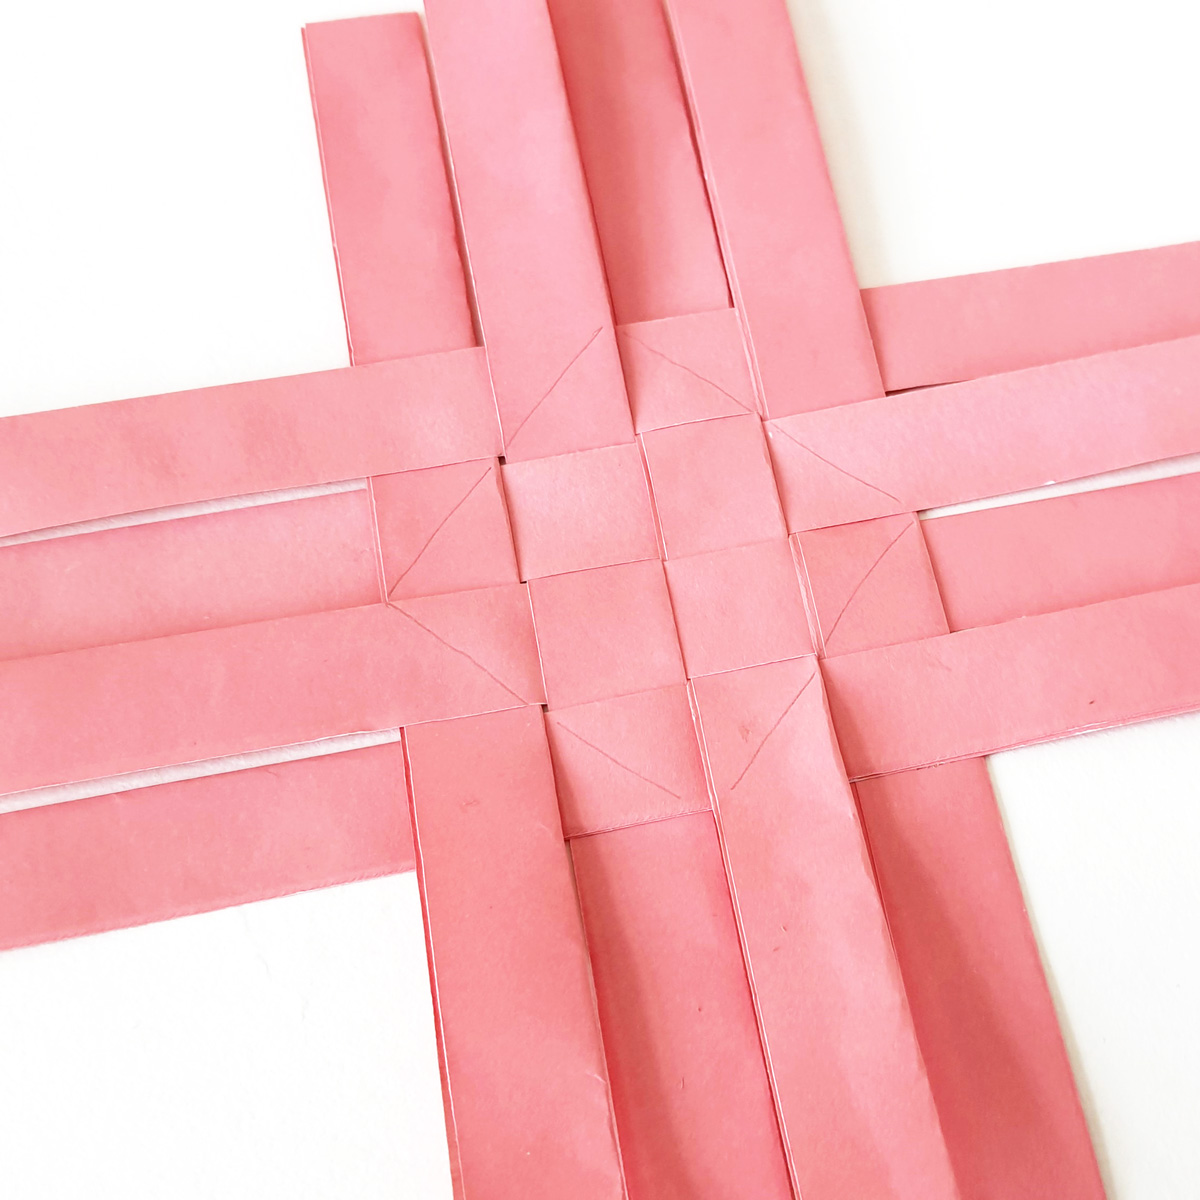
9. Start with any side. Hold the two center strips of that side.

10. Since the two strips are side by side, one is under its last square while one is on top. Move the bottom strip over the top strip, bending them to form a 90-degree angle.
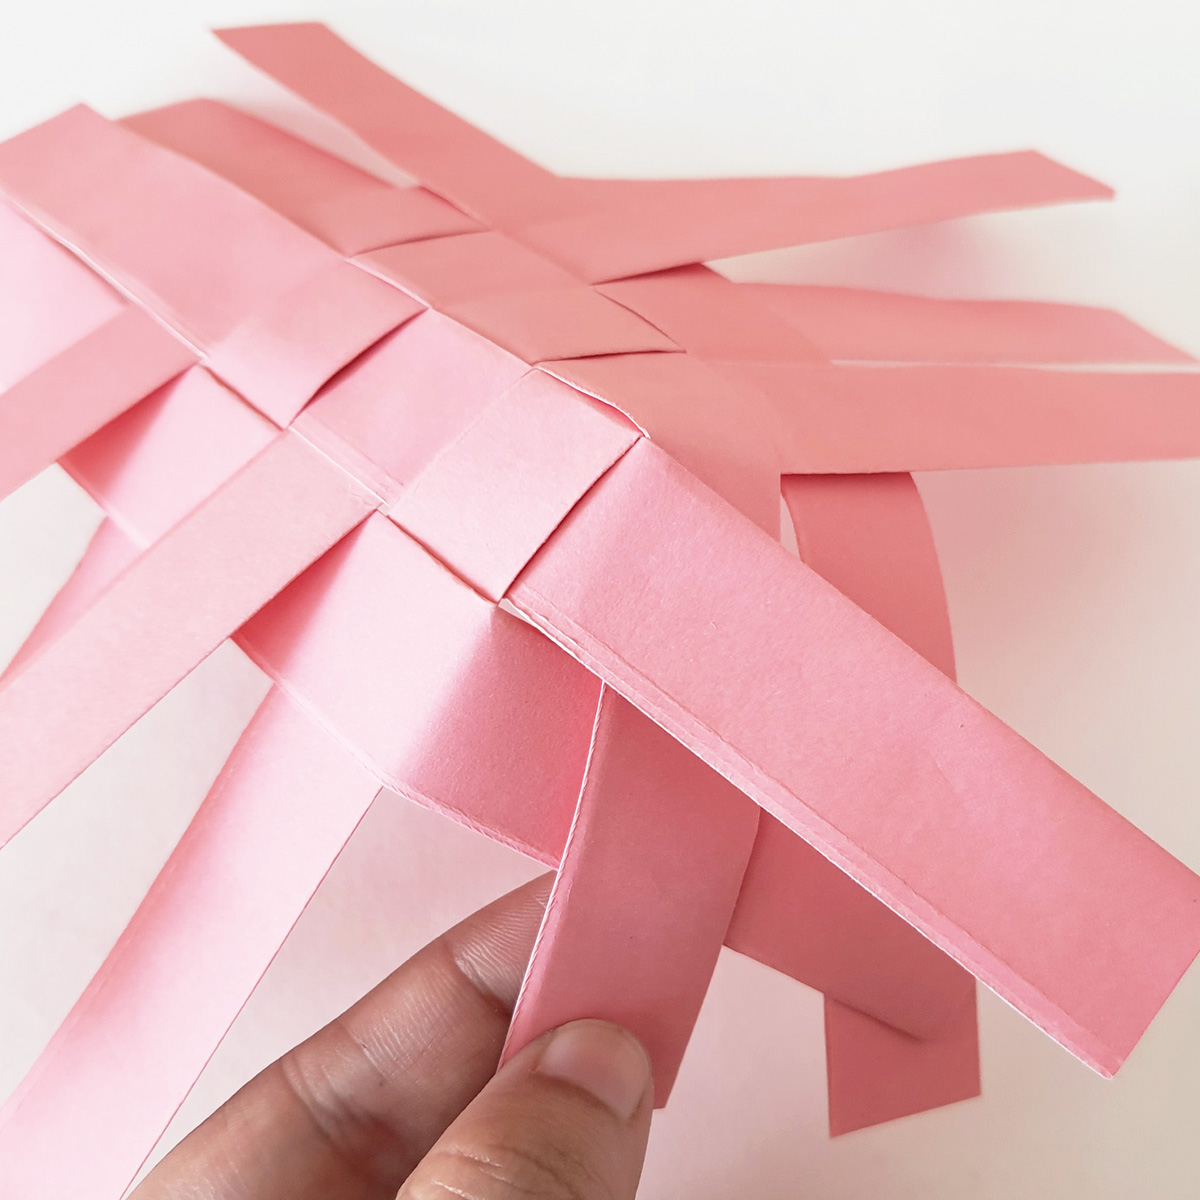
11. Now take the next strips on either side of the ones used in the previous step, and weave them over and under the first ones and each other, still holding the corner at a 90-degree angle. This is the first corner of the basket.
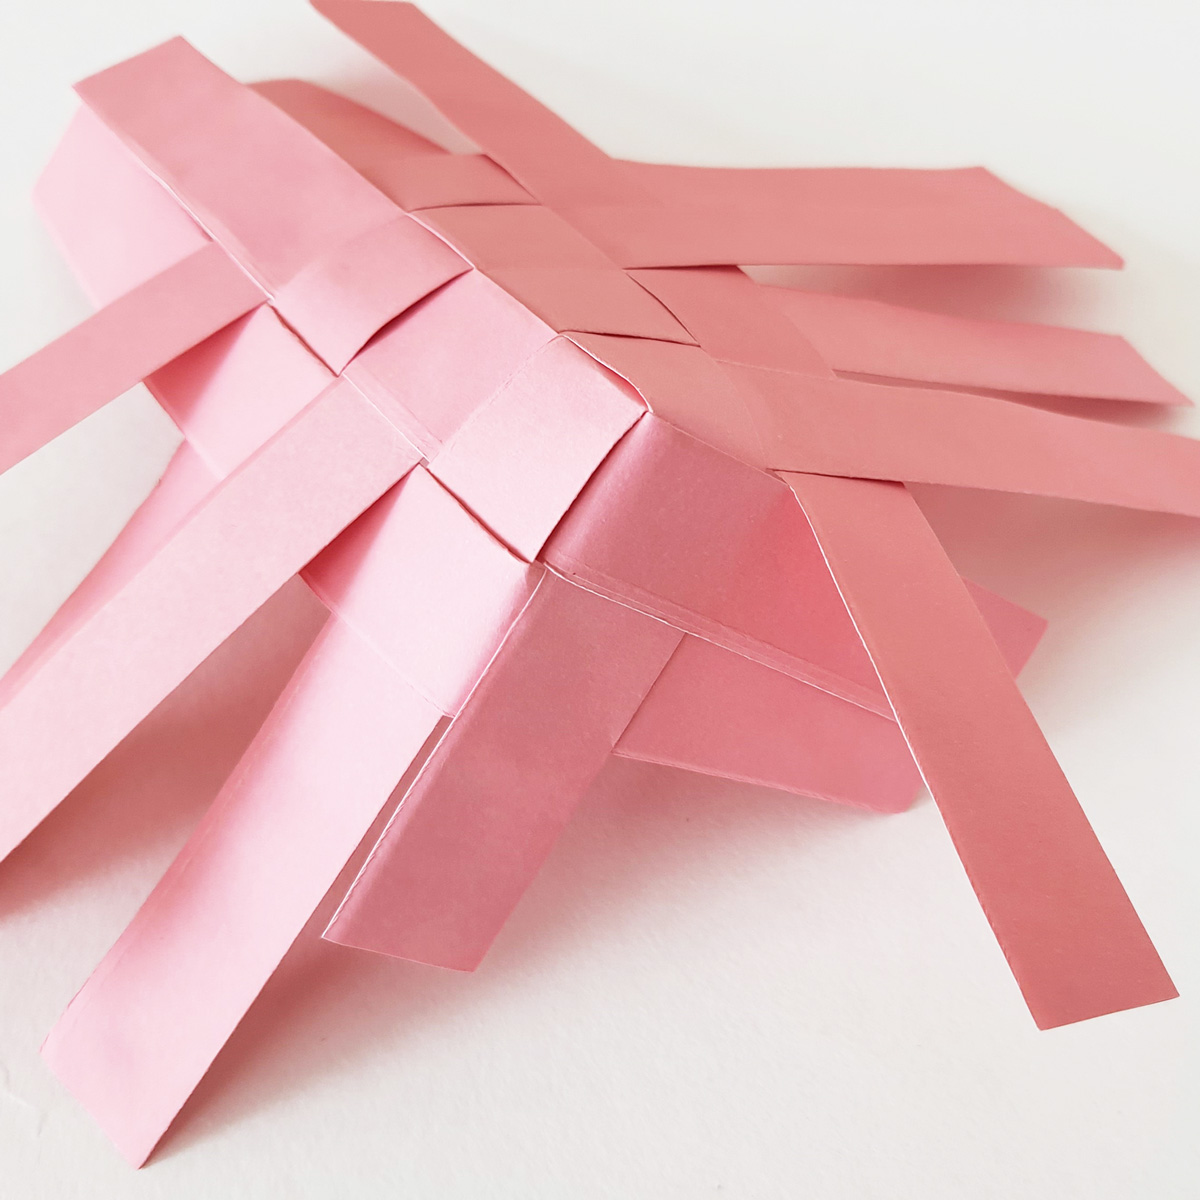
12. Use glue on the outer parts of the weave to secure the first corner in place.
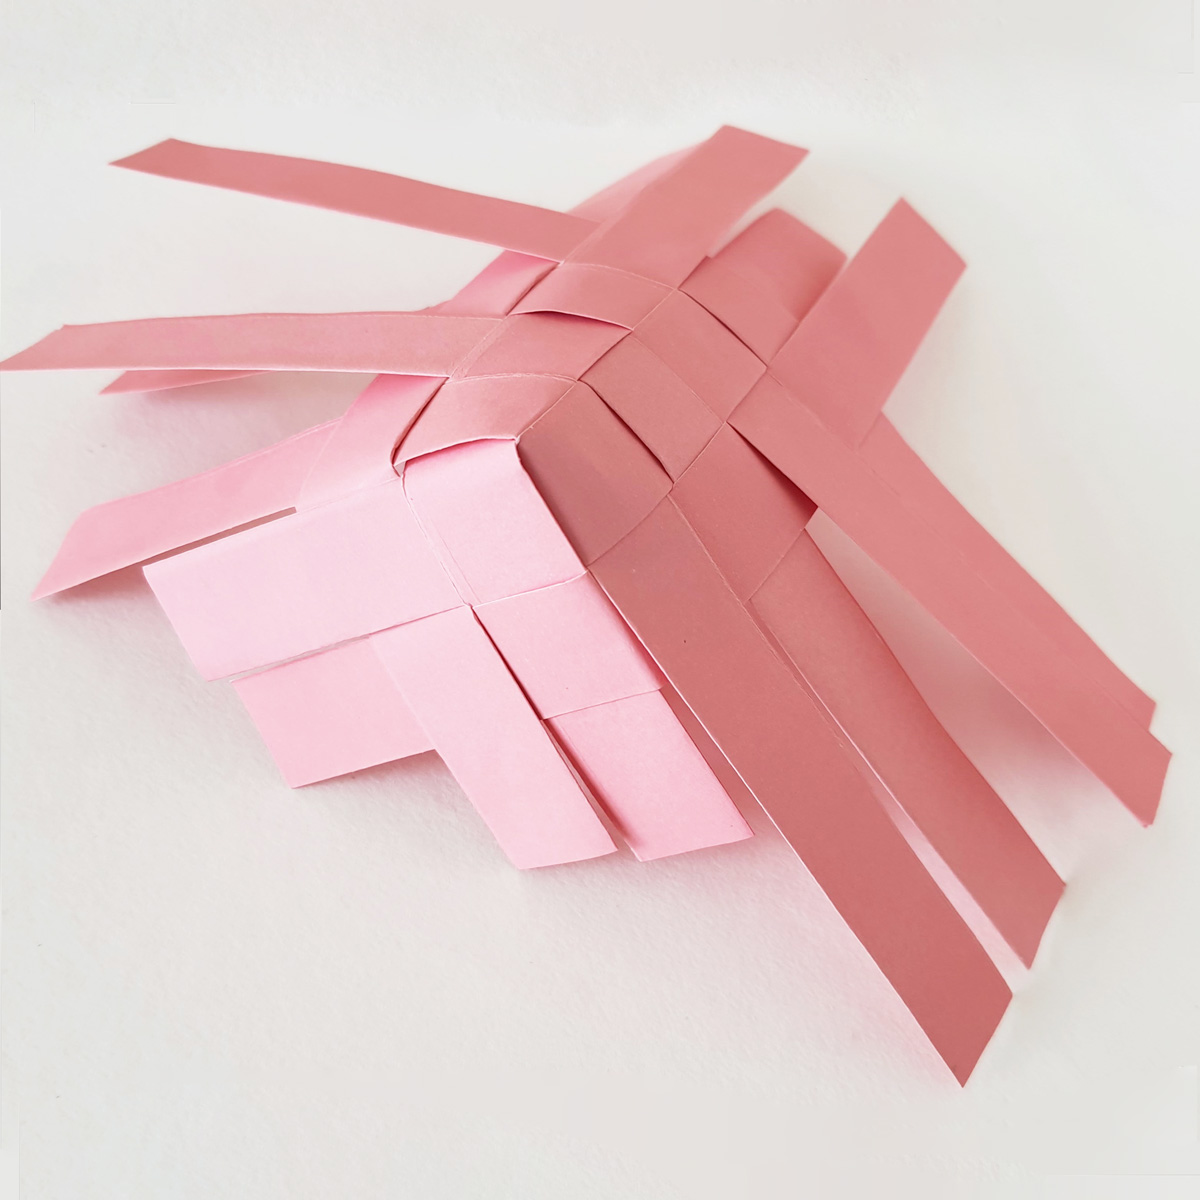
13. Turn the basket to the next side, adjacent to the first finished corner.
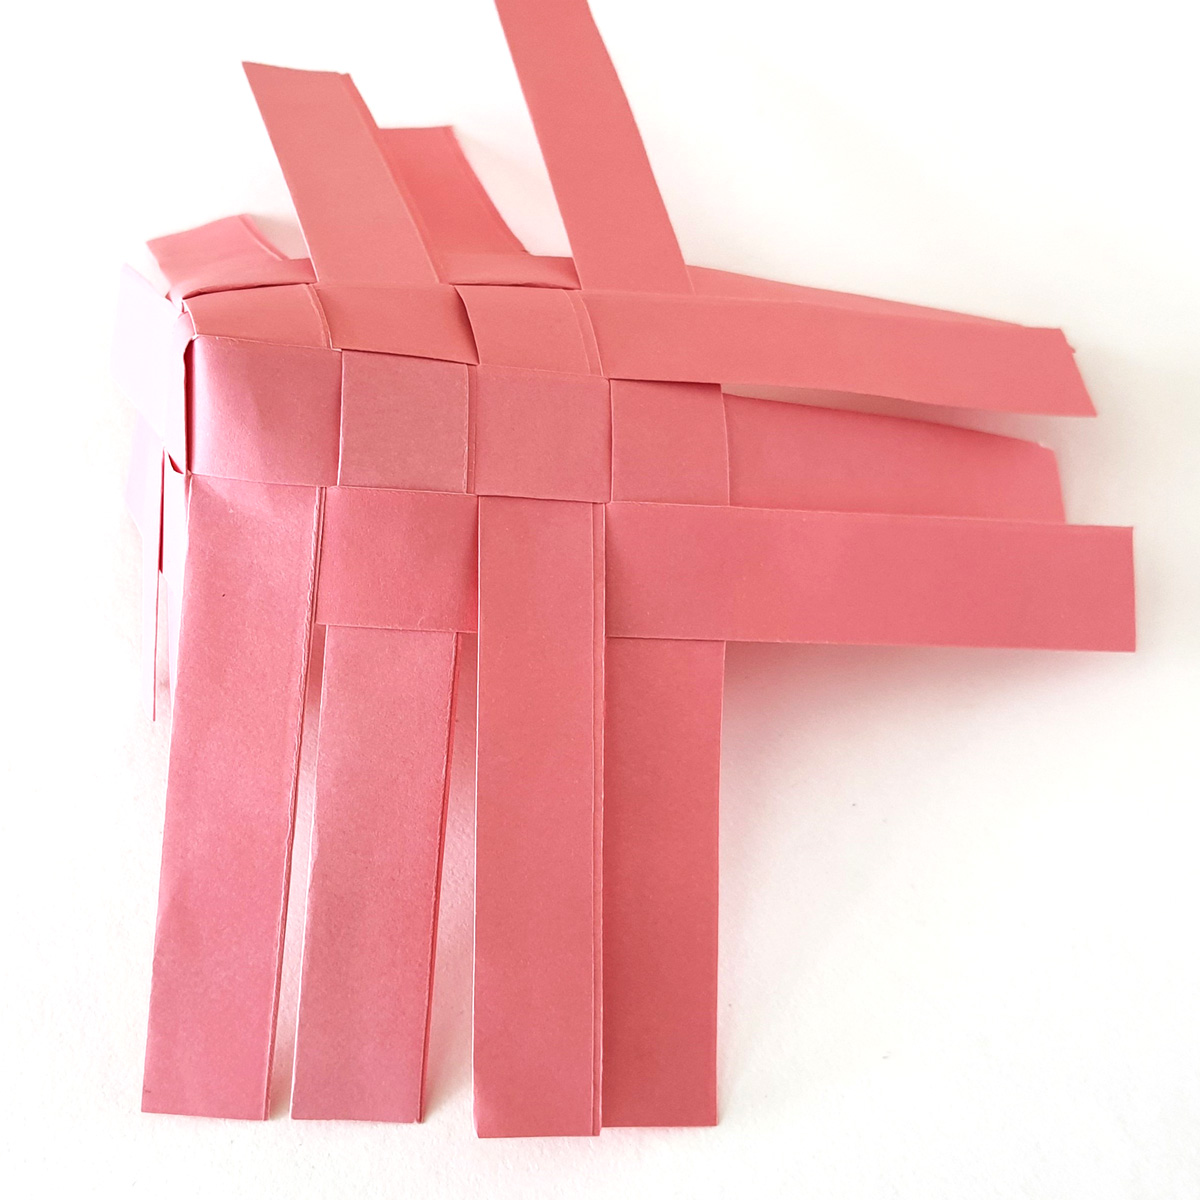
14. As you did in steps 9-12, start with the center strips, weave the lower one over the top one, and then continue to weave all four strips of that side over and under each other. Secure it with glue.

15. Weave the next side to form the 3rd corner. This is what the pattern should look like from the bottom after weaving the 3rd corner.

16. Finally, weave the last side to form the 4th corner of the basket and secure it with glue..
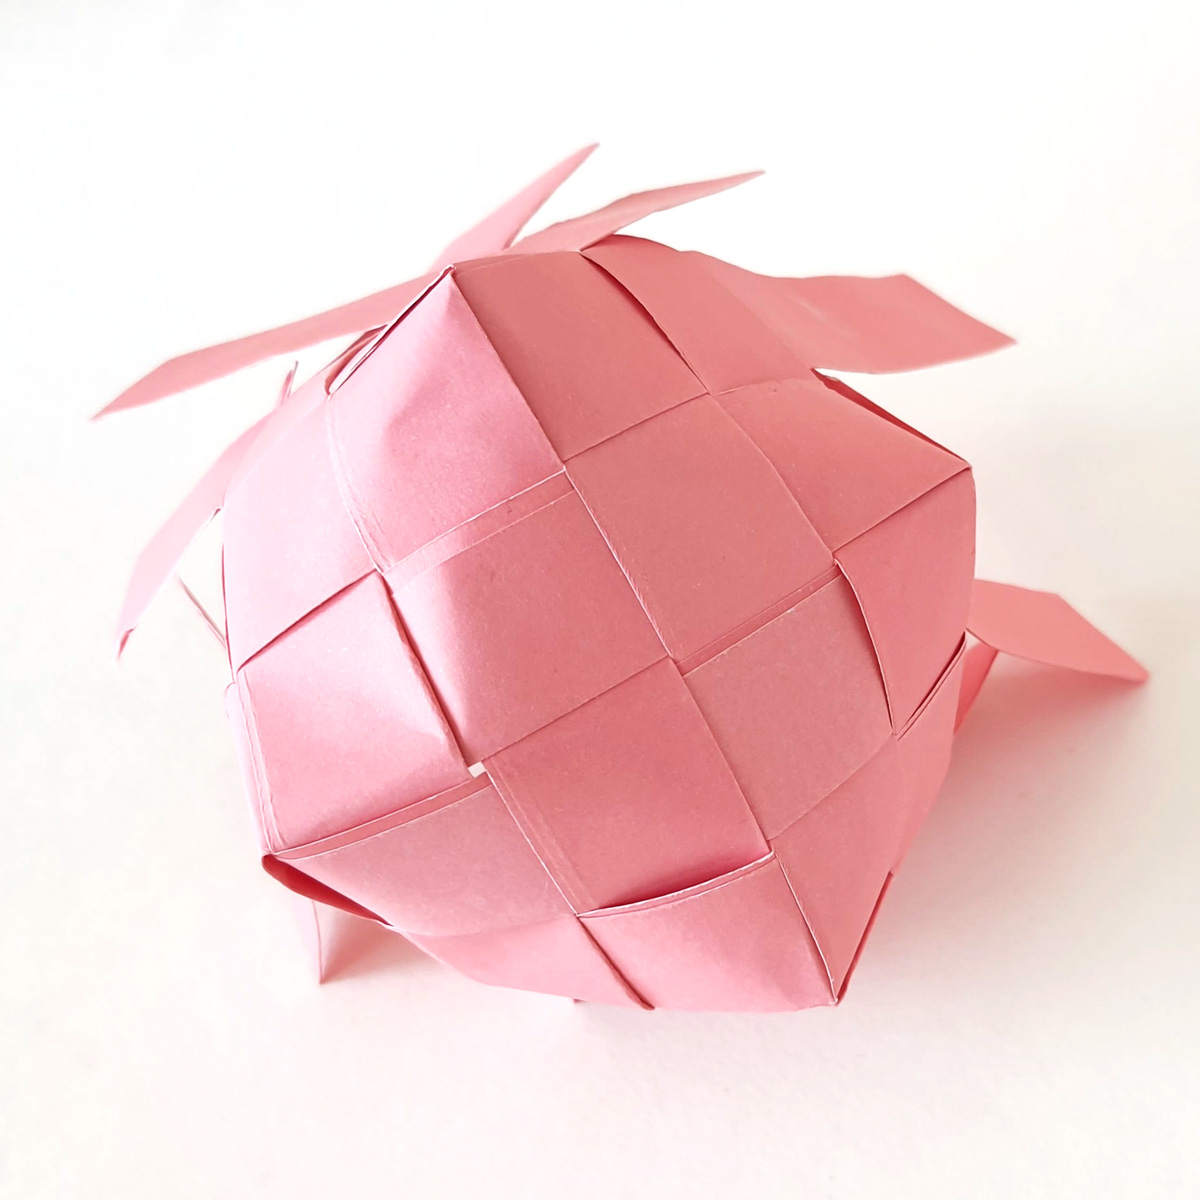
17. Let’s work on the top part of the basket now. We will weave over and under with all the strips now.
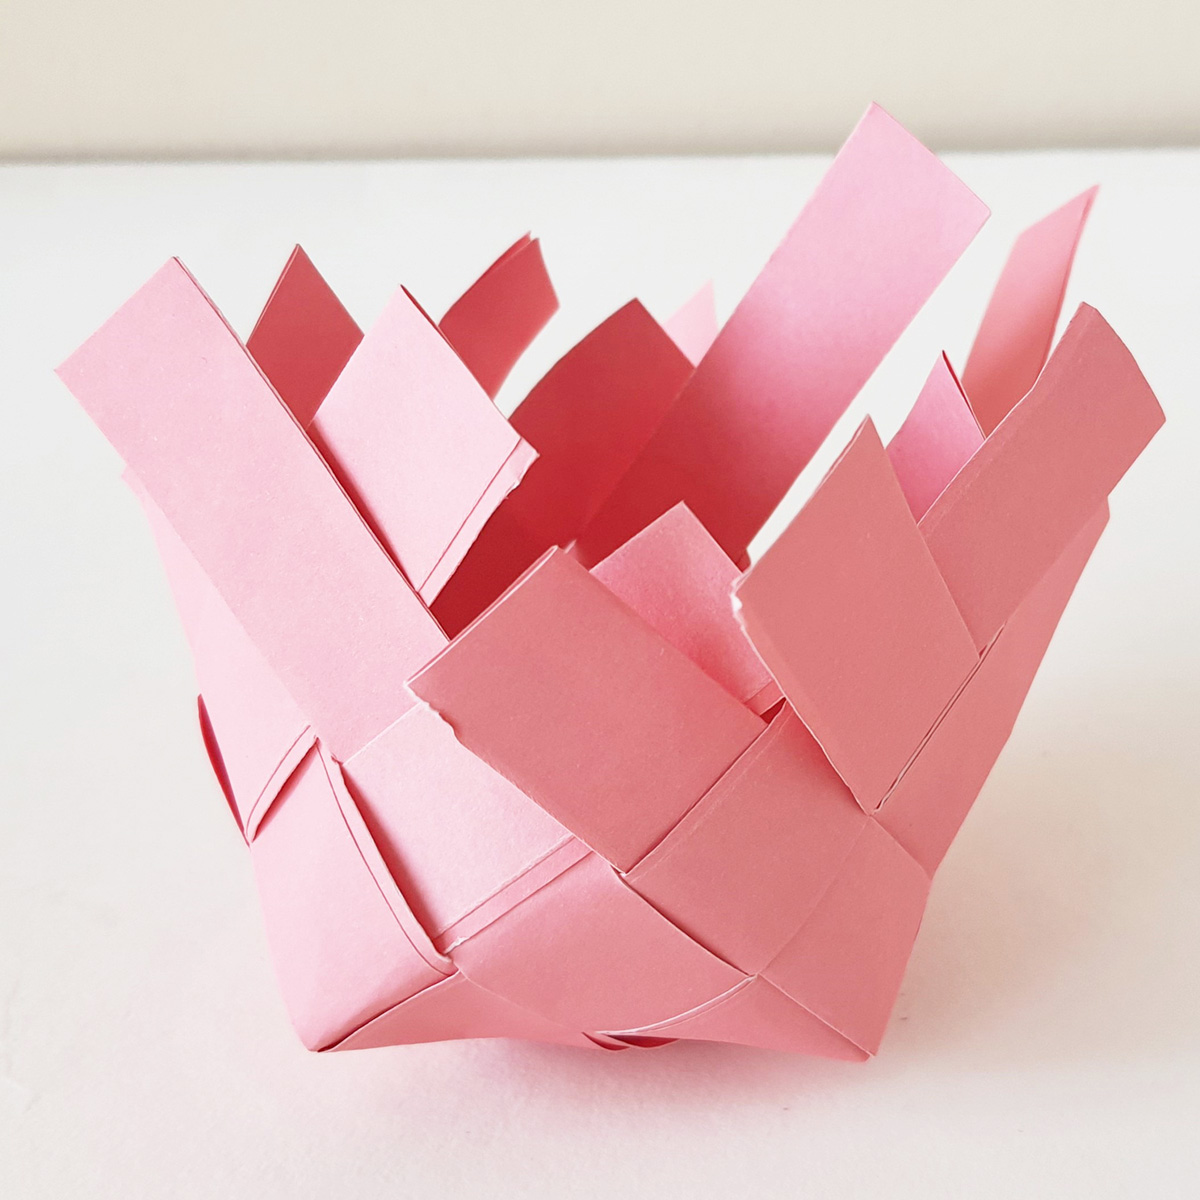
18. Weave any remaining loose ends over and under each other until you get to the end of the shortest strip.
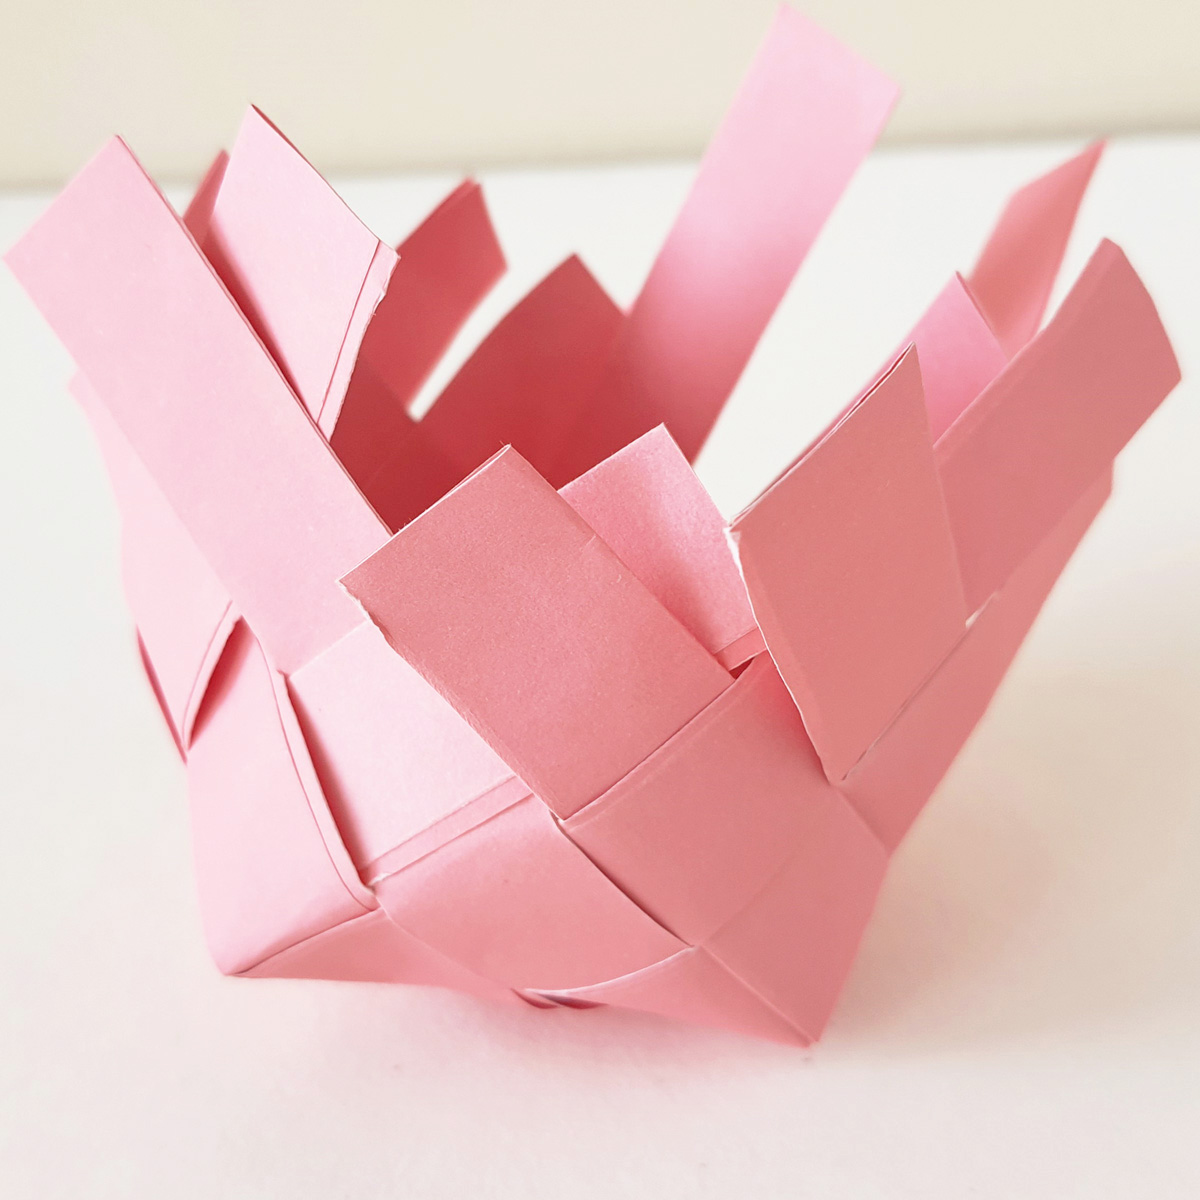
19. Take the shortest strip that’s sticking up from the outer layer, and fold the end toward the inside of the basket, folding it over the strip behind/below it.
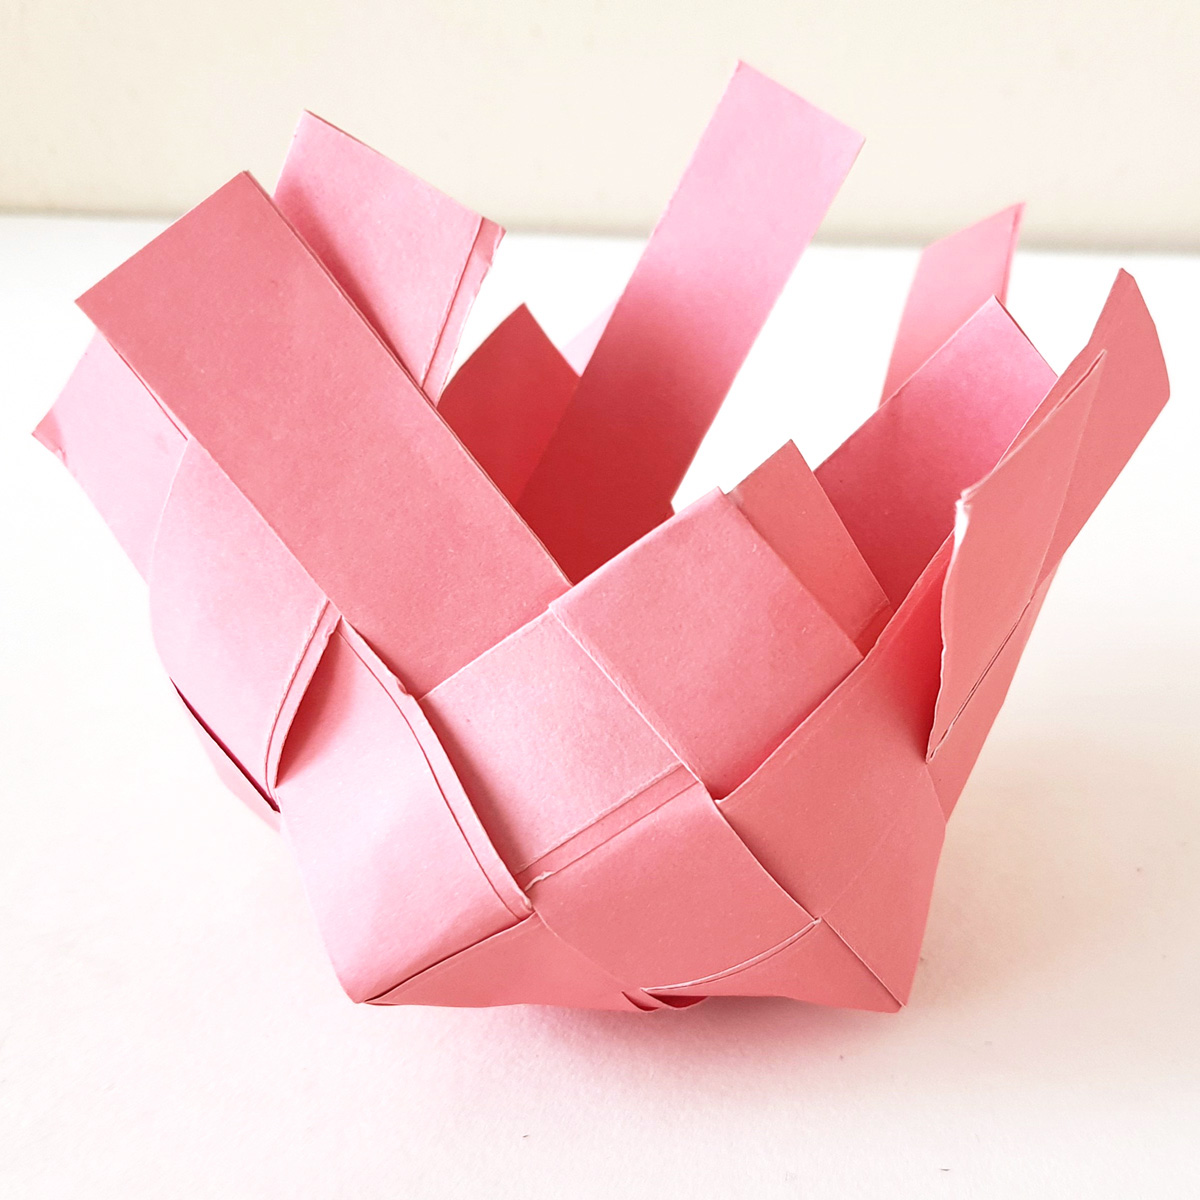
20. Take that bottom strip (under the one you just folded) and fold it over the first strip into the inside of the basket, giving the edge a finished look. Secure both strips’ ends with a little glue.
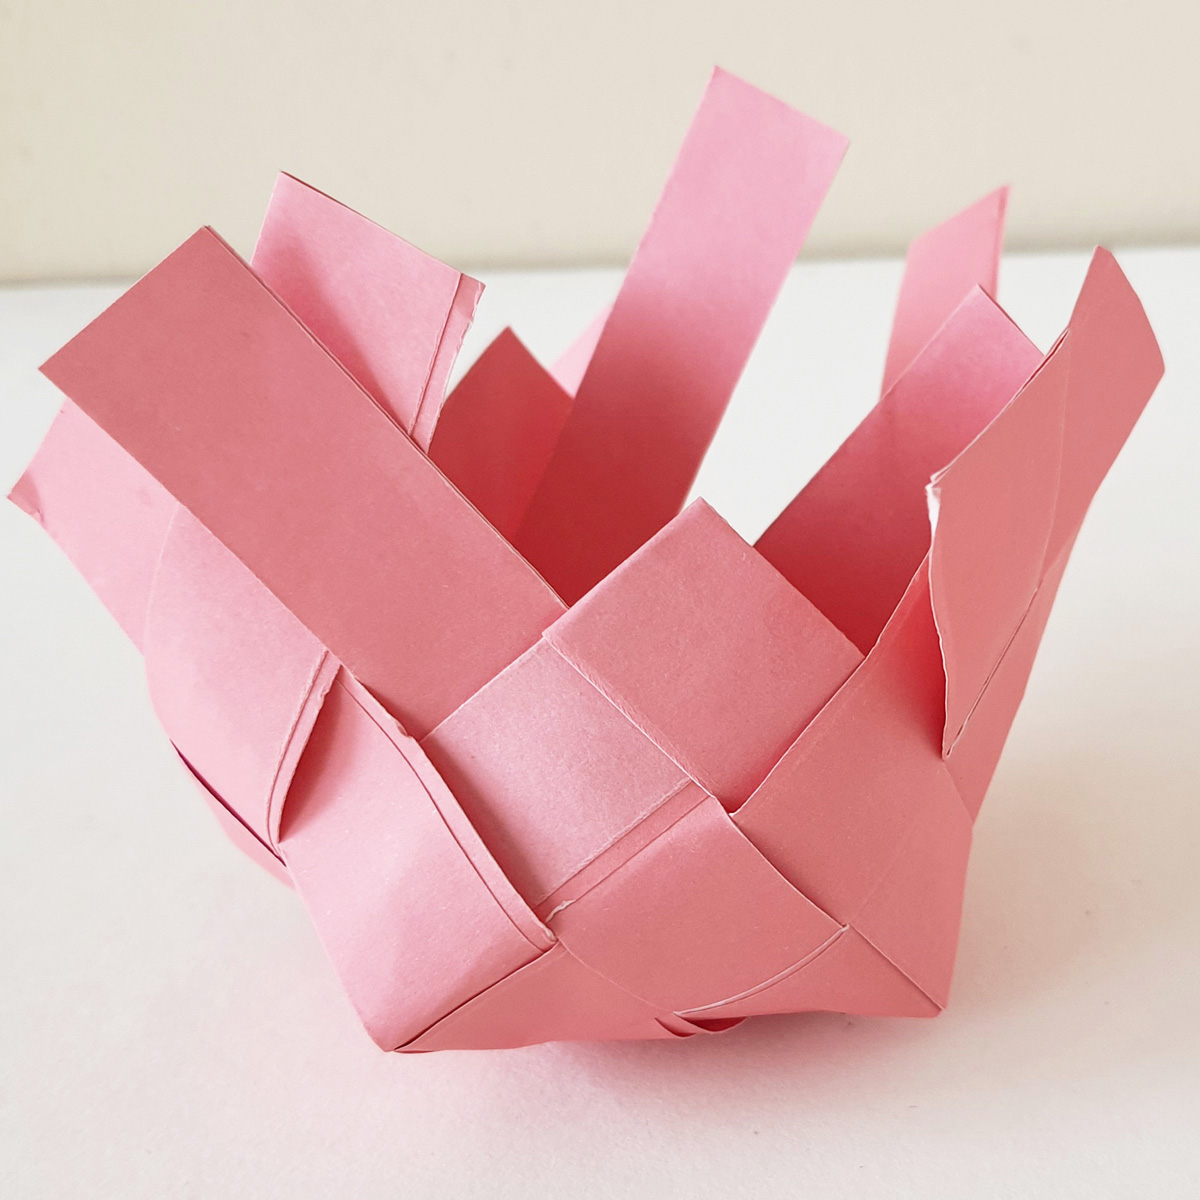
21. Repeat these steps to finish off the next pair of overlapping woven strips.

22. Continue repeating to finish and secure all of the open ends.

23. Use another strip of paper or a ribbon to make a handle for the basket. You can make it any size you like. Fold it over as you did for the strips at the beginning to make it stronger.
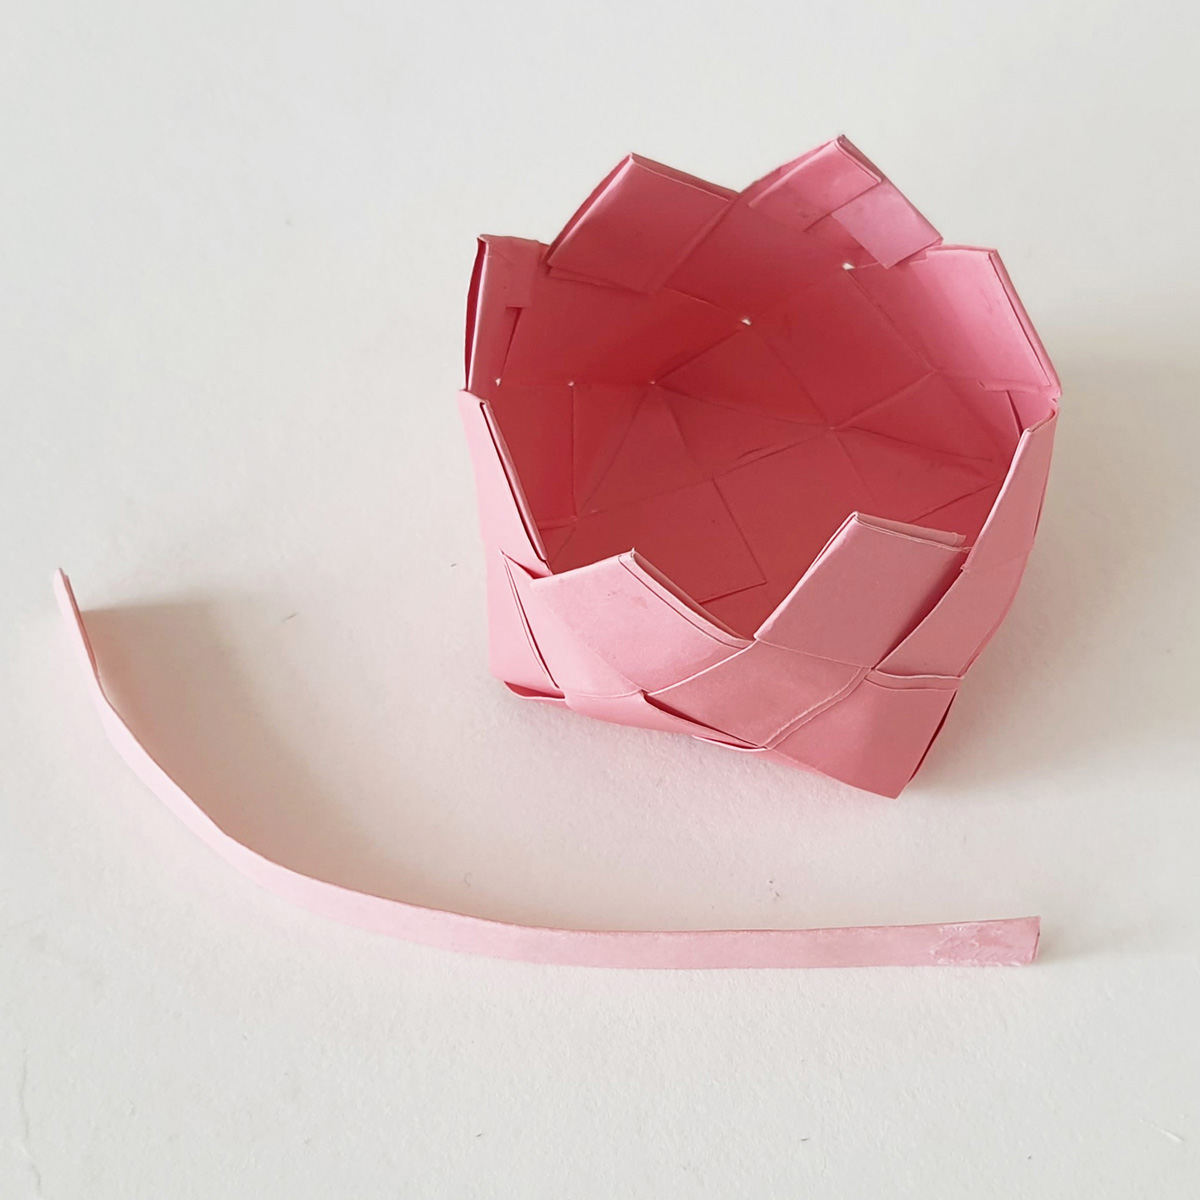
24. Glue the ends of the handle strip to the inside of the top of the basket.
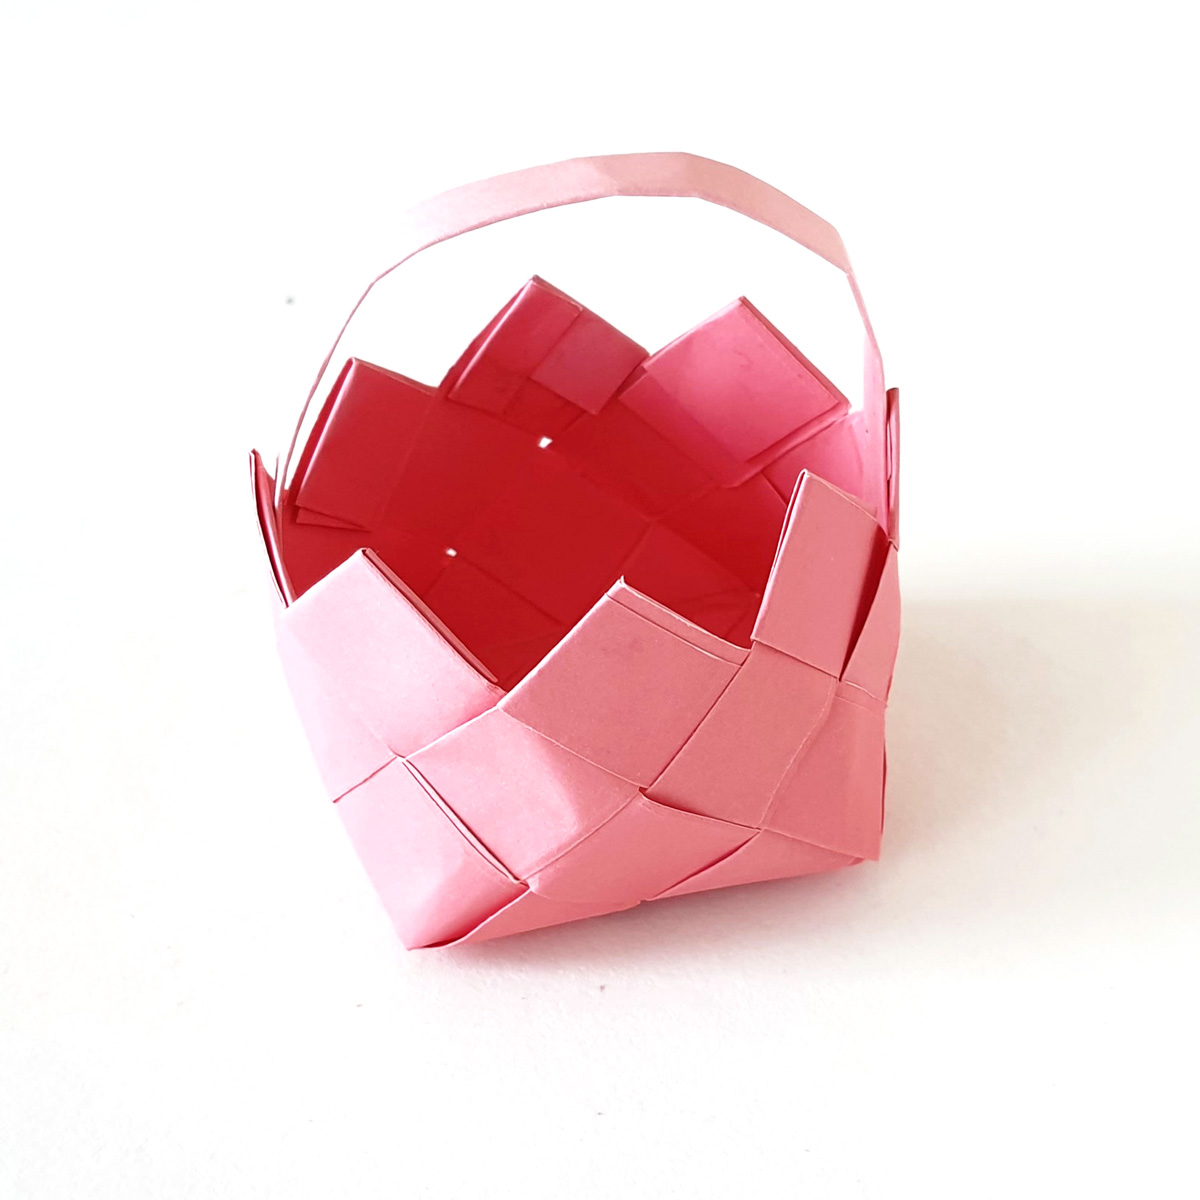
Your Purim woven paper basket is complete! What will you use yours for? Comment below!


This is a cute and meaningful way to get children and senior citizens involved in a Purim activity. This would be a great activity at nursing homes.
I am Ariel Israel Ben-Zion, a disabled and bedridden 64 year old Jewish man that lives in a long-term nursing home in Hampton VA.